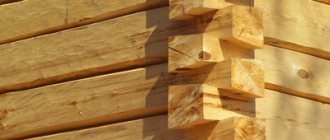
A house built quickly and inexpensively using frame technology raises doubts among many.
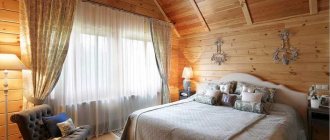
How reliable and warm is it really, and is it comfortable to live in? In the article we will understand the features of building a frame structure, as well as its pros and cons. The essence of building frame houses is that floors and finished wall sections are attached to the erected frame. Residential buildings of this type are now called energy efficient for good reason. Frame houses spend 30% less energy in winter than brick houses built using conventional technology. I would immediately like to note such advantages as the availability of building materials, the light weight of the building and ease of installation. Building a frame frame will not be difficult for a developer who knows how to work with wood and owns the tools required for construction.
By the way, if you want to find out the prices for construction work, as well as make a calculation for facade insulation, we recommend going to the website https://kronotech.ru/fasadnye-raboty. Installation of a ventilated facade - from 2250 rubles/m2, current repairs - 350, major repairs - 1700, external insulation 300, “wet facade” from 1890.
Advantages of buildings using frame technology
A house on a frame does not need a reinforced buried foundation. It is enough to build a half-meter strip or pile foundation and the transfer of the load from the house to the soil is ensured. Pile foundations can be concrete, metal or reinforced concrete rods buried in the ground. What are their advantages:
- speed of installation;
- either a complete absence or a small amount of excavation work;
- the time interval between the completion of installation of the base and the further construction of the frame.
The exception is foundations made of grillage and monolith. When constructing such a foundation, they wait until the concrete gains strength, which takes 10-15 days. It is not necessary to wait 4 weeks to begin installation work, because the installation of the frame is carried out gradually.
It is quite possible to build a frame house in 2-4 months. Builders today consider frame construction to be the most practical and cheapest way to purchase their own real estate. And if the house is built on its own, then the costs will be significantly reduced.
Auxiliary equipment
Building a frame house with your own hands is not complete without additional equipment. In this case, homemade scaffolding, a winch (replaced the standard 3 meter cable with a 10 meter one) were used to lift and level the walls, as well as insurance (consisting of 2 carabiners and a 12 m rope) for working at high altitudes.
Preparation for the construction of a frame building
For the construction of any house, the preparatory work is identical and consists of:
- Preparing the area.
- Building markings.
Preparing the area for construction
The first step is to clear the area of green spaces. It is important to completely clear the area where construction of the house will begin. If the area is well prepared, this will simplify the marking, making measurements more accurate and with less error. When the site is located on a slope, it is either leveled horizontally using special equipment, or an appropriate foundation is erected.
Important! Do not neglect site preparation. By spending 2-4 hours clearing today, construction work will move faster in the future.
House marking
The layout and how even the corners of the walls will depend on the correct marking. You need to approach marking responsibly. Any inaccuracies made at this stage will be difficult to correct.
Marking the base of a frame building consists of placing pegs. They mark external and internal walls.
Know-how: combinations of pitched roofs
There is one new architectural fashion: a gable roof, which consists of two single-pitch roofs, but not connected at the ridge. And technologically, we are still talking about two separate pitched roofs, which are built according to all the rules. And in the middle they place either a flat part or an open terrace between the two halves of the house. An incredibly successful and functional solution, we note, which allows you to add more natural light to the house.
Houses with a pitched roof are recognized throughout the world as the most favorable in terms of energy saving. Which is not surprising, because the cube also takes first place in this regard, but what then is such a house if not a cube?
Now we’ll tell you a secret: it’s all about compactness. Any structure is called compact if it has the minimum possible area of all external surfaces. Thus, a house is sometimes built according to rather intricate designs, when almost every room has three external walls, plus a complex roof. And sometimes it happens that the rooms have only one such wall, and the roof is generally pitched.
What's the point? The fewer external surfaces that come into contact with cold street air, the warmer the house itself will be. This is why compactness is so important in construction!
In this design, everything is simple: pitched roofs are built according to the same templates, but rest on two parallel mauerlat purlins. And the main advantage is that such a non-thrust structure does not “pull apart” the walls of the house with its pressure, and, therefore, there are much fewer strength requirements for the frame structure itself. True, such a house must have at least two internal walls.
And in modern architecture, a new style has recently appeared: roofs united into a single whole, which are inclined in different directions.
Foundation
Any type of foundation is suitable for building a frame house. The limitations will be the capabilities of the developer and the type of soil at the construction site.
Pile-screw base
Today this is the most common foundation for frame framing; it is both cheap and easy to install.
Suitable for different soils, except rocky soils. Many developers choose a pile-screw foundation for swampy soils, where dense soil is located deep and huge amounts of money are required for the construction of other types of foundation.
Metal piles are screwed in using manual equipment or mechanized drilling equipment. Ready-made concrete piles are driven or pressed into the drilled holes. The construction of such a foundation takes 1-3 days. The installation of piles is carried out by specialized class=”aligncenter” width=”1200″ height=”839″[/img]
Bored piles are also made independently. The piles are made from M200 concrete, resulting in a monolithic base. For formwork, roofing felt rolled into a tube is used. A frame of 3-4 reinforcing bars is installed inside the formwork. Concrete solution is poured into the resulting structure, which is compacted with a high-frequency concrete vibrator.
A load-bearing reinforced concrete, wooden or metal beam (crossbar) is installed on top of the pile heads.
The individual piles are connected into a rigid, stable frame using a grillage. The upper part of the pile foundation is:
- hanging;
- ground;
- buried.
When the grillage is buried, it is already a shallowly buried strip foundation. It is erected from a reinforced concrete monolith around the perimeter of the building and under the partitions, which are load-bearing. The trench is dug up to 50 cm deep and filled with crushed stone and sand.
Formwork is installed on the crushed stone-sand cushion. Steel frames are laid in the middle, they are rigidly fixed with the outlets of pile reinforcement. To strengthen the strapping beam at the bottom of the formwork, metal pins are prepared in advance (their diameter with thread is 12 mm). The studs are fixed with wire or welded to the reinforcement cage rods. Along the length of the grillage, fasteners are made every 1.5-2 m. From the corners of the base, fasteners are placed at a distance of no more than 0.3 m. The studs can protrude 13-15 cm above the top of the formwork.
The installation locations of the racks are pre-marked on the structure. But take into account that the fasteners of the horizontal beam and the racks should not coincide. After construction, the surface of the foundation is treated with waterproofing mastic. Next, 2 or 3 layers of roofing felt are laid on the base.
Shallow strip foundation
The same foundation is also often used in the construction of frame buildings. The cost of the foundation is low, and it is possible to use concrete floors in the house. But since a shallowly buried strip foundation is fragile, it is important to follow the deepening technology.
This type of foundation is suitable for good soils. Installation of the base on swampy soils and on soils with close groundwater is contraindicated.
Slab base
Every year new technologies or improvements appear in the construction of houses and the foundation for them. This is how slab foundations became popular. The cost is high, but developers are not deterred by the price. The advantages pay for the costs: reliability of the structure, versatility, long service life. The slabs are used as a rough floor surface, and there is no need to spend money on a separate floor.
When building a frame house, instead of a classic monolith, a slab base with stiffeners is used. This ensures excellent stability of the foundation due to the uniform distribution of the weight of the house on the ground.
When using this type of foundation, attention is paid to insulation. Expanded polystyrene slabs are laid on a crushed stone cushion. Construction insulation is not afraid of moisture, it will not rot, and retains its thermal insulation qualities for 50 years.
To supply communication systems, sleeves are installed when concreting the slab base. Underground passages will provide access when laying water pipes or sewerage. The sleeves are mounted in advance, otherwise it will be difficult to install channels in the slab later.
When constructing a ground and shallow foundation, the installation of sleeves will be required to ventilate the space under the floor. For frame houses this is an important point that is not neglected. Underground passages will reduce air humidity. This is important for all structures, and especially for wooden ones.
Step-by-step construction instructions with photos
There are several different technologies for frame house construction, but the classic method of construction is Canadian. It is also called the platform method, since first the floor of the frame house is assembled, and then the skeleton of the walls is assembled on it, like on a platform. We'll tell you how to build a house using this method. It won’t be difficult to figure out the rest: only the sequence of actions is different.
Step 1: Foundation for a frame house
Choosing a foundation is a separate complex and voluminous topic. The geological picture on the site, the height of the groundwater, the weight of the building and the seasonality of living in it, the region in which construction takes place, snow and wind loads are taken into account. But in general, foundations for frames are most often piled, piled-grillage or strip foundations.
In our country, the palm in do-it-yourself frame house construction belongs to the pile-grillage foundation. It is quickly built, requires small material investments, is correctly calculated and built, and is reliable. Combining the advantages of both pile and strip, it evenly transfers the load to all supports.
More reliable when constructing a pile or pile-grillage foundation are TISE piles. Due to the widened heel, they have a greater load-bearing capacity and better resist heaving forces.
Construction of a pile-grillage foundation with TISE piles
You can drill holes for piles using a hand drill or a motorized one. As formwork, use roofing material rolled into pipes of the required diameter (at least three layers must be rolled), secured with tape. Other options are asbestos-cement or PVC pipes of suitable diameter. Three or four reinforcement rods are installed inside the piles, connected to each other in the form of a triangle or square. The reinforcement rods are cut so that at least 0.7-0.8 meters protrude above the surface of the pile. Everything is filled with concrete of a grade no lower than M25 (read about concrete grades here).
After pouring the piles, the tape formwork (grillage) is installed, and the reinforcement is laid and tied into it. Longitudinal rods are connected to bent reinforcement outlets from the piles. At this stage, holes are left in the tape for supplying communications and ventilation (insert sections of plastic pipes across the tape).
The strapping beam will subsequently be attached to the foundation strip. To install it, studs are fixed in the tape. They are installed in increments of 1-2 meters. From each corner, 30 cm are retreated in both directions. Here, studs are required, the rest depending on the dimensions of the house, but at least every 2 meters. Please note that it is the studs that connect the frame of the house to the foundation. That’s why it’s better to deliver more often. And one more thing: no matter how short the wall is, there must be at least two studs.
When everything is ready, the concrete is poured.
Filled grillage. The foundation for a frame house with your own hands is ready
After pouring the concrete, so that it does not dry out, but gains strength, it is better to cover it with polyethylene (look at the photo). If the temperature after pouring the foundation remains within +20°C, construction can continue after about 3-5 days. During this time, under such conditions, concrete will gain more than 50% of its strength. You can work with it freely. When the temperature drops, the period increases significantly. So at +17°C you need to wait about 10 days.
Step 2: Bottom Rail and Floor
To prevent the wood of the frame from drawing moisture from the concrete, cut-off waterproofing of the foundation is necessary. The safest way to do this is with bitumen mastic. And it’s better - in two layers. You can also use roll waterproofing. Roofing felt is cheaper, but it breaks over time. Waterproofing or other similar modern material is more reliable.
You can coat the grillage once with mastic, and roll out waterproofing on top. Another option for cut-off waterproofing under a frame house is two layers of waterproofing coated with mastic: the closer the groundwater is, the more thorough the waterproofing should be.
The first layer is liquid waterproofing. While it is not dry, you can glue a layer of rolled waterproofing on it.
Then the beds are laid - boards measuring 150 * 50 mm. They must be dry, impregnated with bioprotective and fire-retardant compounds. The edge of the bed is aligned with the outer edge of the foundation. In the necessary places, holes are drilled for the studs (the diameter of the hole is 2-3 mm larger than the diameter of the stud). Then the second board is laid. It is placed so as to cover the joint of the first row. It turns out to be a castle.
The second board is laid so that the joints overlap
In general, you can lay one beam of 100-150 cm, but its price is much higher than two boards, which together give the same thickness, and properly fastened two boards have a greater load-bearing capacity, although their installation takes more time. To make them work as a single beam, they are knocked down with nails in 20 cm increments in a checkerboard pattern.
We install the harness and logs
Next, a strapping board is attached to the bed. Its dimensions are also 150-50 mm, but it is placed on the edge. Aligned along the outer edge of the foundation, nailed with long nails (9 cm) to the beam every 40 cm.
Installation of the piping: according to the instructions, the assembly of the frame house continues with the installation of the piping to which. the floor joists will rest
The next stage is installation and installation of the logs. These are the same 150*50 mm boards placed on edge. They are attached with two oblique nails (9 cm) at the end to the trim board, two nails on the right and left to the bed. So each lag is on both sides.
Example of installing floor joists
The photo shows that the first joist is installed close to the second - this way the load is better transferred to the foundation. It is installed along the second edge of the bed. The installation step is 40-60 cm. It depends on the length of the span and the cross-section of the lumber used: the longer the length, the smaller the step.
Layed and secured floor joists
If the logs are long and there is a cross beam, as in the photo above, to prevent the logs from “moving away,” jumpers are placed above the cross beam. Their length is equal to the step of installing the logs minus the double thickness of the board: if the step of the log is 55 cm, the thickness of the board is 5 cm, then the jumper will be 45 cm long.
Insulation and flooring
After the base for the flooring has been installed, it is time to insulate the floor. It can be done in different ways, with different materials. We will show you an economical option - with polystyrene foam boards with a density of 15 kg/m3 (more is possible, less is not possible). It is, of course, not environmentally friendly, but it is the only one that is not afraid of moisture and can be installed without a subfloor. The estimated thickness of the insulation is 150 mm, two layers are laid: one 10 cm, the second 5 cm. The seams of the second layer should not coincide with the seams of the first (they shift).
To begin with, a 50*50 mm cranial block is packed along the lower edge of the log. It will hold the foam.
At the bottom you get a frame made of a cranial block, which will prevent the polystyrene foam from falling out
The foam is cut with a regular hacksaw. The blade can be used on wood - it cuts faster, but you get a torn edge, or on metal - it goes slower, but the edge is smoother. The cut slabs are laid in two layers, the seams overlap. Then they seal the perimeter with sealant to ensure waterproofing.
Laying foam
Next, lay the subfloor from boards, level it and lay plywood on top (preferably FSF 5-6 mm). To prevent the rough flooring of boards from warping, lay the boards alternating the direction of the wave. If you look at the cross section of the board, the annual rings go in a semicircle. So, you need the arc to look up and down (see photo).
How to lay plank flooring correctly
You can do without plank flooring. Then the thickness of the plywood should be at least 15 mm. Consider what is more profitable in your region and choose.
In any case, the sheets should be laid in a spaced pattern - the seams should not match (as in brickwork). Also, do not forget to leave a gap of 3-5 mm between the sheets of plywood to compensate for changes in size when humidity changes.
The second stage of building a frame house has been completed: the floor has been laid
The plywood is attached with self-tapping screws 35 mm long (preferably white ones - less waste) around the perimeter in increments of 12 cm, inside in a checkerboard pattern in increments of 40 cm.
An example of using frame technology to build a wooden shed is described here.
Step 3: Frame Walls
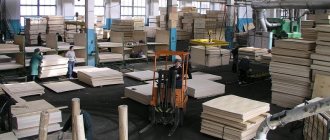
There are two ways: the wall frame is assembled (all or part, depending on the size) on the floor, then raised, positioned and secured. Sometimes with this method, OSB, gypsum fiber board, or plywood are attached directly to the floor on the outside of the frame: the rigidity is greater. This technology is called frame-panel or “platform”. Factories generally operate according to this principle: they build ready-made panels according to the design in the workshop, bring them to the site and only install them there. But frame-panel house construction is possible with your own hands.
One of the options for assembling a frame wall, names of elements
The second method: everything is assembled gradually, locally. The beam of the bottom frame is nailed, the corner posts are set, then the intermediate posts, the top frame, etc. This is the technology called “frame house construction” or “balloon”.
Assembling the wall frame with your own hands can be done gradually (balloon technology) or in block-boards (platform technology)
Which one is more convenient? It depends on how many people work and whether it is possible, at least periodically, to attract help. Working on the floor is faster and more convenient than jumping up/down a stepladder countless times. But if the section is assembled large, then it will be difficult even for two people to lift it. The solution is either to call help or to break the wall frame into small segments.
Installation step and cross-section of racks
Corner posts should be 150*150 mm or 100*100 mm, depending on the load and the required width of the insulation. For a one-story frame house, 100 mm is enough, for a two-story frame house - at least 150 mm. The intermediate posts are the same in depth as the corner posts, and their thickness is at least 50 mm.
The installation step of the racks is selected taking into account the load, but in reality it is more often selected based on the width of the insulation. If you will be insulating with mineral wool in rolls or mats, first find out the actual width of the material. The gap between the posts should be 2-3 cm less than the width of the insulation. Then there will be almost no waste, no gaps and cracks through which heat will escape. The density of installation of insulation in frames is the main point, because only it will serve as protection from the cold. The slightest violation will lead to the fact that the house will be cold. Therefore, the selection of insulation and its installation must be treated with full attention.
An option for gradually assembling the frame of a house: corner posts are placed and secured, the top frame is immediately mounted on them, then the vertical posts are installed at a selected step
Fastening the racks is possible in several ways: with wooden dowels, with a notch or on corners. The cut into the board of the bottom trim should be no more than 50% of its depth. The corners are attached on both sides. Fastening with dowels is an old technology, but difficult to implement: long dowels are planed, a hole is drilled obliquely through the stand and beam of the lower trim, a wooden tenon is driven into it, the excess of which is cut off. It works well if the wood used is dry. If not, drying out and loss of fastening rigidity is possible. Installation on reinforced corners is much easier.
According to Canadian technology, the beams to which windows and doors are attached are made double. There is more load here, therefore the support must be more powerful.
Reinforced counters near windows and doors are a must. This is the only way a frame house built with your own hands will be reliable
Read how to make a gazebo out of wood (also using frame technology) here.
Bevels or braces
If the outer cladding is planned to be made of high-strength slab material - OSB, gypsum fiber board, gypsum fiber board, plywood - temporary slopes are installed from the inside of the room. They are needed to level and maintain geometry until the outer skin is attached. The strength of this material is sufficient to create the required structural rigidity.
If the cladding is planned to be made up of linings, etc. installation of permanent jibs is required. Moreover, the best option is not those that are placed on several racks, but four small pieces for each: two on top and two on the bottom (as in the photo below).
Such braces will give sufficient rigidity to the walls of a frame house.
Please note that in the photo above the racks are prefabricated: two boards are nailed together along the entire length in a checkerboard pattern. Such racks have even greater load-bearing capacity than solid ones and cost less. This is a real way to reduce construction costs without losing quality. But construction time increases: you have to hammer in a lot of nails.
Corners of a frame house
The most questions arise when constructing corners. If you place a beam in a corner, then there seem to be no difficulties, except that the corner turns out to be cold. In regions with short and mild winters this is not a problem, but in central Russia it requires some kind of solution.
Even with this option, the corner will be colder
There are several ways to make the corner of a frame house warm. All of them are shown in the diagrams, so it’s clearer.
When building a one-story frame house, you can do this. For a residential second floor, the corners are made using one of these methods.
After assembling the frame, it is most often sheathed on the outside with OSB, plywood or other similar material.
The construction of the woodshed is described in this article.
Step 4: Covering
The floor beams rest on the beam of the upper frame. There are several mounting methods:
- on supporting steel brackets;
- on the corners;
- with insert;
Notching - the depth of the cut should not exceed 50% of the thickness of the top frame timber. It is hammered in from above with two nails, which must go into the harness at least 10 cm. Corners are the usual method. You can use reinforced, but not necessarily Perforated brackets - the shape can be different Fastening the ceiling beam using metal brackets
The dimensions of the beams and the pitch of their installation depend on what will be on top. If there is a second residential floor or attic, the cross-section is taken larger, the step is made smaller: so that the floor does not sag. If only the roof and attic on top are assumed to be non-residential, these are completely different calculations and dimensions.
In this one-story frame house, the floor beams also support the rafters. Therefore, they are extended 30 cm beyond the perimeter of the walls
If a second floor is being built, the ceiling is sheathed with the subfloor of the second floor. This will make it easier to work on creating the second floor of a frame house. Its assembly is no different from the construction of the first one. The only reason is that all the lumber has to be hauled to the second floor.
Step 5: Rafter system and roofing material
When developing a house project using frame technology, the most popular are a gable or mansard roof. Their device is no different. All the same principles and calculations. The only limitation concerns the weight of the roofing: it must be a light material, the load from which wooden beams and ceilings can withstand.
This is what the frame looks like before the sheathing. If the walls are not sheathed, slight vibrations are felt when working on the rafter system. The outer skin makes the frame much stiffer
A gable roof with a raised tie was chosen. For ease of fastening the rafter legs, a 50*50 mm block was nailed along the edge of the floor beams. There was a groove made in the rafters for it. During installation, they first simply rested against the block, then fastened
To fix the rafters in a given position before the sheathing was filled, temporary jibs were used
Another relatively inexpensive technology for building a house from aerated concrete is described here.
Step 6: Insulation
A frame house can be insulated with any of the materials available on the market with the appropriate characteristics. All of them are imperfect, but all problems have standard solutions.
The most popular insulation for frame walls is basalt wool. It is available in the form of rolls or mats of different densities. It is more convenient to install mats in walls: they are denser and hold themselves well due to the pushing force. To do this, as mentioned above, their dimensions should be 2-3 cm larger than the distance between the frame posts. The mats, of course, are additionally fixed with special fasteners, but it is more convenient to work with than with a soft roll.
The most common type of frame wall insulation
Mineral wool has high thermal insulation characteristics and good sound insulation. But there is also a serious drawback: it is afraid of getting wet and it must be protected on all sides not only from moisture (rain), but also from the penetration of steam. Therefore, from the side of the room it is covered with a layer of vapor barrier membrane, which prevents vapors from penetrating inside.
On the street side, the thermal insulation made of mineral wool is covered with another membrane, but of a different type with different characteristics: a hydro-wind-protective vapor-permeable membrane. It is not blown through, it does not allow moisture in liquid or gaseous states to pass through from the street side, and vapors can escape from the insulation: the vapor permeability is one-sided. After installing the insulation, only finishing work remains. Actually, that's it, construction is over.
This is what a basalt mat looks like installed between the posts
Now you know how to build a frame house. The detail of some processes is far from complete, but you have a general assembly sequence.
Video “Turnkey frame construction in 2 months.”
Perhaps another video from a professional carpenter who has been building frame houses for decades will help you (see below).
Floor construction
Frame floors are no different from the floor surfaces of other types of houses. At the request of the developer, they can be made of wood or concrete. The choice of floor depends on the constructed foundation and capabilities.
The horizontal structure, which provides the load on the foundation from the room, is understood as a bench (or lower frame). It is made from high-quality dried edged boards. Their size is 50×150 mm. For the same purposes, timber with a cross-section of 100×150 mm is also used.
Step-by-step steps when laying the bottom trim:
- Beams or boards, which are lubricated with a bioprotective composition and fire retardant components, are laid around the perimeter of the foundation.
- The lower trim is placed above the bolts, and all the fasteners are lightly struck with a hammer. After this, the bolt locations are marked.
- At the point where the dent forms, use a large drill to drill out a gap, the diameter of which should exceed the cross-section by 3 mm.
- Insulation (tape made of fiberglass) is laid on top of the foundation. The lower trim is installed above it.
- Using an impact wrench or manually using a wrench, tighten the nuts onto the bolts with washers.
- The horizontal position of the bench is monitored using a level or building level. If it is necessary to change the position of the board, the nut is loosened slightly and wedges of wood are placed. Only then are they stacked to the required level. Liquid concrete is poured into the hole.
- At the corners, the boards are connected “half-tree” or with a root tenon.
After laying the bottom trim, the floors should be laid.
They will serve as the basis for installing wall blocks. When installing racks sequentially on the finished floor, it is easier to move than to climb on a stepladder all the time. Floors in a frame house are laid using several methods:
- using a ready-made slab foundation;
- lagged;
- unpaved.
Lag floors are laid indoors on a strip or pile foundation. This results in a ventilated subfloor that appears in the middle of the bottom of the structure and the ground. Logs are laid out in the following ways:
- reinforced from the outside with a façade board, resting on the bottom trim;
- inserted into the grooves that are cut in the lower trim;
- installed close to the bed using metal brackets.
When working with logs, timber with a cross-section of 110×60 – 220×180 mm is used. This is affected by the distance between the supports. If the span is very wide, the element, accordingly, must also be powerful.
The installation step is from 50 to 60 cm. Where heavy equipment or furniture is installed, beams are installed more often. After approximately 30-40 cm.
The sequence of actions when laying joist floors on metal brackets:
- Beams of the required length are cut out and cut out.
- Next, they are placed on top of galvanized brackets and secured with self-tapping screws or nails.
- Skull bars with a cross-section of 50×50 mm are nailed to the underside of the joists.
- OSB sheets or moisture-resistant plywood are laid on bars. This is considered the basis for the insulation.
If the span is more than 2.5 m, spacers are placed in the middle of the log (pieces of boards or timber that make the system bending rigid). They are fixed with nails. To do this, they are nailed to the end diagonally through the joist.
Each wooden structure is well treated with fire-retardant components and anti-rot agents before the installation procedure. This significantly increases the service life of the material, protecting against insects.
Basement ceiling
To begin with, the surface of the grillage was covered with bitumen mastic, on top of which waterproofing was laid. A day later, laying of the main harness began. For the work, larch was purchased, four meters long, dimensions 200x50 and 150x50, with 15% kiln drying. The harness was secured with pins. To begin with, their location was accurately transferred to the surface of the strapping boards, after which holes were drilled.
Advice: It is better to make the holes in the harness slightly larger at once, because otherwise you will have to do flaring.
Wood must be treated with antiseptics and fire protection. Subsequently, floor joists were installed, which were strengthened with spacers. To level the platform under the subfloor, 40x50 beams were installed. On top of the beams, a subfloor made of FSF 6 plywood was laid. Tyvek Soft strips were placed on the plywood, which were attached with a stapler, and rockwool was already laid on them. After all the basic preparatory procedures, the installation of OSB boards began. They were fastened in three ways at once, for the best effect: first, the slabs were seated on glue, after which they were screwed on with screws and finally nailed. In terms of hardness, the floor turned out to be very reliable. The expansion joints were sealed with silicone.
Laying a floor made of wood
The tying of the pile foundation includes the beginning of lining floors made of wood. It is made from beams measuring 150×150 mm or 150×200 mm. This is affected by the thickness of the wall and the size of the gap between the piles. If the distance is very large, it is better to take thick timber. This moment will eliminate sagging.
In order for the foundation to remain rigid, strapping is needed. It is also used when the load is evenly distributed on the base and serves as a support for the floor.
For unhindered manual tying, perform the following procedure:
- The boards are laid around the perimeter of the foundation, the diagonal and size of the walls are checked. This stage includes the accurate and final marking of the walls in accordance with the approved project. Pay attention to waterproofing. It is laid out under the harness as roofing material.
- Now mark the place where the boards are connected, which should be on the pile. These are vulnerable places; they cannot sag.
- The beam is connected to an overlap of approximately 20-30 cm. The master cuts out “locks” from the end.
- The corners are connected using almost the same method.
- Using studs and bolts, the timber is connected to the foundation. Drill gaps in the head of the foundation and directly in the board. To make further installation comfortable, deepen the nuts with studs or bolt heads. The connection lines are nailed using nails, the size of which is 200 mm or 150 mm. It is affected by the size of the boards.
- After the perimeter is ready, we begin to tie the foundation under the internal walls of the room from the frame. In a similar way, the timber is attached to the previously laid outer one. To enhance the effect, metal mounting angles are also used.
The installation of the frame floor begins after the foundation of the room has been laid.
Frame construction theory
Composition of the main elements of a frame house
The construction of houses always begins with preparatory actions:
- analysis of the site - soil structure and soil behavior characteristics;
- designing a building - foundation, calculating the structures themselves that make up the elements of the future house;
- generation of necessary documentation – drawings, technological maps;
- approval of papers before the start of construction with permitting authorities.
The main feature of frame house construction is the use of wall and ceiling elements for the base - timber and metal profiles. As filling there are various insulation materials (mineral wool, polystyrene foam), which are closed from the inside and outside with various panels - wood, metal, plastic or a combination. The structure is gradually mounted on the foundation and sheathed in parallel - on the inside and on the outside. This allows buildings to be erected by small teams of workers - from two people, and also not to use construction equipment - everything is done manually.
Example of a two-story house 6x6
As a result, the owner can receive a unique building with the properties he needs, which depends on the purpose of the building, the local climate and financial capabilities.
Pros and cons of frame houses
In most countries of the world, frame construction is becoming more and more popular every year. There are several reasons for this:
- the total cost per square meter is the lowest among all other construction methods. Only cardboard houses or tents are cheaper;
- versatility: the ability to adapt the building to hot and cold climates, as well as to build simple outbuildings;
- ease of maintenance - frequent renovation of facades is not required, and repairs are as easy as construction;
- high speed of construction - even a small team of 2-4 people can create a standard house in 3-6 months;
- low heat capacity of walls and horizontal partitions - simplifies the heating process, the cost of which will be minimal;
- good sound insulation – provided that proper insulation materials are used;
- frame houses are the safest - this applies to both ecology and earthquake resistance. The buildings are able to withstand tremors up to 8-9 points.
Separately, it should be clarified that, if necessary, you can build a house that can be quickly disassembled, transported to a new location and reassembled again. Such mobility is ensured only by frame and frame-modular construction schemes.
Important! Often, it is possible to prepare foundations of medium or shallow depth for the construction of a house - the weight of the structure is small, therefore, if the soil allows, the use of simple and light types of foundations is allowed. But for this you need to carefully study the area. Some types of soil require the creation of a permanent foundation, otherwise the house will deform or completely collapse over time.
But there are also negative points:
To reduce the noise of the entire structure, you will have to install heavy types of insulation in the walls - this is not very important for a summer house, but a house that is intended for permanent residence will require this.
A reliable frame house can be erected only after scrupulous calculations. Without the appropriate education, it is very difficult to draw up correct drawings, so it is recommended to turn to professionals. This will require allocating part of the budget to order design documentation, but it will guarantee that the house will not fall apart in a year or two.
Framed floors
At this stage, it is recommended to pay special attention to all communications related to the premises. This is a sewer with water. Gas and electricity are supplied later. However, if you do this right away, there will be fewer problems in the future.
Next, logs are installed on top of the trim. It is recommended to work with boards measuring 100x150 mm or 100x200 mm, when the gap between the supports is approximately 4 meters. It is not forbidden to sew two boards of 50×150 mm or 50×200 mm.
When the distance is up to 3 meters, they work with timber measuring 50x150 mm. It’s even better to take 50x200 mm boards.
Installing logs is not difficult. However, there are some features:
- The size of the gap between the joists affects the size of the insulation material. If mineral wool with a sheet size of 100 × 60 cm is used, the gap between the beams is made a couple of centimeters less than the width of the insulation itself (about 57-58 cm).
- The logs are attached using fastening angles and nails. They are installed 5 cm less, but not at the level of the trim. This is done so that an additional board of 50×200 mm or 50×150 mm fits into the perpendicularly fixed beams. The size is influenced by the size of the timber used, which will make it possible to close the existing gaps around the perimeter.
A board is nailed between the joists to increase the rigidity of the floor in a framed room. The size of the timber is affected by the size of the lag. Basically, these are 50x200 and 50x150 mm.
Basic tools and materials
- Equipment for concreting foundations;
- 13 cubes of concrete;
- Bitumen mastic;
- Hydroisol;
- Larch boards 200x50 and 150x50, 4 m long (the entire construction took about 27 cubic meters);
- Hammer and large square;
- Plywood fsf 6;
- OSB 18.3 mm (subfloor), 12 mm (roof sheathing) and 9 mm (wall sheathing);
- Rockwool Light Butts;
- Tyvek Soft;
- Moment glue (5 packs) and Titibond glue (12 packs);
- Screw nails 50-60 mm, self-tapping screws, bolts and studs;
- 2 assistants, as well as a team of roofers (4 people).
Insulation and protection of the structure from moisture ingress
Follow these steps:
- Attach a 150x25 or 100x25 board at the bottom perpendicular to the floor joists or similar. Most often this is done end-to-end. However, in the case of rigid fastening of the logs, every 40-60 cm is sufficient. It is recommended to fasten the board using self-tapping screws.
- The waterproofing membrane is nailed on top of the joists and the fixed board.
- Insulation is stuffed between the joists on top of the waterproofing. The climate zone affects the thickness of the layer. Its size is usually 15-20 cm.
- The insulation is laid in such a way that each joint is covered by the following layers.
- First, a vapor barrier, then an OSB board or plywood is stretched over the insulation. You can simply sew the board tightly.
Keep in mind that waterproofing and vapor barriers are installed with an overlap, following certain rules. It is necessary to avoid the formation of moisture inside and outside the insulation. The insulation is packed tightly, preventing the formation of cracks.
As a result
Any construction is unthinkable without the creation of design documentation, which includes building drawings, plans, a list of parts, and an estimate. It is important to understand that you will always have to collect the mentioned documentation, with the exception of cases when construction is carried out on the territory of a garden or a summer cottage. Otherwise, a building permit will not be issued, and the house will be considered an illegal building. As a result, the authorities may demolish it.
Also, pay attention to the amazing chalet-style house designs.
It is best to entrust the development of drawings either to specialized engineering firms or to private traders, if they have the necessary qualifications. The first option is preferable, since the company provides guarantees for the work, and in most cases offers additional services for project approval.
If the construction takes place at the dacha, then you can draw up the drawings yourself. To do this, it is better to use special PC programs that simplify the work and do not require the skills of a professional engineer. The main thing is accuracy and attentiveness.
Installation of room walls
The beams and boards are connected using mounting angles made of metal and (or) nails, sometimes they are connected with studs.
Almost the entire frame is made from boards 50x150 mm or 50x200 mm. This is affected by the thickness of the wall and insulation.
Installation of walls and windows and doors
The walls are assembled on the prepared floor. However, please note that all measurements must be accurate. This is necessary so that the walls do not come out larger or smaller than the laid floor.
The walls are assembled as follows:
- First you need to decide what height the ceiling will be. For example, 280 cm. Therefore, the size of the vertical posts of frame walls should be 265 cm (280-15). The image shows where the 15 cm value appeared.
- Taking into account the width of the sheet of insulating material, determine the size of the gap between the racks. Often it is 60 cm. In the case of a cotton base insulation, the distance is made shorter by a couple of centimeters. This is necessary in case of compacted joints.
- Having laid out the wall boards, mark the places where the vertical posts are attached. Next, lay out the racks, nailing 120-150 mm. It is not prohibited to connect them with corners.
- Any wall is always less than the thickness of the wall than the length of the floor.
- If the wall is longer than the board, the wall is assembled from two or more parts. This is also true with a small number of specialists, since an entire finished wall weighs too much.
- To make the structure rigid, jumpers are installed between the racks. There are no strict rules regarding the quantity and frequency of installation. This is affected by the height and length of the walls. However, they are often nailed two at a time or one per space between the posts. The second option is more relevant, when the jumpers are nailed one at a time. They are installed in a staggered order (first at the bottom, second at the top). This is also done after the walls are installed. Often, jumpers are nailed in full confidence that they will become the junction of plywood or osb board. This is influenced by the progress of further work.
- Openings in the walls and windows of the frame room are arranged according to the diagram.
The most common mistake when assembling the walls of a frame room is that most people do not remember the thickness of the board when making calculations. Because of this, the wall ends up being a different length than expected.
Wall installation
Read the instructions for assembling the walls in detail:
- They expose one wall of the room from the frame, connect it to the floor, and then make temporary supports.
- Now the remaining walls are lifted and installed one by one and connected with studs and (or) nails. If there are several parts to the wall, its top and bottom should be the same in size.
- The resulting corner is filled with insulation. This is many times superior to a solid corner made of timber.
- At this stage of construction, the walls “walk” a little. They need to be fixed for a while. They are secured using a thin board that is nailed diagonally across all walls.
- And when temporarily strengthening the structure, pay attention to the vertical position of the corners. It is recommended to use a plumb line, since the boards are often not entirely level. And this can lead to inaccuracies in measurements at the usual level.
When installing walls, you should work with a cord that is passed from corner to corner. Otherwise, the corners will become even, but the walls will be the opposite.
Corner frame design
The most problematic places in frame rooms include corners. Laying timber without the use of additional insulation contributes to the appearance of a cold bridge. Unlike mineral wool, wood has very high thermal conductivity. This suggests that the walls in the corners of the house sometimes freeze.
To eliminate this moment, structures are assembled using one of the following methods:
- Using two stands. The finishing corner enhances the junction of the two walls.
- California corner. A strip of OSB or board is nailed from the inside to the extreme point. This place is filled with insulating material.
- Scandinavian corner. It is the warmest of the options proposed above. It is assembled from 3 racks into such a pairing that almost no cold bridges appear.
The first and second methods are more technologically advanced, but they have lower quality of thermal insulation. At the junction of the two walls, there may be remnants of through gaps. They are very difficult to seal.
Top trim and structural reinforcement
The top trim is made from the same boards as the walls. It is needed to make the adhesion of the corners more reliable. It also gives unity to each part of the frame wall and distributes the load between them.
It is necessary to nail the board around the perimeter (on top of the walls) with 120-150 mm nails. This is done in such a way that all joints overlap with an overlap of at least 25-30 cm. Except for the corners in which the overlap is equal to the wall thickness.
The entire structure requires reinforcement. There are some ways. The most famous is reinforcement using OSB boards or plywood.
The frame of the room becomes rigid if you punch through one side along the entire perimeter using OSB sheets.
Start of work: calculations, preparation of drawings
Drawings of frame houses
Before designing a structure, you need to step by step decide on the following points:
Step 1. Purpose of the house - for example, for a non-residential building, insulation may not be required, the walls will be thinner.
Sectional example of wall insulation
Step 2. Heating - its type (separate boiler room or powered from existing communications), heat consumption per living area (the more rooms, the more expensive it will be to warm them up), chimney installation.
House heating layout
Step 3. Number of residents - the number of floors and bedrooms depends on this.
Layout of a two-story house
Step 4. What materials will be used - wood products are often used, since they are available in all regions, but it is important to understand that long elements (over 6 meters) cannot be purchased. For example, beams for tying the foundation will have to be joined. This will require relevant experience.
An example of the use of wood materials
Step 5. Location of communications in the building - external or internal. In the first case, maintenance of pipelines and electrical wiring is easier, but the appearance of the premises is spoiled. In the second, if repairs are necessary, you will have to disassemble the casing.
Laying communications under the house
Step 6. Finding bathrooms, kitchens and other utility rooms - they try to group them close to each other - to facilitate pipe routing.
Consider also the air circulation in the room
Step 7. Planning is the most difficult stage for future owners. Comfort depends on the proper arrangement of the premises, and making changes after construction will be difficult. It is recommended to use 3D computer modeling - this will make it possible to clearly verify the correctness of decisions.
A clear example of 3D modeling
Step 8. Balconies and loggias - done if the building is (at least) two-story. Elements should also be provided for and calculated in advance.
Second floor balcony
After this, you should decide on the sizes. They depend on the size of the site and its quality. If the landscape has strong differences in height, this will have to be corrected in advance.
Example: 6x6 house with an attic. Standard designs and drawings
Second floor layout 6x6
A one-story 6x6 house is one of the best solutions for an average family of 2-3 people. Such projects are often chosen for construction in private gardens; houses are suitable for relaxing and sleeping on summer days. Almost any site owner can create drawings for one-story 6x6 houses.
First floor layout option 6x6
Main advantages:
- saving building materials;
- compactness;
- simplicity and high speed of construction.
One of the options (general plan):
First floor layout 6x6
- First floor – kitchen, bathroom and toilet.
- Second floor – bedrooms.
- The foundation is made of lightweight screw piles.
Floor layouts can be chosen depending on the purpose of the house. experienced builders create such houses even alone.
Video - DIY 6x6 frame house
Houses 6x4
6x4 projects are also compact, but are not suitable for a large family. Often used to build summer cottages, hunting lodges or for household needs.
The main feature is the fastest possible erection if a one-story house is chosen. The buildings also weigh little; on stable and stable soils they will require the simplest foundation.
Video - Drawings of a 6x4 frame bath
Projects 6x8
Frame house plan
In such buildings, 3-4 residents will be comfortable. There are projects of two-story and one-story houses. In the upper part there is an attic or attic; this is not considered the third floor.
Layout of a frame house
The choice of layouts is varied. On the ground floor you can provide a living room, a bathroom, a kitchen and a small utility room. On the second floor there are bedrooms and guest rooms. In the attic there is a workshop, a gym, or additional rooms.
Indoor partitions
Installing partitions is almost identical to installing an external wall. However, it is subject to gentle requirements for thickness and insulation material:
- Indoor partitions are made thinner than external walls.
- The insulation in the middle of the partition acts as a sound-absorbing material, not thermal insulation.
- It is possible to fill room partitions with insulation without the use of vapor barrier and waterproofing materials.
Above are the main differences between the outer wall and the one inside the room. In other cases it is installed the same way.
External and internal finishing of a frame house made of timber
Since the timber frame is sheathed at the end with OSB boards, which not only do not look aesthetically pleasing, but are also destroyed by moisture, the walls must be protected with external finishing.
There are a huge number of types of finishing for frame buildings. This can be painting, plaster, PVC panels, siding.
Read more here. Natural wooden materials include a block house, which gives a frame building the appearance of a house made of timber.
Do not forget the cheaper lining, which, after being treated with modern materials, acquires a decorative appearance and strength.
Frame house with block house finishing
External finishing can also create an additional air gap, for example when using ventilated facades.
However, this type of finishing will be much more expensive than plaster.
Interior decoration can also be varied - from wallpaper to decorative plaster.
Moreover, the flat surface of the OSB board makes it much easier to work with drywall.
Read about interior finishing options here.
Frame roof
Installing a roof for a frame building is less labor-intensive than for a block or brick house. Fastening the roof to the walls is easier.
Rafter structure and roofing
The rafter structure of a frame house is installed in stages:
- The extreme supports are installed under the rafters and the ridge. The grooves for resting on the frontal board are selected in advance.
- Install the middle ridge posts along a cord stretched between the outer supports. They are fastened with jibs, which are then removed.
- A 5x20 cm ridge beam is placed on the posts. To prevent the section from feeling bending loads, the beam is joined above the supports.
- The places where the rafter legs will be attached are marked.
- The rafters are cut according to the template. They are mounted, resting on a wooden beam on the inner surface of the outer wall and on a ridge beam.
- The structure is strengthened by constructing a support under each inclined beam, as well as wind struts for the rafters to increase the strength of the rafter structure along the axis of the ridge under two adjacent rafter legs.
- At the bottom of the rafters, cornice strips are screwed.
- The waterproofing film is spread parallel to the overhang, and installation begins from the bottom up. An overlap joint is required, no less than 8-10 cm. The waterproofing is secured with a stapler, the film between the rafters sagging up to 2 cm.
Install counter lathing. The bars for it have a cross-section of 4x5 cm; they will provide ventilation to the roofing “pie”. Counter slats between the roof and waterproofing will create a space where air will “walk.” 2.5x10 cm sheathing boards are laid on top of the counter lathing in increments of 25-30 cm. The spacing is selected in accordance with the wavelength of the metal tile profile. Wooden elements are nailed.
Next is the installation of drainage and roofing material, usually metal tiles:
- For gutters of the drainage system, hooks are attached to the eaves board, making a slope towards the drainpipes.
- The first 4 sheets of metal tiles are laid out without fastening. The sheets are aligned along the end and edges of the cornice and screwed with self-tapping screws. Using rubber gaskets, hardware is attached to the lower part of the wave.
- Mount ridge and wind strips.
Architectural advantages of pitched roofs
Of course, where gable roofs have existed for thousands of years, everything unusual seems ugly and ridiculous. But the Eiffel Tower in France in the first years of construction embarrassed local residents with its “ugliness.”
The fashion for single-slope European villas has come to Russian open spaces quite recently. And to this day, individual architects rebel against this trend, calling mono-pitched roofs exclusively “barn” and claiming that clients do not even look at such projects.
But in fact, not only customers of their future “dream home”, but self-builders with golden hands are increasingly making the roofs of their buildings pitched, with different angles, directions and combinations with other roofs. Because, in addition to the more dynamic look that only an inclined plane can give, shed roofs are actually more functional and even economical.
Most often in world practice, pitched roofs can be found in Finnish houses, which are known for their pleasant combination of modesty and restraint:
.
In warm and hot countries, houses with a pitched roof are especially popular: no insulation is needed from the inside, the design always looks original, and such a roof is much cheaper in terms of costs. So the northern countries began to adopt this useful fashion.
For example, not long ago a new type of residential building was created in Norway - a high-tech one, with a pitched roof sloping at 19°. It generates its own energy thanks to solar panels on the roof: the atrium has enough thermal mass to accumulate enough heat during the day and release it throughout the night. And not only to give, but also to provide the entire house with electricity.
And for water heating of walls and floors, rainwater heated by the sun is used, which flows down the pitched roof directly into the drain. With a conventional gable or hip roof, all this would not be possible!
Insulation of a built house
In a frame house, the floor base, walls and ceiling will need to be insulated.
When choosing insulation for walls, both the characteristics of the insulation and the characteristics of the wood are taken into account. The reason is that not all types of insulating material interact well with wood.
Instructions for insulating a frame structure:
- A special waterproofing membrane is stretched over the OSB sheets. The instructions indicate which side to pull on.
- Between the racks inside the building, 2-3 layers of insulation are laid. The number of layers depends on the thickness of the walls and the requirements for the building. Each layer is laid, making an overlap at the junction of the previous one. This will avoid cold bridges.
- The floor is insulated in the same way.
- The ceiling is insulated from the attic. First, a vapor barrier film is stuffed onto the ceiling beams, then insulation is hemmed with boards or plywood.
- Having laid the insulation, a vapor barrier film is stuffed on top; it protects the insulation from moisture from the inside.
Further finishing of the frame house depends on the needs and capabilities. Usually, sheathing material is placed on top of the film on the walls. This can be either a board or OSB sheets. And already on top of the sheathed walls, finishing is done.
We recommend studying: how much money can you build a normal country house for today?
Frame house project
Preparing a frame house project is the initial and most important stage of construction. Frame construction technology allows the construction of buildings of different heights and purposes on a site. We decided to build a 6 by 4 light frame house on the site, consisting of one single room, with four windows and a hip roof. Insulation of the house was not provided, since it is planned to be used exclusively in the summer.
You can find ready-made projects of frame houses on the Internet, or you can draw a project yourself. To develop a project, special programs are mainly used, but if the house does not have complex architectural solutions, you can draw it by hand on a regular sheet of paper.
Project of a frame house on a piece of paper.
The drawing must indicate all the functional parts of the house, such as door and window openings, the roof structure, the thickness of the walls, floors, you can indicate what materials will be used in the work and calculate the approximate cost of construction in order to build a frame house inexpensively.
It is the design drawing that allows you to determine what economic costs will be needed for construction.