Hello to all blog visitors!
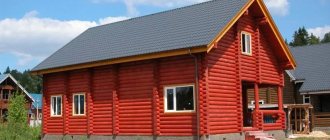
A log house in the paw is also called a “clean corner” and “a log house with corners without residues.” People quite aptly give images of technology in the corners of a house or a bathhouse chopped with an ax. It is the corners that are the most difficult process, requiring careful adjustment.
Even small deviations of the cutting in the paw create consequences, the most serious of which are the blowing of the corners and the violation of their verticality (i.e. the bathhouse will be lopsided). We will leave detailed questions about how to cut a log house to people who are professionally trained, and the topic of today’s conversation is insulating the corners of a log house in the paw.
From this article you will learn:
Finishing - methods, materials and features
Individual cutting of the corners of the log house also requires different finishes. For example, if a log house was made without any residue, that is, in the paw, there is nothing more to offer for it except sanding and high-quality caulking.
But there are still other options:
- If the house is a structure made of a not very attractive material, then in addition to the cladding, the question of how to close the corners of the log house needs to be resolved. In order to create additional insulation for this method of cutting. The materials can be foil and styrene, which are placed under the cladding.
- However, you don’t want to hide a beautiful tree, and thus, they make overlays for the corners, which are decorative elements similar to wood and again provide insulation.
- Cutting into a bowl, in itself, gave the elements of the house a truly Russian spirit of construction, and it would be wrong to close it. On the contrary, you need to emphasize the corners. For this purpose, jute or linen rope is used. The rope is already beautifully woven, and the density will serve as an additional caulk. External finishing of the corners of a log house using the “bowl” technology requires accuracy, and the rope will ensure this.
- To finish the inner bowls, you can also resort to woven material. However, this is only beautiful for framing entrances; an abundance of ropes is not a very good design technique. It is better to use a sealant that matches the tone.
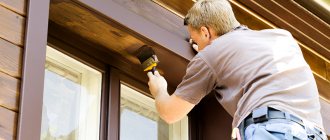
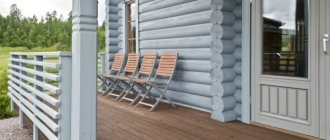
Installation of siding is almost always carried out on the sheathing. If the surface of the house is ideal, then the siding can be mounted directly on the wall. Log houses clearly do not belong to this category. So there is no way to do without lathing.
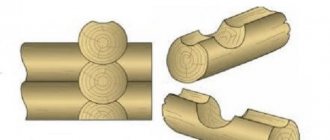
The walls of a log house are cut in a “paw” (also called a “clean corner”) or “in a bowl”. The main differences between these types are that in the first case the wall of the house practically represents one plane. In the second case, the crowns are joined together using cut grooves that form angles protruding beyond the plane of the walls.
Scheme of the general cladding of a house with siding.
To install the sheathing, in the case of cutting the log house “in the paw”, additional work will most likely not be required. If the crowns are placed “in a bowl” and at the same time protrude greatly beyond the walls, then it is advisable to shorten them. This will require additional labor costs, and the feasibility of this step must be considered based on specific conditions.
The sheathing can be done either using wooden beams or using metal U-shaped profiles. If the choice is on wooden sheathing, then you need to make sure that the slats are dried. Installing damp slats can lead to their bending during the drying process after installation.
You can attach wooden slats for sheathing directly to the logs of the walls. First of all, this applies to a log house assembled “in a paw”. In all other cases, installation of the sheathing must be carried out on metal hangers.
Before covering the log house with siding, it is necessary to treat the surface of the house with an antiseptic solution. This event will protect the tree from rot, mold, mildew and insects. If necessary, you need to seal the cracks or replace rotten structural elements. Remember that this step must be given due attention, because once the walls are covered with siding, access to them will be difficult.
Peculiarities
Logging in the paw is most often used in the construction of wooden houses than other types.
This can be explained by its advantages such as:
- an even and smooth corner of the structure without parts of the logs protruding forward;
- attractiveness and aesthetics of the building;
- convenience when decorating the exterior of the house (for example, when covering with siding);
- the log is used to its entire useful length, which means that the material is consumed as economically and efficiently as possible, which reduces the cost of the work process itself.
However, with all its advantages, this method is not without some disadvantages, namely:
- the construction of walls that meet the necessary heat consumption requirements is unlikely;
- the stability of such a building leaves much to be desired;
- the work is delicate, almost like jewelry, it is difficult to perform without special knowledge, experience and skills, and the slightest mistake can lead to the walls “floating” over time;
- Possible cracking and drying out of corners.
When erecting a log house in a paw, it does not hurt to resort to the help of special technical documentation - GOST 30974-2002. It clearly states what joint sizes are recommended for logs of a particular diameter.
How to seal cracks with sealant
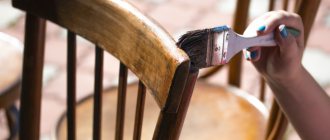
Eliminating cracks and cracks using sealing is the most common method due to its accessibility and ease of installation. Sealants firmly connect the walls of the wood gap. To prevent the product from getting onto the surface of the wood, cover the edges of the crack with masking tape. Then a strand of tow or jute or fabric for compaction is placed in the cracks and inter-crown joints. And the sealant is applied on top using a spatula or a gun.
When applying sealant, seams, joints and cracks are not completely filled to the brim. The composition is applied so that it comes into contact at two points of the tree and connects two opposite edges. The sealant is left for at least six hours, and after hardening, the sealed cracks are painted over to obtain a more aesthetic appearance.
If the product does get on the clean surface of a log or beam during work, remove it with fine sandpaper after drying. The masters of the MariSrub company efficiently and quickly seal a wooden house, which ensures reliable hydro- and thermal insulation, and also prevents the wood from drying out and the appearance of cracks or crevices.
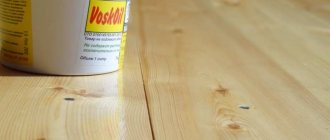
The most optimal solution for a wooden house is acrylic sealant. This is an environmentally friendly and safe product without odor. It is not afraid of temperature changes and dampness, reliably fastens the walls of wood and eliminates cracks or crevices. Silicone sealant cannot be used for a wooden house due to its harmful composition. In addition, such material cannot be painted, and it will ruin the appearance of the wood. The most popular brands are Neomid and Eurotex, made in Russia.
Read also Plants for the border perennial photos and names
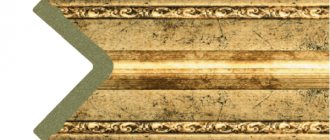
Types of decorative corners
Corners can be considered a universal finishing material; they are used in the bathroom, in the kitchen, in the nursery and even on the balcony. Corners decorate not only walls, but also fireplaces, stoves, and furniture. The appearance of the corners and their technical characteristics directly depend on the material from which they are made. The material also determines the scope of use of the corners. Depending on the material and area of use, there are several types of corners:
Metal
The most popular metal angles are made from aluminum, brass and steel.
This type of corner is rarely used for finishing residential premises - more often in furniture production. Brass and steel corners have a smooth polished surface. The aluminum profile can also be natural, polished, or anodized with a coating of any color. Such corners are usually used to match the material with which the walls are finished.
Wooden
This type includes models made of bamboo, cork, MDF or natural wood. They are mainly used for finishing external and internal corners of walls lined with clapboard, natural boards or similar material, but are also applicable for finishing wallpaper of any kind. Corners made of natural wood are made from different types of wood, are additionally painted, varnished, and can sometimes have on the surface patterns.Wooden corners are an excellent solution for attic balconies and bathhouses lined with wood. Such corners are fastened with secret nails and/or carpentry PVA. The disadvantages include low ductility and high fragility, which makes it impossible to use such corners in rooms with uneven walls, and therefore corners.
Silicone
This type of corner is suitable for framing the joints of wallpaper or painted surfaces. In addition to aesthetics, the silicone profile will make the corners less dangerous when it comes to a children's room.
In addition, it is resistant to water, so it is used in the bathroom; it can be mounted even on an uneven surface due to its flexibility. To attach such corners, an adhesive corner base is used.
The downside of silicone corners is their instability to household chemicals, which makes maintenance more difficult. For cleaning you should use non-aggressive products.
Polyurethane
Such corners are produced by pressing; they have a smooth surface and complex relief. Such profiles are wear-resistant, they are not afraid of moisture and temperature changes. Unlike plastic, they are thicker, which can complicate the installation process, but polyurethane profiles are easy to paint if necessary. Polyurethane corners imitate gypsum stucco, wood texture, and come in plain white or with gold-plated ornaments. Fits perfectly into a classic interior. Polyurethane glue is used to attach them.
Corners made of decorative stone
Elements made of stone are usually used to decorate the facades of houses, but if the interior of the apartment also has stone trim, such profiles will fit organically here too. You need to choose flat stones, they will add aesthetics to the structure. The stone corner combines harmoniously with decorative plaster, wooden panels, and even ordinary wallpaper.
How to decorate the corners of walls in an apartment: photo The easiest to use is decorative flexible stone. The material is lightweight, but durable, and can be mounted on any surface using liquid nails.
Flexible stone, despite its lightness, is a very durable and wear-resistant material. Under the influence of hot air, stones become soft and pliable, so they can be attached at any angle, even at imperfect angles. This stone has a rough surface and varied texture, and is resistant to mechanical stress.
Flexible artificial stone can be mounted directly on the corner. Ready-made corner elements are also quick to install. This L-shaped tile imitates stone, consists of a short and a long part of the brick. The same elements can be used to decorate arches and slopes.
Corner elements of artificial stone based on gypsum. For wall cladding without using ready-made corner elements, the edges of decorative stones are cut at an angle of 45 degrees and brought together with this part.
Further work is carried out according to the usual scheme - the seams are rubbed with cement grout. For internal corners, only the second option with sawing is applicable, since ready-made corner internal elements are not produced.
Ways to fasten the lining
First, let's look at the pros and cons of the log-in-foot technology
However, it is distinguished by a more harmonious shape, due to the absence of the ends of the logs protruding at the corners. For this reason, it is called a “clean corner”.
Actually, the same as the building as a whole. Namely:
Sanding is the first stage of pre-treatment and requires special attention. It includes the following work:
- To ensure that the corners of the log houses do not freeze, do not interact with moisture, and, as a result, do not deteriorate for a long time, they must be properly processed. This process requires sanding beforehand.
It is designed to remove the remaining bark from a log or beam, seal small networks of cracks, and, in general, make the house look well-groomed. You need to use special machines with petal attachments, because such work cannot be done manually - it will take a lot of effort and time.
- An independent process is quite possible. Also because the services of specialists are not cheap at all, however, by ordering the polishing of your own home, you don’t have to worry about its appearance.
- How do you grind the corners of a log house? It is not significantly different, as if it were carried out for the rest of the surface. The only difference is that special attachments are used that allow you to get into even the most inaccessible places.
- First, movements begin from the edges, gradually going deeper into the joints. It will not be possible to immediately make a perfect connection of logs - dust will clog them, as well as your nose and eyes. Therefore, it is worth arming yourself with a cleaning brush and personal protective equipment.
Without this, high-quality grinding is impossible. When the process of bringing the corners into decent shape is completed, you should carefully sweep away the wood dust again and leave them to dry naturally for 24 hours.
How to insulate walls with tape tow and linen rope?
One of the improved sealants is natural tow in rolls. It is made from flax, which is first well combed on carding machines, then the fibers are polarized and turned into a 15 cm wide ribbon. Next, the fibers are cleaned of various impurities. The result is an excellent noise and heat insulating material with good waterproof properties.
Unlike ordinary tow, tape tow is easier and more densely placed between joints; although it is soft, it is not so brittle.
Diagram of the sequence of external work to seal cracks in a log.
Thanks to the naturalness of the material, the walls of the log house breathe well and do not rot. Tape tow seams are more durable and are not easily pulled out of cracks by birds. Lay the rolled material, as usual, along the crowns and along their edges using a chisel or a special caulk spatula, carefully tucking the edges of the tape inside each seam and crack. The result is a reliable seal between the logs, and the appearance of the log house is quite attractive.
A house insulated with linen rope looks even more beautiful. This sealing of seams is called rope sealing. Three-strand flax rope is used as insulation, which is secured to the seam using staples or nails. To work on sealing a log house, you need the following materials and tools:
- tape measure or ruler;
- scissors;
- linen rope;
- hammer;
- short nails;
- metal staples;
- brush;
- wood impregnation.
The purchased linen rope is placed along the line of the inter-beam seam and every 15 cm, after pulling it well, a bracket or nail with a small head is driven into the beam. At the corners of a wooden house, the distance between fasteners may be smaller. To make the rope sealing of seams look aesthetically pleasing, when driving in nails or staples, perform the following action: first, open the strand of rope a little, then hammer in the fasteners, tuck the rope itself to the wall of the log house and tighten it. The strand is closed, and the staple or nail head is hidden underneath from prying eyes.
When sealing the seams with natural linen rope is completed, care should be taken to ensure its preservation for a long time. To do this, you need to take a protective impregnation for wood and carefully treat all the rope edges with it. You can perform this procedure by impregnating the log walls themselves at the same time. Despite the fact that the process of sealing all the seams of a wooden house is quite long, it is simple and can be done without the help of other people. Rope insulation of seams in a wooden house is highly reliable, perfectly protects the log house from moisture and gives the structure an unusual but attractive appearance.
Antiseptic protection is the most important stage
When dealing with wood, home craftsmen have already learned its weak points by heart and will not allow a house built with their own hands to fall into disrepair due to failure to take precautions. There are usually three defenses:
- Moisture resistant.
- Bio- and parasitic.
- Fire resistant.
There are mixed formulations on sale, but they are unreliable. It is worth remembering that wood needs protection from all sides, so it is impossible to ignore the internal corners of the log house. Sequencing:
- The first thing you need to do immediately after grinding is to inspect the frame for existing damage - the machine will not be able to completely remove it. For example, only a knowledgeable person will recognize the beginning of a fungus or a laying of a bark beetle.
The trouble is, if you don’t notice this and start work such as finishing the internal corners of a log house, the parasites will take root and the matter will be lost. If there are such places, it is recommended to go through them again, in a circle, with a larger faction.
- Next, you need to apply the composition, paying special attention to the joints. Since most of them (compositions) are already ready for use, you can start working immediately. But there are also those whose formula is highly concentrated.
You should be extremely careful with them and carefully read the instructions on the packaging. Otherwise, there is a risk of damaging your own health when processing the corners of a frame made of timber or logs.
All products are applied in this order - moisture protection, bio, and liquid - fire retardant. All connections need to be completed - internal and external.
- To apply the compositions, different tools are used: brushes, rollers, sprayers. All this must be accompanied by personal protective equipment. After work, it is recommended to wash everything in running water with some neutralizing powder - for example, baking soda.
Then dry thoroughly, pack and store away from children. This is about tools. Remaining compositions cannot be stored at all.
It is better to use them completely for their intended purpose, and dispose of the container or burn it. Thus, the corner frame, like any other, is subjected to chemical treatment.
Everyone can definitely handle this kind of work.
Installation of sheathing: nuances
Layout of sheathing for siding.
The main task of the lathing is to prepare an ideal plane for the subsequent installation of siding. The sheathing slats are installed perpendicular to the direction of the siding panels. The decision to sheathe the house vertically or horizontally must be made at this stage.
For preliminary marking, you will need such necessary tools as a building level, a laser level, or at least a plumb line. It is necessary to make vertical markings along the wall of the house in increments of 30-40 cm. The hangers are attached using the markings. The sheathing will be attached to them.
It is better to assemble the lathing first on one wall, and then move on to the next. Installation begins with setting the slats on the left and right corners of the house “to zero.”
Siding installation diagram without sheathing.
- The first option is using construction cord. The first point of attachment of the cord is selected at the top on one of the fixed slats. The second point is at the same height on the other staff. The third point is selected in the middle of the first staff. The fourth is in the middle of the second rail. The fifth is at the bottom of the first rail and the sixth is at the same height of the second rail. The result will be a zigzag. This is a general approach; you can place the cord attachment points more often. The remaining slats are installed according to the marked level; if adjustment is necessary, you can place blocks of different widths under the slats (if the sheathing is assembled from wooden slats).
- The second option is to use an auxiliary rail. It is attached at the top between the slats installed in the corners. The rest of the sheathing slats are attached to it with a free suspension, opposite the installed brackets. This option is more suitable for installing profile sheathing. After this, all that remains is to carefully attach them to the hangers.
After completing the fastening, the auxiliary rail is removed. The limitations in the use of this method are clear: it can be used if the distance from corner to corner of the wall is not very large, otherwise the auxiliary rail will bend greatly under its weight and the profiles suspended on it. Of course, you can install additional fasteners at one or several points and then dismantle them along with the rail itself.
Upholstery with siding is carried out according to the usual scheme:
- marking the line for attaching the starting profile;
- installation of the starting profile;
- installation of corner profiles;
- fastening J-profiles or trim around window or door openings;
- installation of siding panels;
- installation of the finishing profile;
- installation of gables.
Wet method
Now let’s look at how to properly insulate a house made of timber under decorative plaster or painting.
The preparatory work is the same as for a ventilated facade, with the exception of the lathing - it is not stuffed. Instead, special metal hangers are screwed (nailed) onto the wall (pictured below).
You can buy them or make them yourself from metal 0.7 mm thick. Dimensions 26x6 cm, where 6 cm is the width, 10 + 10 cm for hanging insulation 10 cm thick and 6 cm for the heel. They are fastened with self-tapping screws 51x4.8 mm in such a way that there are 2 hangers per basalt slab. Testing showed that one holder can withstand a load of 16 kg, which is enough for one mat. The second one is stuffed for insurance.
When all preparatory operations have been completed, insulation begins. To do this, the slabs are pressed against the hangers. In places where it touches the metal, marks remain, which are cut right through with a knife. After this, the insulation is mounted on metal holders, and then finally attached to the wall with special dowels (the fastening diagram is shown below in the photo).
Each subsequent mat sits on hangers with an overlap of 0.5-1.0 cm over the previous one (the slabs will stand apart, tightly blocking the connecting seams). The passage of external corners, window and door openings has its own nuances, which can be seen in the work “Technology for insulating walls with basalt wool.”
After insulating the entire area of the façade, the thermal insulation layer is reinforced with fiberglass mesh. Glue - “CERESIT CT190” or plaster-adhesive mixture “EK THERMEX - EK Chemical”. The mesh is glued overlapping, overlapping the previous strip by at least 10 cm, and covered with a 3-millimeter layer of diluted glue on top.
Finishing
Before applying decorative plaster, the facade is treated with a primer. Before painting, the walls are primed and then puttied. The paint should allow the wood to breathe. Therefore, only acrylic options are for outdoor use.
The qualifications of the hewer are of great importance
If a worker who undertakes to build a log house does not handle the hatchet skillfully, gaps on the paw are inevitable and the assembly of the corners itself will have negative consequences. After some time, the tree will dry out, the house will shrink and warp, or even...
The only budget option is to notice in time, insert wedges (cut from wood of the same species) and caulk the cracked areas. This does not guarantee a beautiful exterior, but it will help resist drafts and dampness.
Cutting corners with a chainsaw
“Modern technology” of chopping with the paw. Very often, today's “masters” cut their paws with a chainsaw. And here there is a negative point that not many people know about. The saw cuts off the densest “old” wood on four sides. What remains is the core, which is always looser and therefore less durable.
The result is that the log sections going into the paw lock are open to the atmosphere and are subject to faster rotting. Conclusion: when choosing an ax or a saw, choose an ax. But it’s much more difficult to do the job with this “flying” tool; it will take a long time to get used to it... A chainsaw is without a doubt easier and faster.
Let's move on to the topic of how to insulate a log house, or more precisely, its corners. Without delving into the physics of the processes, I’ll say right away that proper insulation is always done from the outside, that is, from the outside. Moreover, it doesn’t matter what the house is built from (wood, brick, types of concrete, etc.). Any experienced heating engineer will confirm this. Let's move on to reviewing the materials.
Traditional - jute or linen, tow, moss. What to choose? Canvas based on jute or flax in the form of a twisted ribbon began to be used relatively recently. It is easy to install, and its twisted structure ensures strength. In addition, the seam looks aesthetically pleasing.
Adviсe
A log house is the most common option for constructing such a building. The assembly process itself takes a little time, especially if all the preparatory work was carried out efficiently.
Although it is possible to build such a house yourself, it is better to consult with an experienced craftsman before starting work. It is necessary to take into account every little detail, because the strength and safety of the new building may depend on it.
Of course, reviews about this cutting method are contradictory. But it is supported not only by its obvious, well-known advantages, but also by the fact that this method is still the most common, despite certain difficulties and disadvantages inherent in it.
A reasonable approach to business, strict adherence to all the necessary rules will help you successfully complete this work and get a warm, cozy, durable and safe log house.
See below for information on how to cut into a paw.
To insulate or not?
Scheme for installing siding on the sheathing.
- In the summer, the siding will begin to absorb all the sunlight, and an air cushion will appear between the log house and the cladding, which will be well ventilated. The house will be cool and comfortable.
- In winter, if this is a country house where you visit only once a week, insulation is probably not advisable. And even if you permanently live in a house, but it is heated with network gas, the effect of insulation will be insignificant, and the costs will be considerable. Moreover, if you use mineral wool as insulation, then over time it will begin to deteriorate, and the smallest particles will enter the house through the cracks in the logs. Mineral wool contains phenols, which do not add health to the body.
If the log house is assembled “in a paw”, then it is necessary to insulate the corners of the house.
Is it worth caulking a wooden house?
The most famous inter-crown insulation materials are considered to be moss, hemp and tow. The advantages of these natural materials are resistance to temperature fluctuations, bactericidal and mold fungi, low thermal conductivity, and good moisture absorption. But fewer and fewer people who build log houses use these materials to seal seams in a wooden house. Why has the demand for moss, tow and hemp decreased so much?
Read also Reviews about violets and fertilizer
Diagram of the sequence of work with sealant for sealing cracks in a log.
The process of caulking cracks and spaces between the crowns is quite labor-intensive and lengthy, because you need to carefully and evenly plug them with natural materials using a chisel. The walls cannot be caulked immediately after the construction of the log house, since its shrinkage will take at least a year, and during this time moisture can already begin its destructive work. The disadvantage of caulking tow and moss is the fact that this process will need to be repeated more than once. The thing is that birds love to “steal” materials from people to build nests. By pulling moss and tow out of cracks and joints, they violate the integrity of the seal and give the wooden frame a sloppy, disheveled look. Winds also worsen the appearance of walls. As for material such as hemp, it is susceptible to attacks by moths, which, through their activity, harm the seal.
Knowing these shortcomings of natural insulation, manufacturers of building materials produce more advanced sealants to improve the quality of insulation of all cracks and seams of a wooden house. What are the benefits of modern wall insulation?
Seal problem
Angle thermogram
Let us immediately emphasize that the problem of thermal insulation of crown joints is by no means new and has been successfully solved by builders over the past millennia. All modern techniques are simply the replacement of archaic building materials with their modern analogues.
Despite the fact that during shrinkage the entire frame is deformed, the main channel of heat loss is still the corner joints, so finishing the corners of the frame is often considered as a separately paid operation.
Let's consider what methods exist for insulating corners, and how you can sew up roof joints.
Re-caulking
A more modern version of caulking involves the use of jute ropes and ropes, which significantly speeds up the process, but reduces the reliability of holding the insulation in the gap.
Creating wedge joints
This method is applicable only at the construction stage. It consists in a more careful implementation of the joints between the crowns, the locks of which have a wedge-shaped configuration.
Scandinavian-Canadian wedge
The recess inside the log is filled with a sealant with a maximum service life (for example, mineral wool), and the edges are sheathed with a closing sealant.
Polymer sealing
Polymer sealing scheme
The most effective and fastest way to insulate houses made of profiled timber and logs is polymer sealing.
The peculiarity of this technology is that if it is performed correctly, you can forever forget about the consequences of shrinkage, since the seam is filled with an elastic sealant with a high adhesion coefficient.
When the logs shrink and shift, the new seal is deformed but not destroyed.
The only problem with this method is the high price of a sealant that is resistant to climatic factors.
As an alternative, a combined approach is used, when the main volume of the insulated gap is filled with ordinary (that is, inexpensive) acrylic sealant, and the outer protective layer is formed from a stable special composition.
In such cases, the repaired log house can be covered with cladding made of boards, the fixation of which must be carried out taking into account shrinkage displacements.
Wind protection of the facade
Sometimes the deformation of a log house is at such a stage that sealing the joints alone is not enough to normalize the heat balance of the house. In such cases, external wind protection is installed in the form of additional facade cladding.
This design is installed using the “ventilated facade” technology, and a block house or lining is used for external finishing.
Internal thermal insulation
Any sealant that can be used to seal seams in a wooden house is very critical to large changes in humidity and temperature. Therefore, in baths and saunas, in addition to all the methods listed above, internal thermal and vapor insulation is installed, which can be made either in a standard multi-layer method or using a simplified technology - from penofol.
This approach not only extends the overall period of normal operation of the log house, but also increases the energy efficiency of the house.
will carry out decorative and protective finishing of log and timber houses, including the installation of additional thermal insulation. You can clarify the details of cooperation and calculate the cost of the necessary work using any method of communication published on the “Contacts” page.
Calculate the cost of painting and insulating your home right now
Do you have accurate measurements of the house?
I measured it myself. I have a house design. Measurers came. I want to call a measurer.
By clicking on the button, you consent to the processing of personal data
Painting a wooden staircase - choice of dyes and main stages of work
About technologies for external protection of log houses using natural and mineral oils
Why choose Aquatex wood oil
Review of sealants Zhivitsa for wood
Choose wisely
Jute or linen fabric. When purchasing, look for insulation made from primary natural fibers of jute and flax. “Which fabric is considered natural? The one that is obtained after primary processing of plants and without third-party additives.”
We noticed that the fibers are very short or contain thread trimmings of a different color - a product made from recycled materials (usually recycled sack containers or rags). Don’t be shy to ask for a certificate, which should indicate the raw materials, the presence of impurities and additives, and most importantly, their proportions (in %).
For information: all jute and linen fabrics are produced using the same technology, which, by and large, has not changed for the last hundred years. Equipment and costs are also comparable. Therefore, a reduction in the price of finished products is possible due to low-quality raw materials (for example, recycled) or due to a decrease in the total mass of raw materials (this means lower density, strength and durability). This will affect the quality parameters of the insulation, and therefore the comfort of life in the future home.
“When there are several options for purchasing jute or linen, do not try to buy cheaper. A low price is usually a sign of unnaturalness or low quality.”
Moss. Moss insulation is perhaps the oldest. The ancestors noticed that, unlike tow, birds do not pluck it for nests. In addition, it is a natural antiseptic, “not friendly” with fungus, does not rot, and rodents and insects do not revere it. But there are three "Don'ts".
- Not all moss is applicable. Preference is given to long-fiber flax (red flax, cuckoo flax, sphagnum).
- Not all builders know how to lay correctly. It is better to attract those who work with him constantly.
- Fragility. Moss dries out over time, turning into dust of little use.
Property of jute
Jute fiber is extracted from the stems of jute, a herbaceous plant belonging to the linden family. The growing area of jute is quite extensive; it is cultivated in Asia, Africa, Australia and America. India is one of the main suppliers of jute to the world market. In this country, jute fibers have been used to make fabrics and clothing since the 18th century.
Jute fibers are less elastic than flax, and the fabric they make is rough and tough, so jute is widely used as a raw material for the manufacture of ropes (twine, ropes) and packaging fabric (burlap).
Modern insulation materials
I’ll say right away that materials with a closed porous structure (foam plastic, polystyrene foam, penoplex, etc.), sprayed polyurethane foams (including polyurethane foam), synthetic sealants (acrylic, silicone, etc.), foamed polyurethane foams (such as foam rubber) – completely unsuitable for insulating log corners. Why? Because they are absolute vapor barriers. Moisture emanating from a house or bathhouse, accumulating in the thickness of the insulation, causes the seam itself to freeze.
Or another case. There is a so-called “warm seam” offered by some sellers as a reliable option. However, if we follow the technology of its installation, we will end up with hermetically sealed seams and the absence of natural ventilation. Inside the heat-insulating tape, moisture vapor from inside the house collects, which means you can expect condensation to appear at the joints and accelerated rotting of the corners. This method is good for insulating double-glazed windows in a concrete house, but not for the corner of a log house.
But practical Finns use a special type of tow, made like double-sided tape. Tow can “play” with compression and expansion in the range from 5 to 15 mm. It allows vapor to pass through, but does not absorb moisture. And there is no need to re-caulk.
There are also well-proven new products made on the basis of jute (ThermoJUTE) and flax (ThermoFLEN). These are specially developed products for insulating wooden buildings and the reviews about them are quite good.
One of the radical ways. The corner is completely covered with foil insulation (foil facing out), or nailed with a furniture stapler. The top is covered with wooden paneling for decoration. Helps. But it looks alien and there is no vapor barrier.
Perhaps that's all. I hope the information will be of benefit to someone.
An anecdote from everyday life: “A wife is washing dishes, seeing a leaking faucet in the kitchen, calls her husband. - Pashka, come here, change the gasket for me! The husband mutters fiercely - well, you’re completely lazy..."
Good luck and dry corners to your log houses! Bye! Bye!
Wisdom Quote: He who laughs is not angry, because to laugh means to forgive.
How to properly close the corners of a log house when insulating the log house in a bowl or in a paw? Improper execution of this stage of work will lead to a lack of living comfort (drafts, heat loss, dampness, etc.).
The process is carried out immediately after the log house is ready or at the time of construction. The “bowl” type retains heat better compared to the “claw” type, which is more susceptible to cold and dampness.
Minuses
- The most important flaw is the drafty corners of the house or bathhouse due to the short edges of the logs. Additional insulation of the corners with thermal insulation materials helps to retain heat in the room. For additional insulation, it is recommended to cover them with corner boards.
- The compounds tend to dry out over time, which naturally results in the appearance of cracks and cracks. To prevent this from happening, the log house must be regularly wedged.
- If the size of the logs is selected incorrectly, blowouts may occur in a couple of years, which cannot be eliminated even with the help of an expensive sealant. This is a minus of all log houses, but in this case it is more pronounced.
- Compared to cutting into a bowl, the period of operation of such a house or bathhouse is shorter. If you take a responsible approach to the issue of finishing and insulation (especially corners), you can extend the period of trouble-free use of your home. Otherwise, the destruction of the wood structure will lead to a gradual loss of structural stability.
- Difficulty in building a house, bathhouse and other structure. It is unlikely that you will be able to do all the work yourself. A “Canadian bowl” log house is easier to create, and the result as a reliable and durable structure is guaranteed.
When cutting into a paw, it is important not only to select a forest of the same diameter, but also to carefully adjust all the crowns, corners and joints. Even small errors can subsequently lead to blowouts and the bevel of a house or bathhouse
- For the lower crown, which will be laid on the foundation, it is worth selecting dense and thick wood. During the preparation process, the logs are given the correct shape, for which one side is trimmed using a plane. It will serve as the inner part. When processing the edges, the tree must be cut to 1.5 diameters. The final shape is square or rectangular.
- Before making a log house, the ends of the logs are marked. Marking begins with a log that has the smallest diameter in the upper cut. Based on the parameters of the paw of a given log, the ends of other logs are marked. Defects in marking the paws violate the vertical position of the corners and their airtightness.
- The edging, which will be located on the inside, is completely trimmed. From the outside it is trimmed to a length equal to 1.5 - 2 times the diameter of the log. The remaining edges are processed to a length slightly exceeding the diameter of the wood.
- The log house is assembled from the frame crown. Two logs are laid parallel. Parameters are measured using a level. Then two more logs are laid perpendicularly and marking begins.
- The logs in the log house are placed with their butts in opposite directions, while maintaining a clear horizontal position in each row. Insulating material (moss, tow, jute, etc.) is laid along the entire length of the log. The log house is connected by means of a block of wood, the blows of which allow the logs to be placed with the closest possible fit to each other. The log house, lined with insulating material, must be left for some time to dry and shrink, after which you can begin final caulking, sanding and finishing with purchased materials.
To assemble a log house, bathhouse and other structure, a beginner will need:
- chainsaw;
- axe;
- hammer;
- caulking tools;
- level or rope;
- marker;
- square;
- measuring instruments.
Before starting work, it is recommended to make a sketch and calculate the amount of material required.
What happens if you don't close the corners
If you ignore the stage of insulating the corners of the log house, in addition to the lack of comfort during your stay, there is guaranteed to be a distortion of the shape of the structure, which will become askew over time, dampness and elements of rotting wood will appear. What happens if you don't close the corners from the outside? External insulation allows you to more effectively maintain comfort in the house compared to internal insulation, and therefore is more important. If you cut a corner of logs or beams without sufficient experience, then there is a high probability of defects appearing after construction, in particular large gaps during shrinkage. The situation is corrected with the help of wedges. They are cut from the same type of wood as the log house. Mistakes when sealing corners will also lead to serious problems. For external insulation, you cannot use polyurethane foam, which will accumulate moisture over time and cause dampness in the wood. When choosing sealants, you should not use silicone or acrylic types due to the high likelihood of peeling or cracking. You should pay close attention to the internal and especially external corners, since they become the paths for cold penetration if the insulation is improper.
Insulation of a wooden house using Warm seam technology
Our website presents a number of log house projects, for example: Or you can see all prices for log houses. You can calculate the house or bathhouse you need with maximum accuracy using our log house cost calculator. To order and buy a log house, call:
Comments
No comments yet.
What you should not use to insulate a log house.
Insulation with polyurethane foam, mineral wool.
Foaming the cracks of a log house is not the best idea, because... Polyurethane foam does not have sufficient elasticity; when exposed to sunlight, it dries out and falls apart. It’s also not worth laying mineral wool between logs - mineral wool wrinkles under the weight of the logs and shrinks. In addition, soft wool is gyroscopic - it absorbs water from the environment, as a result of which the seam between the logs may freeze through. Due to increased humidity, wood begins to rot. It will be possible to insulate the wall of a wooden house or bathhouse with cotton wool, but not the space between the crowns.
Features of closing and insulating corners for different types of felling
The choice of material for insulating corners chopped into a bowl depends on the type of wood used in construction. To seal timber structures, the following are used: natural moss, jute fabric, flax batting, etc. It is important to use the same material that is laid on the crowns. You should not use different insulation materials, so as not to cause defects due to the difference in the thickness of the sealant. A log house made of logs (untreated or rounded) must be insulated with jute or linen rope, the twisted structure of which will ensure complete elimination of cracks.
Constructing a log house using the “in-the-cup” method is a labor-intensive process that requires more building material than the “in-the-paw” option. The Canadian type is now popular, characterized by the presence of a fat-tail protrusion in the recess and a trapezoidal shape. During the shrinkage process, the logs form super-strong joints with the insulation. As a result, the penetration of cold and drafts into the room is completely eliminated. This construction option is much more expensive than a simple (rounded) bowl. Log houses with crowns in a bowl or Russian corner are not covered with external finishing; in the area of the ends the wood breathes and therefore lasts longer. To seal, use caulking of the corners with a rope, which is pushed into the gaps using special tools. The material is hammered in using a mallet, which is used to hit the caulking blade. During work, you need to pay special attention to the joints of the corners with the ceiling and floor. Especially below, where sources of dampness are located. If a wild log house is being built, it must also be caulked.
Insulation of a log house in the paw
Log cuts that form a paw lock or a German corner are more susceptible to rapid rotting and environmental influences. Therefore, it is more difficult to properly insulate corners. 1. The process should be carried out more carefully than for the bowl. 2. The cracks are sealed at the time of construction of the log house, the corners are sealed more tightly. 3. For a beginner, it is better to assemble crowns using a stencil to draw each end of a beam or log. 4. An incorrectly supplied element is immediately replaced. To insulate the log house, jute fabric, folded several times, is used in the paw. Birds love to take away the tow, and the moss turns into dust over time. Features of closing and insulating corners for different types of felling depend on the work area: inside or outside. When constructing a permanent house, it is necessary to use these two options. You need to be more attentive to external elements.
Layered insulation is used if the log house is intended for exterior decoration. Caulk and sealant are a universal combination, most suitable for rounded logs.
Insulation for external cladding
In modern construction, an interesting method of insulating a log or timber frame is used if the external cladding of the building is planned. You need to cover the corner with a foil membrane or secure it with a furniture stapler. When externally insulating the outer surface of a house, before finishing with siding, the following is used: 1. Basalt insulation. 2. Foamed polyethylene. 3. Fiberglass materials. 4. Foam plastic. 5. Extruded polystyrene foam. Non-flammable insulation and metal siding increase the fire safety of a wooden house. Before the outer cladding, sheathing, insulation and a hydro-windproof membrane are attached to the surface of the log house. This layer-by-layer structure is called a thermal insulation cake.
Peculiarities
Regardless of what kind of lumber, timber or logs the house is made of, there are two main ways to connect corners:
- “into the bowl”, after the junction there is a certain piece of log;
- “in the paw”, beams or logs are cut without leaving any residue.
When using this method of cutting corners, a very beautiful form of joint is obtained, which can be decorated in an original way, for example, by painting different elements of the log with contrasting colors.
With a corner connection without any residue, insulation becomes of particular importance, since in this option, the corner remains unprotected and, in the absence of good insulation, allows the cold to pass through.
Typically, this method of cutting a log house is used if the cladding of the log house is planned in the future. Closed corners, chopped without leaving any residue, become warmer and more airtight.
You can cover the pre-caulked corners with a regular board. If you fix the board rigidly, then when the log house settles, the logs may hang and cracks may appear. To avoid this, it is necessary to make a vertical slot 2 cm long in the board and, when screwing it to the corner joint, screw a self-tapping screw into the highest point of the slot.
A board nailed in this way will not interfere with the natural shrinkage of the house. If over time the length of the slot turns out to be insufficient, you can unscrew the screw and screw it again to the top point.
We invite you to find out which moss is best for a log house
After the shrinkage processes are completed, the corners can be sheathed with clapboard or siding. Cladding corner joints chopped into a paw does not cause any particular difficulty, since the corner is cut without leaving any residue, it will not interfere with making the sheathing in the usual way.
In another way, this angle is called “warm”, and this is no coincidence. With this type of cutting, the corners allow less cold to pass through, making the house warmer. But from the outside of the building, the logs protrude outward; often the ends are of unequal length, which does not allow the frame to be installed correctly. The question arises: how to sheathe the corners of a log house in this case?
In some sources you can find advice: gradually cut down the protruding structural elements, and fasten them with staples to strengthen them. However, as a result of sawing off the ends, which are elements of the supporting structure and give strength to the house, the building may lose stability and weaken.
If pins were not installed during construction, then for a weakened structure, even the slightest effort is fraught with destruction. Therefore, you should think carefully before making such a decision.
If the ends are of different lengths, they are filed so that they form an even line. It is quite possible that in this case the frame will recede greatly from the wall, then the dimensions will have to be equalized using thick bars with a section of 50x50 mm.
You can use an alternative option, which involves mounting the frame separately for the wall and separately for the corner. In this case, the corner frame is an independent structural element and is made in four planes. The presence of additional corner elements will increase the consumption of material, but in its finished form such a structure looks very impressive.
Logging in the paw is most often used in the construction of wooden houses than other types.
This can be explained by its advantages such as:
- an even and smooth corner of the structure without parts of the logs protruding forward;
- attractiveness and aesthetics of the building;
- convenience when decorating the exterior of the house (for example, when covering with siding);
- the log is used to its entire useful length, which means that the material is consumed as economically and efficiently as possible, which reduces the cost of the work process itself.
However, with all its advantages, this method is not without some disadvantages, namely:
- the construction of walls that meet the necessary heat consumption requirements is unlikely;
- the stability of such a building leaves much to be desired;
- the work is delicate, almost like jewelry, it is difficult to perform without special knowledge, experience and skills, and the slightest mistake can lead to the walls “floating” over time;
- Possible cracking and drying out of corners.
When erecting a log house in a paw, it does not hurt to resort to the help of special technical documentation - GOST 30974-2002. It clearly states what joint sizes are recommended for logs of a particular diameter.
Cracks and crevices in a wooden house
As the house shrinks and due to strong temperature changes, lack of proper insulation and waterproofing, cracks appear on wooden materials and between them. To avoid this, it is important to treat the wood during construction.
Logs and beams are coated with antiseptics after the manufacture of lumber, during the assembly of the log house and during the final finishing work. In the future, a wooden house also requires maintenance. Protective treatment is carried out every 3-6 years, depending on the type and quality of antiseptics.
In this case, it is very important to carry out competent and reliable insulation of a wooden house, as it protects the timber and logs from severe cracking. In addition, you need to choose products with good drying.
The craftsmen of the construction company “MariSrub” independently produce beams and logs and carefully monitor each stage of production. We use safe and high-quality chamber drying, which prevents wood from cracking. Be sure to treat lumber with protective compounds!
If cracks and cracks appear, the defects must be eliminated. They reduce the thermal insulation properties of the house, as a result the walls or floor will be blown through, and drafts will appear in the room. In addition, cracks greatly spoil the aesthetic appearance of the house. In the future, the cracks grow and aggravate these problems, negatively affecting the condition of the lumber. Therefore, it is important to eliminate defects in a timely and correct manner.
Felling stages
High-quality assembly of a log house using the methods listed above is a rather lengthy and painstaking process, even for experienced woodcutters. There is a certain sequence for carrying out work that cannot be violated.
The log house should be cut in accordance with the list of steps given below.
- The first step is to prepare the log for subsequent felling. It can be simply debarked or scraped. Assembly can be carried out either from dry material or from round timber with natural moisture. In the latter case, you will have to give the finished log house time to shrink; the period can range from 6 to 36 months, depending on the diameter of the logs and weather conditions.
- Next, blanks are prepared from future logs of the lower crown, trimming their ends on both sides. The peculiarity is that the depth of the cut surface must be equal to its width. Next, the remaining two sides are trimmed in the same way, obtaining an exact square in cross-section.
- Markings are applied to the resulting blanks to obtain the desired shape. The location of the points depends on the chosen chopping method. The marked places are cut off, obtaining a finished framed log. This is how the required number of blanks for the first crown is processed. It is worth noting that the first crown does not require notching from the bottom, while the remaining logs of the log house will need to be processed from above and below, obtaining the required connecting element.
- Based on the sample of the first full log of the wall, a plywood template is made to facilitate further work. This will help avoid constant measurements and prevent possible errors when cutting logs under the corner joint.
Finishing the internal corners of the log house
Grinding the corners of the frame outside and inside is always carried out before starting other work in order to prevent freezing of the wood, interaction with moisture and rotting. During the treatment, the remaining bark is removed and the cracks are filled. The equipment used is a machine with petal attachments and a grinder. The process begins from the edges, moving towards the joints. Personal protective equipment is required due to the large amount of dust. After completing the work, the log house is left for a day to dry. A simple way to finish the internal corners of a log house is to install a pair of vertical edged polished boards. They must be tightly closed to avoid a gap, resulting in an even vertical angle. Less commonly, the board is installed at an angle of 45° to each wall. Internal surfaces are treated in different ways, for example, lining, plastering, plasterboard. Mineral wool, polystyrene foam, and isoplat (pressed flax fiber) are used as insulation materials.
Roof overhang decor
The roof overhang is decorated with a large or small, complex or simple, single or composite under-roof cornice. An additional dividing strip on the facade may run slightly lower, allowing for color zoning of the facade of the house. The corner of the house itself is designed in many ways in order to visually reduce or increase the height of the structure. Rusts, pilasters, combined options - these are the main types of facade decor for the corner of a house. A separate and most important part of decorating the exterior walls of a house is the façade window decoration.
Other methods of sealing cracks
- Instead of buying putty, you can make the putty yourself. To do this, mix PVA glue and sawdust until thick and use a spatula to fill the cracks with the mixture;
- To seal wide cracks, use a wood chip the same length as the defect. The piece of wood is sharpened with a wedge and the crack is hammered in; the top is secured with putty or homemade putty;
- Arbogypsum is another product that is used to seal cracks in a wooden house. It contains dry gypsum and crushed bark or sawdust in a ratio of 1:3. The result is a strong and reliable composition, which is diluted with water in the volume of half the gypsum taken. The elastic and dense mass is mixed until smooth and lumps dissolve. For greater plasticity and elasticity, you can add a little shampoo to the product. Seal the cracks with freshly prepared mixture, as it hardens quickly.
Whatever method you choose, before work you need to thoroughly clean the timber or log walls, and also clean the cracks from debris and dust. It is better to repair defects in above-zero temperatures, in dry weather and on dry wood. After caulking with moss, the walls are left to dry for three days; when working with other materials, for at least six hours.
What the appearance of a wooden house will be, first of all, depends on its decoration. Many owners of wooden buildings prefer to sheathe the house with a variety of finishing materials, which at the same time decorate, insulate and protect wooden walls from adverse factors. However, the cladding of a log house has some difficulties, the reason for which is the corner joints of the log house. The corners interfere with the installation of the sheathing, without which it is impossible to frame the house. Finishing the corners of a wooden house outside and inside the room causes the greatest difficulty when carrying out finishing work. How to properly finish corner joints, and how to sheathe corners without damaging the wooden structure? We will talk about this in the article.
Decorating the corners of the facade with rustication
The classic way to finish the corners of a house is rusticated stone (rust). Rusticism as a design technique became widespread during the time of Peter the Great. Then not only the corners of building facades were finished, but also door or window openings, as well as the basement. In modern private construction, various decorative elements are also used, including interfloor belts, moldings and cornices, window locks and brackets.
Stone rustication Source designcapital.ru
See also: Catalog of companies that specialize in designing country houses.
However, the most famous decoration technique remains natural rusticated stone, thanks to which the structure acquires an exquisitely aristocratic appearance. Rustic corners made of natural stone have the following advantages:
- Physical properties . They are distinguished by mechanical strength and resistance to environmental factors (frost, rain, sun).
- Quality . Retains original properties for decades.
- External attractiveness . Finishing with natural stone always looks decent, retains its texture and richness of colors throughout its entire service life.
Stone for cladding walls and corners of a house is chosen based on color, texture and other qualities. Common options include the following types of stone:
- Sandstone, shell rock, limestone . The breeds are popular due to their budget cost, moisture resistance and good density; sandstone remains the leader, due to its special frost resistance. When choosing, a wide color range of materials, from bright white to dark brown, is also important. The rustic finish with these stones gives the house an ancient, majestic look.
Clear appearance of a rusticated facade Source penoprofil.ru
- Dolomite and travertine . Rusts made from these types of stone have premium quality, excellent density, and a special texture. The color palette, which depends on the place where the stone is mined, is particularly sophisticated and allows you to choose rarer shades - creamy beige, greenish, sea green. The high strength and wear resistance of dolomite allows it to be used for cladding the base.
- Granite and marble . The most durable, durable and expensive materials. They rarely cover the entire facade, but are often used to decorate corners, window openings and entrance areas.
Regardless of what architectural style the country house belongs to, and what stone was preferred, the natural beauty and texture of the material will be a harmonious addition and decoration of the facade.
Bossage with bevel Source penoprofil.ru