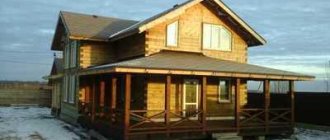
Choosing the material from which a future house will be built is an important and very responsible task. Strength, comfort, durability and reliability in the future will depend on this. And it doesn’t matter whether they are frame partitions in a residential wooden house or load-bearing walls. If we consider partitions specifically, then, for example, for a lightweight frame it is extremely undesirable to make them from brick or concrete slabs. To understand what exactly you can choose, you need to understand the existing varieties, features and functions.
Features of the partition or how it differs from a regular wall
Vertical internal structures are walls that act as load-bearing structures and partitions. The first ones must be built strictly according to technology, since they are assigned, perhaps, the most important role - distributing the load of the house, including the roof on the base.
Partitions are not load-bearing structures; they only serve to divide the internal space into zones. Therefore, it is possible to use lightweight materials for their production. They will only affect the level of noise and sound insulation and are responsible for the aesthetic appearance.
When remodeling, people are often confused about the concepts of load-bearing and non-load-bearing structures. To bring at least some clarity and understand what can be demolished and what cannot be demolished, consider the following definitions:
- A load-bearing wall is a structure that takes on the weight of the roof or ceiling, and then transfers it to the base. Since they are responsible for the integrity of the house, they build them according to preliminary calculations. Mistakes here are fraught with grave consequences. It is strictly forbidden to demolish them yourself.
- Non-load-bearing walls are structures that, although they are laid out along the entire height of the house, transfer only the load of their own weight to the base and the roof is not based on them.
- Partitions are structures built from floor to ceiling. Compared to walls, the partitions of a frame house rest on a specially designed floor. They are not assigned a load-bearing function; they are intended only to delimit the internal space into rooms.
- The requirements for partitions are much lower than for walls. They can be demolished during redevelopment without the appropriate permission from the architectural bureau for these actions.
What requirements must they meet?
There are a number of requirements that must be met depending on the purpose of the rooms:
- In bathrooms, laundry rooms and other similar rooms, due to high humidity, the partition must be made of appropriate (moisture-resistant) materials. To prevent steam and moisture from penetrating into other rooms.
- For attic rooms, it is necessary to choose lightweight materials so that they do not create additional load on the base.
- In order to make the room inside brighter, it is better to choose light-permeable materials, for example, glass blocks, structures in which you can insert glass yourself.
- For laying communications: electrics, water supply and sewerage, stationary (special) partitions between rooms are well suited, albeit with increased thickness.
If the house has rooms with different temperatures and they need to be separated, then for this purpose it is better to use more massive structures with good thermal insulation.
Ordinary standard partitions cope well with most of the tasks. To improve sound permeability, you can make sound insulation yourself, rather than using factory-made ones.
Any of the interior partitions should be:
- Durable, stable, comfortable - in a word - so that it does not create interference, does not interfere with free passage, does not pose a danger to the health of household members;
- Meet the deadlines set for;
- The material must be chosen correctly so that the structure does not crack and is firmly and securely attached to load-bearing or non-load-bearing walls.
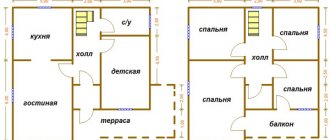
Purpose of partitions in a frame frame
Frame partitions are not erected immediately, but only after several months. During this period, the shrinkage of the structure should end. Partitions are made for the purpose of:
- Dividing space into rooms (zones);
- Creating an aesthetic appearance through decorative finishing;
- Performing sound insulation in created premises.
First you need to make partitions in a frame house, only then start cladding, using any modern material you like.
Installation on an uneven wall
A room may not always have perfectly smooth walls. The installation of the frame in this case looks a little different. You should start by identifying irregularities: the timber is placed on the floor along the wall and a line is drawn along its outer edge. Next comes the marking for future racks at a distance of 60 cm. The next step: the rack beam must be pressed vertically against the wall and at regular intervals mark the position of the end behind its exit on the floor.
It is important to place the support beam evenly, because vertical beams will then be attached to it. To level the racks, you can take scraps of fiberboard, wood or plywood.
Installation of drywall can be done with your own hands, having an idea of what should happen. It is important to follow a certain algorithm of actions; there is no need to rush here, because it will not be so easy to correct mistakes later. Before the process, you need to make all the necessary measurements and calculations, stock up on all the materials and tools that you will need. For example:
- screwdriver;
- roulette;
- pencil;
- hacksaw;
- metal scissors;
- drill;
- level.
But perhaps the most important point in the construction of a plasterboard partition is the documentation for the permit. It is not recommended to start work before you have received all the necessary permits.
Installation of interior partitions
The design of the partition between rooms is simple, so homeowners often do it themselves, using materials that they know how to work with, or that, in their opinion, are easy to install and process.
The basis is the frame. It can be made of wood, plastic or steel. Plastic is rarely used, but the fact is that it can still be used, for example, in an office, for arranging a screen. Basically, wooden beams and aluminum profiles are used.
The wooden beam that is most suitable for this purpose should have a cross-section of 40x60mm. Board – thickness not less than 30×50 mm. It is not advisable to make a frame structure from boards - it is unreasonable and uneconomical if they are not considered redundant after construction. That is, you don’t need to buy them specifically; you can use those for which you can’t think of a use.
Advice! If after building a house there is a board of 40-120 mm left, it can be cut in half, so you get two beams. This will save material costs.
The frame is assembled and secured with screws or nails. Sometimes, but very rarely, mounting plates are used for this.
The steel frame is made from a simple profile, which is used for plasterboard sheets. Or a profile with a stiffening rib. Once the frame is ready, it can be sheathed with any material that suits your financial capabilities. It could be:
- Plywood;
- GVL;
- The board is thin;
- GKL;
- DSP;
- Lining;
- OSB.
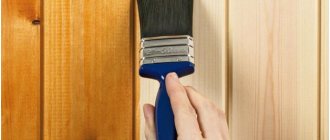
Sheet materials are prepared for finishing (finishing), the lining is sanded, sanded and only then covered with a finishing layer of decorative compounds or simply painted.
Advice! Frame partitions from lining must be assembled after the production of the subfloor, and not before. And after the ceiling is ready.
Frame making
Mark the floor, walls and ceiling, drawing lines for installing the metal profile. Attach the profile using filler screws. Install vertical guides, fixing them on the walls, in the upper and lower profile.
Provide a place to install the interior door. To increase the rigidity of the structure, insert a wooden block inside the profile that forms the doorway. Determine the width based on the door you plan to install, taking into account the door frame.
Install a guide beam horizontally from a profile with a wooden block. The latter is fixed in the profile with nails. Also use nails to connect bars located in different profiles.
Install vertical posts at intervals of approximately 60 cm. Mounting locations should be determined based on the size of the plasterboard sheets to ensure they can be securely fastened.
All types of partitions for frames
All internal partitions in a residential frame house, mounted on joists and beams, are divided into the following types, the so-called traditional:
- Frame-panel;
- Carpentry;
- Wooden;
- Solid.
The building materials market is constantly updated with new materials. This made it possible to produce the following types of partitions:
- Glass;
- Plasterboard;
- Designer ones.
Any design is not particularly complex, so you can do it yourself. Here you don’t need skills or experience working with the material – it’s a matter of desire, time and patience.
Frame-panel view
It is considered the most economical and easiest to implement:
- The frame is made of timber with a section of 50×100mm;
- Beams are attached in increments of 50-60cm;
The connecting element here is the harness. It also gives strength and stability to the partition.
The frame is insulated with mineral wool or polystyrene foam 50-100mm thick. It is recommended to seal both sides using a vapor barrier material. It will protect the partition from moisture.
To give a perfectly flat surface, the partition can be sheathed with sheets of plywood.
The soundproofing properties that the partition receives as a result are much better than in any other form.
Carpentry and wood varieties
In this case, ready-made carpentry structures for internal partitions are used. They are ready for use, insulated and lined on both sides. The cladding, as a rule, is of high quality; it uses sheets or veneer from valuable wood species. Thermal protection and sound insulation in these structures leaves much to be desired. Most often you have to redo it yourself.
Advice! Where noise absorption and insulation are not needed, you can leave it as is. This could be a dressing room, zoning in the living room, arches.
The cost and thickness of a frame partition in a residential wooden house will depend on the financial ability of the buyer, the brand and the materials from which they are made.
Sound insulation, resistance to rot, mold and fire
When choosing the type of partition, it is necessary to take into account the requirements for sound insulation, as well as the impact of aggressive factors - dampness, mold, open fire. It is impossible to increase the sound insulation of timber partitions due to the fact that both sides are part of the interior of the house. Therefore, sound insulation is limited by the thickness of the timber or boards from which the partition is made. The sound insulation of plank and frame partitions can be increased by installing sound-absorbing elements - mineral wool, polystyrene foam, foam rubber. The exception is plank partitions, both sides of which have a direct impact on the interior of the house.
To increase the resistance of partitions to fire, rot and mold, boards and timber are treated with special substances. The first time this is done before assembling the partition, the second time before final grinding. If grinding is not required, then re-processing is carried out after installation is completed, and then repeated once every 3-5 years.
Solid partition
This type of partition is made from the same material from which the structure was built. The system can be given rigidity using metal spikes (Ø 10 mm, length 100 mm). A frame of beams is assembled on them and secured in two ways:
- Nails directly to the load-bearing walls;
- Grooves are made in the supporting structure into which the beams are placed during the assembly of the frame.
The second is used when the structure has not yet completely shrinked.
Thermal protection and sound absorption systems are made from materials that the homeowner chooses himself. There are no priorities here; all modern materials are suitable for these purposes.
Overview of the main options
Before making partitions in a wooden house, you need to decide what material will be used. We will look at the most popular and popular solutions.
Solid option
The installation of a partition in a wooden house made of timber is most often carried out in parallel with the construction of the box
As the name suggests, a solid structure is erected, for which a wooden beam with a thickness of 50 mm or more is most often used (the most commonly used material is 100 mm thick).
We'll tell you how to do this type of work yourself:
- The elements are fastened together with wooden spikes from 5 to 10 centimeters long; for this, holes are drilled in the material, into which the spike is driven and combined with the second element, and so on.
- The wall is fixed to the floor and ceiling using triangular bars, which act as a limiter. Fastening is best done using self-tapping screws; they hold the system more firmly, and if necessary, they can be unscrewed and disassembled the wall without damaging the wooden parts.
- Since internal partitions in a wooden house are installed independently of the external walls, deformations may occur during the shrinkage of the structure. To avoid this, a deformation groove is made in the load-bearing wall, which will prevent the elements from bending.
The deformation groove allows you to compensate for changes in the size of wooden elements due to changes in temperature and humidity
Frame-panel structures
This option is the most common and in demand, since its price is the most affordable of all possible solutions.
Construction instructions are as follows:
First of all, vertical posts are fixed in increments of 500-600 mm. A beam is attached to the ceiling and floor, to which the remaining elements are attached; you can connect them with self-tapping screws, or you can use perforated corners, this is both simpler and faster.
The frame must be strong and stable
- The installation of partitions in a wooden house continues with the installation of transverse elements; they will give the entire system additional rigidity.
- The entire space is covered with insulation, which will also serve as a sound insulator. The material should be placed tightly - without cracks or voids.
- The surface on both sides is covered with a vapor barrier film and covered with either plywood or plasterboard sheets.
Plasterboard systems
If earlier the question of what to make partitions from in a wooden house was limited to solid and frame-panel options, then these days the option with plasterboard has become very popular.
Before you build a partition in a wooden house, you will need to purchase a partition profile; it differs from the standard one in being thicker and more reliable.
The work is carried out as follows:
- First of all, the wall elements are attached; they determine the location of the future structure, so take all the necessary measurements correctly.
- Next, vertical posts are located at a distance of 50-60 cm. To ensure reliability, horizontal crossbars are added to the structure.
A metal profile frame is erected quite simply and quickly
All internal cavities are filled with mineral wool and covered with vapor barrier material. After this, you can attach plasterboard or gypsum fiber sheets.
From plasterboard
Such partitions are made very simply and quickly. This is a lightweight version that can be used in any room of the house, even in the bathroom. This system consists of:
- Profiles for gypsum boards. Rack-mount and horizontal guides are made from it;
- Thermal protection. You can use any insulation you like;
- Sealing. From any vapor barrier material;
- Sheathing material in the form of ordinary plasterboard for living rooms or moisture-resistant for bathrooms and toilets.
How to make a frame for drywall is discussed above. Plasterboard partitions are made before the flooring is laid, during the finishing of the rooms. The seams between the sheets are puttied, the partition is primed, and only then do finishing work begin: wallpapering, painting or applying decorative plaster.
Tools:
- Hand saw or jigsaw/grinder;
- Hammer or drill with impact function;
- Screwdriver or screwdriver;
- Metal drill (diameter 6 mm and 9 mm);
- Paint brush;
- Tape measure and pencil.
Step 1. Support bars for the partition
To construct a partition, you first need to install support bars 150 cm long from below and above. To do this, I sawed a block with a cross-section of 50x50 mm along the floors using a jigsaw with a wood saw.
Next I sanded the bars with sandpaper. This made it possible to give the bars a smooth surface on which paint would be better applied. I painted the bars with wood impregnation (walnut color).
I drilled two holes in the block that needs to be fixed to the ceiling. To do this, on each side of the block I stepped back 25 cm from the edge and drilled through holes with a drill dia. 6 mm. Then I drilled a countersunk hole for the self-tapping screw with a drill bit dia. 9 mm to a depth of 1 cm.
I marked the holes in the ceiling using a drilled block. Next, I drilled holes in the ceiling with a hammer drill and secured the block using two self-tapping screws with a 4.5x80 mm plastic dowel.
The bottom block was secured to the floor using double-sided tape and additionally secured to the wall with a metal corner. I decided to do this so as not to spoil the floor covering (laminate).
Double-sided tape was attached to the block with staples using a construction stapler.
Here's what happened:
Step 2. Installation of furniture board
To begin with, I measured the distance between the installed bars (I got a value of 255 cm) and sawed off the furniture board according to this length. The shield was sawed off using a circular saw to make the cut more even. When sawing, it is also necessary to take into account the gap between the top beam and the end of the shield of at least 5 mm (i.e., made the shield 254.5 cm long).
To install the shield, I installed embedded T-shaped profiles (30 cm long) on the lower and upper bars. This solution helped hide the shield mount and simplified its installation.
Each T-shape The profile was secured using 3 pcs. wood screws 4.0x30 mm.
I made slots on the ends of the furniture board with a grinder (it would be more convenient to do this with a circular saw). The slots are needed to install the shield on the T-shape. profiles.
Before painting, the furniture panel was sanded well with sandpaper and painted with wood impregnation. Next, I pushed the shield along the T-shape. runners and that's it. I did not additionally fix the furniture panel.
The cat constantly monitored the process so that there were no mistakes))
Step 3. Installation of vertical bars
I made vertical bars 255 cm long (the distance between the upper and lower bars). If there are any defects on the bars, you can cover them with wood putty and then carefully sand these places.
After sanding all the bars, I begin painting with wood impregnation.
Next we install the bars. I fastened them using 4.0x70 mm wood screws at an angle and screwed them completely into the body of the block. I started the installation with the outermost bar, then installed the central one, and so on.
If a little bit of the head of the screws is visible, you can tint them with the same wood impregnation.
As a result, I then added intermediate lintels from the remains of the timber for a more rigid design of the decorative partition.
In terms of money, this partition cost about 4,000 rubles. I think it turned out very well) I hope this solution will be useful to someone.
Transparent partitions
Laying glass blocks can also be done independently, at the stage of finishing work, before the final finishing of the ceiling and walls. Installation of glass block partitions in a frame house is similar to brickwork. The difference is that bandaging is not necessary here.
- Glass blocks are laid on a cement screed.
- The thickness of the seam should be small, 1 cm will be enough.
- For masonry, you can use both cement-sand mortar and cement-lime mortar.
The connection of such a partition with the ceiling should be as strong and resilient as possible. Be sure to use cork gaskets in the connection. This is necessary to protect the glass from cracking, since glass is a fragile material and can easily be damaged if deformed.
Important! It is recommended to make the masonry from white sand or cement, so the seams will look neater.
Arrangement of compensation gaps
The provision of expansion gaps is an essential aspect of good construction practice. Such gaps are necessary to prevent deformation of the partition frame when the geometry and dimensions of the house box change over time. Professionals advise leaving 1 cm as a compensation gap on each side of the partition. The partition frame is attached to the house frame elements through sliding supports, i.e. supports that allow the partitions to move relative to the house frame elements when the latter is deformed. The joints of the partition with the walls, ceiling and floor are covered with plinths or profiled slats covering the indicated gaps. The plinth and slats are attached only to the floor, ceiling or walls, but not to the partition.
This design protects the partition from stresses when the size of the house box changes.
In established buildings that have already experienced shrinkage, the size of the compensation gaps can be somewhat reduced, since the period of the main deformations of the building is in the past. In such situations, it may be sufficient to lay a compensation tape made of elastic material around the perimeter of the partition. Filling the gap with polyurethane foam is also used.
In new buildings, the compensation gap is calculated by adding the amount of expected shrinkage to 1 cm of the upper gap.