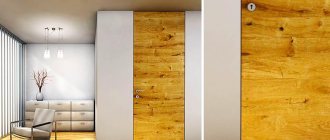
Lining is a modern, versatile, environmentally friendly, inexpensive and easy to install and maintain material. Most owners use this material to decorate various surfaces of their households. But few people know that it is possible to make doors from lining and such a panel looks good, is simple to make and lasts a long time. The versatility of the material allows you to create truly unique canvases.
Characteristics and properties of lining
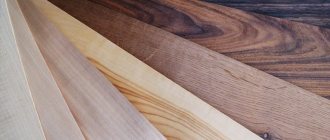
A clapboard door can be made from leftover wood.
Natural material is thin-thick cladding boards that are made from whole natural raw materials or using leftovers from wood processing. The elements are joined using a tongue-and-groove joint.
MDF lining is a facing material that belongs to the group of environmentally friendly coatings. Pressed panels made from small chips are considered as an alternative to natural boards or plastic strips. The adhesive in the mass is legin, a natural component of wood, and phenol and epoxy resins are not used.
The difference between artificial and natural boards:
- have less weight;
- easier to install;
- a greater variety of colors, textures, and options for simulating not only wood, but also stone.
Wooden and synthetic linings are produced in the form of profiles, which differ in locks and cross-sectional shape. The basic profile is the Standard trapezoidal section, in which the edges are cut at 30°. On the reverse side there are grooves to compensate for changes in the size of the part.
Natural lining is treated with an antiseptic against fungus
. There are varieties:
- Calm;
- Europrofile;
- Eurolining;
- American.
The properties of the lining are suitable for covering doors. Resistance to fungus and rot depends on the breed, but all material is treated with antiseptics. Resistance to fire is provided by modifiers in the composition of MDF plates and fire-resistant impregnation of natural wood. All materials are easy to paint, so the door can be designed to suit different interior styles.
Where can you use straight arms?
If you ask any city resident about the lining, in 90% of cases the answer will be about the balcony with which it is covered. And it doesn’t matter what it’s made of: vinyl lining or natural – every kind is actively used on the balcony.
Lining can be used not only as finishing, but also as a full-fledged material
It’s a different matter for owners of private houses and dachas, here they will first of all remember lining in relation to a bathhouse, in decorating a house inside and out, in the choice of protective impregnations and paintwork materials. In a word, all mentions of it are in one way or another connected with the possibility of its independent use.
It is for them that our story today.
Rules for choosing material for the door leaf
Making lining on a machine
Before production begins, the wood is selected and unsuitable raw materials are rejected. The selected round timber is fed to the sawmill, where it is cut into individual edged boards, from which the lining is made. They manufacture products in accordance with GOST 8242-1988, and also use European standards DIN 68-126-86. The quality of the material is checked before being sent for sale, and as a result the product is assigned a grade.
Select the material for door cladding according to the following characteristics:
- the humidity of natural wood should not exceed 8 – 12%;
- determine the number of knots and their condition (living, non-living, fallen, staggering), for living ones the color of the color matters;
- find areas affected by the fungus in the form of blue areas;
- check the compliance of the geometry and dimensional parameters of the board, as well as the degree of curvature;
- identify wormholes and cracks;
- determine the direction (tangential, radial) in which the cut was made.
Drying is done during production in heating chambers or an innovative infrared method is used. The correct geometry of the board is obtained on planing machines, where the product is processed simultaneously from four sides. Here the lumber receives a groove and tenon from different sides for perfect joining during installation.
Classic material is produced in 1, 2, 3 grades. The elite types Extra, Elite and others are distinguished by manual screening.
How to choose lumber for sheathing
The choice of lining for finishing a door is not limited to determining the grade, species and shape of the lamella. There are a few more important points.
- Drying degree. The moisture content of lumber should not exceed 12%. It is advisable that it drys under natural conditions. This takes several months, so forced drying is also used. This is also an acceptable option. Damp wood cannot be used. After assembly, it will continue to release moisture and will inevitably become deformed.
- Appearance. It is advisable to inspect the slats before purchasing. An unscrupulous seller may try to sell low-quality products under the guise of high-quality ones. There should be no defects or chips on the planks. Pale blue or greenish spots are not acceptable. This is a sign of developing fungal diseases.
- Quality of locking connections. Experts recommend always checking this circumstance. To do this, you need to take two plates from the pack at random and try to click the lock. The grooves must fit together accurately, without irregularities or difficulties. If you have problems when trying to click the connection, it is better to look for another lumber.
It is advisable to buy material treated with special compounds. It is more expensive, but the factory processing is worth it. It is carried out in special cells where special conditions are created. They cannot be repeated at home. Therefore, treatment with the most expensive compounds will not give the same result as factory treatment. The photo below shows the material processed in the factory.
Instagram leinosmarket
Instagram lesark.ru
- Doors and partitions
How to insulate a metal entrance door for the winter in an apartment or private house
Required elements and materials
Options for lining layout for making a door leaf
Before starting work, mark the surface of the door leaf, for which you will need a tape measure, a pencil and a square.
Tool list:
- building level for determining the verticality of elements or horizontality in a complex pattern;
- rubber hammer, pliers;
- electric drill, screwdriver;
- circular saw, jigsaw or wood saw.
The materials you will need are jagged clamps of different sizes to fasten the boards, for example, if the sheathing is mounted on a metal sheet. The elements are fixed to the wood with screws, and fastened to the metal with self-tapping screws. It is preferable to take clamps made of galvanized or stainless steel.
You will need an antiseptic and impregnation for fire resistance. This treatment is done independently before cladding, since the material is often sold for sale in its raw form. Only MDF lining, in which modifiers are present in the raw material, can be processed.
If the door is insulated on one or both sides, pieces of insulation will be required. Such material can be polystyrene foam, extruded polystyrene foam, mineral wool, stone wool, glass wool, and foam rubber are used. To install the insulating layer, you will need a lathing made of wooden battens with a cross-section of 20 x 40 mm. It is attached to wood with screws, and for a steel surface, metal screws with fine threads are used.
The rail is leveled using wedges or spacers. You can make the elements yourself or purchase ready-made ones with a corrugated surface in the store.
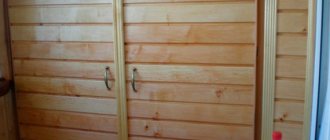
Method 1: wardrobe on the balcony
I had such a wonderful mezzanine on the balcony, assembled from pine beams. And all sorts of rubbish was stored on it, which frightened everyone with its appearance every time you visited it. It was decided to improve it by hanging doors, which automatically turned the structure into a full-fledged closet on the balcony.
But how to make clapboard doors in a city apartment without routers and a sawmill? The easiest way is to buy ready-made ones in the store.
I wanted an MDF panel
Having taken the measurements, I went to the supermarket, but when I found out the prices for MDF facades, I changed my mind. For the format I needed, I would have to pay about 3,500 rubles for 3 elements, which is too expensive for a little-used cabinet on the balcony.
The idea of making doors from clapboard suggested itself, since the entire balcony was covered with this material.
I decided to use lining
I arm myself with a simple tool:
- Roulette;
- Electric drill;
- Square;
- Hacksaw;
- A pack of wood screws;
- With a hammer.
Let's get started:
- Using a tape measure, I measure the length of the future cabinet door;
- I mark it on the clapboard;
- I cut with a hacksaw;
- I apply it to the opening;
- I calculate the number of slats - I got 7 pieces per door;
- I calculate the number of cross members in the same way - 2 longitudinal and one oblique.
An important point: do not forget that the lining has a tongue and groove. It also needs to be taken into account when calculating the width.
We drill holes for the screws so that the lining does not burst.
I fasten this whole thing with self-tapping screws. Their length was selected in such a way that when twisted the tip would not pass right through. 32 mm fit (lining thickness 2*20 mm).
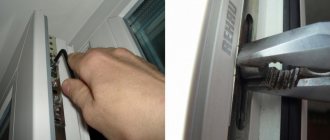
I mark the place for the hinges
Don't forget to drill the lining - because... The self-tapping screw may deform it. I used a 2mm drill bit.
I apply the finished structures to the opening and mark the places where the hinges will be attached, and fasten them with self-tapping screws.
The door should close with a magnet
Finishing touch:
- I frame the opening with platbands;
- I secure the handle with a screw;
- I use a magnetic clasp to secure it.
I bought the frame for the doors and the handle at the store.
All that remains is to paint everything to match the lining on the balcony and the work can be considered complete. The asking price is 800 rubles.
Making a door from clapboard with your own hands
Frame for a door made of clapboard
Before installation, the cladding board must lie in the room for about a day so that the material adapts to the microclimate in terms of humidity and temperature. Slats only from the store often burst and crack during installation. For a complex pattern of lining, you need to make a drawing on the surface of the canvas.
Step-by-step procedure for covering a wooden door leaf:
- The canvas is removed from the awnings and its surface is cleaned.
- The hinges and handles are unscrewed from the sash, and the locks are removed;
- The filling of the lining begins from the side of the lock, so the first section is measured.
- The slats are cut into pieces depending on the chosen pattern; sometimes the boards are placed not only vertically and horizontally, but also a stripe is used in a combination or at an angle.
- The first part is placed along the edge, the position is checked with a level and a square, and secured with finishing nails; such hardware is the least noticeable.
- Subsequent elements are joined tenon into groove and fixed in a similar way, the ends are sanded.
The finished surface is coated with varnish, and after hardening, the fittings are fixed in place. If you have to sheathe a steel door, the procedure is similar.
Decorating a door with clapboard on iron:
- Remove the fittings and clean the surface.
- Before installing the strips, clamps are attached to the surface, they are placed on the screws using a screwdriver.
- The slats are fixed to small holders with screws or self-tapping screws.
When insulating, the insulator is cut into pieces and inserted between the slats. It is glued to the surface of the canvas, because in a vertical position the pieces can settle over time.
Why trim doors?
Wooden planks decorate the structure. But this is not the only advantage it gives. Let's list everything.
- Additional thermal insulation. Wood is a good insulator. It retains the heat coming from the apartment. Another plus is the absence of condensation that appears on the inside in the area of cold bridges.
- Additional sound insulation. Wood dampens sound waves, and the amount of noise coming from outside will be significantly reduced.
- Durability. With the right choice of material and proper care, the finish will last for several decades. It will not lose its operational and decorative properties.
- Strength. The wood is resistant to mechanical damage. Even strong enough impacts leave only scratches or chips. They can be sanded or sealed. In the most difficult case, the damaged bar is replaced with a new one.
- Easy installation. The design of the planks greatly simplifies their assembly, thanks to this, even a novice craftsman can cover the doors with clapboard with his own hands.
All these advantages are relevant only for correctly selected and installed lumber without errors. Otherwise, the wood will “show” all its shortcomings. These are swelling and rotting under the influence of moisture, expansion and contraction under the influence of temperature fluctuations, fire hazard, damage by microorganisms and insects.
Instagram svitderevakopychyntsi
Instagram irbis_listvennica
- Doors and partitions
How to insulate a wooden entrance door in a private house for the winter
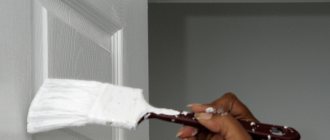
Door surface treatment tips
To hide the heads of the nails, use a metal finisher.
After installing the lamellas, problems arise that can be avoided if you know the intricacies of installation. Sometimes grooves appear between the elements after the boards dry out. During installation, you need to place the lining as tightly as possible, using a rubber mallet for this. The boards are placed with the tenon up and the groove down with the lamellas arranged horizontally.
Tips for processing door panels with clapboard:
- Before installation, they are treated with a special chemical preparation so that mold does not form on the surface of the cladding. The last board is placed at the awnings, so the longitudinal section of the lamella, which is not always even, will be less visible.
- The lining comes in different widths, which must be taken into account when calculating. You need to measure the length of the canvas and its width, count the number of strips so that the material does not remain and there is enough for the covering. If you have to choose slats of a different width in the store, they will recalculate along the way.
- Sometimes nail heads spoil the overall appearance of the canvas. To solve the problem, buy a hammer in the store - the tool will help hide the nails. It is not advisable to push the cap inside by more than 3 mm.
When cutting strips to the desired size, branching fibers spoil the painting and are difficult to remove with sandpaper. Use a hacksaw with fine teeth, for example, for metal, or put a corresponding file on a jigsaw. The inner layer of sheathing at the joints is coated with PVA. The glue will harden, and when it gets colder, it will prevent condensation in the cracks, and the lining will not be deformed.
You can trim the sash using clapboard ornaments; American is more suitable for this. Such a board can be installed overlapping and is suitable for unusual decor, for example, diagonally. You can use old plywood as a backing
Initial stage of work
To find out the required amount of material, you first need to decide on the dimensions of the future door. To do this, measure the opening where it should be installed. This is done using a tape measure or metal ruler. Typically, the height of standard structures is two meters with a width of up to 90 cm.
Lining diagram.
But to reduce heat loss, you can move away from these figures and make a structure with dimensions, for example, 180 X 80 cm. It all depends on the size of the opening. You may need to make a small window in the door so you can see into the room from the outside.
Such structures are not sold in construction stores, so you will have to make them yourself. If the frame in the opening is in good condition, then it can be used to hang the door. If it is not there, then you will need to install it. To do this you will need a 100 x 100 mm beam, construction nails and a hammer. After installing the door frame, you will need to take the dimensions of the resulting opening and make a door according to them.
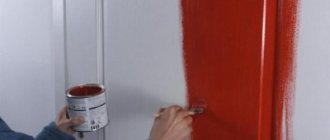
Painting a clapboard door
The lining is coated with a layer of varnish to preserve the structure of the wood.
High-quality lining is usually not painted, but covered with a layer of varnish several times. Varnishing shows the texture of the design. If the wood is too light, use stain to reveal the wood.
Painting is carried out in the following cases:
- peeling of the old layer;
- tarnishing of lamellas;
- ingress of fat, oil, dye, the appearance of fungus and mold;
- interior renovation.
Painting is required if it is necessary to level the surface, repair chips, fallen knots, or large cracks. Use Senezh Neo or Frost to whiten darkened areas on the slats. Degrease the surface with acetone solvents. Roughness is smoothed out with sandpaper.
Use wood putty, press it into cracks, places where knots have fallen out, and after drying, sand it. The putty areas are then primed and painted.
Advantages and disadvantages
To finish the door leaf, it is necessary to buy materials that comply with international standards (eurolining) or markings accepted in the country according to GOST 8242. Then there will be no doubt that the cladding, made in accordance with all the recommendations and technology for laying wooden slats, will retain its shape and appearance for several more years.
According to these requirements, manufacturers offer them in the following lengths: 1.5, 3 and 6 m. This should be taken into account when calculating the amount of material for cladding. The area will not always correspond to the whole number of planks, and joining scraps can ruin the look or make installation more expensive. Advantages of doors covered with wooden lining:
- Wood can easily be painted with protective compounds with color or paints, so there will be no problem with matching the interior.
- The surface acquires additional strength, which depends on the type of wood used. Of course, such a finish cannot protect against penetration better than steel or metal, but with high-quality assembly and installation it represents a durable structure.
- Due to the porosity of wood, it significantly increases the parameters of sound and sound insulation. Therefore, a door lined with clapboard will reliably protect against unnecessary other people’s conversations outside and keep the family’s secrets in the apartment.
- Low thermal conductivity will increase the thermal barrier and protect the room from heat leakage through the door.
- Wood can serve for a long time even in contact with the street due to coating with protective agents and compounds.
Disadvantages of a door trimmed with clapboard:
- Low fire resistance of dry material, which requires additional treatment with fire retardants. This is done in the workshops of the eurolining manufacturer, and materials of other categories need to be coated additionally.
- High moisture permeability. Even if you use products that close the pores of wood, it is very difficult to achieve complete isolation from contact with moisture. If the lining is not treated with special means, oils and other protective substances, then the fibers, after contact with liquid or at high humidity, will swell, swell or change their shape (how to treat lining?).
- If coniferous material is used, then the wood itself, due to the content of natural resins, prevents the development of pathogenic microflora. Linden, larch and other species must be coated with antiseptic agents, which also implies additional costs.
What kind of fabrics can be veneered: instructions and photos
Lining is such a pliable material that it can be mounted on any surface. Doors made of any material can be sheathed in this way:
- metal,
- wood,
- plastic.
Let's look at it in detail:
- Most often, plastic sheets already have the necessary decorative qualities and sufficient levels of noise and heat insulation that it is simply irrational to decorate them additionally.
- Wooden panels are the easiest to cover with panels due to the “softness” of wood compared to metal products.
- Sheathing metal structures is more difficult, and the process itself takes much more time. It is best to do this cladding on canvases removed from the hinges. It is very difficult to attach panels to a steel frame, so it is recommended to remove the fittings.
Advice If you don’t have the knowledge and skills, then it’s better not to take risks and enlist the help of craftsmen, since a damaged canvas is more difficult to put in order.
Metal
All work is divided into three main stages:
- Frame construction.
- Attaching it to a metal sheet.
- Installation of lining.
To work you will need tools and materials:
- lining,
- slats or bars made of wood,
- tape measure and a pencil that can draw on the surface of the wood,
- saw or jigsaw,
- screwdriver,
- drill,
- hammer,
- several dozen screws.
Creating a frame:
- The parameters of the door leaf are measured using a tape measure.
- The slats or bars along the perimeter and in several internal rows horizontally are measured and cut.
- The base for the panels is laid out on the canvas with markings applied to the surface of the door.
- Using a drill, holes are drilled into which long self-tapping screws will be screwed. The drill must be selected with the same diameter as the self-tapping screws so that the wood does not crack and they fit in easily.
Important At this stage, you can additionally insulate the door. To do this, polystyrene foam boards or foam rubber are placed between the frame slats under the cladding. The frame is attached to the door leaf with self-tapping screws. For convenience, it is better to fix the insulation on the door leaf.
The lining is attached using a simple technology: each subsequent sheet is laid with a ridge in the groove of the previous one. Clayers, nails or self-tapping screws can be used to secure the sheets.
It is possible to do without a frame, but this will require special devices.
Entrance
If the front door is made of metal, then it must be sheathed according to the above principle. With wooden canvases it is somewhat simpler. The following materials, tools and devices will be required:
- lining,
- tape measure from 3 m,
- a simple pencil or a construction marker for wood,
- plane,
- saw, hacksaw or jigsaw,
- screwdriver or drill,
- hammer,
- building level,
- self-tapping screws or special nails for fastening the lining,
- sandpaper,
- paint coating and brushes,
- sawhorses or other surface for convenient work with the door leaf.
- To attach the panels to the door, you must first build a special frame. The measurement of the structure is carried out very accurately, using a tape measure. All planks that will fit into the supporting frame must be measured in accordance with the measurements taken, marked and cut. Attention: To make the material more durable and fit better, it must be sanded at the ends with sandpaper.
- After fixing the frame with self-tapping screws, the lining is installed. It starts from one of the edges, and for accuracy of location it is set vertically or horizontally according to the level. The entire subsequent installation procedure depends on this, so you should not neglect the alignment of the first plank.
- The panels are fixed with self-tapping screws or special nails with very small heads. It is necessary to ensure that the metal fasteners do not protrude above the surface of the lining fabric. Transparent varnish or a tinted composition will create an additional durable coating to protect against adverse external influences. This will allow the wood to retain its qualities and characteristics for a long time.
- The fittings are fixed only after the door’s paint and varnish coating has completely dried, just as it is installed on the hinges.
Craftsmen recommend using special “finishing” nails with a very small head size to fix the lining panels. This will create a cladding with discreet attachment points.
Why lining?
An essential criterion for selecting a material is the ability to weigh all its advantages and disadvantages. However, it is also worth paying attention to the room itself and its requirements for doorways. Let us highlight the main advantages of using eurolining:
- This material can be used for entrance doors of both country houses, cottages, and apartments. Such canvases are distinguished by their relative strength and pleasant aesthetic appearance.
- Quite a long service life, ease of installation and affordable prices: as they say, cheap and cheerful.
- Possibility of installation in rooms where there is high humidity. Many builders believe that when the material is steamed, it releases substances that are beneficial to our body.
Photo from dveridoma.net