In recent years, consumers increasingly prefer the construction of log houses.
After the project has been prepared and building materials have been purchased, the question arises whether to hire professionals or do the construction yourself.
If you have at least some experience in the construction industry, then you can build a home with your own hands, the main thing is to prepare all the necessary materials and strictly follow the step-by-step construction technology.
Consumables, tools and equipment
In addition to the timber, you need to prepare the necessary consumables and tools :
- Untreated pine timber, size 150x150 or 150x100. The best material is wood harvested in winter. The lumber must have natural moisture, so drying will be required.
- Boards. They are useful for carrying out auxiliary work (creating dowels, flooring, lathing). It is recommended to choose dried boards.
- Nageli. Needed to secure rows of beams together. You can buy ready-made dowels or make your own. The cross-sectional size must be calculated according to the size of the drill, then if you take a drill with a diameter of 25 mm, the dowel should be 22x22 mm.
- Tow. Tow is a linen roll material necessary for insulation between rows of crowns. You can also use dry sphagnum moss or felt.
- Ruberoid. Rolled material that serves as waterproofing for the roof and foundation.
- Antiseptic compounds. Special products that protect wood from rotting, fungi and mold. It is recommended to treat each timber with antiseptic impregnations.
- Nails, screws, staples, corners. Materials required for fastening building elements.
- Sand, crushed stone, cement for foundation construction
- Level, square, tape measure, plumb line. Measuring tools that you cannot do without during construction work.
- Hand tools: hammer, axe, nail puller, chisel, sledgehammer, hacksaw.
- Electric tools: plane, jigsaw, miter and circular saws, drill.
Important : If there is a misalignment in the level, it is not necessary to use a plane - you can use a sledgehammer.
These tools should be on hand during construction.
Types of logs
Logs are made from coniferous wood, mainly spruce, pine or larch.
According to the method of production (harvesting), a log can be:
- debarked
- scraped
- planed
- rounded
Barked logs are one of the commonly used materials for building houses. Minor processing helps the tree retain all its protective properties, which significantly increases its service life. In terms of price, houses made from debarked logs are not expensive, but they require additional finishing.
From a debarked log, by removing the underbark (bast) by scraping and grinding, a very durable scraped log is obtained. During the processing process, the logs are adjusted to each other, all irregularities, knots and other defects are removed. The price of a house made from such logs will be higher than from debarked logs, since additional processing requires quite a lot of time. A log house made from scraped logs does not require additional finishing work, but on the contrary, due to the uniqueness of each log, it looks very dignified.
The name itself – “planed log” – speaks about the technology for its production. Using an electric planer, a small upper part is removed from the logs, and all irregularities are eliminated. Thus, fairly even logs are obtained. Just as in the case of scraped logs, planed logs are adjusted to each other. Houses made from planed logs are very warm, durable and do not require additional finishing work. The price of such turnkey houses is significantly higher than that of the options listed above.
A rounded log is obtained by processing the log on a rounding machine. Due to this, perfectly even logs are obtained along the entire length, which do not require adjustment. As a result of processing, the protective layer is removed from the tree, which can subsequently lead to cracking of the log and rapid deterioration of the log house (rotting). Houses made from such logs are assembled quite quickly and look beautiful without additional finishing. The price of houses made of rounded logs on a turnkey basis is not high, but it is quite difficult to obtain a high-quality log house from such material.
How to do it: construction stages
Building a house from wooden beams has its own nuances. To avoid problems in the future, it is recommended to strictly follow construction technology. It consists of several stages .
- Creating a Project. It is better to entrust this work to professionals, but if you have at least some knowledge in the field of architecture, you can develop the project yourself.
It must contain a detailed plan with the location of rooms, the presence of communications, windows, doors. It is necessary to calculate the required amount of timber and boards. Calculate the foundation and its cost, create an estimate. - Site preparation . Clearing the area of trees and bushes, leveling the soil, dismantling existing buildings.
- Foundation construction . For houses made of timber, you can use a strip foundation. You need to dig a trench around the perimeter of the box, pour crushed stone and sand into it, then compact it. After that, formwork is created (usually made of wood) and concrete is poured.
- Laying crowns and subfloors . Cover the foundation with roofing felt, and the first crown will be mounted on it. To protect the crown, you can lay a larch board with a cross-section of 200x50 mm on the roofing material.
- After laying the first crowns, you need to move on to installing the floor . First of all, logs are laid (section 150x100). Lay boards across them to serve as the base of the floor. On top - waterproofing, then - insulation, then - vapor barrier, the last layer - 40 mm thick boards.
- Construction of walls . Drill holes for dowels along the length of the lower crown and at its corners. The next crown cannot be laid before the previous one is completely laid. The seams between the crowns must be caulked with tow, moss or jute.
- Roof structure. Make temporary flooring on the beams. Place the rafters vertically, maintaining a step between them of 1 meter. They are attached to the base with nails, after which they are tightened with corners. Connect the rafters together with a longitudinal beam.
For rafters, it is better to take boards with a section of 50x150 mm; the same board is suitable for constructing gables.Spread waterproofing on the sheathing, and roofing material on top.
- Installation of doors and windows . You can install doors and windows only after the house has settled down. The openings must be trimmed and a window frame installed in them. Leave a small gap (about 10 cm) between the wall and the top jamb and fill it with mineral wool or other soft insulation. After which you can install the doors and window frames.
After carrying out these works, you can move on to the interior and finishing of the constructed house.
DIY wooden house
Content
If you really want to, building a wooden house with your own hands is not that difficult. The most important thing is not to get hung up on saving materials, and if you don’t have any special skills in this matter, then it’s better to stick to softwood as the starting material.
The fact is that needles, that is, coniferous trees, somehow inspire more confidence in terms of practicality than deciduous ones, plus, they are not so susceptible to rotting.
Choosing a foundation
But if the material is more or less clear, then the choice of foundation should be approached with special “trepidation”. Taking into account the fact that no matter what kind of wooden house it is, it will in any case be much lighter than any concrete structure, when choosing a foundation you should focus on the properties of the soil. In some cases, it is even possible to do without a reinforced foundation. But often, building a wooden house with your own hands involves the use of a columnar or screw foundation.
So, now a little about how to build a house with your own strength and skills... In general, even when you don’t have the slightest idea how to approach the issue of building a wooden house, you can use the advice of our website, where you will find a lot of wonderful ideas , photos of interior design, as well as instructions for the construction and renovation process.
We recommend: Learn more about how to insulate a wooden house from the outside. Popular methods, choice of insulation, vapor barrier
For example, photo material will help you decide on the choice of design, and in order to quickly master the technology of how to build a wooden house with your own hands, video stories will be more than eloquent.
Options for building a house made of wood
But for greater clarity, consider the two simplest options for building a house out of wood with your own hands.
The first one is ideal for those who have no idea what installation of a structure and construction in general are, but are full of strength, confidence and ideas.
The whole point of the idea is to go to a place where there is a ready-made project for a wooden hut, and all that is required of you is just to compare the markings of the timber and the plan. Advantages? - weight:
- speed of assembly, respectively, short construction time;
- saving financial investments on the services of construction organizations;
- It is almost impossible to make a mistake during the box assembly process, because the logs are cut at the factory.
The second method is specifically the male version. It is designed for those who have already heard and experienced what construction is, and know exactly how to build a wooden house with their own hands (well, at least up to certain points).
However, in this case, you should take into account the fact that you will have to assemble the structure in a separate area, making the adjustment of the beams yourself. Accordingly, the construction time will increase by a good order. But don't think that there are no advantages here! Vice versa!
Firstly, due to the fact that you will do almost the entire range of work yourself, you will save your family budget very well.
Secondly, you will have a free schedule, not dependent on anyone, and not obligating you to anything.
Thirdly, your home will truly become your pride, built on your own and for the benefit of your family.
Step-by-step instructions for building a wooden house
The construction process begins with the selection of the popular size of beams 10x15 or 15x15, which are pre-treated with an antiseptic.
1. The very first thing is to install the crown trim (crown trim), which is connected at the corners into half a tree. And the tree is fastened with dowels.
2. The dowel is necessary so that the beams can be connected and for it you need to make holes in three beams into which it must be driven without much effort in a checkerboard pattern with an interval of 30-40 centimeters. (It is better to use oak or birch as a material).
3. After the crown is installed, the timber is laid, tying the crown into the floor. That is, it turns out to be a floor. The beams need to be laid on a narrow end, not exceeding the step size of 0.7 meters, then put a sealant, again beams and again the same sealant.
Please note that if the pitch of the beams is 0.7 m, then the floor board should be at least 40 mm, and if you decide to reduce the pitch to 0.4 meters, then you can take a narrower board, thirty millimeters.
In general, you need to understand that the seal between the beams will be of great importance. Therefore, it is best to use more modern materials, such as jute fabric. But if the issue of saving is acute, then, of course, you can even use moss, although it is better to take tow, felt or hemp.
4. If the construction of a wooden house does not include cladding, take care of drainage. To do this, make a chamfer on the outside of the upper edge of the beam, approximately 10x10 or 20x20 millimeters.
5. The construction of the first floor should be erected to a height not exceeding three meters, after which the floor of the second floor can be installed (if such a scale is planned).
Well, about everything else, for example, about the interior decoration of a wooden house in more detail, you can find out from the pages of our website, where the best materials and illustrative examples have been selected for you. The most important thing is not to forget about safety precautions and follow all technical standards.
Video of building a wooden house with your own hands
Errors in the process
When constructing a wooden house yourself, you can make a number of mistakes that can lead to a reduction in the life of your home.
Possible errors are :
- Poorly thought out layout .
You cannot take the design of a brick or block building as a basis. Different buildings have their own design solutions. The project must be developed specifically for a timber structure. When drawing up a project, it is recommended to consult with a specialist. - Wrong choice of material . It is necessary to choose timber of the optimal cross-section, based on weather conditions and time of residence in the house (for year-round living it is better to choose lumber with a larger cross-section).
- Incorrect connection of beams . If there are no dowels between the crowns, they will sag over time and cracks will appear in the structure.
- Incorrectly arranged harness . If the first crowns are laid unevenly, the structure will quickly deform and cracks will appear, which will lead to a decrease in the service life of the structure.
- Refusal to treat with antiseptics . Without special impregnations, timber will rot faster. Solutions protect wood from rodents, mold and rot. There are impregnations that change the color of wood; they can be used for finishing the exterior of a building.
In order for the house to last as long as possible, construction technology must be strictly followed.
Bottom harness
Construction of a house begins with the bottom frame - a structure made of boards or timber, fixed to the foundation. The purpose of the strapping is to fix the frame to the foundation and become the support of the house. How to properly make a frame from boards on a columnar foundation is described step by step in the video. This option is suitable for a small country house.
For more serious buildings, it is better to make the frame from timber. The following video discusses the installation technology for piles.
Useful: Mini houses - a rational and environmentally friendly choice
Advantages and disadvantages
Before you decide whether to start building a wooden house yourself or hire professionals, you need to weigh all the advantages and disadvantages.
The advantages of self-construction are :
- the opportunity to build a house according to your own design;
- personal participation at all stages of construction;
- gaining experience in construction work;
- budget savings (no need to pay a team of workers);
- the ability to build a house in stages;
- confidence in the quality of construction.
There are also disadvantages to such construction.:
- waste of time and effort;
- you need to find an assistant, since it is impossible to build a house without outside help;
- the need to independently select and order material;
- low construction speed. The process may take years;
- Lack of experience can lead to mistakes in construction, which will lead to problems in the future.
If possible difficulties do not frighten you, you have the time, opportunity and desire to learn, then you can start building with your own hands.
What to choose for facade finishing
To protect and decorate the facade of a frame house, you can choose almost any materials that do not weigh down the structure and do not place significant loads on the walls. You need to decide on the finish before building the foundation in order to take into account the potential load.
Recommended materials:
- vinyl or metal siding - cheap and quick finishing;
- fiber cement boards are an alternative to capricious wood;
- facade concrete tiles with imitation stone, brick, wood;
- block house - imitation logs;
- decorative plaster;
- brick-like clinker panels - imitate brickwork.
Watch how professionals install a block house on a frame house.
Window installation
Among two options for installing windows, one with unpacking, or installation immediately with double-glazed windows, a decision was made to choose the second. The difficulty is the high weight of the frame structure, about 50 kilograms. Option - a ramp is built to lift the structure to the second floor. The frames were made to order and the installation was carried out independently.
Where to put
A plot for a summer cottage is selected based on how accessible it is, in terms of distance from the house and cost. An important factor may be the presence of developed infrastructure, accessibility to the road, availability of electricity, gas, water supply system, etc.
It is not enough just to choose a place for construction that is convenient for the homeowner. There are certain rules regarding where which structures can be placed.
According to the current provisions of SNiPs, a country house should be located 5 m from the street, but no closer than 3 m from the road. If there are already other buildings nearby or planned, you need to maintain 3 m between them.
Examples of successful projects
Comfort does not always require a large space; with the right layout, even a small house can become a great place for temporary living.
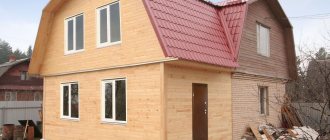
The most popular solution is a dacha with an attic and a veranda. The extra space allows you to effectively store things or organize full rooms.
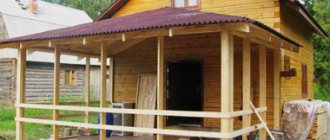
Cottage with terrace
During the warm season, snacks in the fresh air are often arranged on the open terrace or veranda.
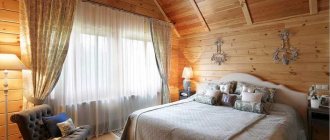
If you raise the roof higher, you can create an attic - an additional floor that follows the shape of the roof. Here, decorating the bedrooms will be a good solution.
An excellent option are buildings in high-tech style, where precise edges and flat roofs are used.
Roof construction technology
After assembling the box at home, it must be protected from exposure to precipitation. To do this, you must immediately build a roof over it.
To do this, you will need 150*50 mm boards, from which the rafter system is constructed. A roof slope of 30 degrees is optimal. The rafters are installed at a distance of 60-100 mm from each other and are attached in the lower part to the wall using long nails or metal corners, and in the upper part to the ridge beam. Roofing waterproofing is laid on top of the rafters, a counter batten is nailed to provide a ventilated gap, and a wooden sheathing is installed.
Roofing material is laid on the sheathing. In the case of flexible bitumen shingles, a continuous base is made of plywood. The price of a soft roof is higher than a metal one, but in certain cases (complex hip roofs) its use will be preferable and more expedient.
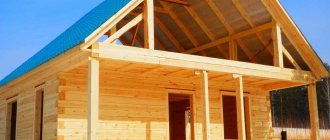
A log house with a roof installed will have a beautiful finished look.
Wall construction technology
Before laying the first crown of the log house, it is necessary to waterproof the foundation by laying waterproofing material on it (roofing felt, hydroglass insulation).
For the first crown, choose the largest log in diameter and the most resinous one.
You can also use larch logs, but its price is quite high. To give greater stability to the log, part of it is removed, making a flat area. Treated with an antiseptic solution and laid on the foundation.
For a good fit to each other, a longitudinal groove is selected in the logs. When ordering a finished log house made from rounded logs, this groove is already made in production. In all other cases, the groove is made manually.
Video. How to make a longitudinal groove manually:
The logs are laid with the groove down on top of each other. For a tight and warm connection, moss or tow is laid between the logs. The logs are connected to each other using wooden dowels, which are inserted vertically into pre-drilled holes.
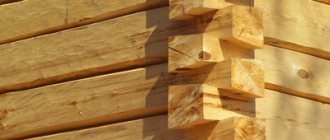
The corner connection can have several options: with or without a remainder.
When connecting logs with the remainder, there will be an overconsumption of material, since part of the log protrudes beyond the walls of the house. This method will increase the cost of construction.
The corner connection of the logs should be warm. It can be obtained by connecting into a paw (when connecting without a residue) and by connecting into a bowl (when connecting with a remainder).
If the diameter of the logs is large enough, then, most likely, to build a house from a log you will have to resort to the help of equipment: a crane or a manipulator.
It is easier to build a house from rounded logs than from regular logs. The log is smooth, all the necessary grooves and corner connections have already been made in production, all that remains is to assemble the construction set.
Sewerage preparation
Two drainage pipes are drained from the septic tank. Appropriate holes are drilled into the brick, having a depth of within 3 centimeters, after which the corresponding rods are inserted into them. In the dug trench under the right and left branches of the geothermal type circuit, it is planned to install a water well, as well as a collector. Water pipes, of which there will be three, are laid in trenches.
We reuse the formwork at the stage of constructing the beams; the second span is installed 50 centimeters narrower than the first, which makes it easy to use no more than four sets of beam formwork. When it is necessary to create permanent formwork, an inch board is used. A septic tank, a geothermal circuit, and a water well have already been added to the foundation.
A pit with a width of three meters and a similar depth is constructed as a septic tank. The depth is chosen in reserve, the bottom is filled with sand, leveling is carried out, and sewer pipes are laid. The length of the pipe is 20 meters; in case of cleaning it, inspection pipes are inserted in the central part so that a technological hole is provided for cleaning. The slope of the pipe is 2.5 centimeters per meter, the entire length is 0.5 meters, the end will be above the established ground level exit.
The pipe is wrapped in geofabric, which is secured with Mylar twine. The drainage pipes are filled in the reverse order with gravel and sand. The septic tank was chosen to be a three-chamber one, although it actually consists of one, but additionally equipped with special partitions. An asbestos cement board is used for the partitions; the liquid outlet is regulated by a check valve. The volume of the septic tank is 7 cubic meters, which is enough for 11 people.
