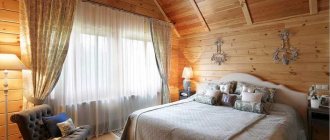
A well-appointed balcony means additional square meters that can be used as you wish. Winter garden, study, recreation area, bedroom - there are many solutions. However, to obtain a practical and beautiful result, it is important to choose the right material and technology for covering the main surfaces - walls, ceilings. One of the most popular options is finishing the balcony with clapboard, which allows you to radically change the space, making it cozy and comfortable for a long stay.
- General scheme of work
What is lining?
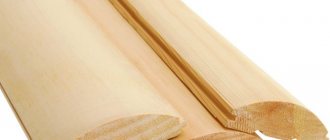
Lining is a thin processed board with a tongue-and-groove locking joint, which ensures reliable, almost seamless joining of individual elements. Suitable for finishing facades, residential and technical premises.
Wooden lining with tongue-and-groove lock
The name of the material is directly related to railway carriages. After being put on the rails, they required additional internal finishing, which was provided by wooden planks tightly fitted to each other. Over time, they were replaced by another material, but the name “lining” was firmly attached to the corresponding finish.
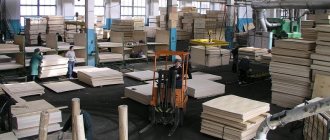
The raw materials for the production of lining are edged boards that have undergone preliminary drying. They are planed, and grooves are made on the sides using the tongue-and-groove or folding method. After this, the workpiece is cut into elements of a given length.
The production of lining in Russia is regulated by two documents - GOST 8242-88, DIN 68-126/86. However, in the second document the requirements for the material are higher.
Application procedure
Before treating the lining on the balcony with paints and varnishes, it is necessary to prepare it for this procedure. You should approach each stage responsibly: the service life of the wood and the decorativeness of the coating directly depend on the quality of their implementation.
Each means for processing lining has its own technical characteristics and application features. Therefore, before starting work, you must read the instructions from start to finish, and then adhere to the rules specified in it.
Particular attention should be paid to the “Precautionary Precautions” section
Preparation
If the coating is applied to an old, already nailed lining, then it will need to be cleaned of the old coating or dirt. Then you need:
Carefully inspect the surface and look for any cracks or crevices that may have appeared during the service of the lining. They are thoroughly puttied: any recesses are a potential “breeding ground” for pathogenic microorganisms and pests, and if the crack is on the outer wall of the balcony, cold wind will blow into it. It is recommended to use a special wood putty - it will hide even minor irregularities. After applying to problem areas, excess mass is carefully removed with a spatula. Sand after the putty has dried using sandpaper with a small grit: no more than P. First, only the putty areas are treated, and then (if desired) the entire rest of the surface is sanded. If you try and spend enough time, you can get an almost perfectly smooth lining. Clean the wood from dust. The easiest way is to use a vacuum cleaner turned on at maximum power. Alternatives – broom or brush
It is important to remove all dirt, including in hard-to-reach corners and at the joints of boards. Dust and pieces of wood caught in the paintwork will make it uneven.
Now you can proceed to applying an antiseptic, if necessary.
Impregnations: creating an antiseptic and fire-resistant layer
Antiseptics protect wood primarily from fungi. Of these, the biggest headache is caused by mold, which loves to settle in cool and damp rooms, which include the balcony.
Antiseptics are divided into 2 types:
- Glazing. The translucent texture emphasizes the pattern of wood fibers and traces of knots and tints the lining.
- Covering. They completely cover the texture of the board and come in different colors.
Builders recommend applying an antiseptic layer before nailing the boards in order to treat them on both sides. But covering one side of the lining will also bring a lot of benefits, reducing the risk of mold appearing on the balcony.
Most antiseptics also produce a fire-resistant effect, which increases the safety of using the lining. In case of fire, it will not burn intensely. Double action products are also called “Biopyrenes”.
All types of impregnations are applied using a brush. If paint is applied in the future, a primer will also be required.
Application of the base coating
Coating the lining is a simple process. But it requires accuracy, attentiveness and adherence to technology. The most suitable conditions are air temperature 10–30 °C and low humidity: up to 40–60%. If it is damp or has recently rained, it is recommended to reschedule the work because the applied layer will not adhere well.
A good tool is one of the keys to success
Processing of lining takes place in 4 stages:
- Preparation of the product. It is described in detail in the instructions for use. Usually it is enough to mix the composition with a stick so that its consistency becomes homogeneous. If it is too thick, some paints and varnishes can be diluted with warm water (but its volume should not be more than 10% of the total) so that the layer of paint or varnish lays down easier and more evenly.
- For the application itself, you need to use a high-quality brush with long and thick bristles. It is not permissible for the fibers to fall out when pressed. The products are applied along the wood grain, section by section, trying not to create sharp transitions between shades.
- You need to separately brush the corners and recesses between the boards.
- Wait for the first layer to dry (from 3 hours or more - depends on the type of coating) and, if necessary, apply a second one.
Paint and varnish materials are distributed evenly over each board, leaving no empty areas. After completing the work, it is better to play it safe and once again inspect the walls of the balcony under bright lighting to detect possible defects.
Advantages and disadvantages of the material
Wooden lining is widely used for decoration not only due to its beautiful appearance, but also other advantages.
- During operation, it does not release toxic substances into the air even when exposed to high temperatures.
- Provides additional heat and sound insulation in the room.
- Thanks to the tongue-and-groove connection, it forms an almost seamless coating.
- “Breathes” - passes air through micropores, maintaining an optimal microclimate on the balcony.
- Convenient to install. Sheathing technology does not require special knowledge or tools.
- Suitable for finishing not only walls, but also ceilings.
- Repairable - individual boards can be dismantled, restored or simply replaced with new ones.
- Provides ample opportunities for decorative processing with varnishes, waxes, and paints.
When connecting the slats, the seams are almost invisible
The lining also has disadvantages, but they are inherent more to the wood than to the finishing material itself. It requires careful impregnation with antiseptics that prevent rotting, and regular maintenance of the appearance with protective compounds. It behaves capriciously when exposed to moisture, direct sunlight, and temperature changes. There is a high risk that the finish will become deformed under the influence of aggressive external factors.
How to mount it correctly?
There are five ways to fasten building materials:
- horizontal;
- vertical;
- diagonal;
- open;
- closed.
Moreover, each method has its positive sides. The vertical method of installing the finishing board helps to visually increase the height of the loggia, the horizontal method helps to visually expand it; and diagonal - will give the room an original look.
If the floor or ceiling requires repair, then horizontal laying will help to do this with the least amount of labor (read more about finishing walls and ceilings with clapboard here). After all, you will only need to remove a few planks. A similar situation exists with the issue of ventilation. If mounted vertically, air will not circulate over the surface of the entire board. Here the horizontal option is more preferable. But since the vertical fastening method requires less work (measuring, cutting) than the horizontal option, it costs less.
There is nothing complicated when covering a loggia. To do the work yourself, you need to correctly calculate the area of the room in advance, purchase high-quality material and choose a method for attaching it.
Criteria for choosing a finishing board
>
High-quality wooden lining is one of the keys to reliable results. And here there are several criteria that need to be followed: type of wood, class of boards, type of profile, dimensions.
Wood species
The lining is made from deciduous and coniferous trees. The finished cladding material differs in its scope of application and performance properties.
Boards made of linden, alder and oak are characterized by beautiful natural colors, durability, and good moisture resistance. However, linden darkens over time, losing its attractiveness, and alder is difficult to care for. It needs to be treated with protective compounds with enviable regularity. Oak is the leader in all performance characteristics, but its price is quite high.
The alder board has a pleasant pinkish tint
Rarely, there are slats made of beech, ash, and mahogany. These are exotic options, the price of which is also above average.
>
All deciduous wood requires careful processing and constant care, losing in quality to coniferous wood. Among the latter, the following are widely used for finishing:
- spruce - soft, plastic, suitable for complex reliefs and shapes, but susceptible to rotting;
- pine is a light and beautiful wood that can be easily processed, but is not resistant to mechanical damage and releases natural resin for several years;
- cedar - characterized by high strength, resistance to deformation, retains heat well, contains a natural antiseptic;
- larch is durable, moisture-resistant, retains its natural shade for many years, the only drawback is the high price.
Larch boards withstand high operating loads
The choice of a cladding board from a particular type of wood directly depends on the operating conditions. If the balcony is glazed, constant temperature and humidity are maintained there, the lining can be anything, even inexpensive.
With cold glazing or its complete absence, when the finish is exposed to negative influences, choose a material with improved characteristics.
Manufacturing profile
The profile of the wooden lining for finishing the balcony determines the type of finished coating. Its main types:
- standard - smooth lamellas that fit almost flush together;
- eurolining - the joining elements form a groove up to 15 mm wide, on the back there are wide ventilation channels to remove moisture and relieve stress in the material;
- soft line - standard lining, but with rounded chamfers;
- “wave” - a groove is formed at the junction of the lamellas, they have a concave front surface.
Such slats are joined vertically, but there are also options for horizontal installation - “block house”, “American”.
The “block house” imitation cladding board has a curved front surface and resembles a log house.
When installing the “American”, each subsequent lamella slightly hangs over the previous one. This helps remove moisture from the skin, extending its service life. On the balcony, such a covering hides a lot of space, and the costs for it are not entirely justified.
Basic profiles of wooden lining
A specific finishing board profile can be ordered. This is resorted to in cases where it is necessary to create an exclusive interior. On request, the “wave” can be larger and the groove wider. However, this is expensive, since the equipment is reconfigured in production.
Non-standard types of profiles
Types of wooden lining
Grade is one of the characteristics that determines the quality of lumber. The current GOST 8242-88 does not directly regulate the classification of lining by grade; the relevant information can only be found in the German document. There, profile products are divided into grades: “Extra”, “A”, “B” and “C”.
“Extra” grade boards have no disadvantages. They have no knots, eyes, chips or microcracks, and the pattern is clearly defined.
For grade “A” material, “dead” and fallen knots, rot, blue discoloration, and insect damage are unacceptable. Acceptable presence:
- microcracks;
- no more than 10% of tarred areas;
- lamellas with a changed color - no more than 10% of the surface of 10% of the boards in the package;
- slight roughness after planing.
Healthy knots of natural and brown color are not considered defects; their number is not limited to an exact value.
Boards of grade “B” should not have rot or blue discoloration; there are no other restrictions. Acceptable presence:
- falling knots up to 20 mm in size;
- cracks in the direction of the fibers no more than 300 mm long;
- resin pockets;
- sprout;
- pink stripes;
- planing defects that do not interfere with assembly.
>
For class “C” the presence of rot is unacceptable, but the following are acceptable:
- holes from fallen knots with a diameter of more than 20 mm;
- resin pockets, tarred areas;
- insect damage;
- germination;
- improper coloring, even blue;
- planing defects, if they do not interfere with the stability of the finish.
Visual differences between different types of lining
The domestic GOST 8242-88 contains requirements for wood depending on the type of its coating - transparent or opaque. In the first case, there are much fewer permissible shortcomings than in the second.
For finishing the balcony, class “A” or “B” material is most often used. With a minimum number of defects, such boards last longer without losing their attractive appearance.
Sizes and humidity of lamellas
According to the current Russian GOST, the dimensions of the lining should not exceed the following values: 150 mm in width, 6000 mm in length, 25 mm in thickness.
According to European standards, lamellas can have dimensions: 500-6000 mm - in length; 80, 100, 110, 120 mm - in width; 13, 16, 19 - in thickness. Here the values are regulated more precisely, since the requirements for eurolining are higher.
If for living rooms a finishing board thickness of 12 mm is sufficient, then for a balcony it is 14-16 mm. This coating is more resistant to changes in temperature and humidity.
The humidity of the slats themselves also matters. The rawer the material, the lower its price, but the higher the risk that after installation the cladding will deform during the drying process. For interior decoration, chamber-drying lining with a humidity of no more than 10% is preferable. It does not shrink and immediately after installation allows you to proceed to decorating the sheathing.
DIY installation
Self-laying of lining panels consists of several stages.
Preparation
The preparatory stage of installation includes:
- Removing old finishes, if any;
- A thorough examination of the surface for damage (cracks, chips, dents, etc.);
- If they are found, then at this stage of preparation they should be eliminated - by embroidering, plastering, puttying, concreted or using other methods of elimination - this depends on the material from which the balcony structure is constructed;
- The walls on which the lining will be located should be treated with a special antifungal compound;
It is advisable to purchase solutions that work in several directions of biological protection of surfaces at once, protecting them from many types and methods of sabotage.
Installation of sheathing and insulation
This installation step will be a little more difficult. It involves the installation of lathing and a thermal insulation system. It is also complicated by the fact that you first need to decide on the type of insulation. After all, the complexity of installation and arrangement of the sheathing depends on this. There are two technologies for insulating balconies:
- For the first, thermal insulators such as isolon, penofol and other foil materials of this category are suitable. If they act as insulation, then the sheathing needs to be strengthened over them;
- When choosing insulation, for example, polystyrene, mineral wool, the first step will be to lay not a heat insulator, but a sheathing.
Covering a balcony with clapboard - step-by-step instructions
To cover a balcony with clapboard with your own hands, you do not need to have special knowledge or complex tools. One assistant and compliance with installation technology is enough.
General scheme of work
The finishing of the balcony with clapboard is carried out with preliminary preparation of the working surface and installation of the sheathing. Laying insulation under the finishing material is not necessary, but is advisable. By retaining heat, it maintains an optimal microclimate in the room and extends the service life of the finish.
Completed balcony decoration
Sequence of work:
- taking measurements, calculating material consumption;
- removal of old coating;
- leveling working surfaces, leveling height differences;
- installation of lathing on walls, ceilings;
- laying insulation in the sheathing;
- fastening the lining to the walls and ceiling;
- installation of skirting boards, slopes, corners.
If the floor on the balcony is uneven and the finishing coating needs to be replaced, after laying the insulation into the sheathing, the logs of the balcony floor are installed. They are also insulated and covered with plywood. Only after this they begin to cover the walls and ceiling with clapboard.
What you will need for installation
The list of what is needed to install the lining is impressive. However, there is nothing expensive or rarely found in the assortment of hardware stores.
In addition to the already mentioned lining and timber, you will need the following materials:
- insulation - mineral wool, polystyrene foam, expanded polystyrene;
- polyurethane foam - for blowing out cracks;
- membrane for vapor and waterproofing;
- assembly adhesive;
- skirting boards;
- protective compounds for wood - varnish, impregnation.
To work, you need fasteners - clamps, nails with a large head, dowels measuring 6x60 mm, self-tapping screws 50, 70, 90 mm long.
Tools you will need:
- hammer drill or impact drill with 4 and 6 mm drills;
- screwdriver;
- hacksaw;
- pencil, ruler, tape measure;
- building level, plumb line.
Basic set of tools for work
In addition, it is worth stocking up on rags to remove dirt, containers with water, and newspapers to protect the floor.
Correct material calculation
The starting point for calculations is the area of the sheathed surfaces of the balcony. For the convenience of taking measurements, it is divided into separate sections - squares, rectangles. The final result is the sum of all areas obtained. The area of door and window openings is subtracted from the calculation.
The consumption of lining (pieces) is calculated as follows: the area of the sheathed surface is divided by the area of one lamella. Another 8-10% is added to the final value, which will be used for material rejection and installation errors.
>
Consumption for timber is calculated separately for each surface of the balcony to be finished. Separately for end walls, parapet, etc. To obtain the result, the height of the area (m) is divided by 0.6 (standard lathing pitch) and multiplied by the length of the wall (m). The final value is the amount of timber in meters.
Preparatory work
At this stage, the old coating is removed from the working surfaces, preparing them for covering, the condition of the walls is assessed, and defects are eliminated.
A spatula is useful for removing wallpaper, a special solvent for paint, and a hammer drill with a chisel attachment for tiles.
Removing the old paint layer
After cleaning, the condition of the walls is assessed. Large cracks are blown out with foam or filled with cement mortar, small cracks are covered with plaster. The quality of the working surface is checked using a building level. Irregularities are leveled with putty, sandpaper, and large protrusions are knocked down with a hammer.
If there are metal elements sticking out of the walls, the rust is removed from them and coated with an anti-corrosion compound.
The base leveled under the lining is covered with 1-2 layers of primer. It protects the walls from the spread of mold.
Assembling wooden sheathing
Before assembling the sheathing, choose the direction of its installation. The main rule: the beams must be perpendicular to the lining. If the slats are mounted vertically, then the sheathing bars are mounted horizontally, and vice versa.
Before starting work, the beams are treated with antiseptics and fire retardants.
General rules for assembling the sheathing:
- the first beam is fixed at a distance of 10 mm from the edge of the wall or floor covering;
- standard spacing between sheathing elements is 600 mm;
- holes on the bars must be located at a distance of at least 50 mm from the top and bottom edges;
- the perimeter of window and door openings must be lined with beams.
Work on assembling a wooden frame begins with markings on the working surface. In accordance with it, holes are drilled for fasteners with a depth of 60-65 mm. Dowels are inserted.
Installation of sheathing for finishing
After this, the walls are covered with waterproofing film. It is fixed with liquid nails, and an overlap of 10-12 cm is made at the joints, which is glued with tape.
Then the frame beams are applied to the surface to be sheathed and fixed with self-tapping screws in accordance with the holes made. The plane of the sheathing is checked with a plumb line or a building level.
Thermal insulation is placed in the cells of the frame; it is more convenient to work with slab or roll material. The insulation must completely fill the space between the beams. If cracks still remain, they are filled with polyurethane foam.
The insulation is covered with a layer of vapor barrier film, fixed with assembly adhesive and a counter-lattice. These are slats that are mounted in a similar way to a frame made of beams, but perpendicular to it.
If the balcony is small, you can refuse the counter-lattice. Some craftsmen do this in order to save material.
Fastening the lining
There are two ways to fix the lining on a wooden frame - with finishing nails or clamps.
The finishing nails are thin and have a small head, so the places where they are driven into the lamellas will be securely hidden under the tongue-and-groove locking joint. You need to drive the nails in at an angle, ideally at an angle of 45 degrees. To prevent the wood from delaminating, at least 1 cm is removed from the edge of the groove.
Scheme for fastening lamellas with nails
To understand how to cover a balcony with clapboard using clamps, you need to look at their design. They are special brackets, one part of which is attached to the sheathing, the other securely holds the lamella.
>
The principle of fixing lining using clamps
The installation looks like this:
- a tenon is cut off from the first board, and the cut is pressed against the corner from which work begins;
- do not completely fix it at the top and bottom with two nails;
- insert the clamp into the groove of the board until it stops;
- use nails or self-tapping screws to attach the clamp to the sheathing;
- remove temporary nails.
The following lamellas are installed according to a similar pattern; they are fastened together with a tongue-and-groove locking connection. To ensure a tight fit, each board is tapped with a mallet. The last part is cut with a hacksaw to the required size, nailed to the frame with finishing nails, and the joint is covered with a decorative corner.
Preparatory work
Before you start finishing, first of all, you need to think through and plan all the details in advance, starting from visualizing the future interior, measuring the area of the room, choosing the material, and preparing the necessary tools.
Balcony decoration with clapboard photo
When thinking through the design, first of all you should decide what material to use for finishing (natural wood, PVC or MDF panels), what kind of ceiling to simply whitewash or finish with the same lining, whether lighting is needed, if so, in what place. Calculate the area to calculate and purchase the necessary material, if the area of the balcony allows you to additionally make a cabinet and a wardrobe, even plant flowers.
How to choose the right lining with your own hands video
Tools you will need:
- Drill, electric screwdriver and jigsaw with wood saw;
- Tape measure, wood hacksaw, square and pencil;
- Construction level, ax and hammer;
- Nails 30 mm, dowel nails, wood screws 50 mm, 75 mm, 90 mm.
How to cover the lining on the balcony
It all depends on the interior design and operating conditions of the finish. For a balcony exposed to direct sunlight, you need a coating with increased ultraviolet protection, and for cold glazing, one that is resistant to low temperatures.
To protect the casing from negative influences, there are special compounds:
- tinting antiseptics - at the same time protect the wood from rotting and give it a certain shade, do not require the application of a topcoat;
- antiseptic primer - suitable for treating finishes before finishing with varnish or paint;
- impregnations - form a vapor-permeable polymer film on the surface of the skin, protecting against mold and dirt;
- wax compounds - reliably protect the wood structure from destruction and moisture;
- waterproof varnishes based on alkyd, acrylic or polyurethane - dry quickly, highlight the wood texture, and form a matte or glossy finish.
The finish is protected with a glossy clear varnish
Specific operating conditions for each composition are on the factory packaging. It also contains information about safety precautions and the method of applying the substance.
In most cases, protective compounds are applied in two layers with preliminary grinding of the working surface. Allow the first coat to dry for several hours before applying the second coat.
Read more about the means for protective and decorative treatment of lining in this material.
Panel processing
In order for wood to retain its beauty longer, it must be processed.
Different compositions can significantly save time and effort; the choice depends on your plan. For example, they are very popular:
Tinting antiseptics protect against fungi and insects, painting the planks in the chosen shade. They do not require final painting after installation.
Before applying the solution, lightly sand the lining to level and remove the top layer. Detailed instructions for the compositions help you navigate, and the combined properties save time on processing the panels. Tinting compounds usually do not provide gloss on the lining; this requires a finishing varnish. Whether to use it or not is a matter of taste, but it’s better not to mess with paint (it turns out long and expensive). Regularly treat wood with protective compounds to preserve its beauty.
After decorating the space inside the loggia with clapboard, the appearance of the room completely changes. If you carried out all the work carefully, then you can now be proud of the work done!
Frame installation
Before starting cladding work, you need to equip the supporting system. For lining, the frame is made either from profiles for fastening drywall, or from wooden guide beams. Many craftsmen prefer to work with wood, because any type of fasteners can be used for it.
Photo - frame installation
Step-by-step instructions on how to install the frame:
- The surface of the wall is marked. For ease of work, it is recommended to first prepare a drawing of the room. Next, all angles are measured and marking begins from the lowest (minimum point). The first line is horizontal; for an accurate level it is recommended to use a laser pointer;
- Afterwards a line is marked near the floor. This is an important point, because often the floor is slightly curved, and this unevenness can cause the panels to be incorrectly attached to the wall. The measurement is made in the same way as from the ceiling, but the highest is selected for the starting point. Horizontal beams are installed on the marked lines; depending on the capabilities, they can be attached to the wall with nails or dowels. When covering a balcony in a private wooden house, it is most convenient to work with self-tapping screws;
- The pitch of the frame mesh is determined individually, the average value is 20 centimeters. Its width depends on the size of the sheets and panels.
When the frame is ready, you need to additionally insulate it and isolate it from moisture and condensation. For both plastic and wooden lining, to insulate the balcony, it is recommended to use either penoplex or polystyrene foam, since they do not retain moisture. Mineral wool will constantly absorb excess atmospheric liquid, which can negatively affect both the walls and the finishing of the balcony itself.
Photo - insulation
Afterwards, a waterproofing film is installed on top of the heat insulator. The installation technology is the same as for finishing roofs: the film is mounted on top of the frame beams, thereby separating the finishing panels from the external walls.
Photo - foil insulation
Opening with varnish
The final stage of finishing the balcony will be varnishing the lining. It is acceptable to leave the lining “as is”, but if you want the balcony sheathed with your own hands to last as long as possible, it is better not to neglect this stage. Opening with varnish will minimize the impact of moisture and ultraviolet radiation on the boards and will serve functional and decorative purposes. Numerous transparent or tinted varnishes make it possible to imitate almost any type of wood, which will greatly please those who are not happy with the natural color of the lining or want to create an interior in a single color scheme.
Photo of the balcony after finishing with clapboard.
That's it, your balcony is lined and ready to use!
Many houses have an unheated room such as a balcony or loggia. How to insulate it and make it suitable for normal use in winter will help.
Residents of Khrushchevkas are familiar with the situation of disorder on the scanty balconies that these legendary buildings of the USSR are equipped with. In order to somehow organize it.
The article talks about the technology of covering the ceiling on a balcony with plastic panels, including preparatory work and installation of the ceiling.
Methods for restoring balcony slabs, their characteristics, and possible options for strengthening are considered using the example of repairing a balcony slab in a Khrushchev-era building.
We will show you how to arrange cabinets under the parapet on a balcony with a carry-out, mark and attach frame profiles under the sheathing, and sheathe the balcony parapet.
The working process
It is worth familiarizing yourself with the features of how to make a hallway with your own hands. If you have a small room, then give preference to those items that will not overload it. With a minimum number of square meters, you can use compartments designed to store outerwear, shoes, as well as the items you need.
If you have a spacious hallway, then you can use a spacious closet. Depending on its parameters, the cost of the product is calculated.
After determining the model, it is necessary to take measurements and make accurate calculations. Prepare a set of tools that will be useful during work.
Description
Eurolining is called wooden boards that are processed on all sides along the edges. The material has a tongue-and-groove type of connection, which allows for cladding without visible joints or fastenings. When a perfectly smooth surface is not required, it is better to use air ducts that are located on the back of the eurolining. This will prevent harmful condensation from forming.
The category of building material is determined immediately after the manufacturing process (depending on the presence of various defects, curvatures, etc.); during sorting, it is divided into 4 grades. Products are divided into classes:
- “Extra” - there are no defects whatsoever, the lining is impeccably even and smooth;
- A – there may be 2 cracks, 1 knot, 2 resin pockets, while the diameter of the second one can be from 5 to 15 mm;
- B - the number of cracks and resin pockets is the same as in the previous case, but the possible number of knots increases to 4 (diameter - 20 mm);
- C – many unsightly stripes and blue spots, cracks, knots and resin pockets.
