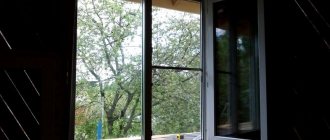
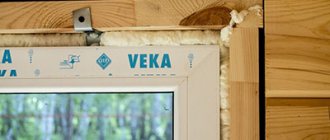
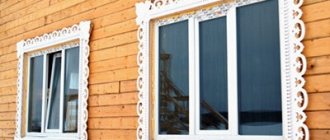
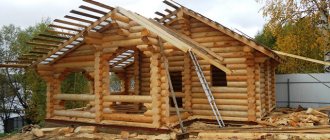
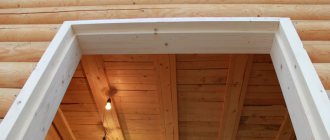
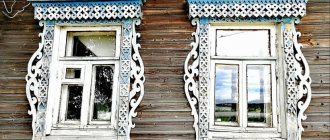
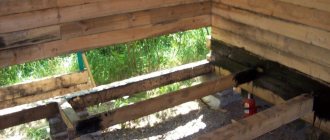
The casing is essentially a protective element in the design of a window or door opening, which ensures the safety of the geometry of the windows/doors. A casing or window frame in a wooden house is a kind of buffer between a heavy “living” wall and fragile glass. The correct casing will last as many years as the house itself.
The need to line openings is determined by the very nature of a wooden house. Let us explain in more detail - the vast majority of log houses/timber houses are built from wood with natural moisture content (that is, no one specially dries the logs before construction). This wood begins to gradually dry out, while decreasing in size. Accordingly, the walls “sit down” in height.
The process of house shrinkage lasts for years. But even after 3-5 years, no one will undertake to guarantee that the openings will not leak in the future. Therefore, since ancient times, windows and doors in wooden houses were installed with casing boxes - they were then called decks.
Painting by Vasily Maksimov “Interior view of a hut”, 1869 - a door surrounded by a log.
Modern casing is a technological thing, perfectly suited for the installation of plastic and aluminum windows, heavy balcony blocks, and metal entrance doors. Let's take a closer look at what types of casing are now popular, methods of its manufacture, and installation scheme in openings.
How to choose the type of casing?
Casing in a rough deck with external finishing.
Currently, three main designs of casing frames (“casing frames”) are actively used:
- casing into a deck (or “U-shaped”);
- spiked socket (or “T-shaped”);
- pigtail in the embedded block.
Let us recall that any casing frame is a frame for mounting a window or door that does not have a rigid connection with the log house. If you formulate in one phrase what a socket is needed for, it will sound like this: “the logs in the log house move, the frame remains motionless.”
Please note that when installing the casing, it is necessary to constantly monitor the absence of fixed connections between the frame and the frame!
The coupling of the casing and the frame in the vertical plane is sliding, of the tongue-and-groove type. Depending on the type of frame, the spike can be located either on the vertical riser or at the end of the opening.
Taking this into account, between the top crossbar of the casing frame and the frame there should always be a compensation gap filled with a fibrous sealant. The dimensions of this gap depend on the climatic conditions in the region and range from 60 to 100 mm.
Each of the above casing options has several modifications, but, nevertheless, several general recommendations can be formulated for choosing the optimal scheme.
Window casing
T-shape with selected quarter
The casing for plastic windows in a wooden house is most often made of the T-shaped type. Its design includes four elements:
- Two vertical posts (“jambs”), the task of which is to provide a movable interface between the casing frame and the frame.
- Top crossbar (“top”).
- The lower crossbar, which in casing frames for plastic windows is also a window sill.
Considering that this type of frame is used very often when installing windows, let us consider in more detail its two basic modifications: monolithic and prefabricated.
From the point of view of reliability, durability and quality of thermal insulation, the best option is a monolithic T-shaped casing. The term “monolithic” in this case means that the frame board and the tenon are one piece and made from one block of wood (board).
But at the same time, this is also the most expensive option, since the thickness of the workpiece must include the height of the tenon.
Casing in a tenon with the tenon placed on glue
To reduce the cost of the casing, a prefabricated version is sometimes used, in which the embedded block (tenon) and the inner board of the frame are made of different boards. In this case, the tenon can either be placed in the groove on both sides, or glued with stable compounds that are used in houses made of laminated veneer lumber.
Please note that it is highly not recommended to connect the board and tenon with self-tapping screws, since over time such a connection will become the main bridge of cold in the window opening. Casing in a deck (U-shaped) when installing PVC windows is used quite rarely and most often in cases where there is a partition made of short-length logs between large windows
In this case, the casing not only protects the window, but also frames the logs, preventing them from moving in the horizontal plane
Casing in a deck (U-shaped) when installing PVC windows is used quite rarely and most often in cases where there is a partition made of short-length logs between large windows. In this case, the casing not only protects the window, but also frames the logs, preventing them from moving in the horizontal plane.
Door frame
The choice of door frame design depends on the type of door.
For wooden external doors, the most durable version of the casing is used - a casing in a deck.
In cases where a metal door is installed in a log house, it is sufficient to mount only the vertical guides according to the “into the embedded beam” scheme.
As a rule, they save money on interior doorways and the doors are mounted in a “mortgage beam” frame without a bottom crossbar. Fixation of the lower frame size in this case is ensured by the floor boards.
Concluding the section with recommendations for choosing the type of frame, we note that when installing plastic windows in a log house, an additional factor in favor of the T-shaped structure is the presence of ready-made grooves for tenons at the ends of the openings, since many manufacturers of laminated veneer lumber perform milling and sawing according to customer drawings .
Options for casing (plugs)
Casing box with end tenon
In this version, before installing the casing, a vertical tenon (ridge) is cut out of the logs at the ends of the window opening.
This procedure can be carried out when the log house is ready. The casing is assembled directly in the prepared opening. On the sides of the box, select a groove corresponding to the size of the tenon. During installation, first the lower window sill board is installed, then the side boards of the box are placed on the end tenon, which is preliminarily covered with a rolled inter-crown seal.
The sequence of actions involves first installing one of the two side boards, then the top horizontal board, then the second side board. The top board of the box acts as a spacer for the sides.
On the window side, the edges of the box can be either completely flat or contain a ledge for tight installation of the window block. That is, the box will have a variable thickness - smaller on the street side and larger on the inside of the room. If the frame has a flat profile, then after installing the window, you will need to install additional finishing slopes to hide the gaps along the edges of the window.
After assembling the frame, a compacted vertically sliding joint is obtained, in which the sides of the box serve as guides for the movement of logs or beams. The use of polyurethane foam and additional fastening of the box to the opening is unacceptable. The only exception is the window sill board, which is rigidly attached to the lower crown through a layer of roll seal. The gap between the top board and the opening is also filled with an inter-crown seal.
When the frame has already been installed, a window block with a low tide is installed in it. Platbands are installed on the outside and inside, which are attached with nails or self-tapping screws to the casing.
Casing box with embedded bar (tenon) – Preferred option
The second option for making a frame for installing windows and doors involves choosing a vertical groove from the ends of the window opening along its entire height. A square block of usually 5x5 cm is placed in this groove.
No fasteners are used. The length of the block should be less than the height of the opening, so that it does not rest against the upper crown during shrinkage.
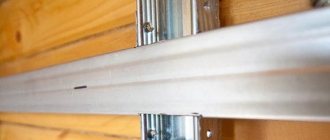
The block plays the role of a guide element, which ensures free vertical shrinkage of the crowns, excluding horizontal displacements; in addition, it is to it that the casing is attached. The box is attached to the bars using self-tapping screws, which should go into the block, but under no circumstances should they go through it. Roll insulation is laid between the box and the ends.
Unlike the option of a casing in a deck, in this option the casing box is assembled in advance and installed in the opening in finished form. In addition, the thickness of the box may be less than that of a deck structure, since there is no groove in it.
After the frame is installed in it, you can mount the window as in a regular opening.
The frame is fastened to the frame using self-tapping screws; the gaps between the window frame and the casing are filled with foam.
The use of foam between the frame and the ends of the opening is unacceptable. The final stage of window installation is the installation of external and internal platbands, which cover the gaps between the frame and the ends of the opening.
Casing: prices, cost
Manufacturing costs can vary greatly: prices and costs depend on many factors; in every wooden building, the part is not just necessary, but simply irreplaceable!
What determine the prices and cost of casing?
It depends on the quality of the wood, the type of casing, the shape of the casing, the presence of decorative elements, the size of the opening, and also on where the part will be installed - in timber, logs or a log house.
The window frame is made of dry material with a humidity of 8-12%. It consists of a top, risers, an adhesive window sill or a window sill board in cases of installing a plastic window sill.
Several types of work:
Solid: all parts are made by processing solid wood while maintaining the correct wood texture.
Adhesive: parts of such casing are made from glued boards. It is glued into a microspike on all four sides. Knots and resin pockets in this case are completely cut out.
Combined is the most common type of casing. The top and risers are made of solid pine. And the window sill is made of glued boards. All of it has a clean appearance and after installation needs to be treated with paint and varnish.
It is important!
Window frames are made to fit each window or door individually. When placing an order, the customer must know which windows and doors will be installed in the future casing. It can be made either with a sample for a window - this option is used in cases where the house will not have exterior and interior decoration, the walls of timber or rounded logs remain untouched
It can be made as a sample for a window - this option is used in cases where the house will not have exterior or interior decoration; the walls of timber or rounded logs remain intact.
And without sampling - this option is used in cases where the house is planned for interior and exterior decoration in the future. This version of the frame can be finished or rough (if it is completely closed during future finishing).
The pigtail can be either a standard shape - a rectangle, or non-standard shapes. Trapezes, polygons, balcony blocks.
Helpful advice!
Non-standard forms have their disadvantages, but there are ways to avoid them. Such information is discussed with the surveyor at the site.
More about the process
After window openings are cut in a wooden house, the structure of the log house no longer has the same rigidity as if the log house were solid. First, let's answer the question, what is a window frame, or, as it is also called, casing (wooden frame).
After window openings are cut in a wooden house, the structure of the log house no longer has the same rigidity as if the log house were solid. This is especially true for the window opening itself. During the shrinkage process, the logs can move significantly horizontally, which will also lead to deformation of the windows.
All these unpleasant moments are prevented by the frame (casing, wooden frame), which looks like a wooden box. From all of the above, it is clear that installing a socket in a wooden house is a dire necessity. This is true not only for a log house, but also for a timber house.
The process of installing the pigtail is quite simple. Having the necessary tools and materials at hand, you can install the pigtail yourself.
It is assumed that the window opening has already been cut. Now you need to use a chainsaw to select a spike (ridge) on the sides of the opening. This is done so that the pigtail does not move perpendicular to the axis of the walls.
Then the pigtail is made according to the obtained dimensions. Accordingly, in its side racks you need to select grooves for the ridge.
All elements of the pigtail are attached using dowels. Installation of the frame starts from the bottom beam. A layer of linen or jute is first laid under it.
Then vertical bars are installed, into the grooves of which flax or jute is also placed. And lastly, the upper beam of the frame is installed. The shrinkage gap, which must be left above the jamb, is covered with linen fabric.
It is important!
The window frame is a monolithic structure and is absolutely independent of any movements of the frame. Framed with frames, windows and doors will please the eye and will last you indefinitely.
Doors
Steel entrance doors, which are ubiquitous in city apartments, are not suitable for country houses, since they are not intended for use in outdoor conditions and cannot serve the purpose of thermal insulation of premises. Due to the high thermal conductivity of the material, in winter the structure will freeze, becoming covered from the inside with condensation and frost, metal parts will begin to corrode, air will blow into the keyhole, and the outer side of the canvas will quickly fade under the sun. If you additionally block the opening with an internal wooden door, this will help alleviate some of the problems. But a more reliable option is to install a steel structure with several insulation loops and special double curtain covers covering the keyholes. You can completely eliminate the possibility of the front door freezing by equipping it around the perimeter of the frame and in the lock area with a heating system based on a resistive cable.
In addition to metal structures, the market offers a wide selection of entrance doors made from solid (compounded) solid pine, oak, beech and other types of wood, as well as from laminated wood with sheet cork insulation, reinforced thresholds and powerful hinges.
Resistant to adverse climatic influences, durable materials for finishing the front door are HDF and vinyl plastic (UPVC) panels, shiplap plywood, and oak slats. They withstand difficult operating conditions and colorful powder coatings very well. But leatherette and laminated MDF boards will not last long, even on a covered porch
As for interior doors, their choice is mainly dictated by interior design. These can be either quite budget models made of solid pine or spruce with paneled doors, or, for example, products made of oak, larch or ash with a multi-layer varnish coating, belonging to higher price segments. The simplest version of internal doors is also in great demand - serial panel panels with a frame made of pine timber and casing made of MDF panels, finished with veneer, melamine or vinyl film, and laminated paper.
How to make a pigtail with your own hands - basic types and drawings
One of the features of wood buildings is their susceptibility to shrinkage, periodic (seasonal) changes in the geometry of the building under the influence of external factors (temperature, humidity). Visually this is not noticeable, but installing door and window blocks in openings with rigid fixation leads to their deformation; or the walls remain in one position (as they say, “hanging”), that is, when the material shrinks, they do not settle, which causes the building to skew.
Casing in a wooden house eliminates such problems; it is not connected to the main structure, but is held in it only by friction. It is often called differently - okosyachka. It is a box installed in openings. Its purpose is to prevent the destruction of window frames, door jambs, and incorrect operation of the sashes.
Pipe design
Regardless of the manufacturing method, the main parts of the frame are.
- Vershnik. Its purpose is to hold the upper ends of the sidewalls in a static position. Essentially, this is a horizontal casing strut. At the same time, it provides a shrinkage gap into which the sealing material is placed.
- Threshold. The lower part of the pigtail. In window openings this is the window sill. It solves a problem similar to that for the apex, but it is this element that bears the maximum load, and therefore great importance is attached to its strength.
- Sidewalls (carriages). Vertical casing elements installed on the sides of the opening. The function is to ensure the “sliding” of the walls of the house (up/down) when the wood shrinks.
Window frame
Work on the trim of window openings must be carried out in several stages:
- As usual, you need to start with preparation. It is worth taking all the necessary measurements, preparing the necessary tools and materials.
- Next, you need to decide on the type of installation of the pigtail. By and large there are two of them. They can be called U-shaped and T-shaped. The first option is simpler, so it is offered for consideration.
- First, the window sill element is installed. It is secured with self-tapping screws to the crown of the house located below.
- After this, the side logs are cut down using a chainsaw so that a vertical spike is obtained. This must be done on both sides of the opening. If there is no chainsaw, then the work can be done with a chisel and hammer, but this will take much longer.
- Next, grooves are selected in the component elements of the socket that correspond in depth to the previously obtained tenons.
- After this, tow is placed on the tenon, which will act as a seal.
- Then the component of the pigtail is put on the spike.
- The final stage of installation of the pigtail is the installation of its upper part or, as it is called, the top. This structural element is inserted by surprise and fixed to the side supports with self-tapping screws.
As a result of the work, a frame is obtained that will protect the window frame from distortion that occurs during the shrinkage of the logs.
As for the process of installing casing elements using T-shaped technology, it must be said that this option is not much different from what has already been described. The difference lies mainly in the fact that the grooves are made in the wall, and the tenons are made in the structural elements.
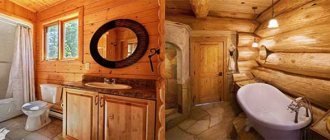
In different bath rooms
Yes, there is a point that windows need to be installed differently in different rooms of the bathhouse.
Installation in a steam room
The steam room is a hot room; many people prefer sauna conditions, plus high humidity. All chemistry, if it stands here, will definitely emit volatile organic matter. On the other hand, polyurethane foam is polyurethane, and it is not recommended for use in a steam room. In general, you just need to remember that it is better not to fix the window in the steam room with polyurethane foam.
It is best to fix the window in the opening using dowels, dowels, and anchors.
In other rooms
In all other rooms of the bath there is neither such humidity nor temperature. Therefore, the use of polyurethane foam can be considered justified. Just don't rely on foam alone - it's a bad idea. And when choosing plates, do not take those that bend like paper in your hands. Take stiff, reinforced ones.
Window frame made of plastic
Testing for plastic windows in a wooden house is carried out not only for double-glazed windows made of wood, but also for plastic ones. Installing windows made of this material has its own characteristics. The opening in the log house should be 10 centimeters wider than the double-glazed window.
It is recommended to order plastic windows after installing the frame box. Installation of double-glazed windows takes place according to a more complex scheme. A carriage with grooves is made (a box assembled from timber, with a groove prepared in advance for the tenon), the size of which should allow the frame to easily slide along the guides during shrinkage.
In baths made of different materials
The material of the walls is the main factor influencing the choice of method of fastening the window in the opening. Let us remind you that a bathhouse can be built not only from wood (and this is not only timber or a log house, but also a frame structure, because the frame is made of boards), but also from block material - brick or one of the cellular concretes (foam concrete, aerated concrete).
Made of brick
In order to facilitate installation into a brick wall, even at the stage of its construction, so-called “mortgages” are installed in the opening - these are bars between the bricks where the future window will be attached. The openings themselves in brick buildings are completed either with a lintel beam or with a brick “castle”.
ADVICE! There may not be any mortgages. This is not a hindrance to installing a window. If they exist, but the bathhouse is old, then before installation you should check the condition of the bars. To do this, take a regular shoe awl and drive it about a third of the way into the block. It’s good if you didn’t succeed or had to make an effort to both stick the awl in and pull it out. Only in this case is the tree still suitable.
Of the mounting methods described above, dowels or anchors are best suited for brick. Of course, you need to drill the frame first, but if there are no embedded bars in your window opening, you don’t need to drill anything in advance - first try the frame into the opening so that the fastening does not fit into the seam between the bricks, but into the bricks themselves. After this you can remove it and drill it.
Anchor plates are also sometimes used for fastening in brick, but this is difficult even if the brick is not hollow, and in a hollow brick such fastening is not used at all.
ADDITION! Reinforced mounting plates are recommended for use when installing into aerated concrete openings. In order for the window to withstand wind loads, each plate must be secured with at least five self-tapping screws in the concrete. Or use aerated concrete dowels.
In a frame bath
Window openings in frame buildings are created using vertical mullions and horizontal crossbars. These are durable boards that can be used to secure a window. There will be no quarters in them.
Some recommend installing windows on the frame only with the help of plates, while others recommend using long self-tapping screws. See above for plates, and self-tapping screws are installed in the same way as dowels, only without sleeves. The window is placed on blocks, fixed, then holes are drilled in it for self-tapping screws. Then the screws themselves are screwed in. That's all.
From a log house
The most labor-intensive will be the installation of a window in a bathhouse made of logs or timber. Because they are not placed in the opening without a casing (aka a frame). The casing is a movable structure that slides along the tongue-and-groove joint along and across the shrinking logs. Only in this case can we hope that the windows will not undergo deformation during operation. The casing imparts rigidity to the section of the wall where the opening is cut.
The casing can be U- or T-shaped, respectively, either a tenon (T) or a groove (P) is cut into the wall. The height of the opening should be 10 centimeters greater than the inserted window frame. This space is then filled with jute or other heat insulator. It is intended as a reserve for shrinkage of the log house.
The inside of the casing may or may not have a quarter for inserting a window. How to act in such cases is discussed above.
We recommend watching a video that clearly shows the process of creating a casing:
Watch this video on YouTube
Prices for a wooden house frame
Installation of casing is an important element in building a wooden house. Prices for this service vary, but consist of: the size of the door or window opening, the diameter of the timber, the formation and preparation of openings. The complexity of manufacturing and installation of the pigtail is also taken into account.
This service is specialized for companies that produce wooden windows. On the Russian market there are both rough and finishing saplings. Let's consider how much a frame of windows in a wooden house costs. The price for each of the materials is indicated as average, and depending on the manufacturing technology and the qualifications of the company, it can fluctuate both down and up.
| Pipe material | Price in rubles per linear meter |
| Draft box | |
| Solid pine | 500-1500 (depending on manufacturing technology) |
| Finish box | |
| Solid pine | 800-1800 |
| Glulam pine | 1100-2000 |
| Glued larch | 1500-2500 |
Prices do not include finishing and painting work. Typically, the cost of casing installation exceeds the cost of its manufacture.
Our prices
| Job title | Price |
| Cutting out an opening for a single-leaf window | from 1500 rub. |
| Cutting out an opening for a double-hung window | from 2200 rub. |
| Cutting out an opening for a three-leaf window | from 3000 rub. |
| Cutting out a doorway | from 2560 rub. |
| The door frame is rough | from 1150 rub. m.p. |
| The opening frame is rough with tenoning | from 1700 rub. m.p. |
| Opening frame with finishing of the opening inside the house | from 2460 rub. m.p. |
Installation of the pigtail
The frame for each opening in the log house is made individually and should not interfere with the natural shrinkage process. To do this, it is necessary to leave a gap between the top of the opening and the top of about 7 centimeters.
The procedure for installing the pigtailSource handspc.ru
To insulate and seal a wooden house, the space between the box and the logs is filled with insulation.
For proper installation of the casing, the following nuances must be observed:
- 80 centimeters from the floor - the height at which the window opening should be cut;
- Depending on the type of pigtail, a ridge or groove is cut out;
- All wood building materials are impregnated with a special antiseptic composition;
- Thermal insulation material is laid along the entire perimeter.
It is necessary to carefully ensure that the screws used to assemble the casing box do not come into contact with the wall beams. Only after completing the installation of the frame can you proceed to the interior and exterior decoration of the house. Platbands and ebb are fixed on the outside of the opening.
Violation of technology and its consequences
Failure to comply with casing installation techniques can cause unpleasant consequences for the owner of a wooden house. They are divided into natural and artificial.
Natural ones include:
- The appearance of gaps between the box and the logs;
- Displacement of the walls between the openings of the log house;
- Curvature of the log house and its walls;
- Destruction of a glass unit;
- The need to regularly adjust the settings of the window opening mechanism;
- The same violations occur when opening doors.
Without a frame in the window, when the house shrinks, the frame and glass burstsSource makemone.ru
Artificial consequences most often arise due to the installation of substitutes for the frame, which are boards or timber. Recently, this replacement has become popular among unknowing people. Its consequence is that there is no forced expenditure of money on replacing the casing structure. It must be taken into account that only a solid structure can withstand the load that shrinkage puts on window and door openings.
Neither here nor there!
If, as a result of shrinkage of the house, the front door is jammed and you cannot open it, you should not press the key with all your might - the lock, most likely, will not respond to this, but the key or locking device may break.
As a rule, applying pressure to the canvas helps. Try pushing it down, lifting it slightly, or pushing it down with a lever tool while turning the key. If this does not lead to anything, call a service technician. One way or another, the holes where the crossbars go will need to be sharpened later. If the window sashes begin to open poorly, you just need to adjust the hinges.
Door frame in a wooden house
The door frame in a wooden house is just as important as the window frame. Without a frame, your doors are just as susceptible to skewing and jamming as your house shrinks.
Many people believe that a door jamb in a wooden house is a waste of money and you can install the door frame on a embedded block, the so-called “sliding block”, partly this solution has a right to exist.
However, many people forget that a real casing (casing) allows you to level the wall and keep it from further curvature, which the embedding block does not guarantee you.
Door frame in a timber house
The door frame in a house made of timber is no less important than the window frame, because it helps strengthen the doorways.
Note!
If the interior walls of your home are thinner than the exterior walls, it is safe to say that your interior walls have a visible warp.
You need to level the walls and frame the doorways, after which you can be 100% sure that your walls will be as smooth as possible, and the installed doors will always work perfectly, without distortions or jamming.
Front door frame
The entrance door frame is distinguished by the mandatory presence of a threshold. That is, the casing for the entrance door frame has a closed shape of 4 parts.
When the doors of the entrance group are framed, the threshold is, on average, the size of the threshold is 4-5 cm; at the request of the customer, the threshold can be made higher or lower.
The door frame in the log house is made for metal entrance doors and PVC balcony doors that are part of the balcony block.
Frame for steel and plastic doors
When installing frames for steel and plastic doors, there are minor differences:
In this regard, the frame of the entrance metal door is produced in a “draft version” (without a quarter). When installing PVC doors, a quarter is selected in the casing equal to the thickness of the PVC profile. The frame of plastic doors is practically no different from the frame of PVC windows.
Interior door frame
A door frame without a threshold is used for interior doors, if the customer plans to have a flat floor. In this version, the casing box has a U-shaped design, without a lower part.
The casing posts are cut into the lower log or, as a last resort, they are attached to the wood grouse in the lower part. We recommend installing interior doors in a door frame; for this, a quarter of 70 mm to 80 mm is selected in the casing, depending on the thickness of the door frame.
Installation of casing of an adjacent window opening with a balcony door
If the house is supposed to have access to a balcony combined with a window, you should take into account some subtleties when installing such a structure.
With this arrangement of the opening, the casing cannot be made common; they should be separated by a T-shaped sidewall. The combined side of the door will have a U-shape, which will allow the overall structure to slide parallel to each other without deforming the opening.
The gap left above the window opening should be smaller, and above the door larger. After final shrinkage, the gaps will become equal.
Why do you need a casing?
A correctly made frame frame secures the window opening, leaving a compensation gap in the upper part. This technique takes into account further shrinkage of the wall, protecting against its consequences. If space is not provided above the window, the weight of the upper crowns will fall on the casing. At the same time, the crowns of the middle part will begin to sag unhindered, forming through cracks.
To ensure that your house does not lose heat in winter, and you do not overpay for heating, you must be responsible in selecting a team of carpenters and installers. A window and door frame installed according to the rules struggles with several problems:
- Prevents the formation of cracks
in crowns.
- Maintains wall geometry
and interwindow walls.
- Protects the integrity of the glass unit
. If there is no expansion gap, you will have to frequently adjust the window fittings; this will lead to deformation of the glass unit and accelerate the failure of the fittings.
Thus, a good casing box has two main purposes:
- Strengthens wall structures
, weakened by cutting window openings.
- Protects window units
during the shrinkage process.
One of the ways to install a window in a wooden house Source 1prookna.ru
Manufacturing of casing
For windows
With wooden frame:
- Preparing grooves on the sides of the opening.
- Laying inter-crown insulation material in its lower part, with a block on top. Its task is to prevent displacement of the sidewalls.
- The grooves on the left and right sides of the opening are filled in the same way.
- Installation of the upper casing element.
For PVC windows
Experts do not recommend installing such blocks in wooden houses, but if the decision is made, then you need to know some of the nuances of installing the casing.
- Preparing the opening involves changing its geometry. The gaps between its sides and the block are at least 130 mm. A more accurate value is determined by the following indicators: the moisture content of the wood of the house and its service life (which means the degree of probable shrinkage), the thickness of the crown joints.
- Making a threshold. Cuts are made in it to obtain a comb. It is needed as the base of the carriage in which the groove is installed. This element ensures uniform shrinkage of the house without destroying the structure.
- Making a carriage. A beam of 150 x 100, with a length less than the height of the opening by 50 mm, is sufficient. A groove is cut into it and the surface is ground to ensure “sliding”.
- For the top, take a “magpie” board with a width of 120 - 150 (according to the thickness of the walls of a wooden house). It also contains grooves for connecting to the ridge of the opening.
- Installing the sidewalls is the same as for a wooden window.
- After checking the geometry, all casing elements are fastened with self-tapping screws. It must be taken into account that they should not go into the wood of the wall. Otherwise, it will form a “rigid” coupling with the supporting frame, and the pigtail will not fulfill its function.
- Insulation of the opening.
- Treatment of wood with special preparations.
For doors
*The simplest option
- Preparing the opening. If it is not pre-arranged in the wall, it is marked and a rectangular segment is cut out. At this stage, grooves are prepared for connection to the door frame.
- Processing the jamb. This technology implies that he is a door frame. Accordingly, wood is sampled for the grooves.
- Placing the box in the opening.
- Installation of horizontal struts (lower and upper).
- Sealing the casing with soft insulation. Another option is flax fiber. The work is carried out in such a way as to prevent the frame from being fixed in the opening; she must remain free.
- Removing the spacers.
- Treatment of wood with a fire-retardant preparation.
- Fastening platbands.
Other door lining technologies are difficult to implement
Considering the importance of this element for the home, it is better to entrust the work to a professional
Types of pigtails in a timber house
The design can be executed in 2 main versions:
- Draft, if additional finishing is provided. A good example is the subsequent installation of ventilated facades, which will completely hide the part. Typically, the perimeter of the opening at the top and sides is made of unplaned materials, and the visible part, the threshold or window sill, is made of laminated veneer lumber or furniture panels.
- Finish, made of planed and sanded material with further coating with a paint and varnish composition. Typically, expensive and high-quality processed types of wood are used for production.
Based on manufacturing methods, the following types are distinguished:
- In the embedded block. For installation, a groove is made along the inner sides of the opening in which a square section beam is placed. The beam is not secured, but simply driven into the groove, which allows it to move along the groove. Finishing boards are attached to the block with self-tapping screws. The casing is fastened in the lower part, filling the voids with soft heat insulators. The method is the cheapest and easiest to implement, but the most unreliable and requires additional finishing. Failure to properly seal will almost always require refurbishment or repair.
- Spike monolith. The product is a T-shaped rectangular block. The tenon is inserted into special grooves made in the vertical timber walls. The vertical part of the casing block is also a window slope. Fastening is done at the bottom and top using special fasteners, and the free space on the sides is foamed. The block can be cut together with the pigtail from one common blank or attached with glue. The design has good strength and functional characteristics. This is often the way to do it yourself in a timber house for plastic windows. Therefore, we will describe this method in more detail below.
- Casing “into the deck”. When constructing an opening in the vertical bars, a tenon is cut out, onto which a block shaped like the letter “P” is placed. From above, the structure is bursting with a top and secured with self-tapping screws. Installation is carried out using sealing materials. The design is ideal for entrance safe doors and large windows made of wood or plastic, providing high resistance to multidirectional mechanical loads. This is an expensive and difficult option to implement on your own.
Rough casing or embedded block
One of the varieties of piping, when a groove is cut into the opening, is inserted into an embedded block. It differs from a monolith in that it consists of two parts - the actual embedded block, which is inserted into the tenon, and a separate casing board. The casing board is attached to the embedded beam, and the door frame can already be attached to it (it can also be attached directly to the embedded beam).
Casing in embedded timber
Please note that the embedding block and the tenon under it are made a little larger than in a monolith. This is necessary to make the fastening more reliable.
When fixing windows/doors, fasteners must be chosen so that they do not go into the wall.
Of course, this option is much easier to implement. But they don’t really like it: its reliability is still much lower than that of a monolith. But it can also be used for light doors and any windows. Another possible use is as a temporary option only for the period of shrinkage after the openings have been cut out and the frame has been left to dry. If the openings are not secured, the walls may twist. In this case, embedded timber is an excellent solution.
A groove is cut out into which the timber is driven. It is no longer held in place by anything - no nails, no self-tapping screws.
Doorway casing
Doorway frame
Speaking about the installation of doorway casing, it is worth noting that they are somewhat more complicated due to their large size, but in general the stages of the work are identical:
- First, the opening itself is cut out.
- Then the tenons and grooves are cut out.
- Then the threshold is installed and tightened with self-tapping screws.
- After this, the sealant is laid and the structural elements are installed.
- Next the top is placed.
It is worth adding that when installing a frame on a doorway, you need to take into account the fact that the frame itself also has a certain thickness, which must certainly be taken into account when cutting out interior doorways and installing the frame as a whole.
Making a doorway
It is important to note that when installing door frames, regardless of location, rigid fastening of elements, with the exception of the bottom one, is unacceptable. The possibility of free vertical movement of logs during the process of shrinkage and drying must be ensured. Otherwise, the described work is quite feasible for independent implementation without the involvement of hired specialists
In addition, work done with your own hands always brings pleasure in itself.
Otherwise, the work described is quite feasible to perform independently without the involvement of hired specialists. In addition, work done with your own hands always brings pleasure in itself.
What is the pigtail for?
What is a door frame? At its core, this is the construction of additional supports that will prevent the walls from moving during gradual shrinkage throughout the entire life of the building.
Over the years, even the highest quality wood begins to dry out, and the pressure on the foundation of the house leads to the fact that its walls and floors can change their original position.
Otherwise known as casing, the frame is a box-shaped structure installed in the door opening. It protects it and the door itself from the impact caused by the movement of logs.
A correctly and timely installed door frame will allow you to:
- Protect the door from skewing and jamming, which can be caused by pressure from the load from the weight of the walls;
- Prevent the destruction of doors - regardless of what material they are made of, wood, plastic or some other;
- Avoid the occurrence of cracks and subsequent drafts.
If you don’t install a door frame in the doorway, you risk not only having problems with the doors, their damage and jamming, but also getting damage to the walls and even their destruction.
This type of work, such as framing door and window openings in a wooden house, is a prerequisite. Without additional strengthening, over time the house may become unsafe, so in this case a lot depends on the quality of the work.
