The manufacture of stairs has always been entrusted only to experienced carpenters, because such a design requires great skill. Every master must be an architect, designer and engineer at the same time. In addition, he needs to have enough practical knowledge and be able to make several types of stairs in order to select and manufacture the optimal option.
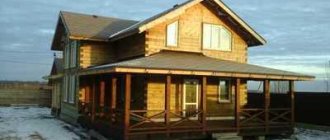
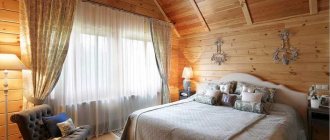
DIY wooden staircase
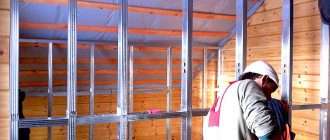
Construction of a wooden staircase
A wooden staircase for a private house most often consists of one or several flights (flights), which are located between floors or intermediate platforms.
Construction of a wooden staircase
The design of a flight of stairs is a combination of various components with different functional purposes:
- Kosour. It is a load-bearing beam made of wood with a sawn comb. Risers with steps are fixed to it, so the part must be durable.
- Bowstring. In some cases, it becomes an alternative to a stringer, performing load-bearing functions (especially if one side of the structure is adjacent to the wall). Before installation, the string must be marked in detail so that the steps are located at a horizontal level.
- Step. The main element of any staircase, which is attached to one of the supporting beams. In addition to the usual ones, there are winder and radius steps. The winder elements have a non-standard shape and are mounted at the starting point of the march. Radius steps have a curved leading edge and can be semi-circular, wavy or with rounded corners.
- Riser. The part is optional, but it provides the staircase with high strength by supporting the step in the center. A spacer bushing is used to secure the riser. A radius type is installed under semicircular steps, and a curved version is mounted under the corresponding steps or under the landing between flights of stairs.
- Pillars for support. They are placed at the starting and ending points of the stairs, as well as along the edges of the inter-flight platforms. The elements increase the strength of the fence and serve as support for the handrails.
- Balusters. These are supporting posts for handrails, from which side railings are formed, and can have different configurations.
- Handrails. They are a required part. They rest on balusters and support posts. The main requirement for the element is a smooth surface.
- Distance sleeve. Such a stand is required for any structure with several flights (even when using stringers).
Preparing for work
Installing stairs to the second floor is a long and expensive process. To make it as easy as possible, you need to be properly prepared.
For greater convenience, the preparatory work before arranging a wooden staircase to the second floor with your own hands can be divided into 3 stages:
- design (drawing creation);
- selection of necessary materials;
- preparation of tools.
A competent drawing is something without which creating a high-quality staircase is impossible.
At the first stage, it is necessary to produce the highest quality circuit possible. For greater information content, it should be performed in three projections: from above, from the side and from the front. In this case, in the top view it is necessary to indicate the location and direction of the flight of stairs. Creating a drawing is usually done on drawing paper.
Advice!
If you prefer to work at a computer, there are a couple of convenient and completely free programs on the Internet for designing stairs and other structures.
Designing a staircase in the Compass program
The next stage is quite simple - based on the calculations, consumables are purchased in the required quantity. At the same time, it is better not to skimp and purchase materials with a reserve.
Also, to install the stairs to the second floor you will need certain tools. In particular:
- pencil;
- level;
- square;
- clamp;
- plane;
- hammer;
- drill or screwdriver;
- Grinder;
- saw;
- fastening elements (usually wood screws are used).
The presence of knots, cracks and other wood defects is not allowed.
Types of staircase designs
When choosing a staircase structure, the main factor is the size of the area required for its construction. In second place is the convenience and comfort of ascent and descent. Here you need to take into account the frequency of use, the presence of children and elderly people in the house.
Aesthetics is also an important criterion. The staircase should be combined with the interior of the room. In addition, it is necessary to take into account material possibilities: the production of wooden stairs with a complex configuration requires more time and financial costs than options that are simpler in form and execution.
Marching
Are the most popular. They got their name thanks to marches (flights) - a group of united steps. The staircase may have one or more flights.
There are straight structures (single-flight and double-flight, with a rest area). They can be free-standing or placed near the wall. But straight models require a lot of space, so in order to save useful space, two-flight options are provided with a rotation at an angle from 90 to 180 degrees.
The flight has a curved shape with an optimal angle of elevation, then rotary steps are used, which are also available in structures with two and three flights without platforms.
(function(w, d, n, s, t) { w[n] = w[n] || []; w[n].push(function() { Ya.Context.AdvManager.render({ blockId: "RA-510923-1", renderTo: "yandex_rtb_R-A-510923-1", async: true }); }); t = d.getElementsByTagName("script")[0]; s = d.createElement(" script"); s.type = "text/javascript"; s.src = "//an.yandex.ru/system/context.js"; s.async = true; t.parentNode.insertBefore(s, t) ; })(this, this.document, "yandexContextAsyncCallbacks");
The most popular types of wooden stairs for a country residential building are:
- Ordinary one-march ones. They have a simple design with a span in the center of the room or near the wall - the most durable with reliable support.
- Curvilinear single-flight. Installed in large rooms to emphasize spaciousness. They are distinguished by a smooth turn and steps widened on the outside.
- Marching with lower turning steps. Sometimes this option is provided for by the layout of the room and can support the chosen architectural style.
- A simple 2-flight system. A staircase with two flights and an interfloor turning platform can be mounted above the door and save space.
- 2-flight L-shaped design. It is located in a rectangular opening along perpendicular walls and saves space.
- 2-flight U-shaped staircase with an upper platform and turning steps. The design is installed in luxury mansions with a large hall.
- 3-flight system with two platforms. This type of staircase saves space, but requires a significant ceiling height.
To select a specific configuration, you must correctly calculate and measure the free area for installation and draw up a drawing. A detailed guide on how to do this will be below.
Screw
Screw-type structures are used less frequently, as a rule, with limited space or for aesthetic reasons by the owner of a private house. They are not as convenient as marching ones, and it is difficult to transport furniture on them. To install the ladder, you will need to perform complex calculations, since with a small error it may lose its functionality.
Spiral staircases sometimes serve simply a decorative function, especially with a fence made of artistic forging. The installation of such options is possible in almost any room, because they take up less space than rotating designs. The following types are distinguished:
- with cantilever pinching of steps on the internal pillar;
- with steps supported on the internal pillar and perimeter walls;
- with cantilever support of steps on the casing pipe;
- with support on the fence and bent bowstrings.
More complex options are modular spiral staircases. The structure is assembled from modules, folding them at an angle in a certain sequence. They come with a central stringer (the steps are attached to the modules, and the edges are connected by bolts) and a central column (rested on a stacked column, connected by bolts). Read more about wooden spiral staircases.
Spiral staircases save space
Types of structures
Before making a wooden staircase, you should choose the best design option for your room.
The following popular types of structures exist:
- on two stringers;
- on one central stringer;
- on bowstrings;
- on pain;
- on the central post (screw);
The simplest is a straight staircase, which ensures linear movement along the flight.
Read more about this in the article about types of wooden staircase designs.
Let's look at making a wooden staircase with your own hands with clear step-by-step instructions in more detail. The process includes two main stages: design and installation.
Processing of the finished product
After the entire structure has been assembled, it is necessary to treat the wood with special means to protect it from insects, rot, etc.
Ideally, processing should be done on the structure in disassembled form.
In order to harmoniously fit the staircase into the interior of the room, it is necessary to use a varnish coating. It is also possible to tint the desired shade. To do this, you can use stain or colored varnish.
The painting process includes three stages: sanding, priming and varnishing.
Calculations of staircase dimensions
Before you start designing, you need to make accurate calculations, draw a diagram and put all the data on it. If you are not sure of the correctness of the calculations, then it is better to entrust the work to professionals who will make a competent drawing, which will allow you to carry out the installation step by step without errors.
Total height of the stairs
The height can be determined by measuring the distance from the floor of the first to the second floor, taking into account the thickness of the ceiling. For example, if on the 1st floor the ceiling height is 2700 mm, and the thickness of the interfloor ceilings is 300 mm. As a result, the total height will be equal to 3000 mm.
If there is no finished floor, then its dimensions need to be approximate.
Number of steps
If the height of the staircase and riser are known, the number of steps in the structure can be determined. To do this, you need to divide one indicator by the second. For example, with a total staircase height of 3000 mm and a riser height of 175 mm, the calculation will be as follows: 3000: 175 = 171 mm.
After this, you need to round the value, the result will be 170 mm. The table shows an example of a calculation:
Dependence of the height of the steps on their number at a given floor height
Riser height
According to experts, the optimal riser height should be 150–180 mm, which is actually the size of a human step. This height can be 150–200 mm. Usually the average value according to the standard is 160-170 mm.
The optimal slope range for the stairs is highlighted in green.
Step width
To avoid injuries as a result of incorrectly selected width of steps, you need to calculate it correctly. Based on many years of practice, the width of the part should be in the range of 220 – 400 mm.
To determine a more accurate value, you can use a certain formula. You need to take the average width of a human step (600 - 640 mm) and subtract from it the height of the riser, multiplied by 2, i.e. 640 – 2x175 = 290 mm. This indicator will be optimal for moving.
March width
According to safety rules, for convenient movement of people, the span should be at least 80 cm wide, but it is better to take at least 90 cm. For convenient transportation of furniture, this figure for a private residential building should be 100 - 120 cm.
Plan length of the staircase
To calculate this parameter, you need to multiply the number of steps and the width of the tread. In our example, it will be 29x17 = 493 cm. That is, the staircase is quite long and when constructing one flight, a room of at least 6 meters will be required. In a small log house or country house, you will need to make 2 flights with a 90 or 180 degree turn.
A platform is installed between the flights or turning steps are installed. If you can’t perform the calculation yourself, you can use the special program presented below, which will clearly reflect the localization of the staircase parts.
Ceiling opening size
When building a staircase from solid wood, you need to remember to calculate the ceiling opening so that you don’t have to bend over when going up. This indicator will depend on the slope, which affects the ease of movement and is selected individually.
A slope of 23-36 degrees is considered optimal, but often it is not possible to maintain the required angle due to the small area of the room (the steeper the slope, the less area it will occupy).
The size of the opening in the ceiling area will depend on the angle of the flight of stairs. So, for a folding structure, a small opening will be required, and for a larger slope, a more significant one will be required (up to 2 m).
The size of the opening in the ceiling is determined based on the minimum permissible value for human passage
Stringer length
To determine the length of the stringer, the Pythagorean formula is used: (length of the staircase in plan)²+ (height of the staircase)²= (length of the stringer)².
Determining the length of the stringer
That is, with a length of 493 cm and a height of 300 cm, we get the following: L = √ (4932 + 3002) = 577 cm (the indicator is taken with a margin of 580 cm).
Online calculator for calculation
For your convenience, you can use a convenient and visual online calculator for calculating wooden stairs.
Building codes
During construction work, any structure must meet certain standards.
The same is the case with the stairs. It must be strong to withstand human loads, and safe so as not to be injured when moving.
And also, it should provide convenient and comfortable movement to the required floor of the building.
You must make the steps with certain parameters, since a narrow step will interfere with the comfortable placement of the foot, which can cause injuries. If the step is very high, then it is inconvenient to step from one to another.
Therefore, such a project must be approached according to the rules, everything must be accurately calculated and defined in the drawings.
Material selection
After all the calculations have been completed, you need to purchase materials. This will require boards of different lengths and densities: for steps the thickness is 3-4 cm; for risers – 2-2.5 cm; for a bowstring or stringer, the thickness is 5 cm and the height is 150-250 mm. It is better to buy ready-made handrails and balusters, since their production will require a lathe and timber measuring 10x10, 15x15 cm. To fix the components, you will need screws and nails, as well as metal corners for reinforcement.
Manufacturing of parts and installation of stairs
The installation technology includes the manufacture and installation of all elements of the staircase structure in accordance with the drawing.
Assembling bowstrings or stringers
On the prepared boards you need to mark the length and saw off the excess. On the block, using a square, mark the height of the riser and the width of the tread with a decrease of 2-4 cm.
Marking a solid stringer
Option for making a stringer with fillies
Assembling a bowstring with stiffeners
The notches for the steps are cut out with a jigsaw or saw. Next, place the workpiece at the installation site so that the lower edge rests against the floor, and the upper edge against the ceiling. The cuts under the steps should be horizontal, without “blockages”. After this, it is recommended to sand the surface of the block and perform milling, rounding the outer edges.
For optimal rigidity, sometimes 2, 3 or 4 stringers may be required, the number of which is selected depending on the width of the stairs. Sometimes it’s easier to order a ready-made supporting frame, which will include all the elements with cutouts, designated by numbers for joining in accordance with the diagram.
Installation of steps and risers
The risers are mounted in the prepared cuts of the stringer, leveled and sanded. Fastening is done using self-tapping screws, which can then be puttied or covered with finishing material.
Methods for installing steps on a stringer
Options for attaching steps to the string
After fixing the risers, pre-milled steps are installed, the length of which should exceed the distance between the pair of outer stringers by 1-2 cm. The width of the elements should be 2-3 cm larger than the comb protrusion. The steps are fastened to the risers and stringers using self-tapping screws, the heads of which must be recessed into the wood.
Attaching the stringer to the upper ceiling. Methods of connecting staircase elements.
Attaching the stringer to the floor
Installation of fences
You can give the structure a complete look with the help of auxiliary parts. For this, carved, straight, figured wooden and metal fences can be used.
Fencing fastening scheme
Installing posts with balusters is considered a complex task, requiring precise markings and adjustments. In the step, the hole for the dowel is marked at a distance from the edge equal to ½ the width of the base of the baluster. Then holes are made on the steps and dowels are glued into them (they should protrude 1-1.5 cm from the surface).
Fastening balusters to dowels
After this, you need to make holes in the base of the posts and balusters according to the diameter of the dowel and coat them with glue. All elements are mounted on dowels with vertical level adjustment. Next, prepare the handrails by cutting the edges at the desired angle and milling them from the bottom. To connect to the supports, holes are drilled at the edge of the element. The handrail is installed on a dowel glued into the support post.
Fastening balusters with railings
Next, the balusters are coated with glue, and handrails are placed on top of them in the groove. And although fixation into the groove is quite reliable, it is recommended to fix the joint with thin self-tapping screws.
After the glue has dried, the stairs must be coated with an antiseptic primer, then the surface is treated with transparent varnish or paint. You can install a decorative plinth. In a spiral staircase, you can design it with an axial support in the form of a log or beam, or install a bent string to support the steps. The price of such a design will be high, since viscous flexible wood is used in production, but the final effect is worth it.
Assembly steps
- First, a trial assembly is carried out with your own hands to eliminate possible defects in the stairs;
- After final fitting, the wooden parts are treated with a special antiseptic solution to protect the wood from damage by fungus and mold;
- The ends of the steps and the inner surface of the grooves are coated with glue and tightly fastened, as shown in the photo;
- To increase the level of reliability, the steps are additionally fixed with screws on the outside. In order not to spoil the aesthetic appearance of the stairs, it is better to recess the heads of the screws into the beam by 5-8 mm, and fill the resulting recesses with putty;
- Then the staircase undergoes finishing treatment - varnish or paint.
Let's sum it up
There are many design options for lifting products and materials used to equip them. The steps of the stairs, which are installed on a bowstring, look especially beautiful. And thanks to modern technologies, this design has become much stronger and stronger, which makes it possible to extend the service life of such a structure.
The width of stairs recommended by professionals in individual houses is 1300±200 mm.