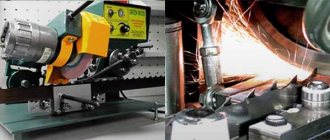
Any construction cannot be done without a circular saw. When performing various operations, you have to make cuts and cuts. With the help of a circular saw, it becomes possible to cut any tree with high speed and high quality. With constant use of such a device, the cutting tool becomes dull and the productivity of the operation decreases. Sharpening circular saws becomes the most important operation.
Types of discs and teeth, as well as features of their restoration
The teeth of the disk are made of a specialized alloy of tungsten and cobalt (this is evidenced by the markings on the “front” side of the disk - VK, VK6, etc.).
Important! The durability of a disc depends not only on the alloy, but also on the amount and correctness of the work performed.
The tooth has the following geometric planes:
- Front;
- Rear;
- Side – two auxiliary faces.
When geometric planes intersect, two working (cutting) edges arise:
- Home.
- Auxiliary.
Geometric tooth shape:
- Direct . With their help, wooden sheet material is sawn in the longitudinal direction.
- Trapezoidal . This shape ensures long sharpening when working with wood of different hardnesses.
- Beveled . The main or auxiliary edge has an angular bevel, which allows the disk to cut not only into a homogeneous wood structure, but also into laminated chipboards and fiberboards. In addition, the “beveled tooth” can cut plastic.
- Conical . A universal shape that allows for longitudinal and transverse cutting. This form has one drawback, which is the rapid loss of the sharpness of the working edge.
Marking
As you can see in the picture, the disc markings can tell you about many technical characteristics. But there is a dependence that should not be neglected: the shape of the teeth directly affects the ability to work with a specific material.
The classification developed by representatives of the GASS divides discs into the following categories based on tooth shape :
GK and GS:p alternately beveled . Suitable for processing all types of wood and “clean” chipboards , without plywood and plastic coatings.
GM : direct . They can only cope with cutting soft wood.
GT : trapezoidal . They are useful in cases where you need to cut MDF or chipboard with lamination.
GR : conical . Cuts multi-layer coatings with double lamination.
GA : trapezoidal and straight . Same features as GT .
laser markings to high-quality saw blades . If the parameters are “written” with ordinary paint , it means that we are looking at an economy-class product that will quickly become unusable.
What is the difference between turning a stationary machine and a hand-held circular saw?
There is no difference in the teeth that are used on a hand-held circular saw or on a stationary machine - their geometry and production capabilities are identical. There are differences only in the diameter of the circle of the disk itself and its thickness: the dimensions of the disks of stationary circular saws are much larger.
This is explained by the volume of continuous production and the need to cut large-sized wooden material, such as logs and beams. Manual circular saws, in turn, are used to work with finished sheet or other prepared material.
If you do not promptly monitor the sharpness of the incisors (an alternative name for the teeth of the disk), you can reach a condition in which sharpening or restoration will be impossible. This applies equally to stationary and hand saws.
It should be said that stationary saws have specific maintenance and inspection schedules, while hand saws are inspected only at the initiative of the owners.
Professional equipment from thousand to 1.5 million rubles
Professional sharpening machines are intended for use in repair shops of large sawmills or service companies specializing in working with such tools. All of them are equipped with industrial controllers with the ability to select a processing program for a specific saw blade model.
| № | Model | Max. diameter (mm) | Drive Power (W) | Weight, kg) | Control type | Price, rub.) |
| 1 | MF1263 | 630 | 300 | 260 | machine | 165 000 |
| 2 | Unimac 600A 288,000 | 630 | 300 | 250 | automatic | 288 000 |
| 3 | GRIGGIO GA U5 | 400 | 560 | 115 | automatic | 451 000 |
| 4 | OS-2M | 1500 | 1 100 | 270 | automatic | 525 000 |
| 5 | OTOMAT-96 | 750 | 1 000 | 850 | machine | 1 500 000 |
How to determine the need for sharpening, the degree of wear and decide whether to sharpen or throw away
The working surface of the disk is the teeth-cutters of a certain cutting configuration. Since the disk is a consumable element of the saw, with the amount of work performed, the cutting characteristics of the teeth decrease, and sharpening becomes unsatisfactory.
The following factors indicate that cutters require prompt sharpening:
- It is necessary to increase the pressure of the disk on the surface of the wood to cut and create a cut.
- Smoke appears from under the protective casing and the smell of burning wood is felt.
- The protective cover gets very hot.
- Small sawdust.
Important! The smell of burning indicates that the teeth are not sawing wood, but cutting through it. This leads to an even greater deterioration in the quality of the incisors.
Due to these factors, the following negative consequences occur for a hand-held circular saw:
- Productivity decreases.
- Electricity consumption increases.
- The load on the electric motor and gearbox increases.
This will ultimately lead to device failure.
Main characteristics
Devices for sharpening circular saws on wood are usually equipped with wheels. These circles can differ significantly from each other in several characteristics:
- by diameter (varies from 12 to 250 mm);
- the material from which the abrasive wheels are made (this could be, for example, CBN or silicon carbide, in some cases diamond coating is also used);
- thickness (it can range from 16 to 40 millimeters);
- sizes of mounting holes (standard diameters of such holes today are 16, 20 and 32 mm).
Almost all modern sharpening machines have an electric drive. The sharpening performance will directly depend on its power. Low-power household models can function uninterruptedly for up to 20 minutes, then they must be turned off so that they can rest and cool down. But professional sharpening units can work up to eight hours with two short breaks of half an hour. Moreover, here the main working element may not be the abrasive wheel, but the so-called sanding belt.
Sharpening angle for woodworking
The cutters have a working surface that is sharpened at a certain angle. The formation of the angle depends on the material the blade is working with, as well as the performance requirements.
Circular saws are equipped with discs that allow you to cut in one direction or with a reverse movement. For discs with beveled cutters, reverse operation is excluded.
In engineering terminology, the sharpening angle of a cutter is the change in tooth configuration to ensure effective performance when processing wood with the working (cutting) edge of the tooth.
Regardless of how sharpening is performed: manually or on a special machine, the following parameters should be adhered to:
- When cutting wood longitudinally, when its fibers are located lengthwise, a range from 15 to 25 degrees is considered satisfactory.
- For cross cutting, a range of 5 to 10 degrees is relevant.
Important! An angle of 15 degrees is considered universal and is used for any cuts.
In order to effectively sharpen the teeth of circular saw blades, it is necessary to know and take into account another important factor - the density of the surface being processed. Tooth sharpness increases with the softness of the wood and decreases when working with hard wood.
Methods for processing disc blades
To shape the cutting edge, any sharpening machine is suitable where the design of the equipment is not of great importance .
Of course, the sharpening angles of disk plates with carbide tips are obtained more accurately using specialized equipment. However, its cost is very high, so a conventional grinding machine is used, which has the ability to change the inclination of the corundum disk. To sharpen a circular disk yourself, you must strictly fulfill several basic conditions:
- Usually the top edge is subject to deformation. Sometimes the rounding of the edges reaches 0.3 mm. Therefore, sharpening starts from the top.
- Processing is carried out taking into account the leading edge and its rear part.
- The operation is repeated at least 25 times. The thickness of the metal being removed should not be more than 0.05-0.15 mm.
- The quality of processing must be exactly the same over the entire surface being processed.
- After sharpening is completed, it can be fine-tuned manually using fine-grain sandpaper.
Sharpening angles for metal work
Circular saws are used for cutting non-ferrous metals due to the soft texture of the material. The most commonly processed aluminum profile.
Hard metals such as iron and cast iron can only be sawed with a grinder (angle grinder).
To work with metal, discs with a specific tooth configuration and a special sharpening angle are used.
The sharpening angle varies from 30 to 45 degrees, while the cutting edge has a wedge, which cores the metal surface upon initial contact.
Types of saws
If the disk is properly sharpened and the teeth are set according to the pattern, then it can process the workpiece in any direction relative to the wood fibers.
There are these types of tools:
- saw with carbide blades;
- discs made of solid metal;
- discs with teeth treated with hard material;
- discs with heavy-duty soldered teeth.
Hardwoods are processed with discs that have special grooves. Technological breaks prevent tool deformation and prevent it from overheating during the production cycle. Vibration and background noise are also significantly reduced, and the quality of the line formed by the cut is improved. The saw has teeth that are machined at a certain angle, each tooth has several cutting edges.
There is a main edge, additional ones are mated to it, and intersecting planes are formed:
- A;
- IN;
- WITH.
The planes themselves also vary in different mates.
The teeth can be straight, they are usually used for preliminary cutting of material. These teeth provide a low level cut. However, the productivity of such teeth is quite high.
Beveled teeth provide a more precise line and are suitable for cutting materials such as:
- plywood;
- PVC sheets;
- chipboard;
- Fiberboard.
The teeth ensure an even cut without the material crumbling.
There are also discs in which there is a bevel at the leading edge of the cutter, and there is also a bevel with the trailing edge. Options for alternating different teeth with different bevels are possible. Such tricks ensure a clean cut, but you should remember: the denser the material, the faster such teeth become dull.
Trapezoidal tooth – this tooth configuration ensures long tool life. Often a complex design is used, when trapezoidal and straight teeth alternate. The latter make the primary cut, which allows straight-shaped teeth to “polish” the cut.
Cone-shaped tooth - these teeth are auxiliary and are designed to work with materials that have a laminated surface. They ensure correct cutting without the formation of any chips.
Sickle-shaped tooth - in this case, the teeth are bent, which makes it possible to accurately cut the material across the wood fibers.
Methods for sharpening a disc for woodworking
The following methods ensure efficient and safe sharpening of circular saws.
Grinder - step by step instructions
Special machines for sharpening circular saw blades are expensive and require certain skills to operate, so angle grinders, that is, “grinders,” are an effective and affordable alternative.
Important! It is strictly forbidden to hold the disc in your hands while sharpening. First of all, it's dangerous; secondly, the required sharpening values will not be achieved.
To fix the disc, a special smooth stand is used, which is designed taking into account the fact that the tooth must be perpendicular to the grinder disc and have a minimum deviation from it.
For sharpening using a grinder, the following algorithm is used:
- The grinder is equipped with a grinding disc, and the disc to be sharpened is attached to the platform.
- The grinder is held by hands or using a holding device.
- The cutting edge of the circular tooth is processed with a grinder. In this case, a light, uniform movement is performed.
Evidence that the edge has been sharpened will be a visual update of the edge - it will no longer be darkened.
It is forbidden to turn on the grinder if the disc is placed in the throat between the teeth of the disc being sharpened.
File
If a file or needle file is used as a tool, then all sharpening activities are the same as when using an angle grinder. In addition, to maintain the sharpening angle, a special template is required, which is used as a guide plane between the tooth and the file.
But at the same time, the work will take much longer, since circular saws use carbide attachments.
Needles are used to “edit” a tooth, that is, to briefly restore the productive geometry of the tooth. During the work process, “editing” requires periodic updating much more often than high-quality sharpening.
Special machine
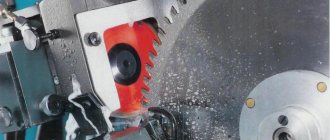
Machines for turning circular saw cutters are complex engineering and technical devices, which, in addition to mechanisms, are also equipped with automatic electronics.
These machines allow you to perform the most effective restoration of cutting edges in compliance with all the necessary configurations. The efficiency of the machines is explained by the following criteria:
- Possibility of automating the sharpening process.
- Saving sharpening angle parameters for each cutter.
- All cutters are sharpened identically with minimal error.
- Possibility of complete restoration and restoration.
For sharpening on a machine, the saw blade is placed in a special support and secured.
The sharpening parameters are selected, which are provided by special mechanisms for tilting the disc being sharpened or tilting the sharpening disc in the machine.
The disc to be sharpened is placed in the working area of the device.
The machine starts up and sharpening is carried out automatically.
Homemade machine
To operate effectively, homemade machines must include the following components:
- Angle grinder (grinder) as a direct sharpening device.
- Support for securing the saw blade of a circular saw.
- Mechanisms to allow the support to tilt to adjust the sharpening configuration.
- The entire mechanism is fixed to a frame, which can be a channel or an I-beam.
The operating process is similar to using the original sharpening machine with the only difference - the circular blade is fed to the working area of the device manually.
Home processing of toothed blades
To process a circular saw, it is not at all necessary to have a special machine for sharpening circular saws with your own hands. To secure the canvas in a certain position, you can use a flat stand, which has several nuances:
- The surface should be flush with the center of the sharpening wheel.
- The sharpening plane should be at an angle of 90 degrees relative to the gear wheel.
- To create different inclinations, the device must have a swivel joint.
To select the desired angle, make a mark with a colored marker. The device must be installed in a powerful vice. Even the slightest movement of the special stand is not allowed.
Originally posted 2018-03-28 15:29:34.
In what cases is it better to take it to a workshop?
It is best to take the disk to a repair shop for restoration in the following cases:
- Cascading change in tooth configuration, that is, the teeth have different cutting edge angles. This phenomenon occurs if the nozzle is “walked” over a stone.
- Bevel or bend of a cutter.
- Chipping of the cutter.
- Wear of the pobedite tip on the cutter.
If the disc itself is cracked or bent, it is best to recycle it.
Application of the machine
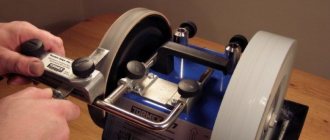
The simplest machine for working at home is a motor with an abrasive. The wheels can be diamond, CBN or silicon carbide.
The tooth to be sharpened is located on the plane so as to be perpendicular to the blade. After turning on the engine, the blade is brought to the circle and pressed against it with a tooth. The layer of metal being removed is regulated by the pressing force. Having finished working with one tooth, the next one is approached using the same method. And so on in a circle until the end.
For the purpose of universalization, the stand is being modernized. The front part is made movable, and a pair of bolts are screwed into the rear. With their help you can adjust the tilt of the canvas. It becomes possible to sharpen the front and back planes of an oblique tooth.
The problem of maintaining the same front and rear sharpening angles remains. To do this, it is necessary to fix the blade relative to the center of the abrasive wheel. To do this, the disk is inserted into a special mandrel, and a groove is made in the stand for it. The required sharpening angle is maintained by moving the mandrel along the groove. If the diameter of the disks is different, then it must be possible to move the engine or stand with a groove.
Another way is to install stops that will fix the desired position of the disk.
How to sharpen a circular saw with pobedit tips with your own hands
Due to their high strength and hardness, pobedit-tipped cutters can only be sharpened with diamond-coated attachments.
Important! Methods of sharpening a circular saw blade using a grinder (also known as an angle grinder) or files are excluded, since pobedite soldering does not tolerate even the slightest deviation in tooth geometry.
The diamond disk of the machine must adhere evenly and over the entire surface to the cutter. Maintaining a uniform sharpening angle is also mandatory. These requirements are achievable only when using special sharpening devices.
Expert advice
Experience is a useful thing, thanks to which you can avoid a number of mistakes typical for beginners. Therefore, paying attention to the advice of experts is very useful if you want to achieve a positive result for yourself when turning a circular saw.
- Always use safety glasses. For some reason, many people ignore this rule, which is why the masters themselves then suffer. Therefore, before you start sharpening, be sure to wear all the necessary protective equipment;
- Do not attempt to remove more metal than required. Remove just enough to remove all existing cracks, burrs and irregularities;
- During turning, be sure to keep the disk in a constant position;
- If the disc has not been sharpened for a long time, you will have to remove a larger layer of metal;
- Keep all teeth identical in shape and height.
Initially, it seems that sharpening is a technologically complex process. But with a little experience, you will be able to sharpen circular saw blades easily.
How to make a homemade sharpening device?
As instructions for the manufacture of a device for sharpening circular saws, we will present a list of structural elements, drawings with their placement and regular place in the device.
The device must include the following structural elements.
- An electric motor that is mounted on a stand so that a grinding disc can be mounted on its shaft (an alternative is an angle grinder).
- A stand that allows you to feed the cutters to the grinding surface in one plane and on the same axis.
- Adjusting screws to equip the platform with the ability to change the parameters of the angle of inclination in the vertical and horizontal axes.
- Clamps for securing the circular blade and the platform on which it is placed.
- Device for feeding the engine back and forth.
- Protective casing for rotating engine elements.
The article examined everything that could be useful for sharpening a circular saw blade; this data is quite enough to carry out the procedure with your own hands and get a good result. If you are confident in your abilities, then go ahead, try, sharpen, it is advisable to practice on an old disk for the first time. Otherwise, contact a workshop, they will sharpen the disc quickly and efficiently, using special equipment, for a reasonable fee.
Manufacturing
Step-by-step instructions for making a homemade machine for sharpening circular saws:
- Manufacturing a frame from a metal sheet, corners. It must be sustainable.
- Install the engine and secure it to the base.
- Install the caliper. It is advisable to order a finished part from professionals.
- Install a mechanism for setting different angles of the abrasive wheel.
- Make protective shields from metal or plastic sheets. Attach to the machine.
- Connect the wires to the start buttons, bring out the cable to connect to the network.
After carrying out the manipulations, all that remains is to check the reliability of fastening of the parts and perform a starting start. After the first sharpening on a homemade installation, you need to calibrate the position of the abrasive wheel to set the required angle.
Any equipment becomes dull over time. The teeth of a circular saw without sharpening will not only spoil the material being cut, but can also be destroyed during the work process. To avoid problems, it is necessary to sharpen the cutting parts in a timely manner. For this, special equipment is used that you can assemble yourself.
Kitchen knife made from a circular disk
Greetings to those who love to craft, I offer for consideration a high-quality kitchen knife that any cook will be happy with. The starting material for the knife was a circular saw blade. The blade was hardened, the blade was sharpened so much that the knife easily cuts paper. The manufacturing process is not difficult, but you will have a lot of sanding work to do, so it will be useful to have a belt sander. If the project interests you, I suggest you study it in more detail!
Materials and tools used by the author:
List of materials: - saw blade (better than the old model); - wood for the handle; - brass, textolite or G10 for the bolster; - brass rod for the pin; - epoxy glue; - acid for etching; - heat-resistant cement.
Step one. Cutting out the main profile First you need to select high-quality source material. The author used a saw blade for such purposes. Before making a knife, it is important to check the steel for hardening, since in modern disks the steel may be bad and the knife will turn out unsuccessful. Well, then we draw the desired profile of the knife on the disk with a marker and cut it out. For cutting, the author used an ordinary grinder.
The easiest way to sharpen the knives of a jointer or planer. How to sharpen jointer knives.
Step three. Bevels We begin to form bevels on the knife, but for this we first make markings. It is important for us to draw a line along the blade, which, after grinding, will become the blade itself. This can be done with a special device, or using a drill of the same diameter as the thickness of the workpiece. And so that the fishing line is clearly visible, we paint over the metal with a marker.
Next, you can start sanding, in this case we will need a belt sander. The author holds the workpiece with his hands, and to prevent the steel from overheating, we wet the blade in water from time to time. When working, make sure that the bevels are symmetrical. The blade after work must have a thickness of at least 2 mm, otherwise the steel will burn out during hardening.
Step four. Heat treatment Let's start hardening, the author decided to use a hamon line on the blade, with it the blade looks unique. To obtain such a mowing line, we need heat-resistant cement; we coat the upper part of the knife with it. Where this coating is, there the steel will then differ in color.
That's all, now heat the blade until it glows red and lower it into the oil. To avoid unpleasant surprises such as cracks and deformations, the oil must first be heated. After hardening, we check the blade with a file; there should be no scratches.
After hardening, we must temper the steel to give it spring properties. As a result, the blade will be able to withstand high bending loads; it will also break if thrown onto concrete. We release the blade in the oven, the temperature should be around 200°C. As for the time, this is usually about 2 hours; you need to ensure that the blade is covered with a straw-colored coating, this will indicate the tempering of the steel.
Step five. Pickling To obtain the hamon mowing line, we need to pickle the steel. To begin, sand the blade very carefully until it shines. The steel must also be well degreased, otherwise the reagent will not react with the steel. We lower the blade into the acid for a while and watch the process, waiting for the desired result.
After etching, treat the blade with soda or another reagent to neutralize the acid. Then the knife is washed under running water and now we have a wonderful blade ready.
Step six. Blank for a handle To make a handle, we will need a block of beautiful wood, as well as G10 material or sheet brass, if desired, to make a bolster. First, we make a bolster, cut off a piece of the required size and make a slotted hole for the shank of the knife. If you don’t have a router, you can use a drill and flat files.
Also, a slotted hole must be drilled in the block, from which the handle will then be made. You can drill a series of holes and then combine them. That's all, now we glue all these parts onto the shank of the knife. We use epoxy resin as glue. The steel must be well degreased for high-quality gluing. We clamp the whole thing with a clamp and leave it to dry.
Step seven. Forming a handle When the glue is completely dry, you can now set the desired profile for the handle. We cut off the excess on a band cutting machine or with a hand jigsaw. Next, we refine the handle with wood files and sandpaper. The wood must be brought to a perfectly smooth state, so the handle will be pleasant to the touch, and you will also get an expressive wood pattern.
When the handle is ready, saturate it with wood oil or wax. This impregnation will perfectly protect the wood from moisture, which is important for a kitchen knife. Oil also emphasizes the natural beauty of wood.
Step eight. Completion That's all, the knife is ready, all that remains is to sharpen . For such purposes, it is very convenient to use sharpening stones or a manual machine based on sharpening stones. The author sharpened the knife to the point of a blade; it easily cuts paper. Of course, such a knife will cut greens and other products perfectly.
In general, if the knife is not left to sour in the sink, it will last quite a long time. At this point the project can be considered successfully completed, I hope you liked it. Good luck and creative inspiration if you decide to do this again. Don't forget to share your ideas and crafts with us!
Sources:
https://kakpravilno-sdelat.ru/kak-pravilno-tochit/kak-pravilno-razvesti-i-natochit-disk-cirkuljarki.html https://moiinstrumenty.ru/rasxodnyj/zatochka-fugovalnyx-nozhei-svoimi-rukami .html https://elton-zoloto.ru/raznoe/kak-tochit-nozhi-na-fuganke.html https://usamodelkina.ru/14469-kuhonnyj-nozh-iz-diska-ot-cirkuljarki.html
Carbide tooth geometry
The teeth of saws, both solid ones made of high-speed steel and those equipped with carbide tips, have a specific shape. Some have the shape of an isosceles triangle, others are crescent-shaped, and others are generally made like a trapezoid. This tooth shape meets several objectives.
Firstly, each mold has several surfaces that form the cutting edges. Secondly, the type depends on the purpose of the tool: a small, even tooth is suitable for cutting thin sheet materials, and a trapezoid is suitable for working with hard wood. Thirdly, the duration of use depends on the shape: the trapezoid lasts longer than the straight or crescent type.
For household use the following discs are usually used:
- Straight teeth - for rough cutting of material. The main advantage is fast cutting of the material.
- Inclined and crescent teeth - designed for working with thin materials.
- Beveled teeth are used for finishing cuts of material.
- Trapezoidal type - saws for long-term work with materials of different densities.
- Conical teeth are suitable for finishing work on materials with a smooth, glossy finish.
As you can see, it is very difficult to sharpen such discs yourself without knowledge of sharpening technologies. The most difficult thing is to maintain the “correct” angle, so that both the geometry of the cutting edge and the shape of the tooth itself are achieved on all teeth.
Improper sharpening of a circular saw blade, at best, results in an uneven cut with crooked edges. And in the worst case, due to the beating that appears, the electric saw itself will have to be repaired.
Carbide tips requiring sharpening and a new saw

