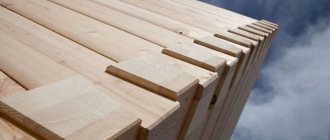
For many, a good-quality wooden house is the ideal embodiment of their dream of cozy and environmentally friendly housing. Currently, the optimal building material for such a house is profiled timber, which allows you to build absolutely smooth and beautiful walls that do not require additional decorative finishing.
However, due to the fairly high cost of this material, not everyone can afford it, so many are trying to solve this problem differently - for example, making profiled timber with their own hands.
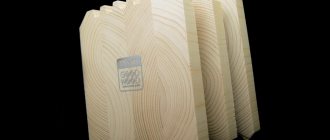
Photos of industrial designs with given dimensions
Before considering various options and methods of self-production, it would be a good idea to find out what advantages this can provide and how profitable it is.
Peculiarities
Currently, profiled timber is used literally everywhere. It is used to build both inexpensive and luxury homes, outbuildings and other structures of similar types. Many people use timber to make homemade eco-friendly furniture. All this indicates the relevance of the material under consideration and its relevance. But few users know that it is quite possible to make timber with your own hands.
The timber is made using special tools. Such work cannot be called too complex or inaccessible, which is why many people resort to them.
There are several most common reasons why users decide to make high-quality timber on their own.
- At the head of the “table” is the financial issue. In fact, in many cases, users can save a lot of money by making the timber themselves rather than buying it ready-made. But at the same time, we must not forget about the time factor - you will have to spend some time making a homemade product.
- Often people need timber that has dimensions that are far from standard. Such materials can be very difficult (or impossible) to find on sale. In such a situation, the solution to the problem can only be the independent production of such an environmentally friendly material with suitable dimensional parameters.
- The reason for making timber yourself may be the presence of a large number of leftovers, for example, edged boards, which are no longer profitable to put up for sale. From such components you can make high-quality timber and put it into use.
- If you really need powerful and strong load-bearing beams, then timber made from thick boards will be a good solution. The results are very good structures that do not crack, twist, rot or mold.
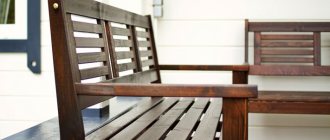
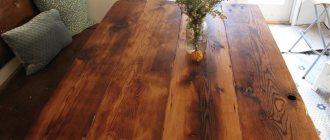
It should be taken into account that walls built from homemade profiled timber can be left without auxiliary finishing. Without paint, wallpaper and other materials, such bases look no less impressive and attractive.
There are several different ways in which users can make high-quality timber with their own hands. Each home master chooses the optimal technology for himself.
Profiled timber
What are the benefits of making it yourself?
Note. Of course, it will take a lot of time to process it yourself, but, for example, budding - profiled timber is offered without intermediaries, and you save a lot of time.
But don't forget that all these savings come at a cost!
List of reasons for self-production:
- Of course, the most important reason is the price - if you make such products yourself, the savings will be up to 5,000 rubles per cubic meter of material.
- You can choose the shape of the wooden profile yourself, taking into account that it is not blown through. Plus, you will do it according to your needs.
- In this case, the insulation will be hidden in the grooves, so the walls will not need additional finishing.
- The crowns will fit most accurately, therefore, the fit will be tighter.
Profile types
When choosing the type of profile for yourself, you first need to take into account your professionalism and what kind of cutters you have for profiling the timber. It's best to stick with the simplest options so that you don't need a lot of different tools and don't have to do the same amount of calculations. To determine this, you can use GOST 9330-76, with which you can make all the calculations most correctly.
Basically, home equipment for profiled timber is quite simple and craftsmen prefer such types of profiling as:
- through a block;
- through a triangle.
It should not be forgotten that GOST always indicates the depth and width of the groove in accordance with the cross-section of the timber being processed.
Machine for the production of profiled timber SPB-200A
This technique is used for processing and profiling the bar on 4 sides. This version of the machine is intended for finishing material with natural moisture or dry workpieces measuring 200x250 mm. Suitable for both small private farms and large sawmills. The machine is small in size, which makes it possible to place it on an area of 11 meters.
Important properties of the machine can be presented in the form of a table: Characteristic feature Value Number of cutters 2 pcs. The frequency at which the cutter rotates is 4580 rpm. The required electrical power is 7.5x2 kW. Machine size 10500x1300x900. Weighs 760 kilograms.
Advantages of this machine model:
- Calibrated guide frame.
- Easy replacement of one attachment for another.
- Not very difficult to operate and maintain.
- Low cost.
The average cost in the Russian Federation is 150-165 thousand rubles. The operation of such a machine can be seen in the proposed video:
Description of methods for self-production of profiled timber
Depending on the experience and technical equipment of the home workshop, several options can be distinguished according to their level of complexity.
Making timber from boards
If there is practically no woodworking equipment available, then the easiest way out would be to make timber from boards.
- For these purposes, the “fifty board” is best suited, having suitable dimensions in length and width.
- First of all, you need to build a slipway from available materials, on which all the work will be performed;
- Then special templates are made according to which the boards will be laid, so as not to measure the dimensions of the tenon and groove of the future beam every time and so that all products are the same;
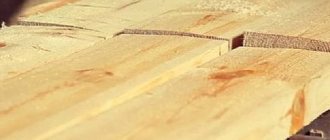
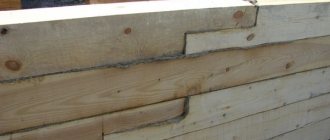
- To produce one beam, you will need three boards, which are stacked on top of each other in length, with the middle board being laid with an offset specified according to the template. As a result of this overlap of boards, a profile is formed in the cross section, where a tenon is formed on one side and a groove on the opposite side;
- After the boards are laid properly, all that remains is to securely fasten them together. The simplest thing is to nail them together on both sides with ordinary nails; for a more reliable connection, you can use metal screws, but in this case you can’t do without a screwdriver;
- Also, to give strength, you can glue the timber with your own hands, for which, before laying the boards on top of each other, they are thoroughly coated with glue. In any case, after this they must be fastened with nails or self-tapping screws, since at home it is very difficult to achieve perfectly strong bonding of such surfaces. The result will be a simplified version of laminated veneer lumber.
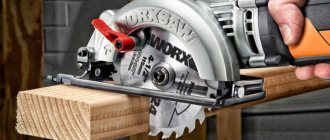
A simple way to modify a rectangular beam
In this case, profiling timber with your own hands requires at least a hand-held circular saw, but otherwise it will not cause any difficulties even for a novice carpenter.
- Here you will also need to construct a stable slipway or workbench for the entire length of the workpiece being processed;
- In this case, the main goal will be to cut identical V-shaped grooves on opposite sides of the rectangular workpiece;
- To accurately mark future grooves, it is necessary to make a template from a block with the width of the future groove, which will be installed along the entire length of the beam exactly in the center. Using the template, two parallel lines are drawn along which the cuts will be made;
- Along the control lines, using a hand-held circular saw set at an angle of 45?, an incision is made along the entire length from opposite sides to a given depth. The result should be a smooth V-shaped groove.
Now, if you place two beams on top of each other with the sides where the grooves are cut, then along the entire length a diamond-shaped cavity with a square cross-section will be formed, into which a standard 50×50 beam should be laid, the dimensions of which should be used to make the grooves.
As a result of these simple steps, you can very quickly turn a rectangular wooden blank into a profiled beam. These are the two simplest and most accessible manufacturing methods.
But in any case, before doing anything, it would be a good idea to familiarize yourself with GOST 9330-76, which is called “Basic connections of parts made of wood and wood-based materials.” This document contains all the necessary information to correctly calculate the profile depending on the size of the workpiece.
Profile cutting using a hand router
In this case, the workpiece will be a four-edged rectangular edged beam, and the main working tool will be a powerful hand router.
By the way, you should again calculate how cost-effective this is, because the price of a good tool cannot be small either, and using a low-power and cheap one, you are unlikely to achieve the desired quality of processing, and the time costs will be much higher.
Step-by-step instructions in this case will look like this:
- We build a solid base in the form of a slipway or workbench for the entire length of the workpieces being processed. The support must be stable without play or wobble, and also allow the workpiece to be firmly secured;
- In addition to the router itself, you will also need a set of special milling attachments, the shape and size of which will depend on the complexity of the profile that needs to be selected. With proper experience and high-quality material, you can obtain products as close as possible to industrial designs;
- When working with a milling cutter, it is important to maintain the accuracy of guiding the tool along the intended path. It is desirable that it moves smoothly along stably installed guides, without jerking or lateral play. The quality of the pairing of elements, and, accordingly, such operational parameters of the future home as thermal insulation and wind protection depend on the accuracy of the work;
Important! If you use a high-speed router with sharp cutters, you can do without additional grinding.
The use of this technology allows, in everyday conditions, to cut profiles of varying complexity on timber, which are in no way inferior to industrial designs. There are other profiling methods, but they require more complex self-made technical equipment and equipment.
In the future, regardless of what type of timber will be used for construction, it is important to adhere to the technology, which requires the use of dowels (dowels) to reliably connect the crowns to each other.
VPK340 and VPK beam profiling machine
This complex includes two machines. They both have four horizontal milling heads. The material is profiled using a similar technique on 4 sides. In the machinery mechanism itself, milling heads first process the block vertically and then horizontally. Machines in pairs are used to finish 4 workpieces at once.
Important properties of the machine complex can be viewed in table form: Characteristic feature Value VPK340 Value VPK Number of cutters 4 pcs. 4 things. The frequency at which the cutter rotates 4700 rpm 4750 rpm Required electrical power 2×110 kW 2×75 kW Machine size 13500x11000x1000 14500x11500x1000 Weight 10.4t 14.4t
The advantages of this complex:
- You can finish 4 workpieces in parallel.
- Processes the block from four sides to depth and adjustable height.
- Has good power.
Each machine from the complex costs 100-150 thousand rubles, which means the cost of the complex will be approximately 300 thousand rubles, but since the productivity will also be twice as high, the payback is relatively rapid.
Making dowels
This type of fastener consists of wooden cylindrical elements of a certain diameter, which are driven into pre-drilled holes in beams lying on top of each other, thus additionally fastening them together.
Making dowels for timber with your own hands is not difficult and anyone can do it, however, any business has its own subtleties that you need to know.
- According to the technology, dowels should be made from harder wood species;
- Their diameter should be such that they can be driven into the technological holes with a slight tension. If the fastener is loose in the hole, it is practically useless, and if it is too tight or protrudes above the surface, it can cause problems with settling of the house.
- You can split birch logs of the required length into many square pieces, and then manually trim them to a round shape of the required diameter;
- If you have a wood lathe available, then these elements can be quickly turned;
- Cuttings for shovels and other garden tools that have become unusable can be used as dowels. In this case, you just need to cut them into pieces of the required length.
Advice! You can also use metal pipe scraps of suitable diameter as dowels.
Imitation as a decorative finishing option
Quite often, to create a certain style or interior atmosphere in the interior of a house, imitation timber is used with your own hands. This approach makes it possible to achieve an almost complete visual analogy with real timber and has a number of advantages:
- Imitation can be performed on a surface made of any material;
- Wood consumption is significantly reduced, and, accordingly, financial costs and time for implementation;
- Such finishing can be done after the construction of the house at any time, both inside and outside.
It is quite easy to make a set of decorative elements for such an imitation at home. To do this, you will need a pre-calculated volume of boards with a thickness of at least 50 mm, as well as an electric plane and a sander.
The manufacturing process will be as follows:
- Using a plane, you need to smoothly round the edges of one of the sides of the board, giving it the rounded shape that a beam has;
- Then, using a sander, you should sand everything thoroughly, removing all the blemishes and marks from the plane.
A board processed in this way can very realistically imitate not only timber, beams and ceiling beams. To achieve complete similarity, in the corners where the planes of the walls meet, the boards must be shifted relative to each other by half their width, simulating cutting the corner of a log house.
If desired, such a “timber” can be tinted to resemble valuable wood species, further enhancing the imitation effect.
Reworking a rectangular beam
There is a method that will make it easy to profile a finished rectangular beam. Let's consider what stages it consists of.
In this case, it will be necessary to build a high-quality structure, in the form of a strong, non-shaky slipway or workbench. The length of this structure must correspond to the length of the raw material.
In the work under consideration, the main goal of the master will be to correctly cut the same type of V-shaped grooves. They should be located on opposite sides of the wooden piece.
- To accurately mark the areas with future grooves, you will need to prepare a template from a block, the width of which will correspond to the size of the future groove. This template will need to be installed along the entire length of the main beam, exactly in the center.
- In accordance with the indicators of the template, the master will need to cut 2 parallel lines along which cuts will subsequently be made.
- Along the marked lines, using a circular saw set at an angle of 45 degrees, you will need to make a neat cut along the entire length of the base on opposite sides, to a given depth level. If you cut everything correctly, you will end up with a perfectly straight V-shaped groove.
Machine for profiling timber yourself - step-by-step process
Profiled timber requires high-quality assembly equipment. To know what a machine should consist of, let's look at what functions it should perform:
- Multi-saw processing of timber;
- Four-sided processing of timber: planing and profiling;
- Trimming and marking of profiled timber;
- Inter-crown connection - a cup is cut out.
Previously, 4 separate machines were used for such processing, which significantly complicated and increased the cost of the technology for manufacturing profiled timber. Today, however, one device can do the job.
The forming machine consists of:
- Bed;
- Knife drum;
- Engine;
- Mobile frame with the ability to adjust the processing height;
- Clamps and stops.
Step-by-step manufacturing process of a 150x150 profiling machine:
- The first step is to choose an engine. For our parameters of the finished timber 150X150, we can recommend a Honda gasoline power unit with a volume of 196 cm3. 6.5 hp – 3600 rpm.
- Next, using metal plates, channels and angles, we create a frame structure to mount the motor on top of the machine, which will rotate the knife drum using pulleys. To do this, you can use ready-made machines and take measurements from them.
- the profiled machine will move along the guides using rollers that will be attached to the corners of each side. There should be 4 rollers in total, which we fix at the bottom of the frame structure;
- After this, we proceed to fixing the knife drum parallel to the engine, which will interact using pulleys. It is worth considering that to regulate the height and depth of timber processing (5-10 cm), the knife drum together with the engine must move along a vertical axis. To do this, you can use adjustable stops that can be fixed.
- Next, we need to make a frame (support) on which the beam will be located and the profiling machine will run:
a) it is necessary to measure the length of the timber that will need to be processed, for example, let’s take 6 meters;
b) now we move on to making the frame where the beam will be fixed. It is necessary to make two metal guides 7 meters long. Our processing engine will drive over them. The width of the guides must be selected based on the rollers that you can find for the mobile machine;
6. When the guides are made, they must be fixed together using channels. For this you can use an I-beam or ordinary channels;
7. We set two guides to the width of the machine and begin to fix them with channels in increments of 50-80 cm, depending on the thickness of the guides and the channels themselves;
8. When all the channels are welded, we proceed to welding special square or rectangular plates on them at the same height. Our processed timber will lie on these plates. We place the plates strictly in the center of the channel so that the knife drum is located in the middle of the plates during operation. Every 1-1.5 meters from below we attach special adjustable clamps to the channel; you can use clamps that will securely hold the timber being processed.
9. After the frame is fixed, you can install a frame structure with a knife drum and a motor on it. To process timber, you can use shaped, straight, or semicircular knives to make grooves. To prevent the machine from moving beyond the guide frame, special stops can be welded along the edges.
Useful tips and tricks
If you decide to build high-quality timber with your own hands, then you should take on board some useful tips and recommendations that will allow you to carry out all the work without errors and shortcomings.
Before making a beam using a milling machine, the master must take into account that a high-speed tool with very sharp cutters will avoid the further process of grinding a homemade beam.
- The most convenient way to cut a log to make timber is using a chainsaw equipped with a special frame. Such a device will allow you to correctly cut the workpiece, refusing the services of a sawmill.
- Before starting a chainsaw to cut workpieces, the master must make sure that the tool contains chains intended for longitudinal cutting of wood (the same type of cutting is suitable for dissolving a log - this is the easiest way to dissolve it into boards and slats). Only in this case will the sawing process be simple, fast and of high quality.
- When working with various tools for cutting or sawing wood, it is very important to follow safety precautions. The user must act as carefully, carefully and strictly as possible according to technology. In such work, excessive haste and anxiety can lead to very bad consequences.
- It is most convenient to make timber using high-quality and properly working tools. Excellent quality is demonstrated by branded devices, for example, devices from Makita, Bosch, Dexter. These products are very convenient and effective to use.
- When making timber using a router, we must not forget that a special attachment for such work should be ideal for it. Often craftsmen are faced with the fact that the equipment they just purchased for a router does not fit their tool. Nozzles must be selected in accordance with the specific model of the machine.
- It is strongly recommended to make timber only from high-quality boards or logs. Materials must not show signs of rot, mold or other serious defects. From such raw materials it will not be possible to obtain truly reliable and strong bars that will be used for further construction work.
When making homemade laminated veneer lumber, the prepared wooden layers (boards) should be sewn together using a special glue for woodworking. The composition must be designed for indoor use. It is advisable to find an environmentally friendly adhesive solution.
Making timber yourself is not the fastest process. If a master is afraid to get involved with such work or does not want to waste time, then it makes sense to think about buying ready-made bars. This is the easiest way out.
Using a Circular Saw
The second way to make a connection with your own hands is to use available tools. For example, using a hand-held circular saw. Such a tool costs 2-5 thousand rubles, depending on the manufacturer. The main thing is that it can be cut at a back angle and make a cut with a depth of at least 65 mm.
The advantages of this option:
- Ability to control the accuracy of the cutting depth.
- Easy cutting of a straight and smooth groove.
- Disadvantages of working with a circular saw:
- The cutting depth may not be sufficient.
- It is impossible to clean the groove with this tool.
- Each time you need to readjust the cutting depth.
- Low operating speed.
- Best used for cutting a triangular groove.
Street option
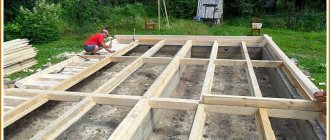
The first stage is design. Some people prefer to implement their own project, while the modern generation most likely uses the Internet - they will type in a search engine the request “video of how to make beams with their own hands” and clearly see all the nuances.
In the private sector there is more freedom of choice in the materials used and the size of the projectile. Some people like the contact of their palms with a wooden surface, while others are guided by the greater reliability and durability of metal structures and therefore the option of making wooden beams with their own hands is not worth it for them (connecting metal parts is much easier).Read here - Do-it-yourself textured plaster: application master class and nuances of using decorative plaster (100 photos)
Second stage of production. At least 6 racks are taken (2 horizontal, size from one to several meters, 4 vertical, slightly more than two meters long) and welded together. The result is a stable four-legged structure.
The handles of the horizontal bars can protrude 20 centimeters beyond the vertical ones, or they can have a closed contour. The legs of the structure are buried at least half a meter into the ground using shovels or a drill, fixed with stones, fragments of bricks, or filled with cement (both options can be used together).
To increase the strength of the structure and a certain supply of material, you can run additional horizontal guides along the bottom of the legs above the ground and weld additional crossbars to the legs of the projectile, which will be more reliably fixed underground.
It is imperative to apply a paint coating to all elements of the beams in order to protect them from the aggressive influence of the upper part of the atmosphere and from contact with wet soil underground.
Check it out here too!
DIY illuminated ceiling: 85 photos of the best options! Types of lighting: spots and features of their connection, LED backlight, diode backlight, “starry sky”Assembling a shower cabin with your own hands: assembling the tray, preparing and installing the walls, installing the portal. All stages of assembly with photos
How to make ventilation with your own hands - we ensure freshness in the house, create comfort yourself (photo + video)
A few important notes
1. Properly manufactured laminated veneer lumber is superior in its structural, mechanical and other parameters to solid timber made from the same wood and with the same dimensions.
2. Modern adhesive compositions for wood, if used correctly, make it possible to obtain an adhesive joint that is stronger than the wood itself. I once wanted to tear off the glued block to the tabletop. The end result was that the block itself split along its length, but at the place of the adhesive connection it did not lag behind one iota.
3. In many cases (including at home in a city apartment), it is possible to make laminated veneer lumber without the use of special expensive tools, if you use purchased parts (floor slats, boards) for its production.
Before moving directly to the manufacturing technology of laminated veneer lumber, let's consider some definitions.
The figure below shows the main parts of laminated veneer lumber and how to connect them. In fact, there are many more connection methods, but the figure shows the easiest ones to make at home. An important condition for timber is the relative position of the annual rings; the lamellas must be glued together in such a way that their relative positions in the manufactured timber are in different directions for adjacent lamellas. In this case, the timber will be least susceptible to warping.
Nuances and features of the work
You need to know that if you correctly make laminated veneer lumber with your own hands, then its parameters will surpass natural ones of the same size. This is achieved due to the fact that strong glue is used and the resulting seam has greater strength than natural wood.
In order to make such a beam with your own hands, you do not need to have special equipment and tools - just purchase ready-made slats or boards. When making laminated veneer lumber, care must be taken to ensure that the annual rings in adjacent lamellas are directed in different directions. This design is least susceptible to warping.
Technology for making laminated veneer lumber at home
Necessary tools (the list of tools, of course, depends on what kind of timber you want to make):
- Hacksaw or two-handed saw
- Clamps
- Planing tools (plane, electric plane, circular saw)
- Milling machine (circular saw with interchangeable cutters), desirable, but not required
- Belt sander, preferable, but not necessary
- Paint brushes, hair brushes, synthetic
- Marking tools (tape measure, steel meter ruler, square, etc.).
Necessary materials:
- Lumber (boards, beams, slats)
- Wood glue or universal
- Solvent 646 (acetone) - for degreasing.
The manufacturing technology of laminated veneer lumber will be discussed using the example of the production of laminated veneer lumber for the manufacture of window frames at home.
Requirements for source material. The lumber used must be dry and healthy. In this case, I used pine and larch timber (100 by 100 mm), which was stored under a canopy, i.e. natural drying.
- We cut the pieces to the required length, with an allowance of 5 cm on each side.
- We select three blanks (lamellas) to make one beam. What is important? Since at the first stage only those edges (sides) of the lamellas that are to be glued and in which the groove will be selected are planed and jointed, it is necessary to determine in advance the relative position of the lamellas in such a way that the pattern of the annual rings is multidirectional. To connect the lamellas I used a dowel connection. After sharpening the glued sides, select a groove for the outer lamellas on one side and two grooves for the middle lamella (on both sides). Based on the dimensions of the grooves on the circular saw, we make blanks for the keys.
- After manufacturing all the parts of the future block, for preliminary assessment and adjustment, we assemble the timber “dry”, without glue.
- Preparing the surfaces to be bonded is an important operation. Depending on the glue used, the order of preparatory steps may vary (see instructions on the glue packaging). But the basic operations, as a rule, are still the same. Usually you need:
- Sand the mating surfaces with sandpaper or, more conveniently, with a grinder.
- Dust the surface with a brush or vacuum cleaner.
- Degrease (I used solvent 646 and a brush), let dry.
- All manufactured parts (joints) should be treated with fire protection, twice with intermediate drying.
After completing these operations, you can begin gluing the timber.
Gluing timber
Gluing timber is the most critical process. It is especially important to choose the right glue here. That is, depending on where (outdoors, indoors) under what conditions (humidity, temperature) the future product will be used, and also depending on the requirements for the appearance of the adhesive joint (color of the glue), it is necessary to select the appropriate adhesive. Now on the market there are practically no problems with the choice of glue.
The gluing technology depends on the chosen adhesive and is usually also indicated on the packaging.
As you can see in the photo, the glue is yellow in color (the color issue was not important for me), the glue is intended for use in outdoor work, on wood, the pattern of annual rings on the timber is multidirectional. Defects and chips along the edges of the timber will be removed during finishing of the timber. After gluing, I used clamps to compress and secure the parts to be glued.
Drying of the adhesive joint must be carried out in accordance with the recommendations of the adhesive manufacturer. As a rule, the following conditions must be met:
- Direct exposure of the product to the sun and water should be avoided (for example, I dried it under a canopy)
- The parts to be joined must be pressed firmly along the plane being glued
- Drying times must be maintained in accordance with the manufacturer's recommendations.
- I will mention one more non-standard (optional) operation. Taking into account the fact that laminated veneer lumber was created for the production of window blocks, and the force impacts when performing caulk work when installing window blocks are not small. I decided to further strengthen the structure of the beam by installing it on dowels. I used homemade dowels made of oak, with a diameter of 22 mm, using a hole in the lower part of the dowel for a conical wedge (the dowel fits into the spacer on the wedge - when driven in). First I drilled the holes. The dowels and conical wedge were placed on glue. I hammered the dowels in with a sledgehammer.
After thoroughly drying the products, we finally process the laminated timber. In particular, we plan timber. When planing, you need to maintain the same dimensions for all beams; the clean dimensions of the beam (in cross-section) are 90 by 275 mm. Next, we treat the glued timber on all sides with fire protection, twice.
The finished glued timber is shown in the photo below (end view and side view).
Technology of work execution
To perform this work at home you will need:
The grooves are made by adjusting the timber to each other.
- wood hacksaw;
- plane;
- clamps;
- brushes and brushes;
- It is advisable to have a grinding machine and a milling machine, but this is not a prerequisite;
- measuring tool;
- boards, slats;
- glue;
- solvent.
In order for the material to be of high quality, the blanks used for its manufacture must be dry. It is best for the drying to be natural.
First, the workpieces are cut, the length of which should be 5 cm longer than necessary. Take three blanks, from which one beam will be made. They plan the edge that will be glued together. It is necessary to pay attention to the location of the annual rings; in adjacent lamellas they should be multidirectional. In the middle lamella we make a groove on both sides, and in the outer lamellas we make dowels on one side.
To see what the laminated timber will look like, first assemble it without using glue. Now you need to properly prepare the surfaces that will be glued together. To do this, they are treated with sandpaper or a grinding machine, all dust is carefully removed and the surface is degreased.
All lamellas are thoroughly dried and coated with fire bioprotection twice, with intermediate drying.
Comment
In order not to get hung up on the word BRUS, we need to add that this technology is quite applicable in the manufacture of other parts. For example, to make a tabletop for a computer desk, I used a purchased floorboard, from which I glued the shield.
Tip: When making small workpieces (for furniture repair) or small structures (wall shelves, drawers), when making grooves or quarters is not convenient, or you do not have such an opportunity, gluing is often done using a smooth fugue. In this case, for more reliable gluing and fixation, a set of center markers will be very helpful. I advise you to buy it. You can buy markers in construction stores; they cost pennies, but they help remarkably. Large markers, in the photo on the right, homemade, turned on a lathe, are used for larger jobs.
When will independent production be justified?
Depending on the situation, each developer will have his own motivation for action:
- First of all, this is a financial issue. Indeed, in some cases you can save significantly, but here you still need to take into account the time factor;
- Quite often there is a need for non-standard dimensions of timber, which cannot be found from manufacturers, and then this is practically the only way out of the situation;
- When there is already a sufficient supply of edged boards and timber, but it is unprofitable to sell it, and profiled material is needed for construction;
- If there is a need for powerful load-bearing beams, and in this case, you can make laminated veneer lumber with your own hands from thick boards. This design is not subject to torsion and cracking, and can also withstand higher loads than a similar solid wood beam.
Raw materials
The main criteria by which glue for timber is chosen is environmental friendliness and strength. Some manufacturers use low-grade compounds, saving on costs, so the timber can turn out to be hazardous to health.
A good adhesive meets the EN 204/205 standard, and the finished product can even be used for interior decoration. Compositions based on polyurethane, melamine, and resorcinol are considered safe.
One-component wood glue Kleiberit 300.0 DIN EN 204
Advice! As for the wood itself, it is best to take the most popular raw material - pine.
Spruce and larch, cedar and fir are also good options. You can also make a combined material, the front parts of which will be made of valuable wood. The initial blanks for laminated veneer lumber are sawlogs, followed by debarking and cutting into boards of the required size, unedged or edged boards.
Thin gauge timber Saw logs