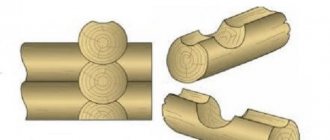
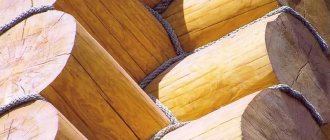
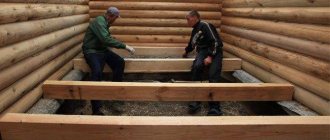
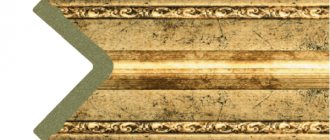
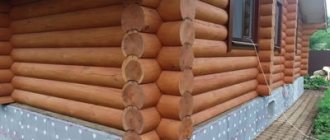
When cutting a log house using the “into the bowl” method, there is no such question as finishing the corners - the corners when cutting “into the cup” (in the oblo) are intertwined with a braid and are initially aesthetic, but when cutting the log house using the “into the paw” (dovetail) method, the corners of the log house are like external , and the internal ones look less aesthetically pleasing - this is due to the cutting method, so there is a need to refine the corners when cutting the log house “in the paw”.
The corners of the frame must be trimmed after the frame shrinks. An example of finishing the internal corner of a log house “in the paw” can be seen in the photo.
The cost of finishing the corners of a log house “in the paw” is from 400 rubles. for 1 m.p.
Articles
Our works
Bathhouse made of timber 5.5x5.5, Priozersk, Leningrad region. Season 2016
Log house 9x8+2, Mga village, Leningrad region. Season 2022
Log house 8x10, Lzi village, Leningrad region. Season 2022
After the log house or bathhouse has dried and sat down, they begin interior and exterior decoration. In the process of finishing log houses, cut into paws, there is a need to seal the internal and external corners to give them a more beautiful appearance, but before sewing the corners must be insulated. This must be done because in the process of shrinking and drying out the log house, gaps will inevitably appear in the crown grooves, as a result of which the corners will be blown through and there will be air through them, and in winter the corners may freeze and heat will escape from the house.
The first stage of insulating the corners of the log house
Insulation of corners must begin with caulking. Caulking means driving insulation material into the inter-crown grooves; for this you will need a hammer and a special chisel with a width of at least 5 cm and a thickness of no more than 5 mm. For caulking corners, several types of materials can be used, both traditional and recently available on the market.
- Moss. Perhaps the oldest material for insulating wooden houses, unlike tow, birds do not pull it out and it has antiseptic properties, it does not rot and fungi do not form in it. In addition, moss is very durable; there have been cases that when dismantling wooden houses that were cut down at least 70 years ago, the moss between the crowns did not rot or turn black, and it could be used to re-insulate a new house. Moss is able to absorb moisture and dry quickly; it does not contain any components hazardous to health. In addition, moss does not cost much, and if desired, you can even collect it in the forest yourself.
- Linen or jute. High-quality flax or jute, like moss, dries quickly when absorbing moisture and prevents harmful fungi from spreading. It is easy to use, comes most often in the form of strips, unlike moss, it does not crumble, and is excellent for assembling and insulating log houses.
- Lnovatin. Modern domestic thermal insulation material. It is made from short flax fibers, flax fiber tows and jute. Just like jute, it comes in the form of strips of different widths and thicknesses. Quickly releases moisture, is not susceptible to rotting and fungus, and is not affected by moths.
Adviсe
A log house is the most common option for constructing such a building. The assembly process itself takes a little time, especially if all the preparatory work was carried out efficiently.
Although it is possible to build such a house yourself, it is better to consult with an experienced craftsman before starting work. It is necessary to take into account every little detail, because the strength and safety of the new building may depend on it.
Of course, reviews about this cutting method are contradictory. But it is supported not only by its obvious, well-known advantages, but also by the fact that this method is still the most common, despite certain difficulties and disadvantages inherent in it.
A reasonable approach to business, strict adherence to all the necessary rules will help you successfully complete this work and get a warm, cozy, durable and safe log house.
See below for information on how to cut into a paw.
The second stage of insulating the corners of the log house in the paw
For better insulation of the log house, the corners are additionally insulated and sewn up outside and inside the log house. Before starting external insulation, the corner of the log house is leveled using a chainsaw. After this, the corner is treated with protective antiseptics to protect against fungus and mold, as well as for fire protection. After this, four vertical guide posts are mounted on the corner of the log house; to avoid hanging corners, the guides must be mounted on sliding fasteners. Galvanized metal profiles or dry wooden blocks treated with antiseptics are used as guides. After this, linen or jute insulation is placed in the cavity between the guides along the entire length of the corner, after which a windproof membrane is mounted on the corner, all joints of the windbreak and the frame are carefully glued using double-sided adhesive tape.
After insulation, the outer corners are sewn up. Most often, imitation timber and logs, as well as dry planed boards, are used to fill corners; less often, unplaned boards, metal or vinyl siding are used.
Our company carries out the following types of work on finishing corners in log houses and bathhouses:
- Caulking of corners in log houses cut into bowls and paws, in log houses made of timber
- Insulation of corners
- Sealing and painting of external and internal corners in log houses with boards, clapboards, imitation timber and logs
How to properly close the corners of a log house when insulating the log house in a bowl or in a paw? Improper execution of this stage of work will lead to a lack of living comfort (drafts, heat loss, dampness, etc.).
The process is carried out immediately after the log house is ready or at the time of construction. The “bowl” type retains heat better compared to the “claw” type, which is more susceptible to cold and dampness.
Drawings and markings of logs
Before you begin assembly, you need to mark the logs. Early marking will greatly facilitate and speed up the construction process.
This operation is divided into certain stages that must be strictly followed.
- The logs are trimmed.
- A horizontal line is drawn through the center of each element from the end. The correctness of the procedure must be monitored using a laser level.
- A template is attached, pre-made from plywood or thick cardboard along the paw on the first log. Two vertical lines are drawn along it. A vertical building level will help check that the lines are drawn correctly.
- The threads are pulled along the pre-drawn lines of the cheeks of the paws. Along them, longitudinal details of the cheeks are drawn with a length equal to the diameter of the logs.
- Using the prepared markings, cut out the cheeks and check how well the part matches the template.
These are the main stages of marking logs to create a log frame. They make work easier and allow construction to be completed in a shorter time. And - adjust the logs as accurately as possible to avoid cracks and holes into which cold air can penetrate.
A log house in the paw is considered colder than, for example, the same log house with a removal. The reason is that the corners of the house are open to “all winds,” and from the outside, rainwater can get into the cracks between the parts and spoil the logs, while in a log house with an offset, the corners are closed by protruding parts of the logs.
A classic five-wall structure, even a small one (for example, 6x4), will require additional protection of both the internal sides of the corner joints and the external ones. Although this may spoil the appearance of the house, such an operation is necessary in order to make the house warmer and protect it from cold and winds.
When using round timber in the construction of houses, it is necessary to ensure the tightest possible fit of one element to another. To do this, most often a groove is cut along the entire length of the upper log so that it fits snugly against the lower one. In addition, the junction of the logs is carefully laid with tow, jute or any other insulation.
Features of closing and insulating corners for different types of felling
The choice of material for insulating corners chopped into a bowl depends on the type of wood used in construction. To seal timber structures, the following are used: natural moss, jute fabric, flax batting, etc. It is important to use the same material that is laid on the crowns. You should not use different insulation materials, so as not to cause defects due to the difference in the thickness of the sealant. A log house made of logs (untreated or rounded) must be insulated with jute or linen rope, the twisted structure of which will ensure complete elimination of cracks.
Constructing a log house using the “in-the-cup” method is a labor-intensive process that requires more building material than the “in-the-paw” option. The Canadian type is now popular, characterized by the presence of a fat-tail protrusion in the recess and a trapezoidal shape. During the shrinkage process, the logs form super-strong joints with the insulation. As a result, the penetration of cold and drafts into the room is completely eliminated. This construction option is much more expensive than a simple (rounded) bowl. Log houses with crowns in a bowl or Russian corner are not covered with external finishing; in the area of the ends the wood breathes and therefore lasts longer. To seal, use caulking of the corners with a rope, which is pushed into the gaps using special tools. The material is hammered in using a mallet, which is used to hit the caulking blade. During work, you need to pay special attention to the joints of the corners with the ceiling and floor. Especially below, where sources of dampness are located. If a wild log house is being built, it must also be caulked.
Insulation of a log house in the paw
Log cuts that form a paw lock or a German corner are more susceptible to rapid rotting and environmental influences. Therefore, it is more difficult to properly insulate corners. 1. The process should be carried out more carefully than for the bowl. 2. The cracks are sealed at the time of construction of the log house, the corners are sealed more tightly. 3. For a beginner, it is better to assemble crowns using a stencil to draw each end of a beam or log. 4. An incorrectly supplied element is immediately replaced. To insulate the log house, jute fabric, folded several times, is used in the paw. Birds love to take away the tow, and the moss turns into dust over time. Features of closing and insulating corners for different types of felling depend on the work area: inside or outside. When constructing a permanent house, it is necessary to use these two options. You need to be more attentive to external elements.
Layered insulation is used if the log house is intended for exterior decoration. Caulk and sealant are a universal combination, most suitable for rounded logs.
Insulation for external cladding
In modern construction, an interesting method of insulating a log or timber frame is used if the external cladding of the building is planned. You need to cover the corner with a foil membrane or secure it with a furniture stapler. When externally insulating the outer surface of a house, before finishing with siding, the following is used: 1. Basalt insulation. 2. Foamed polyethylene. 3. Fiberglass materials. 4. Foam plastic. 5. Extruded polystyrene foam. Non-flammable insulation and metal siding increase the fire safety of a wooden house. Before the outer cladding, sheathing, insulation and a hydro-windproof membrane are attached to the surface of the log house. This layer-by-layer structure is called a thermal insulation cake.
How to chop?
Building a house from logs with your own hands is not such a difficult task. The main thing is to prepare the materials correctly, follow certain rules, observe all the subtleties of this process, and then cutting itself becomes a fairly easy task.
The finishing of the corners is no less important. Any technology can be used here, the main thing is to protect the house from wind and cold, which can penetrate through loosely fitting elements or cracks in cracked corner joints.
From the outside, corners can be covered with siding, artificial stone, natural or pseudo-brickwork. The inside of the joint can be sewn up with the same clapboard. Another thing is that a house made of logs is aesthetically pleasing in itself, it is a real classic of its kind, and covering it with clapboard or, even worse, siding means destroying the very image of a log house.
Building a house from logs, especially building a log house, requires certain knowledge and skills. However, the construction technique is not as complicated as it might seem at first glance. You can learn everything, and clear step-by-step instructions will help you build a strong, durable, warm house yourself.
For this purpose, it is better to use coniferous wood. Important indicators are natural humidity, the time when the tree was cut down (preferably in winter), the place of growth (optimally - northern regions). Pine is well suited for construction (its cost is lower); larch or cedar are also often used (these species are more expensive, but they have higher strength and a longer service life).
The assembly itself includes several main steps.
- Preparation of blanks. The top and bottom are hewn to a depth equal to the width of the workpieces. The appearance of the workpieces should be in the shape of a parallelogram, turned towards the master with the side that has a square cross-section.
- The parallelogram is divided from the end into eight horizontal components.
- Next you need to place the necessary points on the plane. The location of the points depends on the selected paw type.
- They indicate future challenges. Lines are drawn from them at an angle, which depends on the location of the intersections.
- Excess material is cut off and the connection elements are hewn out.
- A template is made on plywood or thick cardboard along the first joint, which will serve as a sample.
It is recommended to apply a special protective compound to the prepared blanks , which will reduce the risk of rot, protect against parasites, and increase the fire resistance of the entire building. In addition to protection, it is necessary to provide additional insulation of the log house.
To avoid the “spreading” of the paws during operation, the joints of the logs on the inside are equipped with a special spike, which reliably fastens the upper and lower logs.
Before proceeding directly to the assembly, the foundation is poured. A log house does not have a very large mass, so it is quite acceptable to use a columnar or shallow foundation strip.
Thicker logs go to the lower crown. They are laid directly on the foundation strip, laid with roofing felt or unloading board, the thickness of which is fifty-five millimeters.
Before you begin laying the next crown, you need to make a special semicircular groove on the logs along the entire length of the log. To do this, one log is laid on top of another, and, using a carpenter's line, a line is drawn on the overlying log parallel to the underlying one.
Next, the top log is removed, turned over, and a groove is selected in it. Once the sampling is completed, the log is re-laid on top and tapped along its entire length. The purpose of this operation is to determine how well the sampling was done and how tightly the logs are connected to each other. If everything is in order, the groove is made with high quality, the connection is laid with insulation (tow, jute, moss), and the log with the groove is finally installed in place. And so - with each log of the upper tier.
At the same time, it is important to clearly monitor the evenness of the walls (they must be strictly vertical), as well as all the geometric dimensions of the log house according to the plan.
Finishing the internal corners of the log house
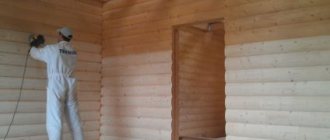
Grinding the corners of the frame outside and inside is always carried out before starting other work in order to prevent freezing of the wood, interaction with moisture and rotting. During the treatment, the remaining bark is removed and the cracks are filled. The equipment used is a machine with petal attachments and a grinder. The process begins from the edges, moving towards the joints. Personal protective equipment is required due to the large amount of dust. After completing the work, the log house is left for a day to dry. A simple way to finish the internal corners of a log house is to install a pair of vertical edged polished boards. They must be tightly closed to avoid a gap, resulting in an even vertical angle. Less commonly, the board is installed at an angle of 45° to each wall. Internal surfaces are treated in different ways, for example, lining, plastering, plasterboard. Mineral wool, polystyrene foam, and isoplat (pressed flax fiber) are used as insulation materials.
Why siding?
Vinyl siding has gained enormous popularity as an exterior finishing material. But the material is not a complete heat insulator. To carry out thermal insulation, you also need to choose insulation for the siding. The best option is mineral wool.
Mineral wool and siding are popular insulation and decor for a wooden house
The main advantages of siding are:
- best price-quality ratio;
- ease of finishing;
- ease of replacement and repair;
- durability;
- not afraid of moisture and direct sunlight;
- a wide range of different textures and colors.
The principle of connecting siding panels allows you to form a seamless cladding. And the density of the vinyl material makes it easy to cut pieces to the desired length. Therefore, installation will be carried out quickly and simply. The material has such properties as thermal insulation and protection from wind and water.
What happens if you don't close the corners
If you ignore the stage of insulating the corners of the log house, in addition to the lack of comfort during your stay, there is guaranteed to be a distortion of the shape of the structure, which will become askew over time, dampness and elements of rotting wood will appear. What happens if you don't close the corners from the outside? External insulation allows you to more effectively maintain comfort in the house compared to internal insulation, and therefore is more important. If you cut a corner of logs or beams without sufficient experience, then there is a high probability of defects appearing after construction, in particular large gaps during shrinkage. The situation is corrected with the help of wedges. They are cut from the same type of wood as the log house. Mistakes when sealing corners will also lead to serious problems. For external insulation, you cannot use polyurethane foam, which will accumulate moisture over time and cause dampness in the wood. When choosing sealants, you should not use silicone or acrylic types due to the high likelihood of peeling or cracking. You should pay close attention to the internal and especially external corners, since they become the paths for cold penetration if the insulation is improper.
Our website presents a number of log house projects, for example: https://www.domastroim.ru/category/proekty-domov/proekty-srubov-domov-ploshhadyu-svyshe-200-kv-m/ Or you can see all prices for log houses . You can calculate the house or bathhouse you need with maximum accuracy using our log house cost calculator. To order and buy a log house, call:
- Vologda
- Moscow,
Seal problem
Angle thermogram
Let us immediately emphasize that the problem of thermal insulation of crown joints is by no means new and has been successfully solved by builders over the past millennia. All modern techniques are simply the replacement of archaic building materials with their modern analogues.
Despite the fact that during shrinkage the entire frame is deformed, the main channel of heat loss is still the corner joints, so finishing the corners of the frame is often considered as a separately paid operation.
Let's consider what methods exist for insulating corners, and how you can sew up roof joints.
Re-caulking
A more modern version of caulking involves the use of jute ropes and ropes, which significantly speeds up the process, but reduces the reliability of holding the insulation in the gap.
Creating wedge joints
This method is applicable only at the construction stage. It consists in a more careful implementation of the joints between the crowns, the locks of which have a wedge-shaped configuration.
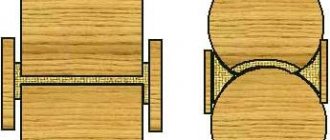
Scandinavian-Canadian wedge
The recess inside the log is filled with a sealant with a maximum service life (for example, mineral wool), and the edges are sheathed with a closing sealant.
Polymer sealing
Polymer sealing scheme
The most effective and fastest way to insulate houses made of profiled timber and logs is polymer sealing.
The peculiarity of this technology is that if it is performed correctly, you can forever forget about the consequences of shrinkage, since the seam is filled with an elastic sealant with a high adhesion coefficient.
When the logs shrink and shift, the new seal is deformed but not destroyed.
The only problem with this method is the high price of a sealant that is resistant to climatic factors.
As an alternative, a combined approach is used, when the main volume of the insulated gap is filled with ordinary (that is, inexpensive) acrylic sealant, and the outer protective layer is formed from a stable special composition.
In such cases, the repaired log house can be covered with cladding made of boards, the fixation of which must be carried out taking into account shrinkage displacements.
Wind protection of the facade
Sometimes the deformation of a log house is at such a stage that sealing the joints alone is not enough to normalize the heat balance of the house. In such cases, external wind protection is installed in the form of additional facade cladding.
This design is installed using the “ventilated facade” technology, and a block house or lining is used for external finishing.
Internal thermal insulation
Any sealant that can be used to seal seams in a wooden house is very critical to large changes in humidity and temperature. Therefore, in baths and saunas, in addition to all the methods listed above, internal thermal and vapor insulation is installed, which can be made either in a standard multi-layer method or using a simplified technology - from penofol.
This approach not only extends the overall period of normal operation of the log house, but also increases the energy efficiency of the house.
will carry out decorative and protective finishing of log and timber houses, including the installation of additional thermal insulation. You can clarify the details of cooperation and calculate the cost of the necessary work using any method of communication published on the “Contacts” page.
Calculate the cost of painting and insulating your home right now
Do you have accurate measurements of the house?
I measured it myself. I have a house design. Measurers came. I want to call a measurer.
By clicking on the button, you consent to the processing of personal data
What materials are used to paint the interior walls of a wooden house?
How to properly insulate the roof of a log house - detailed instructions
Forwood sealant is an environmentally friendly product from Raduga Plant
Hermes 17 - a unique wood sealant from
Other methods of sealing cracks
- Instead of buying putty, you can make the putty yourself. To do this, mix PVA glue and sawdust until thick and use a spatula to fill the cracks with the mixture;
- To seal wide cracks, use a wood chip the same length as the defect. The piece of wood is sharpened with a wedge and the crack is hammered in; the top is secured with putty or homemade putty;
- Arbogypsum is another product that is used to seal cracks in a wooden house. It contains dry gypsum and crushed bark or sawdust in a ratio of 1:3. The result is a strong and reliable composition, which is diluted with water in the volume of half the gypsum taken. The elastic and dense mass is mixed until smooth and lumps dissolve. For greater plasticity and elasticity, you can add a little shampoo to the product. Seal the cracks with freshly prepared mixture, as it hardens quickly.
Whatever method you choose, before work you need to thoroughly clean the timber or log walls, and also clean the cracks from debris and dust. It is better to repair defects in above-zero temperatures, in dry weather and on dry wood. After caulking with moss, the walls are left to dry for three days; when working with other materials, for at least six hours.
What the appearance of a wooden house will be, first of all, depends on its decoration. Many owners of wooden buildings prefer to sheathe the house with a variety of finishing materials, which at the same time decorate, insulate and protect wooden walls from adverse factors. However, the cladding of a log house has some difficulties, the reason for which is the corner joints of the log house. The corners interfere with the installation of the sheathing, without which it is impossible to frame the house. Finishing the corners of a wooden house outside and inside the room causes the greatest difficulty when carrying out finishing work. How to properly finish corner joints, and how to sheathe corners without damaging the wooden structure? We will talk about this in the article.
The best ways to insulate a wooden house
So, let's begin! You recently bought a log building to provide yourself and your family with additional space in high-quality, environmentally friendly, comfortable housing. The log house is made of solid wood, which is processed in a special way and is intended for the construction of small wooden buildings.
The problem with most of these buildings is that they are not well insulated and new residents have to think about how to insulate a log house from the inside so that the living conditions in it do not resemble living in a barn or stable. As a result, you will have to choose: to carry out the insulation from the inside on your own, incurring only the costs of purchasing materials, or to engage a third-party organization to carry out construction work for a fee.
A quick guide to insulating a log home will help you properly insulate this type of building. Regardless of whether you use the log house in the warm summer season or the cold winter season, it will maintain a comfortable temperature at any time of the year.
Insulating a log house from the inside with your own hands is a very labor-intensive and complex operation. The process is quite troublesome and expensive, but effective thermal insulation of a log from the inside requires appropriate investment. However, the biggest costs are labor and the desire to make your home warmer and more comfortable, and the materials used are already in second place.
Let's insulate!
Indeed, the guarantee that your home will not be cold even in severe frosts is the correct insulation of the house made of laminated veneer lumber from the outside.
The most vulnerable places in wooden buildings are the corners. They are more likely than other elements of the building to be blown out, freeze and become damp. Therefore, insulating the corners of a log house requires special attention. Treat the issue carelessly, and drafts and dampness will settle in the rooms, and fungi and mold will become your frequent guests.
To prevent possible heat loss through the walls, it is very important to comply with all technological requirements. Only in this case will you need less money to heat the room, and the house will be really warm at any time of the year
Modern insulation materials
I’ll say right away that materials with a closed porous structure (foam plastic, polystyrene foam, penoplex, etc.), sprayed polyurethane foams (including polyurethane foam), synthetic sealants (acrylic, silicone, etc.), foamed polyurethane foams (such as foam rubber) – completely unsuitable for insulating log corners. Why? Because they are absolute vapor barriers. Moisture emanating from a house or bathhouse, accumulating in the thickness of the insulation, causes the seam itself to freeze.
Or another case. There is a so-called “warm seam” offered by some sellers as a reliable option. However, if we follow the technology of its installation, we will end up with hermetically sealed seams and the absence of natural ventilation. Inside the heat-insulating tape, moisture vapor from inside the house collects, which means you can expect condensation to appear at the joints and accelerated rotting of the corners. This method is good for insulating double-glazed windows in a concrete house, but not for the corner of a log house.
But practical Finns use a special type of tow, made like double-sided tape. Tow can “play” with compression and expansion in the range from 5 to 15 mm. It allows vapor to pass through, but does not absorb moisture. And there is no need to re-caulk.
There are also well-proven new products made on the basis of jute (ThermoJUTE) and flax (ThermoFLEN). These are specially developed products for insulating wooden buildings and the reviews about them are quite good.
One of the radical ways. The corner is completely covered with foil insulation (foil facing out), or nailed with a furniture stapler. The top is covered with wooden paneling for decoration. Helps. But it looks alien and there is no vapor barrier.
Perhaps that's all. I hope the information will be of benefit to someone.
An anecdote from everyday life: “A wife is washing dishes, seeing a leaking faucet in the kitchen, calls her husband. - Pashka, come here, change the gasket for me! The husband mutters fiercely - well, you're completely lazy. »
Good luck and dry corners to your log houses! Bye! Bye!
Wisdom Quote: He who laughs is not angry, because to laugh means to forgive.
Please tell me what options exist for interior finishing of corners in a log house assembled into a claw. Thank you.
Tanya, Samara.
Hello, Tatyana from Samara!
Regarding the options for finishing the corners of a log house assembled into a paw, I can say the following.
Option one
Everything is left as is and nothing is done. What you can see in numerous movies when they show the interior of log houses. They don’t show it on purpose, but just like that, in passing.
Option two
Since in the classic cutting of logs into a paw on the inner and outer sides of the wall, flat surfaces are made vertically with an indentation from the joint of approximately the same amount, it is possible to install two vertical edged boards. The boards are sanded. They are installed tightly to each other without any gap between them and form something like a vertical angle.
In addition, the classic paw connection is complemented by a hidden root tenon. Its length is about one third the length or width of the paw. It is located close to the inner corner. And it serves to ensure that there is no displacement of the logs in the paw.
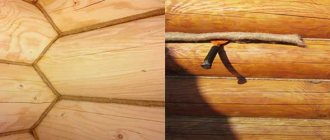
Laying and further caulking of tow joints is mandatory, and if the tow is visible, it is not only tapped (which is done at least twice), but is often made in the form of an applied pigtail. Or they even stuff such a rope. It looks beautiful.
Much less often, corners are covered with one vertical board, which is installed at an angle of 45 degrees with respect to both walls. This is already the third option.
I haven't come across any other options yet.
Construction in Moscow and Moscow region
Wide range of construction services. Foundation, walls, ceilings, roofing, turnkey!
Other questions on the topic of log houses:
Replacing logs in log houses
About caulking log houses
All about log houses
Construction in Moscow and Moscow region
Wide range of construction services. Foundation, walls, ceilings, roofing, turnkey!
Construction in Moscow and Moscow region
Wide range of construction services. Foundation, walls, ceilings, roofing, turnkey!
Construction in Moscow and Moscow region
Wide range of construction services. Foundation, walls, ceilings, roofing, turnkey!
Log houses and their maintenance
