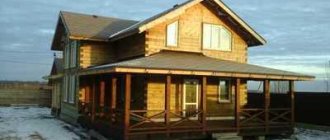
Assembling a house from timber: what needs to be done before it
Houses made of timber: projects and development
Any construction must begin with the development of a project. Projects must include drawings of the future construction, as well as the materials and tools that will be used. By drawing up such a document, you can not only design a house that is suitable in all respects, but also accurately calculate the required amount of building materials and total financial costs.
In the process of drawing up a project, it is important to take into account a lot of important details, namely:
- The place where building material will be purchased, as well as where it will be stored during the construction of the house;
- What kind of communications will need to be carried out;
- Before starting construction work, you must obtain a building permit from the architectural department;
- It is also important to create a detailed estimate.
Important: When developing a project, it is necessary to take into account the dimensions of the timber used.
Budgeting
In order to calculate the total financial costs of a log house, it is customary to draw up an estimate in the form of a table. All materials and tools are included in it along with their cost. The cost of the construction work itself is also included there. Depending on the specific features and parameters of the project, the final estimate may vary greatly.
Selection of timber
When choosing a material for building a log house from timber, you need to know that there are several types of this building material:
- Ordinary timber;
- Profiled;
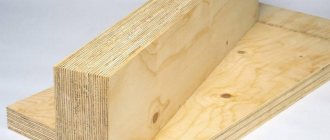
- Glued.
Much will directly depend on financial capabilities. Of course, it is much more convenient to use glued or profiled timber. These types of timber are almost dry and also have special groove locks. And this greatly simplifies the entire process of assembling a house.
When choosing and purchasing timber, experts recommend following the following rules:
- It is better to purchase timber made from timber harvested in winter. This is due to the fact that in this way more resin will be retained in the wood, which will increase the durability of the building material;
- When purchasing timber, it is important to have a tape measure with you to check the dimensions declared by the seller, as there are often cases when the declared dimensions differ greatly from the actual parameters of the timber;
- You should also visually examine the evenness of the material;
- You need to make sure that fungus and mold have not affected the wood in any way;
- Wood with fallen knots should be rejected.
Purchase of construction materials and tools
If you are going to build a log house from timber, you will need to purchase the following building materials:
- Wood beams;
- Insulation;
- Edged and unedged boards;
- Lumber for creating ceilings, floors and interior partitions;
- Building materials for roofing;
- Windows and door panels;
- Waterproofing;
- Construction staples;
- Nails and other consumables.
The purchase of building materials can be carried out either in stages as needed, or in full at once.
If you are going to build a house from timber with your own hands, you will need the following equipment and tools:
- Excavator for preparing the site for the foundation;
- Concrete mixer;
- Wooden formwork;
- Scaffolding and scaffolding;
- Various hand tools for woodworking and concrete work.
Depending on the type of foundation used, different types of equipment can be used.
Wall decoration
After we complete the construction of the log house, it needs to be allowed to stand. This is done so that during the drying process the wood is completely deformed, and the linear dimensions of the structure return to normal - otherwise, along with the walls, the finishing, installed windows, etc. will be deformed.
After the alignment is completed, we begin finishing processing:
- We clean all cracks and cracks in the beams from sawdust and debris. If necessary, cracks can be expanded, limiting their spread.
Caulking walls
- We caulk the cracks by driving moss, tow or jute cords into the cavities.
- We also caulk the cracks from the inside, ensuring maximum tightness of the walls.
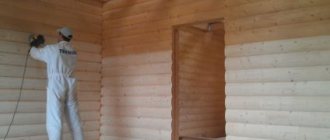
- We clean the surface of the beams with a grinding machine, simultaneously opening the pores in the wood, removing dirt and cutting off excess caulking.
- We carry out moisture protection treatment using antiseptic impregnations.
This completes the work on the log house itself, and we get the opportunity to move on to arranging the interior of our house.
Moisture-proof treatment
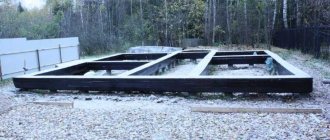
Foundation for a house made of timber
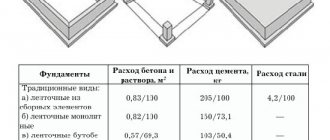
For timber houses, foundations that are not too massive are ideal, for example:
- Tape with a shallow type of filling over the entire area and with all load-bearing walls;
- From screw piles with overlaying concrete slabs;
- Columnar type foundation followed by the use of siding for cladding.
Stage 4. Waterproofing the base
Waterproofing strip foundation
Waterproofing a strip foundation with roofing felt
Treat the surface of the foundation with molten bitumen and lay a layer of roofing felt on top. After the bitumen has completely dried, repeat the procedure. As a result, you will have reliable two-layer waterproofing.
Waterproofing with mastic
Additional insulation with roofing felt
Houses made of timber: how to assemble
Timber processing process
A log house necessarily involves treating the wood with various chemical compounds. To maximize the protection of wood from premature destruction and ignition, you must adhere to the following scheme:
- First, the wood is treated with a special antiseptic;
- Next, a fire retardant composition;
- Then light protection;
- At the very end, waterproofing is used.
Wiring a house made of timber
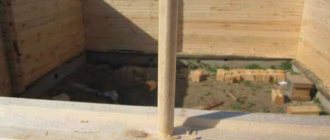
Anyone who is interested in the question of how to make a log house from timber with their own hands should know this. The first crown of the log house (or frame) should be laid level on the pre-dried waterproofing. It is important to remember that the first crown must have a larger cross-section than the others. In this way, the overall stability of the entire structure is achieved. The first crown must be laid on a backing board.
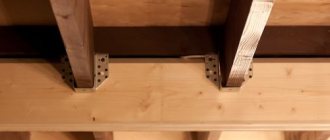
The wooden frame is fixed to the foundation with metal anchors. The box is attached to the foundation only if we are talking about a small building. Large houses with several floors will be stable due to their weight without additional fixation.
The walls of a timber house are built by laying alternate rows. For this reason, the main thing is to understand how the first crown is laid. All crowns and rows are fixed using a dowel.
All layers of timber alternate with tenons and grooves to achieve maximum strength and reliability of the entire structure. In addition, this allows you to make the corners of the building completely windproof. And this has a positive effect on maintaining heat indoors.
Connecting timber in corners and lengthwise
There are two ways to connect timber in the corners:
- With remainder;
• No residue.
Moreover, for each method there are several pairing options, which depend on the method of forming the angle itself.
At the same time, there are four options for longitudinal connections:
- Half a tree;
- Longitudinal tenon on dowels;
- Longitudinal root spine;
- With an oblique lock.
The longitudinal connection method using a tenon on dowels is the most reliable. Therefore, it is most widely used when building a log house from timber. In this case, the groove manufacturing technology completely repeats the technology of corner joints with keys.
Preparation of material
For the construction of the walls of the bathhouse, I decided to use softwood lumber.
To do this, I chose a beam 5.5 m long and with a cross-section of 100 x 150 mm. Thus, the wall of the bathhouse should have been 100 mm thick. Few?
Of course it is. But even a thickness of 150 mm would not be enough for the bathhouse to meet thermal protection standards. And since subsequent wall insulation cannot be avoided anyway, why increase the cost and labor intensity of the work? Since I worked alone, the weight of the lumber was a very important quantity for me. I really didn’t want to carry 50-kilogram “sleepers” 150 x 150 mm on myself.
After I brought all the timber for the bathhouse to the site, I had to dry it for some time, as it was very damp. To do this, it was enough to stack the lumber on spacers and close it on top. After a couple of weeks the wood was ready to be used.
Timber for a bath
To construct a log house, each beam for a bathhouse had to be antiseptic in order to prevent the further development of putrefactive bacteria and bugs. Processing the wood separately would take a very long time. I carried it out simultaneously with the installation of the bathhouse frame. While I was covering with protective impregnation the amount of lumber sufficient for the installation of two tiers, the first two or three timbers were already drying out. With them it was possible to begin the next crown of the bathhouse.
Flax-jute fabric
To seal the gaps between the crowns, I used 100 mm wide flax-jute tapes, which I simply rolled out and attached with a construction stapler. The crowns were connected to each other with nails 200 mm long. Of course, I admire the skill of the ancient carpenters who built log houses without a single nail, on wooden dowels, but I did not subject myself to such “self-sacrifice.”
Read about the best way to fasten the crowns of a log house
Application of dowels
If wooden dowels are used in the construction of timber buildings, it is important to make them from the same type of wood as the timber itself.
It happens that for greater reliability, the timber is tightened with metal dowels. In this case, such a solution will be significantly more expensive, which may affect the overall cost of construction.
Installation of dowels occurs by analogy with brickwork. A hole several centimeters in diameter is drilled for the pins so that they can be inserted without effort. The installation of dowels should be done at a distance of one and a half meters from each other.
Completion of construction
After shrinkage, you can begin roughing and finishing, as well as constructing the roof. At the same stage, entrance doors and windows are installed.
The subfloor is being installed. If the walls have a thickness of 195 mm or more, then they do not need additional insulation and cladding. They will retain heat perfectly.
Whereas protective impregnation must be applied.
This will keep the wood in excellent condition for many years. If you wish, you can purchase a composition that will perform two functions at once - protective and decorative. With this mixture you can emphasize the structure of the wood and give it a rich shade.
Caulking process
When a log house is built from glued or profiled timber, caulking is not carried out. At the same time, if we are talking about building a house from ordinary timber, you cannot do without it. Caulking is a process of insulating inter-crown joints by compacting various natural insulation materials.
The following materials are used for caulking:
- Natural moss with excellent thermal insulation properties. This material also perfectly resists the formation of fungus and mold. And this increases the service life of the building. In all respects, this material is ideal. Its only drawback is that it is very inconvenient to make caulk with its help;
- Linen tow. This material also has a number of advantages, which are completely negated by the fact that it crumbles after five years. Because of this, you have to re-caulk;
- Hemp hemp is an excellent material. It was widely used by our great-grandfathers. Its structure is very similar to natural wood;
- Jute is an imported natural material that is produced in ribbon format. It is very convenient to use, which is why it is widely used in modern construction of timber buildings;
- Linen batting is a material that is a mixture of flax and batting; its main disadvantage is its strong absorption of moisture.
Main features of the caulk:
- The process starts from the top crown moving downwards;
- First, the crown is caulked from the outside and then from the inside;
- First, rough caulking is carried out to isolate large cracks, and then cosmetic caulking is carried out to give a pleasant appearance to the seams.
How long should a log bathhouse dry?
After completing the installation, I installed the rafters and built a temporary roofing material roofing material so that the bathhouse frame would dry out within a year. I spent exactly three weeks on all this work (the log house for the bathhouse and its temporary shelter), even though the autumn weather was not always conducive to fruitful work.
Ahead was a winter with frosts, which should have properly dried the wood of the log house, and a hot summer, which should have completed the drying.
Log shrinkage compensator
Important point. When wood shrinks along the grain, it shrinks much less than across the grain. If the structure of the log house has vertical posts, as I have on the terrace of the bathhouse, it is necessary to provide expansion joints. I made them from threaded rods with a diameter of 14 mm and nuts with washers. As the log house shrinked, I reduced the height of the racks by adjusting the length of the compensator.
I returned to working with wood again after just over a year. Of course, it would be possible to buy a log house ready-made and not waste time on installation and drying, but then the price for a log house would be 2-3 times higher. A finished bathhouse made of timber measuring 6 x 4 m can cost up to 500-600 thousand rubles.
But for me, the year of drying was not lost, since during this time I built a roof , built a sauna stove inside the log house, and also installed and insulated the ceiling. If you plan the work correctly, you can avoid downtime and save a lot of money. Is not it?
If my story was interesting to you, share a link to it using the social media buttons.
Perhaps the information will be useful to someone and they will be grateful to you. To receive information about site news, subscribe to them or join groups on social networks. Everything about the construction of a bathhouse from the foundation to the roof is in the section “Bathhouse made of timber. How I built it with my own hands"
Shrinkage of a timber house
The greatest shrinkage is observed near log walls. In some cases, per three meters of wall, shrinkage can reach ten centimeters. For rounded logs, the shrinkage is slightly less, it can reach eight centimeters.
Depending on the moisture content of the timber, shrinkage may vary:
- Timber with natural humidity parameters shrinks from 6 to 10 centimeters per 3 meters of wall;
- Glued laminated timber shrinks up to two centimeters.
Due to the fact that a log house made of laminated veneer lumber is characterized by minimal shrinkage, it can be finished immediately upon completion of construction work.
Features, required tools
There are several varieties used:
Scheme of preparation of logs for the assembly of a log house.
- Construction - sawn, or, as it is sometimes called, “shaggy” timber. In cross-section it is a square or rectangle.
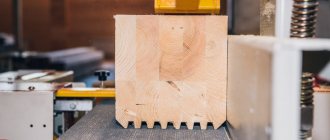
- Profiled timber differs from construction timber by the presence on the upper and lower edges of a system of protrusions and grooves that ensure the pairing of individual crowns during the construction of the wall.
The design of the interface line involves laying a layer of insulation. Sometimes pairing is carried out without the use of auxiliary materials, as they say, dry.
Manufacturers can produce profiled timber in two varieties:
- solid - made from a single solid wood;
- glued - during production, individual lamellas are glued together.
When assembling a log house, regardless of the profile used, you will need the minimum required set of tools:
- saw;
- drill;
- hydraulic or laser level;
- construction stapler;
- sledgehammer.
In addition to the above tools, auxiliary materials are required for assembly:
- interventional insulation;
- wooden dowels;
- if necessary, metal pins with a diameter of at least M12.
Technology of screeding laminated timber with studs.
When constructing a log house from profiled timber, most often at the manufacturing plant, according to the project, a house assembly is prepared. The output is actually a construction kit, where each part is numbered. Using the included design drawings, and with at least minimal experience with the tool, it is relatively easy to assemble the entire structure on site.
The basic rule for storing building materials on site is protection from precipitation and moisture from the soil. Therefore, it is best to organize a temporary storage place under a canopy. To prevent the ingress of soil moisture, all parts are placed on temporary stands. The distance to the ground level should be at least 20-30 cm.
Related article: How to properly remove sweat stains under the arms on colored clothes
Log house from timber after assembly - what needs to be done
Construction and installation of the roof
The rough roof consists of ceiling beams, sheathing and rafters, which are installed according to the project. After the walls are erected, the lags are laid. In this case, the ends of the logs should protrude half a meter from the wall.
For logs, a beam with a cross-section of 15x10 centimeters is ideal. The logs are installed on edge, at a distance of 90 centimeters from each other. At the next stage, the rafter system is installed, for which boards of 5x15 centimeters are used.
A variety of materials can be used as roofing, for example:
- Metal tiles;
- Ruberoid;
- Ondulin;
- Corrugated sheeting, etc.
Floor construction
After completing the installation process of the bottom trim, the floor joists are laid. The logs are laid on edge, after which they are covered with a subfloor, which is made from boards 2.5x15 centimeters. The finished flooring is often made from tongue and groove boards.
Installation of windows and doors
Shrinkage compensation is the most important nuance when installing windows and doors in a log house. For this reason, window frames and doors are attached to a special casing. Thermal insulation material is placed in the gap between such a box and the wall to prevent heat loss.
Insulation of the house
Such houses are distinguished by good thermal insulation, as wood retains heat well inside the room. For this reason, the entire procedure for insulating such a building comes down to high-quality caulking to eliminate all cracks.
Interior decoration of a timber house
Work on the interior decoration of the house is carried out only after it has completely settled. In general, the inside of a house made of timber can be decorated with absolutely any materials; everything will depend on the specific wishes of the owner of the house.
Eco-hut only 30 m²
mike099FORUMHOUSE user
The dream has long crept in about building a wooden house - environmentally friendly, practically without paints, mineral wool, polystyrene foam and other “benefits” of modern industry. The task is to build a solid, comfortable house with minimal effort, suitable for winter visits and year-round living, therefore shingles, boulders, mezzanines, Russian stoves and other delights of centuries past were not included in the project.
The craftsman immediately decided on the design:
- Pile foundation.
- Box made of hand-cut logs.
- Metal roofing.
- Sawdust with clay and sawdust with lime are used as insulation for floors.
Results
The process when you build a log house yourself is not something very complicated. Of course, it is advisable to have at least minimal construction experience. However, even a complete beginner can easily construct such a building.
The main thing is patience, determination, and adherence to the basic rules for building houses made of timber.
If you use high-quality building materials, and also carefully approach the smallest details, then the finished house will turn out not only beautiful and comfortable, but also durable.
Stage 9. Roof
Construction of a roof on males with layered rafters
Rafter system
As soon as the tree shrinks, you can begin building the roof. If you do this earlier, the roof will simply collapse.
Step 1. Place wooden beams on the wall framing (we have already talked about this).
Step 2. Fix the beams and attach the rafter legs to them in 1 m increments. In the ridge part, cut the rafters at the appropriate angle for the connection.
Step 3. Nail a solid board deck to the rafters (if you plan to use rolled roofing material) or make a sheathing (if you use slate, tiles, etc.).
Step 4. Install the roofing according to the instructions for the specific material.
Step 5. Cover the ridge with galvanized sheet steel to protect it from aggressive environmental influences.
Step 6. Cover the roof gables with siding or clapboard.
How to sew up a pediment
After this, proceed to further planned work - pouring a concrete screed or building a wooden floor (in the second case, the logs are cut into the logs of the second crown and fixed), install insulation, carry out interior finishing and arrangement of the steam room according to your project.
An example of a log house with a shingle roof
An example of a log house with a shingle roof
Cornice filing
Roof overhang trim
Conclusion
Timber is an excellent material for the construction of this structure
Thin timber has many advantages when building a steam room. However, we must not forget that it must be protected from external and internal influences. If you watch the video provided to you in this article, you will learn a lot of useful information on the topic we have discussed.
Did you like the article? Subscribe to our Yandex.Zen channel

