Aged surfaces have come into fashion relatively recently, but seem to be here to stay for a long time. Interest in aged things is caused, on the one hand, by a longing for antique objects, and on the other, by the fact that any such thing can add a touch of originality and sophistication to the interior.
Painting wood to look antique is not difficult at all. An aged object, despite its retro style, can look surprisingly modern in the interior. Today, not everyone can afford to buy the antique furniture they like, so methods of giving an object a touch of time are very useful in this matter. In addition, using these methods you can give the finished interior a special charm.
Today, there are many techniques that allow you to give wood texture one or another aging effect, and the main one is a special method of coloring wood.
How to properly prepare wood for painting
How to paint wood antique? Any surface made of wood is suitable for aging - be it a wall, ceiling, doors, interior item or furniture. The main thing when working with aging techniques is proper preparation. Half of the success of the final result depends on this.
Any technique for giving wood an antique touch can be done with your own hands; as a rule, they do not take much time, and besides, this is a rather interesting process that allows you to realize bold creative ideas.
So, before moving directly to the coloring technique, it is recommended to complete the following steps:
- First, the plane must be inspected for painting or varnishing. If it is painted, the paint layer must be removed;
- Next, you need to thoroughly sand the object, and then clean it of dirt, grease and dust. Sanding is carried out using abrasive paper - first of all, the object is sanded with coarse-grained paper, and finally a fine-grained variety is used;
- The next stage is treating the wood with special antiseptic compounds, which will prevent the appearance of mold and mildew on the wood layer, and will also help improve the adhesion of the paint layer to the wood;
- Puttying is not recommended; on the contrary, small chips and cracks will work to your advantage with this type of decoration. If the surface of the object is perfectly flat, you can, on the contrary, artificially add some defects to the product - cracks, chips, scratches, etc.;
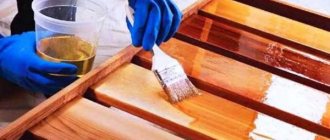
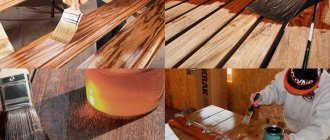
- The next, and most interesting, stage is staining the wood. At this stage, you can show all your creative abilities and create a truly unique and beautiful thing. If there is some uncertainty about the final result, you can first experiment in inconspicuous places.
Modern designers are ready to offer a large number of aging methods. To choose the right method, you need to understand what style the final result will have to meet, and what kind of wooden interior it is intended for.
Selection of materials
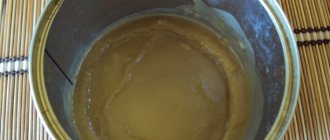
Instead of special paints for aging wood, you can use acrylic-based construction paints. They dry quickly, last a long time, create the matte finish necessary for the result and sand well. Interesting results are also obtained after finishing the workpieces with compositions based on natural wax. Liquids from the series of stains are used less frequently. They penetrate deeply into the wood and sanding with a layer-by-layer option will not give the desired effect. But with a single treatment on the rings, the coating turns out darker than in the area of soft fibers.
Source real-house.com.ua
Now let’s look at options for how to antique paint processed workpieces so that they last longer and maintain the created effect. One of the main rules is matteness. If you finally coat the wood with varnish or transparent paint, which creates a glossy film, then the finished products will look like new. If you do not cover it with anything at all, then the damaged thin layers of the existing finish will quickly lose their appearance. That is, protection is needed in any case.
Some craftsmen, for greater authenticity, damage the paintwork before finishing sanding with fine abrasive materials. Here you can do the same as described above: hammer, hardware, etc. Next, the surface is leveled as necessary and cleaned of dust, first with a dry brush, then with a damp cloth. Finally, as a rule, a matte transparent varnish with an acrylic binder is applied. This is where the work ends.
This video shows in detail the process of aging wood using the method of brushing and firing blanks:
Techniques for artificial aging of wood surfaces
Brushing
Brushing is a common way to give a solid look to wood textures, which is perfect for both furniture and interior details.
To obtain the desired result you must:
- The previously prepared surface must be painted with acrylic paint, after which the product must dry completely. For painting, you should choose matte varieties of paint - this way you can show the effect of antique wood with your own hands even brighter;
- The next step is to create the abrasions. This effect can be obtained from abrasive fine-grained paper. In this way, the natural texture of the wood will appear beautifully;
- After sanding, it is necessary to remove dust and dirt from the product;
- The next step is a new paint job. After drying, some places can be treated again with fine-grained sandpaper;
- The final stage is light cleaning with abrasive material and removing dust.
This technique will help give the object solidity and put traces of many years of use on the surface.
Creating craquelure
The crackle effect can be achieved using a special one- or two-component varnish. Under its influence, small and large cracks appear on the wood, forming a peculiar pattern. Cracks create the effect of long-term use or over-drying of an object in the sun. In addition, this effect can suit both small interior items and quite impressive areas.
To create cracked wood, follow these steps:
- Apply a paint layer to the previously prepared object. Subsequently, it is this layer that will crack;
- After the previous layer has dried, you need to apply crackle varnish to it, and this needs to be done only in the same direction;
- Next, another painting is needed - under its influence the object will be covered with a pattern of cracks; The final stage is surface varnishing.
By the way, the crackle effect can be achieved without purchasing expensive varnish compounds:
- It is necessary to cover the product using any colorful variety, except acrylic;
- After the first layer has dried a little, you need to apply an acrylic composition on top of it - thanks to this simple method, cracks will form on the surface.
What paint do we use?
Traditionally, whitewashing was used as a cheap and easy way to protect wood (lime has antibacterial properties) and give it a neat appearance. Nowadays, when we recreate a whitewash, it is usually done with any water- or acrylic-based white paint for interior or exterior work (which is what we will do in the methods described here).
Water-based or acrylic paints without odor!! and can be used indoors
Patina effect
Patina is a specific dark green coating that is acquired by objects made of bronze, silver, etc. under the influence of the environment.
To achieve this effect, you can use a special paint with the same name:
- First, the object must be varnished with a durable varnish, which gives the surface additional wear resistance;
- After the layer has dried, a thin colorful layer of patina is applied to the product;
- After half an hour, you can treat the product with abrasive fine-grained paper;
- The final stage is varnishing the finished product.
Coloring effect
This term refers to painting wood in several layers, which gives the products a picturesque, shabby look. For painting you need:
- Artificially apply chips, scratches and cracks to the object. In addition, you can randomly drill holes, simulating the passages of bark beetles;
- Next, painting is required, which will have the main color. This should be done in a very thin, translucent layer;
- After drying, the surface is lightly sanded;
- With light movements, another color is applied to the wood, after which the paint can be slightly shaded.
Pollution effect
This method can give the product the picturesque appearance of an antique product. To obtain it you will need hard wood wax. Wax is applied to certain places on the product, after which the object can be varnished. By the way, if you apply dark wax into the recesses of the wood texture, you can reveal and emphasize the texture.
Aging using wet paper
This method of giving wood an aged texture is similar to the previous one with candles, only now instead of wax there will be wet paper (if you suddenly don’t have a candle at home, then everyone certainly has paper).
Necessary materials:
- dye,
- brush, paper,
- bowl of water.
Step-by-step instruction:
- Step 1: Attach wet paper. No base paint was applied here so that the natural color of the wood could be seen. Therefore, we immediately take a sheet of paper and tear it into uneven pieces of different shapes and sizes. After this, dip each piece into a bowl of water and place it on the wood you are going to paint.
- Step 2: Apply paint. Having laid out all the pieces of paper, immediately start painting in the chosen color, that is, you do not need to wait until the paper dries.
- Step 3: Peeling off the paint Next, carefully lift each piece of paper from the surface. You can do this while the paint is still a little damp, or after it has completely dried.
You can make several layers, for example, as in the previous method. To do this, follow the step-by-step instructions described there, replacing the wax with damp paper.
Recommendations and tips
Now that we've looked at all 7 methods of painting wood with an antique effect, I'd like to highlight a few basic tips that you can apply to all methods:
- If the surface you are going to paint has been treated with sealant, wax or varnish, it would be best to sand it a little so that the new paint will adhere better.
- Don't be afraid to experiment; you can mix and match these techniques to create your own personal design style.
- first on a piece of wood or on less visible areas of furniture (such as the inside of a cabinet door to be painted) before moving on to more visible parts.
And remember that the main thing here is your desire! Good luck!
Dry brush texture "Loft"
This technique is great for creating an old and scratched look. The key to success here is simply to use a very dry brush. For example, old brushes with stiff bristles work well.
Necessary materials:
- brush with stiff bristles,
- water based paint.
Instructions:
This is what the process looks like:
- Dip the brush into the paint of your choice and leave as little paint on it as possible.
- Apply the paint in quick strokes in different directions. Be careful not to get carried away and cover the entire surface.
This technique is also suitable for painting with a loft metal effect, for example, for creating such artificial zinc letters.
You can also combine this method with using sandpaper to remove some of the paint after each coat.
External use of aged wood
This decorative material is perfect for decorating rustic-style facades. First of all, this is the German half-timbered style: the original decoration of the walls involves the use of wooden beams of rough texture, giving the building a characteristic appearance.
Country-style finishing also allows for the use of aged wood: the cladding itself, shutters, entrance doors, as well as decorative elements.
Half-timbered
Aged door leaf
Aged shutter fabric
Railings, steps, support pillars at the porch - all this can also be made using the described wood processing methods. After practicing on small pieces, you will be able to handle any surface without much effort. Of course, large-volume elements, such as house trim, are not so easy to process manually, but there are special machines on sale for this purpose. The most important thing is to have the desire, and then everything will definitely work out.
Video - How to age wood
Video - Patination of wood
Video - Aging wood by firing
Rinse method
This method for creating the effect of old wood is suitable for elegant furniture in a rustic or Provence style. It is best used on damp wood.
Necessary materials:
- paint, brush,
- water, rag.
Instructions:
- Apply a coat of paint and let it dry for a few minutes (same as the previous method, so it's still tacky and not completely dry).
- After this, quickly rinse the wood with water , carefully wiping the surface with a rag. The goal is to wash away some of the paint on the surface. Leave to dry. That's all!
For example, a table painted soft green looks simply wonderful after using this method.
Aftercare
After finishing decorating with the effect of aging wood, it is important to follow the recommendations of specialists. Properly aged items do not require complex care
Dry cleaning with a vacuum cleaner once a month is enough, as well as wiping the most contaminated areas with a damp cloth. To enhance shine, additionally coat with glossy varnish or use special furniture polishing products. Leather inserts and furniture nails with copper heads require impregnation with special compounds. Sanded wood with stain without painting can be treated with mastic or wax-based polish. Additional preservation of the product will significantly extend its service life and help protect it from the destructive effects of temperature changes and high humidity. Rub the wax surface with a soft rag or flannel mitten. Tabletops, handrails of sofas or armchairs (other surfaces of intensive shock absorption) require additional treatment with protective varnish
It is important that its base is compatible with the previous coating. For example, acrylic composition cannot be applied to nitro varnish, they react. A tabletop with a mosaic pattern can be additionally covered with flexible glass and the ends treated with silicone sealant.
Furniture care