SHARE ON SOCIAL NETWORKS
FacebookTwitterOkGoogle+PinterestVk
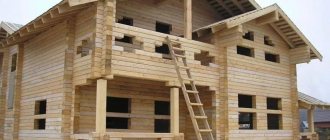
The pediment is a fairly significant element of pitched roofs, which is endowed with an enclosing and aesthetic function. The options for its arrangement should be thought through to the smallest detail at the stage of designing the structure. Next, we will talk about the methods by which the roof gable is sheathed and constructed, and all the materials and technologies that exist today will also be presented.
The pediment is an element of pitched roofs, which is endowed with both enclosing and aesthetic functions.
What is a pediment and why is it needed?
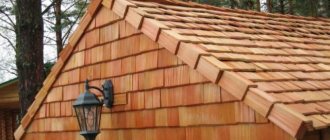
What are roof gables? These are sections of the wall that are limited on the sides by slopes and at the bottom by a cornice. When it comes to gable roofs, it is worth noting that they are often presented in the shape of a triangle or pentagon.
The gable roof gable is in the shape of a triangle or pentagon
This is interesting! In some sources, the roof gable refers to only the part of the wall under the slopes, laid out simultaneously with the main walls using the masonry method. In relation to wooden buildings, the term “gable wall” is often used.
As for the need to erect pediments, it is fully justified by the most important functions with which they cope brilliantly:
- Protection of the attic spaces of the gable roof from the wind, as well as precipitation in the form of rain and snow.
- Maintaining a comfortable temperature. A gable roof involves equipping a residential attic space, which simply needs to be insulated. Even if it is not residential, unclad gables will turn into a “black hole” for the heating system, bringing the numbers in the bills of the home owners to sky-high values.
- Providing additional rigidity to the roof structure. The pediment creates auxiliary support for the rafters, partially unloading them. This, in turn, has a beneficial effect on the level of reliability and durability of the roof, especially if the house is located in an area characterized by strong gusts of wind.
In addition, the gable of the roof of the house gives the building a spectacular appearance. Thanks to decorative materials, you can easily restore the appearance of an aging building without spending a lot of money.
The gable also provides additional rigidity to the roof structure
Pediment: this is the finishing touch in the construction of buildings, a variety of configurations
Although in the minds of most people a pediment is associated with a triangular or pentagonal element, design variations are not limited to these two forms. Photos of pediments amaze with the variety of configurations. Modern architecture represents the following types:
- Keeled. In this case, the name speaks for itself. Despite its elegance, in modern architecture such a solution is used quite rarely, since such a roof element reeks of antiquity.
- Semicircular. This option, like the previous pediment, is currently also practically not used in construction. However, the reason for the low popularity lies in the complexity of such a design.
- Trapezoidal. It resembles a trapezoid, the larger side of which is located at the bottom. This design has found wide application in the construction of half-hip roofs.
- Triangular. The presented type is perhaps the most common today. If the roof is symmetrical, the triangle, accordingly, will be equilateral.
- Male. It is made of logs in the shape of a triangle and is a continuation of the crowns of the gable walls.
- Interrupted. The horizontal cornice of such a pediment is interrupted for the purpose of inserting one or more windows.
- Luchkovy. Its shape resembles a semi-oval bow. If the degree of steepness of the bend increases, it takes on the appearance of a semicircle.
The pediment can be keeled, semicircular, trapezoidal, triangular, arched
In addition, today you can also find stepped structures, the side parts of which are made in the form of steps-ladders, and the roofing is made without creating front overhangs.
House gables: photos of design variations
Today, there are many ways of arranging and options for decorative finishing of gable planes. Of course, the decision largely depends directly on how the owners plan to use the space located under the roof. However, it is necessary to take into account what materials the building frame and roof are supposed to be constructed from.
How to make a roof gable? It is often done in the form:
- prefabricated frame made of wooden slats with laying of a heat-insulating layer and external cladding with clapboard or siding;
- brick or aerated concrete masonry with further surface finishing with cement-sand plaster;
- laying timber or logs in the form of a continuation of the vertical part of the load-bearing walls of a log structure.
Note! Often, the design of the gable of a house significantly influences the overall appearance of the façade of the building. Thus, for structures with complex sloping roofs and additional slopes, the decoration of the gable walls must exactly correspond to the general style of the building.
The design of the pediment greatly influences the overall appearance of the building facade
Looking through numerous photos of roof gables, you can see that a building whose roof consists of 4 gable sections is characterized by a very impressive appearance. In the presented case, four triangles or trapezoids become an integral element of the façade. In this regard, for brick and wooden houses the structure is adjusted in such a way that the masonry visually looks like a single whole.
Structural diagrams
From a constructive point of view, the pediment is an attic wall that protects its interior from atmospheric influences - wind, dust, rain and snow. This part of the facade can be solid or it can have a dormer window - round or semicircular.
A dormer window is required to equalize the pressure inside the attic and outside the building. The dormer window should open, especially in summer. A wooden house without this device will constantly creak and deform. In brick - due to the rigidity of the structures, cracks may appear in them, which can very easily turn into emergency defects that will require a considerable investment of funds to eliminate.
From a constructive point of view, this part is an attic wall
Roof gable: basic approaches to self-creation
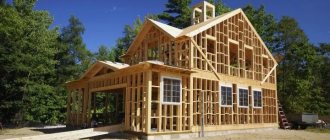
Today, in the process of constructing low-rise buildings, three main approaches are used to the issue of proper design of the gable of a house. Perhaps the main difference lies in the method of erecting and tying the gable vertical walls to the rafters and roof frame.
For compact one-story buildings, as a rule, gable elements are produced simultaneously with rafter assemblies according to a single template, which guarantees the highest precision of the design. In this case, the installation of a gable roof is carried out, starting with the installation of gables and ridge beams, and only at the next stage are rafter pairs and struts installed. Due to this, it is much easier to assemble the pediment of the building.
For large buildings with significant roof slopes, gable lining is carried out after the rafters, sheathing and all the structural parts of the frame are installed. The more complex the roof structure, the later the gable elements are constructed.
For small one-story houses, gable elements are performed simultaneously with rafter assemblies
Brick buildings can be erected according to a combined scheme. If the gable plane is planned to be covered with aerated concrete or brickwork, it is built before the rafter system is organized.
Note! Pre-designed pediments, although they significantly facilitate the process of erecting the rafter frame in the event of strong winds, require a fairly careful adjustment of the dimensions so that gaps do not form between the masonry and the overhangs due to mismatches in the dimensions of the beams.
Perhaps the simplest method of assembling a pediment is to organize a frame structure of sheathing made of wooden planks or timber, laying insulation, a waterproofing layer, and also lining the pediment with plastic siding or clapboard. It is worth noting that the process of laying insulation on the gable of a building is in many ways similar to the procedure for insulating a roof.
Video description
This video was shot specifically so that you have an idea about installing the panels on the frame:
Two ways to install PVC panels
In order to cut slabs of the desired shape, special templates are used, which are made based on the angles of inclination of the roof and its shape. The material for them can be thick paper or cardboard.
This picture shows the most convenient way to cut siding panels Source yandex.kz
When cutting panels according to templates, always maintain the temperature reserve, and do not adjust them flush with the edges of the pediment. At the very top row of panels, the entire nail strip is cut off, and holes are drilled at the top of the slab for installation.
The point for drilling is determined after applying the segment to the seat. But the hole should be located no closer than 3cm from the cut edge of the plate.
The installation of the panels itself proceeds in a vertical direction from bottom to top. Installation begins with fixing the starting profile and continues with the systematic fixation of slabs and connecting elements.
How to make a gable roof gable: theoretical aspects of construction
Speaking about the sequence of work on arranging the pediments, it is worth noting that it is determined primarily by the material that was given preference. Often the choice arises between brick and wood.
The gable of a gable roof can be done both before and after installation of the roof.
You can make half-brick brickwork using a viscous mortar. To give the material the desired shape, you just need to process it with a saw.
Important! The consumption of bricks per square meter, taking into account adjustments, is approximately 35-40 pieces.
In this case, it is preferable to use hollow bricks, since its weight is significantly less compared to classical materials, which means that the load on the foundation is minimal.
Having decided to use wood, you should first form a frame and then finish it with 30 mm thick boards. At the same time, plywood, which is characterized by resistance to moisture, is very often used to cover the gable of a bathhouse.
If you turn the attic into a living space, the pediment, like the roof itself, must be insulated
In order to give an attractive appearance to the outside, you can install siding or lining, which will provide excellent protection against moisture and create a thermal insulation effect.
If you plan to turn the attic into a living space, the question arises of how to sew up the pediment of a gable roof.
Note! Experts recommend using basalt-based mineral wool for this, but if it is unavailable, standard polystyrene foam is quite suitable.
To carry out installation, a frame of boards is formed. Their width should correspond to the thickness of the insulation. Often, 15 mm is quite sufficient. After this, the outer side of the pediment is covered with clapboard or siding with a layer of vapor barrier, and the inside of the structure is covered with boards or panels.
Covering the gable with clapboard or siding is done in the same style as the entire house
Armed with the knowledge of how to make a gable, you can create unsurpassed comfort in your home, keeping it warm and providing excellent protection from wind and rain.
Video description
If you are planning to build a house with a pediment, then you will be interested in this video about the features of siding:
When arranging the pediment of an attic roof, the board is not drawn out with an accuracy of millimeters: the excess section should simply be sawed off after installation in its place. Any openings and openings in the wall can be cut after the structure has been arranged. But still, most craftsmen are confident that it is better to do this first, before installing the sheathing. If the roof structure is of an insulated type, then the door frames should be inserted before the pediment frame is sealed.
To prevent atmospheric moisture from getting into the joints of the sheathing boards, they are spiked on both sides. In this case, the outer tenon should be turned down. The best protection from rain is provided by the horizontal direction of the cladding. If lining or tongue and groove boards are used, the middle tenon should be turned upward.
The horizontal direction of the sheathing boards provides maximum protection from rain and other precipitation Source popgun.ru
Gable of a house: useful practical tips for performing calculations
You can calculate exactly how many building materials will be needed to finish the roof gable, guided by your knowledge of a school geometry course, or more precisely, the formula for calculating the area of figures.
Note! To determine the area of the pediment of a classic triangular shape, you should use the formula: S = 0.5 B*H, where S is the area expressed in square meters, B is the width of the building (length of the base), and H is the height of the figure.
In the process of calculating the area of the attic walls, the height must be taken as the distance from the ceiling of the first floor to the ridge of the roof. In this case, the length of the base should be taken as the dimensions of the wall on which the pediment is being constructed.
Armed with knowledge of a school geometry course, you can calculate the amount of building materials needed to finish the pediment
Calculating the amount of materials for a triangular gable is in no way related to whether the roof is symmetrical. The area of the attic walls, presented in the form of triangles, does not change due to the difference in the slope of the roof slopes.
To determine the area of the trapezoidal gables of wooden houses, you must be guided by the following formula: S=C*(A+B)/2, where S is the area, C is the height, A and B are the length of the bases (walls and roof planes). Thus, the amount of material required to finish a trapezoidal attic wall is the result of multiplying the height by half the sum of the length of the bases.
Related article:
English style house: following traditions and modern features
Features of architecture of different eras. Modern classic style. One-story houses, cottages. Decoration of facades. English landscape design.
If the shape of the wall does not coincide with the standard geometric figure, it is conditionally divided into several right triangles, the area of each of them is determined, and then the resulting values are summed up.
Having carried out the calculation of the pediment, it is necessary to determine the dimensions of one element of the material, which will act as a finishing element. To do this, the length of the sheet or panel is multiplied by the width. The next action is quite predictable: the area of the gables is divided by the area of the material element, thus calculating the total number of units of building raw materials.
If the pediment has a non-standard shape, it is conditionally divided into several right triangles and the area of each is determined separately
Light touches for an eye-catching design
All that remains is to give the pediment a small touch of individuality so that the soul of the master can be felt. For example, here is a simple decorative element for the pediment, which is especially loved overseas:
You will get a nice dormer window if you follow this master class:
You can also make an elegant and very beautiful decoration in the style of Russian architecture that will transform any home.
Got some ideas for yourself? Share your impressions and ideas in the comments!
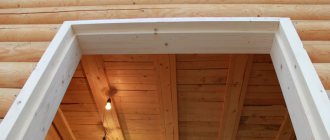
Roof cornice: step-by-step instructions for formation
The process of creating a gable cornice is a mandatory procedure during the installation of any type of roof. While one can sometimes turn a blind eye to the visual characteristics, the practical functions of these elements cannot be ignored.
Arrangement of the eaves overhang can be carried out using one of the following methods:
- lengthening the rafter legs;
- increasing the length of the rafters with fillets.
The first method is characterized by incredible simplicity. In the presented case, the cornices are formed by means of elongated rafter legs, the edges of which protrude beyond the slopes. To increase the length of the overhang, you just need to select longer beams for the rafters.
In the second case, the lengthening of the edges of the rafters, in contrast to the first method, occurs with the help of fillies - extendable parts, for the production of which thinner boards are used.
The arrangement of the eaves overhang is done by lengthening the rafter legs or increasing the length of the rafters with fillets
The choice of method for forming cornices directly depends on the length of the slopes and the parameters of the roofing structure.
Speaking about how to make a cornice on the pediment, you should also take into account that finished overhangs need hemming. This process can be performed using one of the following technologies:
- Straight hem. It involves the creation of a special box, which is located at right angles to the wall of the building, and it is to this that the material is attached.
- Diagonal hem. In this case, the cornices are attached in such a way that the material is parallel to the roof slopes.
Note! Laying the foundation for the eaves overhangs occurs at the very end of the work associated with the installation of the rafter system. When the sheathing is completely ready, the rafters should be laid out in a single level, after which wind boards can be attached to them.
The overhang hem can be straight or diagonal
It is not difficult to construct the cornice of a building yourself. To do this, you just need to carefully study the installation technology. Properly created gable overhangs with good ventilation will provide reliable protection for the roof from premature destruction.
How to make a low tide on a pediment: subtleties of working technology
Organizing a low tide involves performing a series of specific works, and it is incredibly important to do everything correctly using measuring instruments. Thanks to this, it will be possible to avoid distortions and distortions.
To complete the work you will need to stock up on the following tools:
- grinder;
- hacksaw;
- tape measure;
- hammer;
- self-tapping screws;
- pliers;
- roofing nails;
- screwdriver;
- level;
- knife-cutter.
The first stage is to install the rafters on which the roofing material will be laid. For them, you should take wooden blocks, the thickness of which is 50 mm and the height is 80 mm.
Rafters for low tide are attached to the wall at a distance of 60 cm from each other
Note! The tree must be well dried and free of knots. Before use, it should be impregnated with special compounds against fungi and insects.
The angle of inclination of the rafters ranges from 20 to 45 degrees. In this case, the final value is selected taking into account the volume of precipitation that falls in a particular area. As for the width of the ebb, this value should not be less than the size of the roof overhang above the wall. Often this is approximately 500 mm. This length is quite enough to prevent rainwater from entering the façade of the building.
According to the rules for organizing the roof gable, the rafters are attached to the wall at a distance of at least 600 mm from each other. After the roofing material is secured to them and the sheathing is laid, it is necessary to seal the junction of the wall and the ebb.
If the rafters are replaced by a house wall, which is used instead of a pediment, some craftsmen form a slope, and a metal casting is attached on top of it using self-tapping screws. This design is characterized by reliability, protects the attic from the influence of precipitation, and also provides the ability to effectively drain water from the gable.
The angle of inclination of the tide should be between 20 and 45 degrees
By following the above recommendations, it is not difficult to independently cope with the task of installing a low tide, turning it into a home decoration.
Aerated concrete pediment: a few secrets of masonry
Before you begin organizing the pediment of a building made of aerated concrete, you should carry out a series of calculations. If the pediment is characterized by a rectangular shape, they are completely uncomplicated. First of all, it is necessary to determine the height of the roof (ridge), and then calculate the area of the gable. This can be done using the rules of elementary geometry.
Note! Calculating the height of the ridge is the most important task at this stage. When determining this value, especially when it comes to single-story structures, it is important that the ratio of gable height to wall height is 1:1. Thus, you can turn the attic space into an additional room.
Laying a pediment made of aerated concrete involves the following sequence of steps:
Laying gas blocks for the pediment is done in the same way as laying walls
- After calculating the height and area of the pediment, you can begin marking the end walls. For triangular buildings everything is simple: you just need to find the middle of the lower leg. The rail should be fixed in the designated place - thus marking the center of the future pediment.
- Having stretched the laces from the top of the slats to the edges of the facade, you need to use them to find the two remaining lines of the triangle, after which you can lay out the outer rows. Then they begin laying the blocks.
- If you plan to equip the attic with a window, you will need to consider the location for installing the window unit. Having laid out several rows of gas blocks up to the level of the opening, you need to make markings and place the frame on the blocks. After this, you can continue laying the blocks close to the frame.
- After all the blocks have been laid, the final stage remains - cutting the blocks. It is necessary to obtain smooth sides of the slopes of the product. When cutting an even line, you should focus on the laces, and then smooth out the unevenness using a special grater.
Armed with the knowledge of how to lay out gables, you can be sure that the roof will be laid on a very reliable foundation on each side of the façade.
If you lay out the gables according to the rules, you can be sure that the roof will be laid on a very reliable foundation
Brick pediment: basic creation steps
The process of organizing a roof gable with your own hands is carried out in a certain sequence:
- Along the perimeter of the building in places where it is planned to erect a pediment, brickwork is carried out in two bricks, but not in length, but in thickness.
- The new row of masonry is initially driven out without using mortar.
- Using a stretched rope, marks are made on the side bricks, taking into account the future thickness of the seam, along which the product is cut. Due to this, the slopes will have smooth, rather than jagged edges.
- The end wall is trimmed according to the tensioned rope.
- The pediment is driven according to this principle to the very top.
- Then you have to align the sides.
- The masonry is strengthened with reinforcing elements every 4-5 rows.
- Depending on the dimensions of the pediment, reinforcing supports are erected inside the attic or attic. They are placed perpendicular to the plane of the base masonry.
In addition, if a decision has been made to arrange windows on the pediment, the need for additional reinforcement of the above-portal masonry must certainly be taken into account.
The peculiarity of brickwork is that it is driven out without going beyond the boundaries of the stretched rope. The initial production of cut bricks that match the shape of the slope will eliminate the need for further filling of cracks in the already formed extension.
The difference between brickwork is that it is done without going beyond the boundaries of the stretched rope
Important! If it is planned to build a massive pediment, reinforcing pilasters should be built to strengthen the wall.
Speaking about the pediment of a gable roof made of brick, it is worth noting that it is capable of ensuring long-term operation of the entire structure. Moreover, its construction does not involve significant expenditure of money and the use of complex technological solutions. In addition, the presented option is characterized by a decent appearance and the absence of the need for special care.
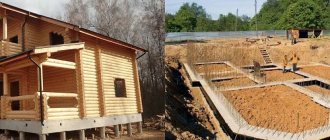
Preparatory work
It is easier to build a strong and beautiful pediment than a rafter system. The best way to handle this job is through careful preparation.
First of all, it is necessary to design the future pediment on paper or in a special program for creating construction drawings. At the design stage, you need to clearly understand what the dimensions and shape of the future pediment are, how much building materials will be needed for its construction, where the windows and ventilation vents are located. The more detailed the project and the estimate drawn up for it, the fewer unpleasant surprises there will be during work.
At the preparatory stage, care should be taken to ensure reliable foot support, since all construction work will be carried out at height. Scaffolding must be assembled in advance and ensure its reliability. Finished structures are equipped with wide platforms covering the entire width. Careful preparation of scaffolding will help you confidently move at height and build frames and sheathing.
At the preparation stage, all building materials and necessary fasteners are purchased. You also need to make sure that all the tools involved in the work are available and in good condition.
The final step of the preparatory stage is ground preparation of materials. Lumber must be cut and treated with anti-rotting compounds. Blocks, compactor mats, and waterproofing film are also sorted and cut on the ground.
How to make a canopy on a pediment yourself: a quick guide
In order to provide complete protection against water ingress, the best option would be to organize a canopy with a slope width of at least 60 cm. It is desirable that the design of the product is not too conspicuous and does not spoil the overall appearance of the building.
As for the overall roof slopes, it makes no sense to make a cantilever canopy structure for them. A much more rational solution would be to install a canopy with outriggers. Often they try to ensure that the width of the canopy is no less than the width of the foundation blind area.
You can finish the cornice using corrugated sheets
The easiest option is to form a canopy on miniature wooden rafter supports, which in their structure resemble fillies. In this case, it is necessary to make and secure the supporting structure of the canopy before the pediment is closed with lathing or siding.
As for the design of the pediment canopy, it should be characterized by rigidity and at the same time lightness. To do this, you need to sew several sheathing bars onto the rafter mini-supports. Ideally, you can design a canopy with a continuous lining of the slope with a lath or clapboard. In such a case, it is recommended to form the slope from the remains of soft roofing material and sew it up with metal tiles or slate.
After the flooring has been laid, care should be taken to protect the area where the roofing material of the canopy meets the wall.
Helpful advice! The area where the canopy adjoins can be easily designed in the form of gutters of the drainage system. Thanks to this, it is possible to minimize the amount of water that flows onto the canopy along the surface of the gable.
The width of the ramp must be at least 60 cm
The simplest solution is to seal the joint between the metal and the wall material using sealant or by gluing roofing felt tape. Then you need to form and sew a narrow strip of metal cornice over the sealed layer.
Insulation
Insulation of the gable will be needed not only for the attic space, but also for the unused attic. Cold enters through the uninsulated gable, which affects the heat loss of the entire building.
There are now many offers on the construction market. The most popular types of thermal insulators:
- Mineral wool. Not subject to biological decay, easily cut into any fragments. The main disadvantage is that it can cause skin irritation if you do not use protective products.
- Styrofoam. Inexpensive and lightweight material that is not difficult to sew between gable partitions. It lasts a long time and retains heat well.
- Expanded polystyrene. An expensive heat insulator, but also more effective. It protects well from the cold and is not damaged.
Other materials can be used as heat insulators, such as penofol, penoplex, and polyurethane foam for sealing cracks.
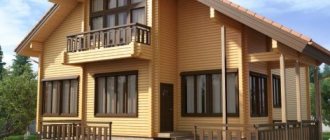
Pediment cladding: variety of materials used
When talking about what to cover the pediment with, many experts advise giving preference to siding. The presented technology involves the use of special panels that are designed to decorate the facades of buildings. Externally, they look like plank sheathing and are conveniently fastened to each other using an end lock.
Siding is good because it does not require additional decorative finishing and can retain its original appearance and technical characteristics for at least several decades.
To finish the gable with siding, one of the following types of material can be used:
The wooden cladding of the pediment is made using glued lining
- Vinyl. Being made of polyvinyl chloride, it is a solid monolithic single-layer lamella of a certain configuration. The material is not prone to cracking during operation and is not susceptible to biocorrosion.
- Metal. This type of plastic is characterized by high strength and durability. In addition, it can withstand quite significant temperature fluctuations.
- Wood. Glued lining is made from wood fibers, which are mixed with adhesive resins, after which they are pressed under the influence of high temperature and high pressure.
- Cement. A pattern is applied to the surface of cement slabs using the stamping method, which imitates natural wood or other natural materials.
Important! When installing cement siding, you should always use respiratory protection. In this way, you can protect your lungs from silica dust, which can cause serious illness.
Continuing the topic of how to sew up pediments, special attention should be paid to the ceramic option, the peculiarity of which is that it can be used to decorate the facade in a unique design. At the same time, it seems that the structure was built from natural material.
Metal cladding is characterized by high strength and durability
Video description
The video contains a detailed description of the features of finishing work using vinyl siding:
Installing vertical siding on the roof gable requires additional labor costs, because with this installation method it is more difficult to achieve an ideal result.
Vertical installation of vinyl siding should be done in the following order:
- Corner strips are fixed along the edges of the gable wall .
- A plumb line is lowered from the top of the rafter system, necessary to indicate the central axis .
- is installed along this line .
- With a predetermined step other plates are attached parallel to the central one.
- the installation of panels begins , with the first segments installed in the corners of the structure.
The end result should be a vertical cladding like this Source bg.decoratex.biz
How to cover the roof gable of a house: several more finishing options
In addition to such a common siding, other finishing options are also no less popular. The most modern solutions include:
- plastic;
- profiled sheet;
- block house or clapboard.
The term “plastic” often refers to panels made of polyvinyl chloride, which are specifically designed for outdoor use. Unlike products used indoors, the presented material is able to withstand significant temperature fluctuations and exposure to ultraviolet radiation.
In the process of manufacturing gables from corrugated sheets, thin metal sheets with grooves and ridges are used. They are coated with a layer of zinc or polymer, which protects the material from moisture and other destructive factors.
Note! Metal profiles are an excellent option for arranging the facades of buildings. But while profiled sheets look truly decent when finishing roofs, the same cannot be said about gables.
Modern options for gable cladding include: plastic, profiled sheet, block house and lining
As for finishing a block house, plastic slats and metal profiled sheets can be replaced with natural wood. In particular, a wooden pediment will look great on buildings built from rounded logs, timber, or made in accordance with frame technology.
It should be taken into account that wood does not tolerate moisture and direct ultraviolet rays. In this regard, you will have to take care of protecting such finishes. In this case, you will need to purchase varnish, paint, water-repellent impregnations or other similar substances.
In addition, the presented options, in comparison with siding gables, are characterized by a much shorter service life. This is due to the need to constantly update the paint or varnish, which shortens the service life of the material. Thus, finishing with a block house can be given preference if the chosen design option for the facade of the building requires it.
How to sheathe a gable with siding: detailed instructions
When deciding on the use of siding, the question inevitably arises of how to sew up the pediment using this technology. So, the guide to organizing finishing involves the following steps:
Before covering the pediment with siding, it is necessary to install the frame and insulate the structure
- Before sheathing the gable, it is necessary to carry out preparations, which include installing scaffolding, removing scraps of old plastic film, cutting off protruding remnants of polyurethane foam, and cleaning the wooden boards from debris and dust.
- Surface waterproofing. It is carried out by attaching the film to a wooden plane using a construction stapler.
- Installation of a frame made of galvanized profile. Guide profiles should be installed along the roof overhang and the lower part of the gable, which will serve as support for the load-bearing ones.
- The installation of the drip strip is carried out by fixing it on galvanized profiles using self-tapping screws with washers.
- Fastening metal slopes to a window opening. If you want to install windows on the gables, you will need to screw the finished elements to the embedded profiles. To avoid moisture getting on the siding, at the connection points the profiles should not just be cut, but bent one on top of the other.
- Installation of starting strip for siding. This element is fixed above the casting strip at a distance of 10 mm from it.
- Installation of all other siding fittings. In this case, the fastening is performed in exactly the same way as in the case of the starting bar.
The final stage of covering the gable with siding is cladding the frame. To do this, you need to install the first strip in the guides, which are formed by the fittings, and then fasten it to the profile through special holes.
A beautiful pediment is the calling card of any home. Guided by the basic rules and recommendations for making it yourself, as well as being inspired by photographs of ready-made solutions, you can give the building originality and a truly unique appearance.