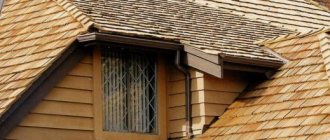
Fashion always comes back, so shingle roofing, which just a few years ago looked too simple and not impressive enough, is becoming increasingly popular today. Especially for buildings and country buildings decorated in ethnic, folk or chalet styles. A shingle roof does not require special knowledge or particularly complex equipment for the manufacture of shingles and their laying on the sheathing, therefore shingle roofing is widely used both for ordinary outbuildings and for country and guest houses.
What is roofing shingles
This material has several most common names; it is also called shingles, shingles, planks and even wooden shingles. All this is the same material for arranging shingled roofing types. Structurally, a shingle, or shingle plate, is a plank of wood of a special shape:
- The dimensions of roof shingles are chosen depending on the complexity and curvature of the roofing, most often it is a rectangle 35-40 cm long and 10-20 cm wide;
- Branded models of shingles for roofing are made with a wedge-shaped section, with a thin end of 4-5 mm; on the butt of the shingles the thickness can reach up to 15-20 mm. The simplest types of shingles can be made of any cross-section;
- A wedge-shaped groove is cut out on the wide part or butt of the shingle. This element is necessary for assembling and laying shingles on the roof.
In some shingle models, additional trimming and rounding of the corners of the shingles are performed, in this case the shingle roof, photo, acquires a “spiky” texture, like the surface of a fir cone.
For your information! The idea of using chopped or hewn wood to form roofing has existed for a very long time. During this time, it was possible to select a technology, material for shingles and installation method that would ensure a roof service life of several decades.
Forming a shingle roof is essentially a manual assembly of the covering. Each element is adjusted manually to the place of installation so as to ensure maximum adhesion of the roofing covering to the base of the sheathing, and at the same time to prevent the appearance of holes and cracks. A roof made of chopped shingles is much lighter than clay tiles, so strong gusts of wind can lift the edges of the shingles, especially in a situation where the shingle roof was assembled with your own hands and laid according to a simplified pattern.
Incompatibility of materials
All builders who have been involved in finishing various rooms inside and outside know that plastering the inside of a wooden house has one important problem: the finished mortar falls off the surface. This is due to poor adhesion. You can apply a layer of material that will provide good adhesion, and then cover it with plaster, as is done with concrete and other similar materials. But with a tree things are different. Plastering wooden walls has its own characteristics.
Any solution requires moisture, which is abundantly absorbed by wood fibers. As a result, the layer of plaster simply collapses under its own weight. To prevent this from happening, wood plaster was applied to the shingles. Shingling is a lattice structure made of wire or thin wooden planks, which acts as a base for applying cladding to the outside of a wooden house. The idea of shingles is that planks packed in several layers create cells that can be conveniently filled with mortar. Thanks to the unique cellular structure, the mixture hardens well and does not stick to the walls, making plastering the walls of a wooden house much easier.
You can make shingles for your home with your own hands, both inside and outside. The assembly technology does not fundamentally change. You need to follow certain standards and choose the right size bars, otherwise nothing will work.
Advantages and disadvantages of shingle roofing
It cannot be said that roofing made of hewn or chopped shingles is an ideal option, otherwise the tradition of covering the roof with wood tiles has long displaced newer materials from the market.
The main disadvantages of shingle roofing include the two most important:
- Vulnerability of wood as a roofing covering. Wood burns, shingles can be damaged by biodestroyers, moss, solar ultraviolet radiation and even bird droppings;
- High labor intensity of installation. Shingles are a fine material, and laying the roof of an ordinary house takes an order of magnitude more time and effort than metal tiles or slate.
Both disadvantages are not so critical as to refuse to use shingles as a roof covering. The shingles are subjected to specialized treatment and impregnation, which protects them from fire and woodworms, and the laying of shingles can be entrusted to professionals. Wooden shingles are also supported by the fact that even today there are entire towns and villages of buildings in which shingle roofs have stood for more than half a century.
Pros of using shingles on the roof
The advantages and positive aspects of using a wooden shingle roof are much greater than the disadvantages. Of the most important advantages, we note the following:
- Light weight and low thermal conductivity of shingle roofing. This means that the rafter beams will not bend or deform, as is the case when using clay tiles or slate;
- Acoustic homogeneity. This is not to say that a shingle roof does not rattle in the rain, but thanks to the mosaic stacked structure, sound and noise are weakly transmitted to the rafters, wooden frame and walls of the house;
- The roof covering is easily repaired and, if necessary, updated; even a novice carpenter can do a small repair of a shingle roof with his own hands;
- A roof covered with shingles remains warm in winter and is well ventilated from melt and rain moisture in any weather.
In addition, the use of shingles and shingles practically solves the problem of combating the condensate that forms. Thanks to a special installation method, rainwater flows along the grain pattern, without overturning the flow under the boards.
The situation is even simpler with fog, condensed airborne and capillary moisture. Any, even a small breeze, very well blows away condensation from the roof surface. Therefore, if you look at the surface of a shingle roof immediately after rain, it seems wet and saturated with moisture, but after 20 minutes the wood looks thoroughly dried.
For your information! The most important benefit of a wood shingle roof is the style and great appearance of the roof covering. Even the oldest peeled wood roofs look quite stylish and impressive.
Sometimes enthusiasts of environmentally friendly technologies consider even things that are not positive qualities of shingles to be positive qualities. For example, it is believed that shingles are the safest type of roofing. This is true, if the wood has passed radiation and sanitary control, there have been cases when bark beetle and fungus from shingles of unknown origin destroyed the rafter system of the roof of a house.
Modern materials imitating shingles
The construction industry today offers many materials that have little external resemblance to real wooden shingles. Products that imitate natural material are easy to use, cost less, but do not have the properties of natural wood.
The following options are produced:
- copper shingles: a painted metal geometric profile imitating shingles, in the form of squares, scales or diamonds, equipped with special fasteners. Such tiles are fireproof, resistant to destruction, but do not have high soundproofing qualities;
- wood-look plastic siding: used for finishing facades, has good moisture resistance, and is lightweight. Disadvantages include low environmental friendliness;
- polymer imitation made of PVC: close in quality and appearance to natural shingles, it contains wood shavings, but resins and mineral additives can release toxic substances.
Each type of coating has its own advantages and disadvantages. Natural material has clear advantages over the most skillfully executed imitation.
https://youtube.com/watch?v=T6RxKTvLWCs
Characteristics of roofing shingles
The quality and durability of the roof depend on the wood used, installation method and manufacturing technology. To calculate the load on the battens and rafters, the weight of one meter of square shingles is taken to be within the range of 14-15 kg. In fact, the weight of the roof can vary greatly, since different types of wood and different humidity levels are used.
The best material for shingles is considered to be:
- Canadian cedar;
- Larch or Siberian pine;
- Aspen and oak over 15 years old.
Cedar shingles are the most durable and beautiful, but the price per square meter exceeds all existing types of roofing. Cedar wood is not afraid of anything, neither putrefactive bacteria nor woodworms, and can stand on a roof for up to 80 years without care or maintenance. The weight of a cedar shingle roof is 15-20% less than that of its closest competitors.
For ordinary buildings, you can use pine, spruce and aspen; they last on the roof for 20-30 years, after which the roof is replaced due to the texture drying out in the sun. Oak and larch are considered the heaviest and most expensive to manufacture due to their high density and severe deformation of the fibers.
Types and methods of docking
Most fiber cement siding is installed in a herringbone pattern, with one board covering the other. This is how houses are usually clad with clapboards. The main advantage of this method is the minimal possibility of water flowing between the boards. The moisture simply flows down, since the boards overlap each other by 25-30 mm (depending on the size of the board). But at the same time there is an increased consumption, since with a width of 19 cm, only 15-16 cm remains “working”.
Different installation methods - overlapping and butt
The second type of joining of fiber cement siding boards is end-to-end. It was implemented by the Belgian company Cedral in the “click” series. The board of this series has a quarter cut, is inserted into one another, and is fastened with self-tapping screws to clamps (small mounting plates for hidden fastening). In this case, there is no need to drill the surface of the board, since the tongue of the clamp clings to the protrusion of the board and thus holds it.
Corner without additional elements
The corners and joints of fiber cement siding can be decorated with additional elements - corners; they can be joined by sawing the boards at an angle of 45° and coating the cut with paint. A jar of paint used to paint your material is issued/purchased with the siding batch. Japanese façade fiber cement panels are coated not with paint, but with a recommended sealant. By the way, the sections under the additional elements should also be painted over. The mounting holes are also coated with the appropriate agent.
The corners are finished with special elements
If you like the design with corner finishing, but don’t like the price of these same corners (much more expensive), there is an option - saw the same board lengthwise (of the same or a different color), paint the cut and connect them at the corner with self-tapping screws. It is clear that upon closer examination this option will lose in aesthetics, but if the budget is limited, this is a good way to save money.
Features of shingle manufacturing
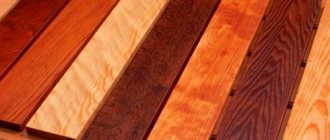
To produce roofing material, wood from mature trees, preferably grown in northern latitudes, is used. Shingles and shingles cut from Siberian and Arkhangelsk pine are considered the best option in terms of quality, durability and cost of the material.
Shingles manufacturing technology
Today, two methods of producing roofing boards are used:
- Manual or semi-machine. Blanks from logs or lumps are cut from the outer layer and split along the fibers into planks manually on a machine or special device;
- Industrial method. The log is not cut into logs or logs, but is processed on a peeling machine along the grain. The process is reminiscent of obtaining veneer, but, unlike sheeting a thin veneer sheet, the cutting element of the machine - the vibrating knife - peels off fairly thick strips of 12-15 mm.
The chipped and peeled blanks are laid out under pressure to stabilize the geometry and final drying of the material. In handicraft production, shingles are cut and sorted, in industrial production they are sanded and additionally impregnated with water-repellent coatings.
For your information! There is also a technology for cutting or cutting logs with a band saw into a package of ready-made roofing boards for roofing.
This type of shingles is either sent to impregnation chambers, where they are subjected to high temperature and pressure in an organic solvent environment, or, if it has not passed control, it is sold to the public for decorative purposes.
Row or nameplate shingles
This is a classic version of roofing shingles, well known both in the vastness of northern Russia and in Europe. Perhaps this type of material came from Scandinavia under the name shield, and today it is called nameplate board or nameplate shingles.
Structurally, the board differs from an ordinary shingle board only in its more elongated shape. If the row of proportions resembles a book, then the nameplate is more like parquet flooring cut with a wedge. The nameplate strip always has one edge thinner than the other, this allows the shingles to be laid on roofs with a large angle of inclination.
To make a block or block of wood, it is divided into halves or quarters with a special tool, similar to a cleaver with a wooden handle welded at an angle of 90°. Next, a quarter of the deck is peeled into dies 15-20 mm thick.
The blanks are placed on the device and, using a two-handed carpenter's knife, they plan and adjust the shingles, giving it the shape of a highly elongated wedge.
Shingles are the best option for a roof
In addition to the nameplate strip, shingles are used for roofing equipment. If the previous version was more like a parquet board, then shingles can be compared to a tongue and groove board. The main difference between a shingle and a nameplate is the presence of a wedge-pointed edge on one side and a V-shaped groove on the other.
As a result, shingles can be laid or roofed in much the same way as is done when laying a floor or finishing walls and ceilings with clapboard. The tongue-and-groove connection not only makes the roofing covering durable, but as moisture builds up, the wood swells and tightly fixes the roofing to the roof sheathing.
Ploughshare shingles
This is a special type of material made from dried, stabilized and slightly moistened timber or block. The ploughshare is cut into long strips of small thickness, due to which the shingles gain flexibility and strength.
Plowshare shingles are used on very long slopes, often with a curved surface. This roofing perfectly withstands deflections and deformation of roof overhangs, so even in conditions of strong wind and rain, the coating does not delaminate and does not lose its properties.
Installation technology
Experts recommend installing shingles under plaster in accordance with the following algorithm:
- we fill in two or three rows of profiles, we do not hammer in the nails completely - they should only fix the slats;
- We nail the output rail at both ends. We hammer one nail in completely, and place the second at an angle so that its sharp tip points toward the near edge of the rail. By doing this we ensure “tension” of the strip and improve the fastening;
- we pierce the tensioned output rail with nails in increments of two strips, using fasteners at the intersection points;
- the tips of the slats should be positioned with a gap of two to three millimeters to prevent swelling of the wood material during the plastering process;
- We remove the nails that secured the first row and secure the slatted ends so that they do not warp.
When putting shingles on walls, a number of conditions must be observed:
- We start working from the floor surface and gradually move to the ceiling;
- if the shingles are dry, they will have to be soaked in water before stuffing;
- if finishing work is to be done in a room with a high moisture content in the air, before filling the shingles, a waterproofing layer is installed - polyethylene material or a special membrane is strengthened along the wall;
- if there is no shingles, it is allowed to use a steel mesh with cells of 4 - 7 cm. It is fastened tightly, sagging is not allowed.
How to make a shingle machine
Quite a lot of options and schemes of devices for making shingles have been invented. Some designs and machines for making shingles with your own hands are produced in an industrial version. Of course, the quality of such units is much higher than a homemade machine made in a garage or cottage.
The main problem in making shingles for roofing remains the strength of oak or deciduous wood; it is not so easy to separate the shingles into separate boards using only physical force. Therefore, most home-made devices use an electric drive and a movable slide table, on which a knife is attached for cutting wood into dies.
One of the options for making a shingle machine with your own hands is shown in the video:
Basis of a shingle peeling machine
Structurally, the device consists of four parts:
- Bed with guides;
- Movable table with cutting element;
- Rocker drive;
- The motor is electric or driven from a walk-behind tractor through a pulley or power take-off shaft.
Advice! Ideally, the machine can use the frame from an agricultural trailer, truck or tractor. The main thing is that the frame mounted on steel supports is strong enough and stable.
A steel angle with a 45 mm flange is welded onto two main parallel beams. This is necessary to hold bearings or rollers on the table, on which the table with the knife moves, at the moment of chopping the next shingle blank.
The level of protrusion of the cutting edge of the blade above the wooden surface of the table will need to be adjusted so that the force is directed strictly horizontally, and at the moment of chipping the shingles, the workpiece is easily separated from the solid wood.
Otherwise, the board will be of different thicknesses, and, accordingly, before laying it on the roof, you will need to spend a lot of time manually trimming the material.
The advantage of using a walk-behind tractor is that you can easily select the cutting speed and force. Using a homemade peeling machine, you can fill the required amount of material needed for arranging a roof in 2-3 days.
The speed of cutting shingles is low; industrial machines cut the stock for laying the roof in 6-7 hours of work, as in the video:
It is clear that before getting down to business, you will need to make several runs to select the moisture content and thickness of the workpiece before you can proceed to making a supply of roofing boards.
Wood requirements
It has already been mentioned that only deciduous wood is suitable for making shingles; coniferous wood has many knots. The quality, quantity and cost of shingles largely depend on the correct choice of wood. There are several general requirements for raw materials.
- The trunk should not have knots. It is advisable to select trees from a dense forest, and not stand-alone ones. Under these conditions, the trunk reaches towards the sun; in the lower part there are almost no branches and, accordingly, knots.
- The tree must be freshly cut; damp wood is much easier to process.
If for some reason the round timber has dried out, then before making shingles, the blanks should be soaked in containers with water for several days. But you need to know that the tree will not return its original properties. When wet, moisture enters only into the intercellular space, and the cells themselves remain dry. The tree must be freshly cut - The length of the chocks is at least 40 centimeters. You can adjust their size by a few centimeters in one direction or another, the main thing is that they are all approximately the same.
- The tree must be healthy, without malformations and signs of pest or disease damage.
Wooden shingle roofing
How to make shingles with your own hands
In the simplest case, for a small roof, you can cut the required amount of material manually. For example, use a carpenter's knife and a piece of a car spring with a welded handle.
The blanks of lumps or blocks are pre-cut with a chainsaw and carefully inspected for the presence of knots or wood defects. Logs with knots and uneven fiber structure are rejected; they are not suitable for roofing. Each block is divided into eight parts with an ax and a hammer, otherwise it will be difficult and physically difficult to chop off an even plank from the massif.
If the wood material is relatively smooth, for example, like aspen, then you can cut the log with a homemade device, as in the photo.
This method does not require special physical strength, and the quality of the shingles, and therefore the roof, will be much higher.
The chopped planks are stacked and subjected to manual trimming. In order for the roof to be dense, without holes and humps, it is necessary to calibrate and cut off excess wood from the workpiece. The last stage is drying; for laying on the roof it is best to use shingle boards with a humidity of 25%.
How to properly lay shingles on a roof
There are several schemes for constructing a roofing covering, depending on the material used, the shape and size of the roof. The most difficult part is laying the ploughshare; in this case, it is better to entrust the installation of the roof covering to professionals. The simplest option, namely, laying a plank board or nameplate, can be done with your own hands.
We build a nameplate roof
First of all, it is necessary to correctly calculate the pitch of the sheathing; the length of the shingles should be 2.5 times greater than the pitch distance. The eaves of the 30 cm overhang are completely covered with boards, and a support strip is stuffed along the edge.
Laying begins from the bottom row, the first pass is laid from a shortened plank, after laying it on the roof sheathing it should reach the first batten of the sheathing.
The next two layers are laid out from normal shingles. On top of the starting row, the planks are laid out in the roof with the obligatory overlap of the joints. The remaining rows are laid out offset by a rafter pitch.
Shingle shingles are installed on the roof sheathing in an oblique manner, with each row necessarily consisting of two layers. This overlap with interlocking edges will make the roof strong and flexible, like fish scales.
Calculation of lumber and estimate for wooden roofing
Of course, you should make sure in advance that the material so carefully prepared for installation is enough for the intended area of the wooden roof. It is advisable to calculate the required number of logs in advance. For such calculations, special tables have been developed that can be used.
With their help, it is easy to calculate the number of planks required for laying in a given number of rows with a known slope. The material should be taken with a margin of at least five percent. What if some amount of material is spoiled by unsuccessful attempts?
The home roofer also focuses on the slope, size and area of the roof. But first of all, they find out how many plates are required per square meter of coating.
A thick log four meters long, prepared for shingles, is divided into an average of ten logs. Each of them will make three or four fifteen-centimeter boards.
Precise calibration is not needed here. Approximately seven plates are laid per meter of roofing along the longitudinal line. Further calculations are made based on the number of proposed coating layers. For example, with a three-layer installation used in housing construction, only a third of the element appears on the daytime surface.
Over verandas, bathhouses and gazebos, wooden tiles are often laid in two layers. That is, the number of prepared plates doubles, resulting in fourteen of them. With an overlap of each previous row of ten centimeters, in the case of a two-layer laying, about thirty cm of the board will be visible from under the next row.
This makes approximately three rows vertically . If you round and multiply the resulting data, you get about 42 pieces. It is better to round this number to 50: in any case, the remainder will not be lost. The façade and pediment are finished with shingles, and the interior cladding is made from it.
Important note! A roof with tiles can have a reasonable slope from 55 to 71 degrees. Experienced roofers consider slope indicators to be the main determinants of the service life of such a coating. The critical limit is the slope of the slopes with an angle of 14-18 degrees. The steeper the slope, the more material it will require.
Shingled roof care
There is a widespread belief among amateur builders that roofing made of larch or cedar does not require special care, since due to the large amount of resinous substances the material is not afraid of water and sun.
In fact, a shingle roof will require periodic cleaning and treatment. The roof needs to be cleaned of debris and large amounts of seeds and grass. Birds like to hide supplies under the roof of a shingle, and in the spring or summer, shoots of green grass sometimes appear on the roof.
In addition, the roofing covering must be treated annually with antipyrene compounds, and if pine or spruce was used, then with antiseptic and antifungal solutions.
A new roof is usually always light-colored, almost white; this is a good reason to cover the shingles with an impregnation with a toner similar to old wood, which will protect the wood from ultraviolet radiation and give the building a more respectable look.
How to apply the solution?
How to plaster wooden walls with shingles? If you want to achieve an ideal surface, you need good plaster and primer, and everything will be applied in several layers. The sequence is:
- The felt is slightly moistened with water; it should be slightly damp before starting work.
- The surface is marked with markers where the grid has unevenness. In these places you will need to apply a thick layer of plaster. You need to make a layer of 1 level - this is extremely important. The maximum thickness should not exceed 1.2 cm. The recommended thickness of the rough layer is only 9 mm.
- The first layer is a spray, it must dry, after which a layer of primer is applied. If you use lime and gypsum, then the layer will be 7 mm, and if the base is cement, then no more than 5 mm.
- When applying the spray, you should try to fill all the voids as best as possible. At this stage there is no need to level the surface; it is enough to maintain approximately the same level.
- Let the primer dry a little, but not completely, it must be damp so that the next layer is properly fixed. If you plan to install tiles in the future, this is where the finishing work ends. If not, you will need to perform 3 layers.
- The top layer of plaster must be clean with the finest fractions possible. To do this, the solution must be sifted through a fine sieve. This way you can get rid of lumps and debris. A finishing layer is applied to the soil, carefully distributing the entire solution, using a trowel and a rule. The plastered area is rubbed with a foam or plastic trowel in a circular motion - this way you can get rid of bumps and small irregularities.
- If the primer is dry, you can lightly cut it with a spatula to form grooves and then moisten it.
Plastering on the shingles is completed, the finishing layer is drying.
Artificial shingles for roofing
In order to make a roof that matches the tone and color of a roofing covering made of natural shingles, it is not necessary to buy a machine or expensive material made of cedar or oak. Already today, signs and shingles pressed from a mixture of polyvinyl chloride, polypropylene and wood flour are increasingly used instead of natural wood.
Essentially, this is the same decking board, but designed in the form of a shingle board. The color and texture of the roofing material can be anything, from freshly cut cedar to old bog oak. The material does not require maintenance, is not afraid of sunlight, frost and does not absorb moisture at all, which means there are no problems with condensation and rainwater.
The only serious drawback of artificial shingles is its flammability. Despite the fact that American roofing manufacturers assure that the material is not afraid of heat and does not support combustion, in practice a slightly different picture emerges. When an attic or roof rafter catches fire in a fire, synthetic PVC wood releases huge amounts of chlorinated ethylene, an extremely dangerous and poisonous gas.
That is why polyvinyl chloride in its pure form is not used for roofing work; most often the polymer is used as protective coatings of small thickness.
Plaster mixtures for wooden surfaces
For plastering walls and partitions made of wood, you can use compositions based on cement, lime and gypsum. Fine quartz or slag sand with a fraction size of about 1.2 mm is used as a filler.
The cement-sand mortar is prepared as follows: 3-4 parts of sand are mixed dry with 1 part of cement until smooth, then water is added and the solution is brought to the desired consistency. This plaster composition is suitable for rooms with different operating conditions.
For rooms with normal humidity levels, you can use a lime-gypsum mixture. When making such a solution yourself, you must adhere to the following proportions:
- 1 part lime;
- 1 part plaster;
- 2 parts sand.
Since gypsum sets very quickly, reducing work time, it is better to use gypsum mixtures with retarders instead of pure gypsum. Gypsum starting putty is suitable for these purposes.
Lime-cement mortar is suitable for damp areas such as the bathroom and kitchen. When preparing it yourself, you will need the following components:
- 1 part cement;
- 1 part lime dough;
- from 2 to 5 parts of sand.
USEFUL INFORMATION: Priming walls under plaster is a “cure” for its destruction
Lime paste is diluted with water in a separate container. The volume of water should be equal to the volume of lime. The resulting solution is added to the cement-sand mixture and mixed.
Important! Before use, lime must be preliminarily quenched and kept for a month so that the plaster does not swell during the drying process and is not damaged by holes from escaping gas.
