Articles
All photos from the article
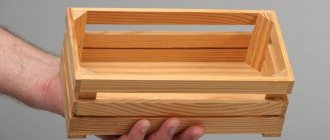
One of the most important kitchen utensils is cutting boards. It is on them that cutting vegetables, cutting meat and many other tasks are performed that allow you to prepare delicious dishes. Next, we will get acquainted with the characteristic features of plywood models, and also learn how to make them ourselves.
Photo of a plywood cutting board
Cutting board as an object of decoupage
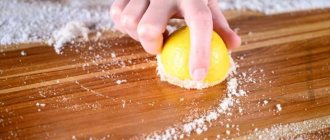
The ideal object for applying decoupage images is a wooden cutting board. The smooth surface of wood will allow you to apply the desired image without any problems.
A decorated bread board will decorate any kitchen. Photos of decoupage boards for use as a sample can be easily found on websites dedicated to this hobby.
Still life
It will be easiest for beginning pyrographers and children to master the technique of “drawing with fire” in the still life style. Find a suitable contour pattern for burning on the Internet and get to work. If you choose a vase of flowers as a base, try to immediately filter out designs that have a lot of shaded areas. It is better to burn such images when you get the hang of them.
Still life will be more to the liking of girls than boys. A beautiful drawing with fruits, plants, kitchen utensils or other inanimate objects is by default considered a purely feminine hobby. For boys who are learning to burn, you can choose simple stencils with cars and cartoon characters.
Advantages of decoupage
This technique has a number of special advantages. These include:
- bright visual effect;
- simplicity. Beautiful decoupage of boards is accessible to any diligent person;
- relative cheapness of materials;
- durability of the applied drawings.
What will you need to decoupage a board?
To practice this hobby you will need to purchase the following materials:
- acrylic based art paints. The set must contain white paint. It will create the desired background on the subject;
- glue. You can use the well-known PVA (its disadvantage is yellowness, which may appear over time). You can also purchase special decoupage glue;
- Water-based acrylic varnish intended for coating wooden surfaces. If the board is primarily decorative, then any varnish of this type will do. If it is intended to be actively used for its intended purpose, then preference should be given to parquet or yacht varnishes. They have higher performance properties;
- scissors;
- brushes;
- sandpaper;
- sponges;
- the board itself;
- decoupage napkins with drawings. They can be replaced with any images you like, for example, newspaper and magazine clippings, or printed drawings.
Advantages and disadvantages
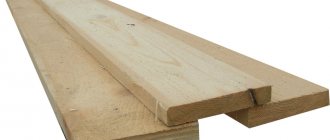
Plywood sheets
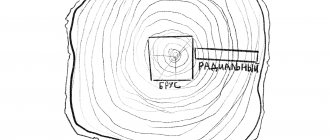
Fiberboard consists of several layers of veneer, which are extensively glued together. Why is it so good for creating a cutting board? This is easy to understand after familiarizing yourself with the characteristic features of such interesting material:
Advantages
- High strength indicators. This is due to the presence of hardened glue in the structure of the product, which is stronger than wood fibers;
The board must withstand constant contact with the knife
- Moisture resistance. What is more important in the kitchen than mechanical resistance? Resistance to excessive humidity. Juice from cut vegetables and fruits, water draining from them after washing, and steam simply standing over pots quickly render ordinary wood unusable. But the sizing mentioned above quite effectively prevents this;
- Beautiful appearance. Plywood, just like a classic wooden product, can boast of having an original textured pattern;
The original natural pattern adds aesthetics to the kitchen item
- Ease of processing. The shapes of plywood cutting boards can be very diverse;
- Acceptable price. Taking into account all the high performance indicators, fiberboard is cheaper than solid wood;
- Durability. The service life is not limited to ten years, subject to proper care.
Flaw
The only significant disadvantage is that toxic glue may have been used in the manufacture of the plywood you purchased.
Tip: You only need a small amount of particle board to make a cutting board, so don't try to save money by buying a cheap product of unknown origin. It is better to purchase material from a trusted manufacturer, which probably used environmentally friendly adhesive. This will eliminate the only possible drawback of your future piece of kitchen equipment.
Manufacturing process
Now let’s directly figure out how to make a cutting board from plywood with your own hands:
Stage No. 1: drawing and template
Example of a drawing of a plywood board
Drawings of plywood cutting boards are needed to create templates. That is, draw a drawing by hand, and then transfer it to cardboard in exact dimensions, creating a kind of stencil.
Various plywood cutting board patterns
Tip: when creating a drawing, remember that the more intricate the contours of the future product, the more difficult it will be to wash. So, if high loads are expected in the kitchen, then it will be more practical to use simple geometric shapes.
Stage No. 2: choosing plywood
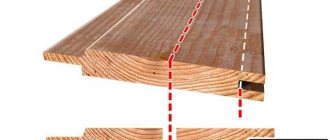
There are several basic requirements
| Requirement | Argumentation |
| High grade | If you choose low-grade wooden plywood, the presence of any defects in such a small area will not only be very noticeable, but will also make the board less convenient to use. |
| No lamination | The laminate will quickly come off as a result of frequent contact with a knife, and it turns out that you simply overpaid for a beautiful coating in vain. In addition, its particles can get into food, and this is completely unacceptable. |
| Thickness of at least six millimeters | Thinner particle board may not be able to withstand the stress of a kitchen. |
Moisture-resistant plywood 10 mm thick is an ideal choice for creating a cutting board
Stage No. 3: tool preparation
Jigsaw for woodworking
To work you will need:
| Tool | Purpose |
| Electric jigsaw | Sawing out the applied contour |
| Sandpaper | Sanding cut edges |
| Brush | Impregnation |
Tip: It is also recommended to use a vice if possible. It is much more convenient to process a fiberboard sandwiched in them.
Vise for home workshop
Stage No. 3: cutting out the outline
This is the most important stage, which, in general, can be described as creating a cutting board. You should cut slowly, exactly following the lines drawn on the template and holding the plywood with your free hand, unless, of course, it is fixed in a vice. The quality of this task depends solely on your accuracy.
Cutting process using an electric jigsaw
Stage No. 4: grinding and impregnation
In conclusion, the instructions involve performing the following steps:
- Take sandpaper and sand all the cut edges;
- Using a brush, saturate the surface of the wooden product with Vaseline, linseed or sesame oil.
This completes the entire work process.
Surface preparation
In order for the applied paint to adhere better, it is necessary to sand the surface. Regular sandpaper will do for this.
For greater effect, it is recommended to first go over the entire area with coarse sandpaper. And after that, repeat the operation, but with fine-grained sandpaper.
We recommend reading:
- Volumetric decoupage is the best master class for beginners. Step-by-step instructions and all the features of the decoupage technique (100 photos + video tutorial)
- Paper for decoupage - an overview of all types. Instructions on how to choose and use the right material using the decoupage technique (120 photos + video)
Decorating furniture with your own hands - an overview of the best methods. 100 photos of the best options for modern furniture decor
Applying the first coat of paint
After sanding, you can apply the first layer of acrylic paint. To do this you should use a brush. Movements should only be made along the grain of the wood.
If during the painting process flaking of the fibers is revealed, then after drying they should be treated with emery cloth and then painted again.
Some craftsmen advise priming the surface before applying the first layer of paint. Paint applied over a primer holds even stronger.
Second coat of paint
After applying the first layer, the board needs to be dried. The paint dries completely in a maximum of 2 hours. If the layer is thin, this will take 30 minutes.
Next you need to apply a second layer of acrylic. To do this you need to use a sponge. The sponge does not leave streaks on the surface being painted, which is typical for a brush.
We recommend reading:
- DIY furniture decoupage: TOP-150 photos of original ideas. Step-by-step instructions + master class with examples
Children's room decor: a review of interesting solutions + step-by-step instructions on how to make beautiful decor in a nursery with your own hands (130 photos of new designs)
Design options
Here you will be presented the very ideas that you can bring to life. We will consider several options separately.
As for me, here you should use your imagination and create something from sawn wood, or from bars, or just a solid board, which will be a wonderful addition to your kitchen.
In my opinion, interesting ideas for DIY cutting boards would be the following:
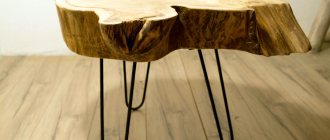
- Solid
. This is a classic. Even a one-piece DIY cutting board made from plywood or solid wood can look beautiful; - Glued
. But the glued board is more original. It is more difficult to assemble, but the design will be more practical and less susceptible to deformation; - Sliding
. Here the board can be placed over a plate, bowl or pan. The sliding mechanism allows you to separate the parts of the board and dump the chopped products into the tray; - With compartment
. The compartment is made according to the principle of a drawer. You can throw waste generated when cutting vegetables, fruits, meat, and other products into it; - Angular
_ Can be installed on a kitchen set that has a wide work surface. By placing a bowl, you can easily unload everything without turning over the board itself; - With legs
. An original design that, due to the height of the legs, allows you to place a plate or bowl on the board, and when cutting food, throw everything into the container. They look original. Can be used as a table for serving breakfast in bed; - With an image
. As for me, even an ordinary round or oval board will look original if you put a design on it. This can be done using decoupage or simple gluing.
Now, using the example of several ideas, let's see how to make a cutting board with your own hands.
Classic cutting board
Whatever one may say, the best wooden or plywood board for a beginner is the classic design.
Don't be greedy and take high quality material. This is class A or extra. The tools you will need are a jigsaw. drill, chisel, as well as a grinder, vice, pencil and tape measure.
The manufacturing procedure looks like this:
- make a template out of paper by drawing it on a sheet of paper folded in half to get precise symmetry;
- Apply markings to the board according to the pattern;
- Use a jigsaw to cut the workpiece along the contour;
- for complex sketches and lines, take a jigsaw with a metal file;
- sand the wood with circles or paper of different grain sizes;
- chamfer and process the corners;
- Apply a layer of Vaseline oil and let dry;
- repeat the oil treatment several times;
- When the oil appears on the surface, remove the excess with a rag and let it dry completely for a day.
Actually, the board is ready.
By the way, let’s talk about what to cover the product with. In general, there will be enough oil. You should not use different oil varnishes if you plan to cook and cut food on a board. And for a decorative board, regular varnish is also suitable.
With an image
Here you can use painting, decoupage method, and so on.
Let's look at the example of a regular color picture printed on a printer.
You will need the following:
- pre-assembled board;
- image;
- scissors;
- parquet varnish;
- brush;
- PVA glue Moment Joiner.
Or use another varnish that is safer for health and also odorless.
The bottom line is this:
- use scissors to cut out a design from paper;
- Apply a layer of glue on the back of the picture and glue it to the board;
- give time to dry properly;
- Apply 1-2 layers of clear varnish to the surface.
You can also paint something on the wood and then cover it with a layer of varnish.
If you make a design on one side, the board will turn out beautiful and functional at the same time. You will hang the decorative side on the wall or place it on the table. And the second side will be used for cutting and slicing.
An alternative to paint and decals is epoxy resin coating.
Glued board
This option is for the more experienced. Obviously more difficult than making a regular board. But no more difficult than making a knife stand, for example.
The point is to glue lamellas of different colors together using different types of wood. This creates contrasting stripes. Looks chic and expensive.
Take light varieties such as maple, ash and birch, as well as dark ones - beech, bog oak and mahogany.
To create a board you will need:
- planer or thickness planer;
- powerful clamps;
- circular saw machine.
First prepare the boards by leveling them using a circular saw. This will allow the elements to fit perfectly together.
The order is as follows:
- pass bars of light and dark shades through a thicknesser to obtain blanks of the same width;
- place all the bars in a template cassette, arranging them at your discretion;
- turn each block on its side and apply a layer of wood glue;
- return the workpieces, fit them tightly to each other;
- secure using clamps or clamps;
- leave for a day so that the glue completely hardens;
- Remove the board from the clamps and clean the surface of excess glue.
You can add holes for hanging on the wall, or install special ring holders. The choice is yours.
Speed up blow drying
If you don't have enough time, you can use a hairdryer to speed up the drying of the paint. The device must be placed at a distance of at least 30 centimeters from the product, and the air flow should not be too hot. The minimum or, in extreme cases, average speed of the device will be enough.
Tiger
Unlike a complex picture, even a small child can burn out animals if you choose the simplest sketch for him. For adult craftsmen with experience, you can find a more complex stencil, with many small strokes. But the image of a tiger on the board is ideal for beginning pyrographers.
To further train a small child, it is better to choose a picture for children with additional elements - trees or other animals. Such designs are often used to decorate cutting boards or act as independent compositions. Gradually, the child will master complex techniques in pyrography, and over time will learn to burn portraits.
Image overlay
After the second background layer has completely dried, you can proceed to overlaying the image. This is a responsible matter and cannot be rushed.
There are two most common methods of this operation - wet and dry. They will have to be considered separately.
Learning to translate
Many people ask the question “How to transfer a drawing onto a board?”, so this is done using a stencil. You need to find and download pictures of fruits, flowers or animals that interest you, as these are the most commonly used patterns for wood burning. It is best to choose simple templates, especially if you are doing pyrography for the first time.
Print the downloaded stencil and cut out the figure if the figure in the picture is empty. If there are additional internal parts, you need to use carbon paper. Place it on the wood, place the printed stencil on top and trace the design. Try not to let the image move.
There is another way to transfer a picture to the board. You also need to print the stencil you like, printed in a mirror image. Prepare a bowl of water, decoupage glue, wood varnish, acrylic paints, a brush and a sponge.
Cut out a stencil or finished design, then carefully coat it with decoupage glue and attach it to the wooden surface with the design facing down. Smooth the design with a sponge so that it does not “bubble” and also so that there is no excess glue left. Let dry. It is best to leave the work to dry overnight.
Once dry, moisten the motif with a damp sponge and begin to erase the paper until the design appears on the wood. Carefully get rid of all the paper. Then we begin to rub the remaining paper with our fingers, making pellets that remain on the wooden surface. We brush them off the tree, and what remains is a finished design, which, after complete drying, can be supplemented by burning (for example, burning its outlines) or simply decorated with paints. Then coat the work with varnish.
Dry method
It is simpler and recommended for beginners. First, you need to very carefully cut out the image so that there are no burrs at the edges. After this, you can proceed to applying it to the surface.
The image is glued to the board using glue, which is carefully applied with a brush.
The drawing should lie flat on the board without forming folds. If the latter do occur, you can remove them with a rubberized roller or spoon.
We recommend reading:
- Door decor - 130 photos of exclusive ideas and options. Instructions on how to make decor with your own hands (video + master class)
- Beautiful DIY kitchen decor - a review of the best ideas. Original and modern design TOP-150 photos
DIY wall decor - a review of the best and original ideas. 135 photos of ready-made solutions, all implementation features + instructions
Mastering the technique
Once the design is traced onto the board, it’s time to start burning. Make sure the board is completely dry. Then heat the burner until the nib turns dark red.
Be careful when working with a hot pyrograph, it is very dangerous! It is better to do everything more slowly, but there will be no consequences.
Burning is best done from the contour to the center. That is, we first outline all the outer edges and only then move on to the inner ones. It is best to burn in separate areas: once you have worked on one, move on to the next, but in another part of the drawing. This will allow the drawing to cool evenly and will not create unnecessary lines or random strokes. When the work is completed, it can be decorated with paints. And then treat it with wax so that the board has a shine.
Related article: Crochet amigurumi rabbits
Let the owner of the house decide for himself whether to use your gift in everyday life or hang it on the wall or put it on a shelf. In any case, your gift will find a worthy place in the kitchen and in the heart of your friend!
Varnishing
After the glue has completely dried, the product must be varnished, otherwise it will not be durable. The varnish should be applied in several layers, each subsequent one after the previous one has dried.
Thanks to this operation, the drawing will be reliably protected from friction. The shine from the varnish will give the product additional aesthetics.
We hope that in this article we were able to answer the question well enough - how to make decoupage boards with your own hands. Given the desire and time, any diligent person can cope with this task.
Conclusion
Plywood is the most suitable material for creating a cutting board due to its high performance characteristics and affordable price. The work itself is not difficult to complete, the main thing is to follow the above recommendations.
DIY plywood cutting board
The video in this article will introduce you to additional materials related to the information presented. Be attentive to the details, and you will succeed. You can ask any questions regarding the topic discussed in the comments.
Photo of decoupage cutting board
Did you like the article?
1+