Some time ago, cutting out a wide variety of wooden shapes with a chainsaw was out of the question. Now this won’t surprise anyone. Today in our country there are plenty of first-class craftsmen for whom carving wood with a chainsaw is a common thing.
It should be noted that this requires a lot of effort, and most importantly time. However, in order to understand the basics of this unique method, it is enough to understand only a few theoretical points.
master class and instructions on how to choose material
Wood carving is both fascinating and frightening when done with a chainsaw.
Not every person could find the strength or desire to engage in such art. However, regardless of whether you are a master, an amateur, or just an outside observer, one cannot but agree - solid sculptures created from a large trunk of a once mighty strong tree attract the eye and evoke admiration for the master’s ability to work with such crude equipment as a chainsaw, so fragile material. If you have found your inspiration in wooden sculptures and decided to start your own path of becoming in this beautiful ancient craft, then be prepared to spend a lot of time and effort learning the basics, as well as mastering the small details and tricks that come to each master exclusively from his own experience .
Learning the basics of wood carving with a chainsaw
For any person, good literature will be an excellent help in the theory of wood carving. On the Internet and on the shelves of bookstores you can find a large number of books that you can buy, download or read while online. You should choose exactly the printed publication that suits your skill level and writing style.
Despite the fact that it seems that every book will say the same thing, it is very important to choose the one that will be easy for you to read, the text should be clear and pleasant, and the information obtained from it should be useful for application on practice. Fortunately, the selection of literature on this topic is really large.
But before you take up a chainsaw, think about it: maybe first you should practice and master simple wood carving using hand materials: chisels, needle files, etc. After all, even after mastering chainsaw carving, you will still have to modify the details of your sculpture with this particular set.
What tools are useful for a beginner?
To start woodcarving, anyone will need not only a set of tools, but also special clothing that meets safety requirements.
First of all, anyone and everyone in this business needs to purchase glasses. Take care of the safety of your own vision, because carving is indispensable without wood chips flying in different directions (including into your face).
Working with a chainsaw is quite noisy. Not all, but many professionals, in order to protect their hearing, purchase special noise-isolating headphones, which, by the way, in addition to noise, will protect your ears from flying sharp pieces of wood.
Clothing should be tight and not restrict movement, so as not to interfere with work, not cause inconvenience, but to protect the body from those same flying sharp chips. It is also worth getting comfortable cotton gloves and shoes with non-slip soles.
All the necessary wardrobe items can be purchased at any hardware store or workwear store. Remember - do not neglect your own safety.
The choice of tools should be approached on a purely individual basis. Chainsaws for carving wood are very diverse. To choose the right model of saw and chain for it, you need to look through a very large number of options, read an incredible number of reviews, and most importantly, you must initially imagine the result of your work in order to have an idea of what qualities your future tool should have.
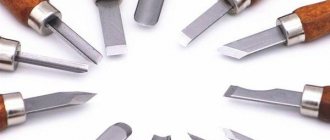
A correctly selected chainsaw is already 50% of success in your difficult hobby. However, it is not enough. A chainsaw can do a lot of the work, but it is very crude. To finish the sculpture and process small details, you will certainly need at least a minimum set of woodcarvers with chisels, sharp knives, rasps, chasers and other tools.
What is the best place to start for beginners?
The most popular motifs for wood carving remain totem poles, as well as the animal world. Creating birds or natural landforms requires some skill and experience in processing the smallest details, such as feathers. It is better to leave such work for the period when you gain experience.
The photographs below show the simplest diagrams for carving a bear and a horse, which may help a beginner decide on the order of actions and create his own first wood sculpture using a chainsaw.
Video on the topic of the article
At the end of the article, we would like to present you with master classes on cutting out figures from wood with a chainsaw, in which real masters of their craft will show you the entire process of creating a sculpture from a single piece of a tree trunk.
Wood selection
It is believed that the ideal material for beginners is linden, which has soft, flexible wood. In fact, without practice, such a craft can be quite easily ruined by careless movement, which is much more difficult to do with hard rock. The choice of wood type is important for the type of craft. So, for example, for sculpting a face, light, plain wood is chosen (dark varieties are less expressive). Recommendations boil down to the following tips:
- If you are planning medium-sized wooden figures, apple, birch, hazel or cypress wood is suitable.
- If you are planning a miniature with a lot of detail, choose birch, alder, pear and linden; Both aspen and maple will do.
Fairytale storySource dachnaya-zhizn.ru
- Pine and spruce wood with a pronounced texture (striped pattern) are used for crafts with large elements; These varieties are not suitable for working with small parts.
- For large figures, you can use aspen: durable, inexpensive wood is not afraid of moisture and does not rot when it comes into contact with the soil.
About wood carving with a jamb knife in the following video:
Required Tools
If you're just starting out, don't put off collecting carving tools. Each master has his own set, although there are also universal options.
The tools you will definitely need are:
- Hacksaw, hatchet. If the sculpture is large, you may also need a chainsaw. These tools are required for rough initial trimming of the figure.
- Adze. It is used for rough cutting of parts of the figure, those that are smaller.
- Cutters. This is the name given to knives with a beveled short blade.
- Blunt knives. Required for a number of small tasks.
- Chisels. Useful for rough notching, background sampling, and detail work. They vary in cutting edge width. They can be curved, as well as flat, oblique, etc.
- Bogorodsky knife. Equipped with a straight, short blade, it is practically indispensable in the creation of wooden products.
- A grinder, rasps, sandpaper are needed for finishing carved figures.
If the product has through holes, you will need a drill.
Briefly about the main thing
To cut down a tree, you need not only to understand the whole process, but also to have the necessary physical qualities, a well-functioning chainsaw and suitable clothing.
Before felling a tree, you should first select a cutting method, inspect the work site and prepare the necessary tools.
Tree felling is carried out after an upper undercut at 45° and a lower horizontal undercut on the other side of the trunk.
When felling, the tree should fall towards the wedge-shaped undercut.
For small trees, the technique of simply felling in the direction of the slope can be used.
Tree cutting with a pull or hanging is performed by professionals using additional equipment.
Carving - what is it?
Carving is an English word that means “to cut.” It is used in many areas of human activity - from hairdressing to landscape design. The carving technique is also used in carving, where a chainsaw can be used to process wood. To effectively practice this technology, you need to be proficient with the tool and constantly improve your skills.
Using carving, you can create original interior items or other interesting products. This method involves both geometric and volumetric processing of objects.
The first method is simpler, so it is suitable for beginners. For its implementation, harder wood species are used - maple, fruit or coniferous varieties. The volumetric processing method is more often used to create figures, interior items - design elements of stairs, chair legs and others. Wood species such as linden and alder are suitable for its implementation.
Video description
This video shows the pull down felling process:
- start work only in normal mental and physical condition;
- be sure to use safety glasses and a helmet;
- hold the chainsaw with both hands when working;
- think in advance about where to go when a tree falls;
- carry out cutting work only in non-windy, non-rainy weather, during daylight hours;
- attach the safety rope when moving up the trunk in two places.
How to cut down a tree with a chainsaw
When felling trees with a chainsaw, it is necessary to select the right blade: it must match the thickness and type of wood. For example, if you need to cut down thin trees, then there is no point in using heavy and powerful units. After all, they have a high consumption of fuel mixture and lubricant, and they are much harder to work with. It is recommended to adhere to the following rules:
- for trunks with a diameter of 600 mm or more, a heavy blade (650 mm) should be used;
- for trunks of average diameter 300-600 mm - medium-sized blade 350-650 mm;
- Thin trunks (up to 300 mm) can be felled using a blade up to 350 mm.
If you have to work with hard wood (oak, beech, cherry, apple, pear, etc.), then it is better to use medium blades for thin trunks, and heavy blades for trunks with a diameter of 300-600 mm or more.
Preparation stage
Felling trees with a chainsaw will be difficult and sometimes dangerous without the preparation stage.
- Make sure there are no people, animals, buildings or other trees in the area where the tree is expected to fall.
- It is necessary to carefully prepare for felling trees near water bodies. If a sawn object falls into the water, you will have to make a lot of effort, including using technology, to get it out and saw it.
- If you need to lay the tree to be cut down in a certain place, you can tie a cable to the top of the trunk or to its middle, and use a winch or other mechanism to force it to tilt in the desired direction.
- Before cutting down a tree, take care of escape routes if an unexpected situation arises (if possible, remove all obstacles that may prevent you from leaving the danger zone).
- Provide access to the sawn and trimmed tree for loading and removal.
- If you have to fell a large tree, you must first eliminate the possibility of large branches falling during the work. It is recommended to rent a lift or use the services of industrial climbers to cut off problematic branches.
Tree felling rules
In amateur practice, it is allowed to fell trees using a single-cut cut only in cases where low plants with a trunk diameter of no more than 150 mm are to be felled. But thick trees need to be cut using standard technology.
- The very first, top cut should be made on the side of the plant into which it should ultimately fall. It is made at an angle of 45°, with a recess of ¼ of the diameter of the trunk. The second, lower cut is carried out horizontally until the cuts join.
- The third cut is called the felling cut and is the most responsible. It is performed on the opposite side of the previously made wedge-shaped cut, parallel to the second cut (see figure below), but 5 cm higher than it. Also, according to the technology, the felling cut should not be sawed to the end, that is, to the wedge-shaped cut. It is necessary to stop without finishing about 1/10 of the thickness of the trunk, so that the remaining intact part acts as a kind of hinge.
- To prevent the saw from jamming in the cut, it is necessary to use wooden wedges. Metal wedges should not be used because the chain may be damaged if the saw kicks back.
- When making a felling cut, carefully monitor the verticality of the trunk. A sudden gust of wind can make its own adjustments, and cutting down a tree as you planned will not work.
- After the felling cut, even before the plant begins to fall, you should quickly, without fuss, remove the chainsaw bar and move to a safe distance. It is extremely unsafe to be near a tree at this moment, since the lower part of the trunk can jump to a height of about 1.5 meters when falling.
After the plant has been felled in the desired direction, you should cut off all the branches on its trunk. For convenience, you need to place a flat piece of wood 100-150 mm high under the trunk. If you do not do this, there is a high probability that you will catch the ground with the saw. When the equipment gets into the ground, where there is always sand, the latter ends up on the tire, namely in the groove along which the chain slides. As a result of exposure to abrasive particles, not only the chain shanks, but also the entire tire begin to wear out quickly. Therefore, the question that builders often ask - is it possible to saw foam blocks with a chainsaw - is inappropriate.
Types of working attachments
When sawing logs with a chainsaw, various attachments are used.
Attachment for longitudinal sawing. It is used for sawing logs lengthwise, the process takes place in a horizontal position. After work, the master receives the same thickness of the product. The finished materials undergo a drying process, after which the boards are used in construction. In appearance, the device is a small frame; it is attached to the tire on each side.
- Drum debarker (debarker). With the help of such an attachment it is easy to dissolve the log; it works due to a V-belt drive. Attached to belts on both sides, special pulleys are used for this. The speed of rotation of the shaft depends on the size of the pulleys, so the performance of the attachment is easy to change. This technology forces the master to carefully monitor each stage of the process; some specialists use an assistant during this cutting. But this option requires increased security measures.
- Sawing with a lightweight nozzle. The method is not very productive, but is used quite often. The element is fastened on one side, but the workpieces are slightly uneven. Such materials are necessary for the construction of sheds or fences.
Chainsaw MS 193 CE Carving
Additional images
Maneuverable saw for carving. Economical 2-MIX engine, STIHL ErgoStart and manual fuel pump for easy starting, non-losing nut on the sprocket cover, with STIHL Carving bar and 1/4″ RMS saw chain for precise and safe cutting.
Execution options
Price
* Manufacturer's recommended price as of 07/01/2019. Manufacturer's recommended price is not taken into account within promotions.
The product range and information may vary depending on the export version. Structural and technological modifications of tools and equipment, as well as price changes, are possible.
Technical data
The product range and information may vary depending on the export version. Structural and technological modifications of tools and equipment, as well as price changes, are possible.
Serial equipment
- A manual fuel pump allows you to manually push fuel into the carburetor using your finger. This allows you to reduce the number of starting jerks after a long break in operation.
- In four bypass channels, the working mixture swirls before ignition. As a result, fuel is optimally burned and engine efficiency is noticeably increased. As a result, fuel consumption decreases and torque increases over a wide speed range.
- Strong vibration in the area of the handles can lead to chronic circulatory problems in the hands. That's why STIHL has developed a highly effective anti-vibration system (AS). For tools with AC, engine vibration transmitted to the handles is noticeably reduced.
- The economical STIHL 2-MIX engine with 1 in 4 channel technology offers high torque over a wide rev range. At the same time, the engine saves up to 20% fuel compared to STIHL two-stroke engines of similar power without 2-MIX technology. At the same time, the volume of exhaust gas emissions is reduced by up to 50%.
- The STIHL compensator - a regulating element in the carburetor - ensures almost constant engine power, exhaust quality and fuel consumption over a long period of time despite increasing contamination of the air filter. It is necessary to clean the air filter only when there is a noticeable drop in power. Long-term maintenance-free operation becomes possible.
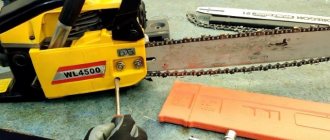
- The tension screw is accessible from the side through the chain sprocket cover. This prevents your hands from coming into contact with the sharp chain and dog tips.
- The STIHL Ematic system consists of an Ematic guide bar, an Oilomatic saw chain and a variable-flow oil pump. The special design of the bar and chain ensures that every drop of oil reaches exactly where it is needed for lubrication. This allows you to reduce oil consumption by 50%.
- The coil spring between the starter cable spool and the crankshaft compensates for peak forces, and now there is almost no shock felt on the cable. The result: STIHL ErgoStart reduces the force by half and the starting speed by approximately two-thirds compared to traditional jump starters.
Toolless Fuel Cap
Special patented caps for fuel and oil tanks. Tanks, if present, open and close easily, quickly and without tools.
The product range and information may vary depending on the export version. Structural and technological modifications of tools and equipment, as well as price changes, are possible.
What problems might arise?
Many people wonder why a chainsaw cuts crookedly or falls on its side?
This occurs due to the fact that the chain tension has weakened or the teeth have been ground down. It can also cut crookedly due to uneven sharpening. Therefore, all manufacturers strongly recommend carrying out a technical inspection before each use of the tool. Users are also interested in the question, why does the saw move to the side? This happens due to uneven sharpening of the links. It is advisable to carry out sharpening in specialized service centers. Another reason may be that the saw set does not match the saw model.
During operation of the chainsaw, the following malfunctions may occur:
- Motor problems
- Doesn't start. Check the spark plugs, replace if necessary.
- It works unstable. Replace the fuel with quality fuel and check the filter.
- It stalls after switching on. Check the fuel filter or carburetor jet.
- Stalls when operating under heavy loads.
- Problems with the ignition system can be solved by replacing spark plugs or cleaning the contacts. The gap between the ignition coil and the magnet may be incorrectly set.
- Problems in the fuel system
- The instrument stalls. The fuel mixture may be incorrectly prepared. The problem can be eliminated by replacing the ingredients with high-quality ones in compliance with the proportions.
- Stalls at idle. Clean the carbon-clogged muffler, air filter, or check the carburetor settings.
- Stalls at high speeds. Clean the air and fuel filters. Perhaps the gas tank breather needs cleaning, so you need to remove the dirt.
- Stalls during heavy loads. The carburetor is not set correctly.
- No fuel pumping. Often this problem occurs after the tool has been idle for a long time. Check the operation of the carburetor.
Oleo-Mac chainsaw repair
History of the development of wood carving
It is difficult to establish for certain the origin of the first wooden products, but they are considered cult symbols (idols) that ancient people worshiped. But it is known for sure that carving appeared in Rus' at the time of the birth of wooden architecture. Man decided to make buildings made of wood more original, and thus the patterned decor of pediments, shutters, doors and furniture appeared.
Once upon a time, the craft was so labor-intensive that people could wait months (if not more) for their order from the carver. The modern master is armed with ready-made sketches and specialized power tools. Therefore, almost anyone can create beautiful paintings on wood.
Guy when felling trees
Let's look at how to cut down a tree near a house (this method is also suitable for felling a tree away from its natural slope). To do this, you need to use additional insurance against an incorrect fall of the sawn trunk. It can be a guy made using a strong rope, winch, spring, rubber band or other stretchable material.
This is how they make a quickdraw Source aograd.ru
A rubber band, which acts as a guy wire, is attached to a steel pin driven into the ground and to another tree standing nearby. You can also attach it to another stationary object. When making cuts, such an elastic band will pull the trunk in the desired direction.
If a rope serves as a guy rope, it must be tied to the top of the tree to be cut down (its length must be greater than the height of the tree). When one person has made the necessary cuts on the trunk, his assistant should pull the rope in the direction where the trunk is supposed to fall.
Basic safety rules
How to use a chainsaw of a particular model is not written anywhere better and more accurately than in the corresponding instructions from the manufacturer (and instructions always accompany such products).
A detailed study of it will clearly not be a waste of time.
The main components of the tool, features of startup and maintenance, and safety precautions are indicated there.
On the other hand, there are general rules for working with a chainsaw and safety principles that must be followed regardless of the brand of the tool and the experience of the master.
Equipment
Even if you only need to cut a few logs into firewood for the stove, it is worth wearing protective equipment. The head must be wearing a helmet with a face mask and headphones. Gloves made of hard material are put on your hands.
When felling trees, wear a brightly colored jacket made of durable fabric and cut-resistant pants. Of course, more requirements are placed on the equipment of a professional feller than on the clothing of an ordinary person. But in any case, it should be comfortable, wear-resistant, breathable, and should not hinder movement during work.
It is advisable to wear boots or other closed, comfortable and durable shoes on your feet. The lower part of the trouser legs should not flutter in the wind. For professionals, they produce special boots with steel plates that protect the lower leg from possible cuts.
Dropping windrow
If you are the owner of a private area with a house, you can legally cut down a tree next to your house. If it is high, the drop felling method will help. It begins with cutting down the interfering lower branches. After this, you need to take a ladder and cut down the next, more voluminous branches, gradually moving on to cutting the thicker branches located above.
Hanging is the hanging of a tree to be cut down. Source udalenie-derevev.ru
When moving gradually upward around the tree trunk while cutting branches, you should use a stepladder. When its height is no longer enough, you will have to put on climbing equipment or make a belay from a strong rope. If the tree has a large crown, some of its branches will also need to be cut down.
To independently build a safety system you need:
- take a rope (2.5 m) that can withstand breaking from one ton;
- fold the rope in half;
- pass the folded cable between your legs so that the loop is at the back;
- tie a figure eight knot in the waist area;
- wrap the ends of the rope around your belt;
- pass the ends of the wrapped rope into the loop at the back;
- tighten the ends threaded into the loop and tie them tightly in front over the knot;
- hook the carabiner to the figure eight;
- put the carabiner on the safety cable, which needs to be wrapped around the trunk twice (it is best to do this over a massive bough or branch).
Sharpening chainsaw chains on a machine
Sharpening the chain of a medium-sized tool is quite lengthy and takes at least 6–8 hours. In this regard, it makes sense to use electrical appliances to solve the problem.
If sharpening is performed using a drill, then it will have to be used in combination with a conventional “sharpening stone” attachment. But you need to make sure that the width of the nozzle matches or slightly exceeds the plane of the tooth blade. Otherwise, the chain will be sharpened unevenly.
In addition, to ensure high-quality sharpening, it is necessary to use a sharpening stone, the surface of which should not have unevenness or any other defects.
The algorithm for preparing for sharpening of this type is as follows:
- You need to loosen the screw that adjusts the chain clamp.
- Then you need to adjust the chain so that its teeth are directed towards the sharpening element.
- Finally, it is necessary to fix the equipment at a certain angle.
If you use a standard stone for sharpening, you will have to grind it to the required size or use special grinding stones. The latter are smaller in size compared to sharpening ones, made of less durable material and quickly exhaust their working life.
At the same time, due to the lower strength, overheating of the metal is eliminated, and this allows the steel to remain just as strong. If the work is done using a sharpening stone, then it is necessary to take pauses between every 2-3 sharpenings of the tooth - these are necessary to cool the stone.
Moreover, it is unacceptable to use water for artificial cooling; here the option is to use a fan or apply a sharpening stone to pieces of ice previously wrapped in rags.
Considering that the sharpening machine has quite a lot of power, it is advisable that the sharpening operation on it be performed by professionals. If you use a regular household sharpening machine, it is able to return its former sharpness only to the upper cutting edge.
This limitation is due to the size of the machine. However, if you use the machine only to sharpen half of the teeth, then this work will take half as much time.
Expert advice
If you are interested in a sharpening and grinding machine in order to perform a number of other operations in addition to sharpening knives and saws, then it is best to buy a compact, low-power unit, which will be similar in its characteristics to a dentist’s drill.
This machine is not only smaller in size but also has different functions as it can be used for carving wood, metal and stone. If necessary, it can be improved so that it can be used to sharpen small parts.
A special group is formed by special machines for sharpening chainsaw chains. However, due to the high cost, the purchase of such installations for the average consumer will be impractical.
Each tool has a limited working life, so to extend its service life it is necessary to take certain measures. In relation to a chainsaw, this is chain sharpening.
Naturally, not in all cases this operation will allow the sawing tool to return to its previous level of performance. Therefore, you first need to understand the reasons for the deterioration in performance, after which you can move on to choosing a sharpening device.
Content:
- Wood carving with a chainsaw
- Chainsaw carving training, video
- Geometric wood carving
- Volumetric thread
Photo 1 - Slotted shelf
Slotted thread is also known as through and saw-cut. The peculiarity of this carving is that the background is removed from the product, this gives the impression of airiness and lightness to the product. The slotted carving looks advantageous in combination with relief and geometric carvings. In combination with relief carving, slotted carving is called through openwork. The most convenient way to carve using sketches.
Photo 2 - Sketch (slotted thread)
Wooden lace looks great on window frames. Rusinok on platbands is created using through holes of different shapes. To create markings during the work process, stencils are used. Stencils allow you to decorate all the trim in the house with the same ornament, which creates stylistic unity of the exterior.
Photo 3 - Slotted trims
Recommendations for carrying out work
If you are a beginner, then you will need to study all the recommendations prescribed in the instructions, which must be included in the kit.
It is important to prepare the equipment and periodically maintain it so that it lasts as long as possible
Tree cutting
The thicker the tree, the greater the precautions required
Often the material for sculptures and figures is trees cut down on the site, and many beginning craftsmen do not know how to organize this process.
Let's look at how to properly cut trees with a chainsaw, since this type of work is very dangerous:
- First of all, it is necessary to determine where the trunk will fall; a free space without buildings and other objects is selected. If there is none, then you will have to clear the area first; its size should be generous, since the tree may move if it falls.
- Be sure to provide yourself with space to ensure an unimpeded escape with the chainsaw; stumbling with a running chainsaw when a tree falls is not the best option.
- First, an undercut is made, which is located in the direction in which the trunk falls. To do this, a cut is made at an angle of 45 degrees through about a quarter of the thickness of the wood. Using a horizontal cut, this piece is cut out and removed.
- The felling cut is made from the side opposite to the direction of fall; for clear control, the tree is not cut to 10% of the thickness; when the trunk begins to tilt, the chainsaw is quickly removed and the engine is turned off.
This is what a diagram of felling a tree looks like.
The felled tree is cleared of branches and bark; for this, both a standard tire and a chainsaw attachment are used to sand the tree.
Carving sculptures
Mushrooms are an excellent solution for beginners
For the first time, you need to choose a simple design: a mushroom, a cube or something similar, the work is organized as follows:
A workpiece of the required size is taken and placed on a platform that will provide you with free access to the element from all sides.
Chainsaws with small tires are best suited for the job and must be equipped with high-performance chains.
Working with a light tool is much more convenient and easier, and the safety of work will be much higher. First, the general outline of the product is given; this stage does not require much precision, but it is important not to remove excess material, so you should not get carried away too much. It is best to have a sample of the product or a drawing of it on hand so that you can accurately imagine the proportions of the finished version. Next, the figure is given precise outlines, and you will have to master this type of work, such as cutting the end of a tire, this is done carefully and requires a good tension of the chain, otherwise it will vibrate very strongly during operation
(See also the article Wooden panels: features.)
The work requires accuracy and precision, so a heavy chainsaw will not work
The finished figurine can be sanded with sandpaper and coated with a protective compound so that the wood is not exposed to the harmful effects of moisture.
Manufacturing stages
The process of making a garden sculpture goes through the following stages:
- Rough processing. Its goal is to draw the basic shape of the figure based on the sketch, which is transferred to the workpiece through a system of control points. Work begins with the projection where the greatest material removal is expected. Based on the sketch, the general silhouette and proportions are outlined.
- Refinement of contours. It is carried out along four edges: frontal, rear and lateral. At this stage, you can refine the lines, and then, slowly, remove excess wood, getting closer to the outline and not trying to overly round the outline.
ElderSource cs2.livemaster.ru
- Doubling of edges. Four corners are removed from the workpiece, 8 faces are formed. At this stage there is no need to deal with detailing; its goal is to clarify the position, plasticity and character of the sculpture.
- Detailing. Using a chisel and mallet, they get rid of the edges, and then begin to work on small details. It is not recommended to mark details with a pencil - it will leave dirt that is difficult to remove.
- Polishing and protection. The finished figurine is treated with sandpaper or a grinding machine and coated with wax, stain or varnish.
- Coloring. If you plan to paint, the figure must first be dried for one to two weeks. If the sculpture will stand in the garden, it is painted with alkyd paints and varnished. Alternative option: the sculpture is well primed and covered with stain.
OwlSource res.cloudinary.com
snow blower
Not many people can afford to buy a good quality factory snow blower. But those who love and know how to make things themselves can assemble such a device themselves. As a rule, for assembly they use what is available from old unnecessary trash.
The design turns out to be reliable - sometimes more reliable than factory models. There are plenty of assembly instructions on the Internet, so you can look for an assembly diagram that suits you.
That is, it will turn out to be an auger-rotary snow thrower, and not just a machine with a blade. The chainsaw is used as a motor here as usual. At the same time, it should have decent power - from 5 hp. As a rule, Druzhba or Ural are used, but in principle modern models can also be used.
Pro Tips
Professionals who have sufficient experience to teach beginning carvers note some of the nuances of wood carving. Every newcomer to this interesting activity should know them:
- Large workpieces are processed with a chainsaw with greater power and bar size. So, you can use a saw with a power of up to 2.5 kilowatts and a 50 cm bar. This will allow you to quickly remove a huge amount of unnecessary wooden material.
- It is worth considering that carving is by no means a quick process, so the chainsaw, like you, must withstand long-term work. This is helped by the anti-vibration system found in almost all chainsaws, which allows you to protect yourself from vibration waves and make smoother, continuous movements.
- Professionals note that the best species for wood carving are elm, oak, larch, and maple.
Important! All species behave differently during use, so for the best performance you need to try all types of wood to evaluate the maximum comfort specifically for yourself.
Circular saw from scratch
Another common method for making a circular sawmill is based on the use of a used AC brushed motor, cutting blade, table top, profile pipe, etc.
This design is similar to the one given earlier (see “Making a circular saw”). But there is one “BUT” - it is necessary to provide a shaft and a belt to transmit rotation from the motor to the disk.
The question is, how to make a circular saw if its power plant is quite powerful, and the rotation transmission mechanism contributes to the instability of the structure?
The answer to this question will be the use of heavy materials as a supporting base, fastening of a profile pipe for smooth feeding of workpieces, reliable fastening of all components of one home-made machine.
