Device for cutting boards with a circular saw
This guide is very easy to work with. The base with the ruler is fixed to a workpiece, for example, to chipboard. You can fix this by using several options. In the first method, part of the cut sheet will be located on the side of the saw blade; in the second method, under the base on which the guide ruler is fixed.
The length of the sheet is 2 marks on the side, which corresponds to the specified cutting methods, at the distance where the cut is located. The distance between marks should be maximum. It is important to consider the thickness of the disc. The base of the ruler is mounted on two signs and secured with clamps. The depth of the clamping jaws should ensure their installation so that at the end of the cut the saw can move freely from the letter.
If the guide ruler is long, then the cross-section is not very convenient. Therefore, it is advisable to make a design that is shorter. For example, for cabinets that are 60cm wide, you will need to make a guide that is 1m long.
READ How to cut a ceiling plinth under 45
Such devices are only suitable for working with materials that have a large width and length. You cannot cut a board into flat rods of this design.
end of the board
See what “end of the board” is in other dictionaries:
END - END, rtsa, husband.
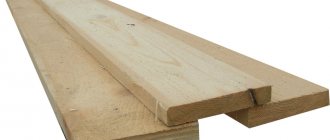
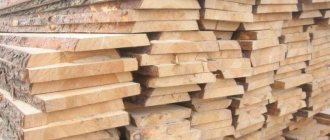
1. A cross section of a log, timber, as well as the transverse edge of anything in general. (specialist.). T. beams, boards. T. table. T. of a book (side, top or bottom cut of its sheets). 2. A block of cross-cut logs for paving streets. 3.... ... Explanatory dictionary of Ozhegov board - Fig. 1. Boards. Rice. 1. Boards: a clean-edged; b unedged; one-sided edged; 1 outer layer (facial); 2 edge; 3 end; 4 wane (uncut in the edge). boards. A characteristic feature of boards that distinguishes them from other lumber... ... Encyclopedia "Housing"
end - B noun; 211 cm. Appendix II (cross section of logs, boards, side of the building) of the end/ When I look at the flying leaves, Flying down onto the cobblestone tore/c, Swept away like an artist’s brush, The picture of someone finally finishing... Dictionary of Russian accents
end - rtsa; m. 1. Cross section of a log, beam, board. T. beams, piles. Stand upside down. Connect into a t. (make up with transverse edges). 2. Transverse side, transverse edge of something. T. columns, pencil. T. key, gears. T. table. T. at home (special;... ... Encyclopedic Dictionary
end - rtsa/; m. see also. end, end 1) Cross section of a log, beam, board. Tore/c beams, piles. Stand upside down. Connect in torus/c. (compose with transverse edges) 2) Transverse side ... Dictionary of many expressions
carpentry work - Fig. 1. Change in shape (deformation) of lumber as the wood dries out. Rice. 1. Change in shape (deformation) of lumber when wood dries out: a timber; b round timber; into the boards. carpentry work - manufacturing, finishing and... ... Encyclopedia "Dwelling"
Terms and definitions - 3 Terms and definitions The following terms with corresponding definitions are used in this standard: Source: GOST R 50963 96: Armored vehicle protection. General technical requirements original document... Dictionary-reference book of terms of normative and technical documentation
Eurolining is a dry planed profiled board intended for dry interior and exterior decoration of premises. Eurolining is made from various types of wood: spruce, pine, aspen, linden and others. Contents 1 Technical characteristics ... Wikipedia
end - Ending, completion, conclusion, termination, expiration, denouement, liquidation, finale, amen, kaput, point, grave, checkmate, lid. In conclusion, at the end, finally, for a snack. Read the book from board to board (from beginning to end). Ending... ... Dictionary of synonyms
Carpentry* - The most important branch of the woodworking industry is carpentry, which deals with more subtle and careful processing of wood, which makes it significantly different from carpentry (see). For a long time, manual labor was... ... Encyclopedic Dictionary F.A. Brockhaus and I.A. Efron
Carpentry - The most important branch of the woodworking industry is carpentry, which deals with more subtle and careful processing of wood, which makes it significantly different from carpentry (see). For a long time, manual labor was... ... Encyclopedic Dictionary F.A. Brockhaus and I.A. Efron
Source
How to make a simple guide and removable device with your own hands?
Diagram of the bearings of the circular saw assembly.
It makes sense to make a simple reference book. To make cuts with a portable circular saw, you can purchase an expensive guide at the building's supermarket, or make a few homemade projects in a workshop if you need to cut a large number of sheets. However, you should know that there is a simpler solution - to make a device from scraps that are not used.
A simple homemade miter template for a circular saw
To make your own saw manual, you need to select a factory edge strip of plywood or hardboard 25-30 cm wide. The strip is fixed along the cutting line so that the base of the tool moves along the flat edge. If foam padding is used to protect the saw blade, it must have cutouts for the jaws.
You can also make a cutting device for this type of saw. A clean and even intersection in some cases is quite difficult to do with the introduction of a circular saw. It's almost impossible to fully control the tool, and pieces of material fly off more often than not, leaving behind chips and jagged edges. So it makes sense to try to make a cross-cut design out of a few pieces of wood and an angle of aluminum.
Production method affects quality
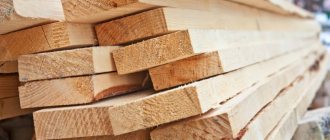
You can always see growth rings on a cut of a tree trunk. These are fibers that grow during growth. The parameters of lumber from different parts of the trunk will differ. When the timber arrives at the sawmill, it is marked for sawing. Several products are obtained from one log at once.
A tangentially sawn board has internal tension - when drying, it can bend in an arc.
How to make a manual template yourself?
Guide bar for a circular saw - this can be made from improvised means by cutting a flat sheet of wood.
When you need to make long cuts with a similar saw, you will need to spend a significant amount of time to make all the measurements necessary to set the mowing line guide and markings exactly to match the width of the base of the structure.
To simplify this procedure, you need to cut a template from fiberboard that is equal to the width from the edge of the tool to the inner edge of the saw blade. The template is then cut to the length of the tool base. To use the template, you need to align its edge with the cutting mark in the product, and on the other side attach a straight guide and secure it with a clamp.
You then need to repeat this procedure on the second cut mark on the other end of the workpiece that is being cut. Such designs can be made for circular saws or electric saw blades.
Processing technology
By adhering to a certain order of work, it is possible to protect the ends of logs, beams and other large-sized timber.
Processing of the ends of log logs takes place in several stages:
- Trimming is the alignment of all protruding logs to the same level in length and plumb. To do this, use a chainsaw or electric saw. Trimming adds aesthetics to the log house: all ends become smooth, without protrusions or burrs.
- Grinding the ends . Sanding helps prepare the surface for antiseptic treatment. In order for the protective layer to lay down better and more evenly, the end of the log must be smooth. The frame is sanded using a grinder or a belt sander. The surface is processed in two stages: the first - with a coarse abrasive, the final - with a fine one.
Sanding the material is carried out in dry weather conditions: processing wet wood will lead to the appearance of nicks and lint, which will not allow smoothness to be achieved.
- Application of a protective composition. The ends should be generously treated with a wide brush at least 3 times. Each new layer is applied only after the previous one has completely dried. Drying time of the layer is 24 hours at a temperature of 18-22°C.
When applying a protective coating, it is necessary to carefully process the edges of the end cuts. Treatment should only be carried out in dry, sunny weather.
How to make a crosscut from a manual circular saw at home
Hello dear readers and subscribers of Andrey PLA's blog. In this article I will tell you how to make a cross-cutting device from a hand-held circular saw for your home purposes, while spending a minimum of money on production. A hand-held circular saw is a good helper in your household, with which you can do “very big things”!
I consider it inappropriate to focus attention on the term “circular”, since everyone already has first-hand knowledge of what this device is, and there are enough thematic materials on my blog. I will try to tell you what saw and convey as much useful information as possible for a visual presentation.
- pendulum;
- combined;
- With a broach.
The pendulum trim is the following design. The basis of any machine is the bed. The table is fixed on it, which in turn is made on a rotating mechanism with a ruler. This device solves the problem of setting the cutting angle with its adjustment.
The cutting angle can be adjusted by moving the work table to the plane of the bed. The saw element is strengthened by a lever and spring-loaded by a hinge. Using a pendulum, the saw moves in the vertical direction.
As for the combined model option, the cutting angle can be changed if necessary in two directions. The device is the same as in a pendulum saw, only an additional hinge is added to the design. As for changing the cutting angle in the horizontal plane, it can be changed in the horizontal direction, which in turn is opposite to the mounted drive.
a saw with a broach makes it possible to move the cutting element both around the axis of the hinge mechanism and in the direct direction along the cut. This was achieved thanks to the installed guides (pictured below).
For convenience on a cross-cutting machine, operators use a special device for cross-cutting on a circular saw, which is called a miter box. A simple design, which consists of a tray for boards, a clamping piece of plywood or a second material, clamping fixing elements (clamps, etc.). How does this device work? I will try to answer this banal question simply and clearly.
The board is placed in a tray and pressed against a sheet of chipboard. Fixed with a clamp and a hand saw, circular saw, or grinder, the workpieces are sprayed through special side slots. Often, a miter box is used to cut material at an angle of 45-90 degrees in home workshops on Tsirkulyarki. Using this device, you can quickly cut the board into a pallet or board.
After all the information, you have an idea of what cross-cutting is and why it is needed. Next, I will tell you how to make a cross-cut trim using a hand- held circular saw using scrap materials with your own hands.
The base of the structure was a box made of chipboard. It has a “U” shape. Confirmants are knocked down and fastened together. To prevent this shelf from moving, it is attached to the work table (workbench) with clamps.
The base under the dust is screwed onto the shelf from above. Fastening is also carried out by confirmants. We ensure that the planes are perpendicular, since the saw blade will be aligned along the edge.
I make sure the sole is aligned along the edge. This will prevent shifting and fidgeting. We screw strips of chipboard onto the sides with self-tapping screws. In this way, the positioning of the sole is achieved.
the saw is fixed with clamps and clips. You can make wing clamps. This is the device for cross-cutting on a circular saw in this version. This device is popularly called “Foreman”.
Next to the base to the table we fix the “table” base. The only drawback is the reduced cutting depth of 15mm. Therefore, you have to place the profile as close as possible to the saw blade.
After making a test cut, we obtain a cutting line based on the stop. Thus, I was able to construct a circular cutter with my own hands. This design of the device copes with the task one hundred percent. If you still can’t design this type of equipment or simply don’t have time to do it, you can use the services of renting a circular saw with a trimmer at affordable prices in specialized workshops.
Another good tool for working with wood is a thickness planer. What is it? It can be divided into two types - manual and in the form of a full-fledged thickness planer. As a rule, the manual version is needed only to transfer data from the drawing to real material and workpieces.
As for the thickness planer, it, in turn, is more functional. In addition to transferring information, you can carry out full processing of workpieces. Such equipment is purchased by furniture factories and can also be found in everyday life during the construction of private facilities. This is what a surface planer looks like with a circular saw and a trimmer, I attach a photo below:
As for the usual planer device, it consists of three parts. A supporting stand with a dimensional ruler, a clamping device and devices for applying markings to the part. They are usually made from hardwood material.
Professional equipment
Now let's talk about professional equipment. Let's consider the cross-cutting saw ZUBR ZPTP-255-1800. The tool is used for cutting wooden parts and thin-walled metal. Why combined? This is because it can be used to both trim workpieces and work like a circular machine.
Main advantages of the model:
- Mobility;
- Compactness;
- Functionality;
- Safety system.
This machine combines a crosscut and a circular saw at the same time. The adjustable head position allows for high quality cuts. The machine allows you to make longitudinal cuts at any given angle. The equipment is equipped with a locking mechanism for turning on the drive and raising the protective casing. This model has the ability to connect an industrial vacuum cleaner to keep the workplace clean.
You can buy a circular cross-cutting machine for around 15 – 20 thousand rubles.
Another good option from all the gray mass of equipment is the Makita MLT100 table miter saw.
It is used both in everyday life and in professional production in workshops and workshops. The design of the machine allows it to be moved on a special trolley and can be easily mounted in a designated place on a workbench. The sliding table allows you to work with large workpieces. The table can be rotated both to the side and forward. The long service life of this equipment is increased due to the high quality of parts and materials used during assembly.
Allows you to make cuts both vertically and at a specified angle. The high precision of cutting parts is due to the presence of clamps, guides, scales with degrees and a ruler. The equipment combines a cross-cutting machine and a circular saw at the same time.
A separate advantage is the presence of an engine speed stabilization system, which in turn plays an important role during the initial start-up of equipment.
Electric brake included. There is a connector for connecting a dust removal device, useful for large volumes of work.
The advantage of sawing logs with a chainsaw
Spraying onto boards can be done using tools such as an electric chainsaw and additional accessories designed to simplify the work. When choosing certain products, you need to focus on the amount of work expected. Stationary sawmills are expensive and are purchased only if you plan to organize a business to create boards.
READ Can a Miter Saw Cut Metal?
The most accessible tool for the job is a chainsaw. Such devices have several advantages over electric ones:
- the chainsaw can be used anywhere, regardless of the availability of an electrical outlet;
- the tool is suitable for working in conditions of high humidity;
- professional chainsaws are significantly more powerful than electric ones;
- You can use the chainsaw continuously for an hour.
To cut logs into boards, a special frame is used together with a chainsaw, which is attached to the device and allows you to create boards of the same thickness. A device is also needed to secure the log in one position. In addition, you will also need a guide.
HOW TO cut boards smoothly with a HAND circular saw!!!
Since household gasoline saws are NOT designed for heavy loads, you should use professional tools when sawing logs. When choosing, pay attention to devices with a power of more than 7 horsepower. Before work, the fixed frame is adjusted in accordance with the selected width of the boards. To create a frame, you can use legs from a school desk or metal corners.
How to treat the ends of logs?
The use of wood in buildings entails compliance with rules to preserve the integrity of the wood and improve its properties. To do this, boards and wooden beams must be processed, painted and protected using special means. However, you need to be especially careful when processing the ends and cuts of logs, since this place is the most accessible for moisture penetration, which contributes to the rotting and disintegration of wooden products.
Failure to process and paint a wooden frame in a timely manner will lead to the appearance of deep cracks in the logs, as well as damage to the hardness of the wood. The ends allow trees to quickly get rid of moisture, which moves along the trunk along the wood fibers; evaporation through the side walls of the tree occurs much longer; this uneven evaporation of liquid leads to tension inside the log, cracks and the appearance of fungus in the log areas.
Long sawing technique
The most difficult stage of the process is making the first cut. To do this you need:
- install a leading ruler, which consists of two boards that are fastened together at an angle of 90 degrees;
- after this, it is necessary to place the sawn log on the supports and fix it;
- then it is important to check whether the log is level;
- at the next stage it is necessary to secure the leading ruler to the supports using self-tapping screws;
- After this, you can start creating the first cut.
How to sand wood correctly?
Grinding technique . The wood is sanded with active movements along the grain or at a slight angle, but without excessive pressure on the block. Movements should be as light as possible, on the second or third pass using fine-grained sandpaper with virtually no pressure.
Preparing the surface for finishing . When preparing wood for applying a finishing coating (varnish, oil, stain, polyurethane, etc.), start working with P120 or P150 abrasive (depending on the nature of the irregularities). After that, move on to P180 grit and finish with P240 abrasive.
Intermediate grinding of coatings . When applying the finishing coating layer by layer, intermediate sanding of each layer is carried out with fine-grained sandpaper P280. For final polishing use P400 sandpaper. Use P600 grit abrasive to remove even the slightest imperfections in a glossy finish.
Requirement of finishing coatings for sanding . Matte types of coatings are not as demanding on the quality of sanding as glossy ones. At the same time, a dark stain will expose all the flaws of unfairly performed sanding.
Source: woodschool.ru
How to cut a board straight
How smart and quick-witted our people are!
Sergey Burkov:
How to unravel a 3-meter board so that both resulting halves are, for example, 10 mm thick
BANDIT#:
you explain it like to schoolchildren, with a countersunk head, etc.
COMPUTER:
What if
the board is 2 meters long?
How are you going to put her on the butt? Nikolay Sitkov:
Ha, I’m NOT smart enough for a hacksaw, although I’ve encountered this problem more than once. That’s a good thing.
How so?:
Christmas trees, keep your fingers, bro. I wouldn't do that)))
Workshop on the balcony:
Simple, cheap and cheerful :))). like
Mike VIZ:
Hello, you have already seen this circular in your frame several times. Is it AEG or another company? Can shoot a review, I choose myself dust, I would like to hear advice from an experienced person on what to pay attention to.
Features of sawing logs using a chainsaw
Creating additional equipment for sawing logs is quite simple:
- To create a support, a frame is used, which can be created from the legs of a school desk. The most suitable pipes are with a square cross-section of 20 × 20 mm.
- When constructing the frame, it is necessary to create 2 clamps and secure the crossbar at one end. This element must have holes for tie bolts. A protrusion for the tire is created in the middle.
- In order to cut a log lengthwise, it is necessary to construct a support frame, the width of which must be at least 8 cm in length.
- For ease of operation, a handle should be welded to the frame.
- Before carrying out work, you must carefully check whether the frame is securely fastened to the tire.
Using a homemade tool is quite simple. Before sawing, you need to install 2 sawhorses - they will be used as a support for the log. In addition, a metal strip or flat board , which will serve as a guiding element.
Lightweight nozzle
Such devices are often used, but they should only be used when creating boards for fences or sheds. This is due to the fact that the attachment is secured to the tire only on one side.
The meaning of the word "butt"
1.
Cross section of a log, beam, board.
The precision and subtlety of the carpenter's art, the white work, was so perfect that the ends of the logs seemed not to be chopped off, but to be sawed off.
I. Bartenev and B. Fedorov, Architectural monuments of the Russian North.
A piece of log with a number written on the end in chalk was a reminder of the work going on nearby.
S. Antonov, Rains.
|| Transverse side, transverse edge of something. Column end.
□
Peter sharply tapped the end of his pencil on the tabletop.
Shishkov, Ugryum River.
|| Specialist.
The side (short) side of a rectangular building or structure.
The end of the house.
Setting up a circular saw before work
Before you start sawing, you need to install the blade and make sure it is firmly in place. The casing should open and return to its original position without any resistance. It is also worth checking whether the riving device is positioned correctly. After this, run the dust for 10 seconds in idle mode to make sure that it is working properly.
To set up a circular saw, you need to adjust the desired position of the guide pin and cutting blade using a caliper. When checking the position of the teeth in front and behind the disc, the difference should not be more than 0.05 mm. You also need to install the riving knife and blade so that they are on the same mowing line. Special washers are used to fine-tune them. To ensure that the tool and table vibrate less, you need to tighten the mounting bolts well.
Main selection criteria
Before going to the store and consulting with sellers, familiarize yourself with the parameters that you should rely on when purchasing a tool. And then you can rationally make your choice.
- power. Affects performance and speed. As it increases, the weight and cost of the tool increases. Household trimmers consume less energy than professional ones;
- disk size. The depth and speed of the cut depends on it. Also find out whether replacement discs for the selected tool model are available for sale;
- cutting parameters. Angle, width and depth. The saw should cut the workpiece at the angle required for your purposes, preferably in both directions. The manufacturer also indicates the maximum cutting depth when working at an angle of 45 and 90 degrees to the surface. The function of limiting the depth of cut is important. It is used when selecting grooves and processing workpieces according to thickness;
- the presence of a horizontal broach. Allows you to increase the cutting width by moving the cutting part in a horizontal plane. You can cut a fairly wide workpiece in one pass.
- number of revolutions per minute. Affects the cleanliness of the cut and makes it possible to work with hard materials. RPM of 4000 or more is a very good indicator.
- engine type: commutator. It is necessary to check the armature regularly, but such a motor has more torque;
- asynchronous. Works quieter and longer;
- serrated No slipping under heavy loads;
- have clamps for frequently used corners and clamps;
- a system that automatically closes the working disk with a protective casing when lowered onto the workpiece;
splitting knife Protects against disk jamming;
What can you do with a hand-held circular saw?
Manual circular saws are suitable for performing a whole list of jobs:
- trimming several wooden blanks at once, which lie in the same plane;
- trimming wide boards for which pendulum dust cannot be used (you will need a parallel fence)
- trimming boards when laying floors;
- trimming workpieces at an angle (you can use a guide or do without it)
- longitudinal spray of workpieces at an angle;
- sampling a quarter in a board or timber;
- cutting sheet materials with the introduction of a guide;
- cutting organic glass and plastic;
- using a hand saw as a stationary one by mounting it to a table.
The main causes of wood deformation
- Changes in temperature and humidity
- Improper drying
Changes in temperature and humidity
A natural material such as wood tends to absorb water. In a room with constant high humidity, wood will absorb water and swell. This will ultimately lead to deformation. The same thing happens from temperature changes in the room. Especially in combination with high humidity.
Improper drying
The largest percentage of deformation occurs during drying. It happens that they sell you under-dried boards, which then, when dried under natural conditions, can warp. The fact is that moisture from the wood does not evaporate evenly along its entire length. This creates tension in the wood fibers. This stress ultimately leads to deformation.
Or you bought good quality boards, they were delivered to your site. They lay in a damp garage, so the geometry of the material will be disrupted. It’s a shame to throw away such material, but it’s also impossible to use it for its intended purpose.
So what should we do? You can try to correct the deformation.
We offer 4 working methods for leveling the board.
The board can be leveled:
- Using a plane
- Exposure to heat and moisture
- Steam processing with pressing
- Leveling under pressure
Learn more about each method.
How to cut a board smoothly with a circular saw
Unlike a pendulum saw, which is stationary, a circular saw is more difficult to make an even cut. This will not be a problem if the board or beam is narrow, but when sawing a wide workpiece or when making longitudinal cuts, you need to know how to make the cut as precise as possible. To do this, you need to follow the following sequence of actions:
- There should NOT be anything underneath the piece of material you will be sawing. The circular saw blade should not be cutting anything else. For example, we would never place a board on a concrete floor - use a sawhorse or a cutting machine table instead.
- Mark the line along which the saw blade will go. Use a tape measure, ruler or square for this.
- Adjust the cutting depth. The blade should barely protrude beyond the workpiece. For example, if the thickness of the workpiece is 40 mm, the cutting depth should be 45-50 mm.
- Check the condition of the protective cover. It should rise gently when the saw is lowered onto the workpiece, and immediately close the working part when it is raised.
- As you begin to cut, look at the front right edge of the blade and align it with the mark on the material.
- Look at the right kerf guide of the circular saw for right angle cuts, and the left one for 45 degree cuts.
- Start cutting the material. Keep an eye on the guide at all times to ensure an even spray.
- Keep the saw blade flat on the material at all times.
- Push the dust hard enough to cut it, but don't push it too hard to overload the motor. The hardest woods should be cut with minimal force.
- After finishing cutting, make sure that the safety guard returns to the closed position.
Preparing the workplace for work
You need to remove all unnecessary items from your desktop. There should be no tools, keys or consumables. In addition, you need to ensure a free approach to the table. The floor in the work area must be dry to avoid accidental slipping. The machine must be grounded.
READ How to Set an Angle on a Miter Saw
There are also requirements for the operator’s work clothes. Clothes need to be tucked in so that there are no flapping ends. If you have long hair, tie it up and hide it under a hat. Wear safety glasses and a respirator. It is recommended to use hearing protection as the noise level can be quite high when using a circular saw.
Before you start dusting, you need to check it for defects in the saw blade and make sure that it is fastened properly. Check to see if the riving knife is installed correctly and then check that the guard is working properly.
If the saw has a short cable, you may need an extension cord so that you can comfortably move around the work area. It is advisable to use a circular saw with a soft start function so that the tool does NOT jerk when starting.
You're lucky: there's no warping
If the selected board falls into this category, you can consider that the deal is in the bag. Regardless of the length of the board, you can quickly get a straight edge using a planer and jointer . If you don't have one, use a circular saw to file down the rough edges of the board.
A straight edge on this type of board can also be achieved using a router. If the face of the board is not planed, use a guide board that has a smooth face and a straight edge, attaching it to the top of the workpiece, as shown in the photo below. Use a guide cutter with a top bearing. Install the guide board with a slight indentation from the edge of the workpiece - this distance corresponds to the volume of material that will be removed during processing. If necessary, make two passes.
When using this method, press the straightest edge of the board against the rip fence to avoid kickback. Having filed the opposite rough edge of the board (photo on the left), move the longitudinal fence, turn the board over so that its new edge faces the fence, then file the second rough edge (photo on the right).
If the sides of the board are planed, fix the guide (it can be a flat board or a homemade or purchased tire) on the workpiece so that when moving along it, the router removes a layer no more than 1.5 mm thick in one pass (photo below) Make as many passes as required to obtain a straight edge.
With the router sole on the guide board, guide the cutter bearing along its edge. Remove no more than 1.5 mm of material in one pass. Use a cutter with an upward or downward helix, or a straight cutter whose blades are longer than the thickness of the workpiece.
Grind a small chamfer on the edge of the face facing the cutter - this will prevent the workpiece from getting stuck when it is fed.
A straight edge can be made on a router table, but it requires a little more advanced setup. First, clamp a straight or spiral cutter into the collet of a router fixed to the table and set the cutter overhang to be slightly larger than the thickness of the workpiece. Adjust the front of the rip fence so that no more than 1.5 mm of material is removed in one pass. Place the back of the rip fence flush with the cutter blades. If the rip fence does not have separate front and back parts, use a clamp or double-sided tape to attach a piece of laminate plastic to the back half of the fence with a thickness corresponding to the layer of material being removed (photo on the right).
Proper operation of a circular saw
A hand-held circular saw is one of the most important tools in woodworking. It significantly increases the speed of working with wood or plastic, sheet materials, boards and timber. Most often it is used for cross cutting, but this tool can also be used for sawing along the grain of wood. In this article we will describe in detail the range of uses of circular hand saws, their setup before work, operating techniques and safety rules.
Safety tips when using the saw
Before starting work, run the circular saw idle. As you cut the material, observe the following rules and recommendations:
- When starting work, you must stand on the left side of the machine so that if the workpiece is accidentally thrown out, it will not hit you.
- Make sure that there are no nails, pins, pieces of dirt or concrete in the workpiece or on its surface that could interfere with the cut.
- It is prohibited to pass objects over a running circular saw.
- If there are knots or cracks in the wood, you need to move slowly when approaching them.
- When changing the saw blade, be sure to unplug it.
End antiseptic: the best choice
A lot of means have accumulated to combat cracking and rotting of the ends. As a rule, their action is aimed at creating a moisture-impermeable film at the end, which prevents its evaporation. As a result, the difference in drying speed is leveled out and the material does not crack.
The following means are used:
- inexpensive oil paints;
- paraffins and waxes;
- a mixture of lime and drying oil;
- a mixture of chalk and tree resin;
- bitumen resin or mastic.
The above methods work, but have a number of disadvantages:
- The created film does not allow moisture to pass through and does not breathe, which leads to disruption of normal drying.
- The lack of an antiseptic effect can lead to preservation of the infection inside and its explosive growth.
- Paraffins and waxes melt in the sun and are easily scraped off by friction.
- Bituminous mastics and resins look unsightly, emit an odor and burn.
- The surface treatment is short-lived; the products are gradually washed away with water.
The use of folk remedies and various cheap substitutes does not provide the proper level of protection. They cover the surface of the end from moisture and clog the capillaries, but do not provide antiseptic protection and do not have a fungicidal effect.
Only special products for processing ends are distinguished by effective and balanced action. Here you can also find a variety of compositions that can be intended for temporary protection, these are so-called transport impregnations, or for permanent protection of finished products. As a rule, such drugs combine several active ingredients at once and have a complex effect:
- The material is impregnated with a mixture of antibiotics and fungicides penetrating into its deep structures to suppress bacteria and mold fungi.
- They deliver compounds that prevent the subsequent development of new fungi and bacteria.
- They create a film on the surface that acts as a membrane that reduces the penetration of moisture. As a result, drying proceeds evenly, and shrinkage deformation does not lead to the formation of cracks.
An example of such a product is the GOODHIM TOR GBS end sealing primer. This product is excellent for large-sized lumber and is used by professional builders for processing the ends of logs, edged boards, rounded and laminated veneer lumber. The advantage is the low price and the presence of a double effect: antiseptic and against cracks.
Finding a good end protection product is not difficult. Today, there are many domestic and foreign brands on the shelves, the products of which are worthy of consideration. Let's take a look at the most interesting of them.
How to adjust the dust for an even cut?
The saw blade must stand strictly perpendicular to the support platform. This can be seen both in the position of the disk and in the degree scale on the adjusting arc. If the disk is at an angle:
- The locking screw is released.
- The platform tilts to the desired position.
- The screw is fixed.
You should be more careful with tightening. On some models, if it is too heavy, the thread can be stripped or the head can break off.
Then it depends on how and what generates dust.
How to cut an unedged board?
Trimming the wane of a board a manual circular saw can be done in two ways:
How to trim a hand-held circular saw quickly and accurately
- By marking with a pencil (marker, sharp tool, etc.).
- Along the guide. To do this, a block, corner or factory guide rail is attached to the board with clamps or self-tapping screws. Dust, presses the edge of the saw platform to the guide.
Cutting along a guide usually produces a smoother cut.
We also recommend reading a useful article with reviews of the most popular and best circular dusts for the home.
What are the advantages of hand sanding?
Sanding wood by hand, although it requires a lot of labor, in return provides a number of important advantages: less aggressive processing, better control over the process and high quality surface finishing in hard-to-reach places - in corners, on smooth curves and other reliefs of any complexity.
Manual technology is indispensable for interlayer sanding of finishing coatings, as it ensures the most delicate work and eliminates the risk of rubbing off the applied finish. When using the same abrasive, hand sanding guarantees a better surface quality than sanding with a sander, grinder or drill.
Why does it cut crookedly?
The disc cuts the line it is directed towards. In this case, the tool should be held or pressed against the guide firmly enough so that it does not move to the side.
If, despite all efforts, the cut turns out to be crooked, the reason is a waste disc. A scorched disc with blue spots on both sides may begin to wobble at the slightest heat. If the teeth on one side are normal, but on the other they are knocked out or blunted, dust may be introduced in one direction, no matter how hard you try to hold it.
Sources:
https://stroyvolga.ru/%D0%BA%D0%B0%D0%BA-%D1%80%D0%B0%D1%81%D0%BF%D0%B8%D0%BB%D0%B8% D1% 82% D1% 8C-% D0% B4% D0% BE% D1% 81% D0% BA% D1% 83-% D0% B2% D0% B4% D0% BE% D0% BB% D1% 8C / https://dnipro-m.ua/news/pravilnaya-rabota-czirkulyarnoj-piloj/ https://benzopilok.ru/rabota/kak-rovno-pilit-tsirkulyarnoj-piloj.html
Straight edges start in the shop
When purchasing lumber, select the best boards possible, paying particular attention to the grain pattern and how it will look on the finished product. You can purchase unplaned material, either having two planed faces or planed on both faces and on both edges. The latter option, being more expensive, often solves the problem of obtaining a straight edge. However, even such boards can warp. Warped boards, although difficult to work with, can also be a good material. A flat board with curved edges (photo on the right) can easily be processed to straight edges by following the decision diagram.