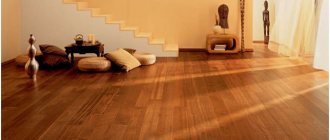
Wood floors are one of the best options for environmentally friendly and reliable flooring. They are durable, beautiful and do not harm the health of people living in the house. The disadvantage of such a base is that if it is installed incorrectly or after some time, the floor boards begin to move apart - cracks form between them, which is why the floors look unsightly, and various debris gets underneath them, and an unpleasant squeak may appear. To prevent this from happening, the technology for laying such a coating must be carried out exactly according to time-tested rules. But, fortunately, even old floors can be restored to their original form if you use a tool to screed the floorboards. Now there are a lot of variations on how to join together floorboards quickly and without much expense.
Tool for screeding floor boards
Tool for screeding floor boards
If possible, post a picture of these devices and the addresses where these devices can be purchased.
They advised me that a tape tie for laminitis could be used for these purposes; anyone who has tried it is better to use a jack or a tie.
Somehow I was also interested in this issue. This is what the bourgeois came up with:
And here's how this thing works
You can buy it on Amazon. It costs about $65.
Unfortunately, I did not find this in Russia. You can, of course, if you wish, construct such a thing yourself; there is nothing complicated about it. Yes, you can order from Amazon, they also send it to Russia
In general, I am a supporter of staples and wedges. If you get the hang of using them, you don’t need any more equipment.
Thanks Meehan. I agree about the staples and wedges. But the devices are more convenient. Maybe there are some homemade ones. Maybe someone can tell me?
Yes, now, of course, many different devices have appeared and the prices are also different, people are used to working comfortably and having everything at hand.
I want to tell you how the old carpenters used to lay the floor and they didn’t have any jacks or special tools at hand, and they used an ordinary ax to pound nails with - these were the specialists!
This is done like this: the first board is placed under the wall and nailed, then the second board is pressed against the first by an ax, which, resting its tip against the beam, pressing the blade towards the board, presses it against the first.
The first row of nails pounded towards the first board, and when they hit them, they additionally pressed the board to the board, and the control nails of the second row were driven straight.
And so, board after board, it didn’t turn out bad, no worse than when using special tools.
When laying wooden floors, it is advisable to tighten the floor boards so that the gaps between them are minimal.
There are many ways to do this, for example using:
- wedges and various staples;
- ax and hammer;
- special clamps;
- pry bar or jack.
But it is best to use a special device for screeding floor boards, as in the pictures below:
I didn’t find any special devices for screeding floors in stores, so I found an old Soviet hydraulic jack, which I could easily use to pull together at least five boards at once, whatever, but it has enough strength. I found a similarity of such a jack on the Internet, and I’ll post this photo. So, I think this option is the cheapest and most effective.
Car jacks were used with my father-in-law. Very convenient if the boards are not completely level.
Thanks builder. Can you give more details?
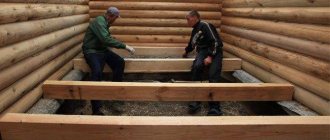
The technology is obvious. Bars were nailed onto the joists, and jacks were inserted between them and the board being laid. When the board was pulled together well, it was screwed on with self-tapping screws at an angle. And so on with the next board. As the boards were laid, the bars were either sawed off or torn off and new ones nailed.
Thank you very much, builder. But still, maybe there are other devices besides jacks?
About the types of screeds
In the dry version, you can replace the soil with sand. Sand is needed to raise the floor level. You can use quarry sand, it is inexpensive, and if the screed is dry, it is quite suitable for use.
The sand can be leveled with a regular flat board. Before laying waterproofing, to protect the film from damage, you can use agrospan or geo-textile. If roofing felt is used for waterproofing, then the above materials will not be needed.
Choose chipboard sheets with a thickness of 16mm. They will cost the most. Sheets need to be selected so that it is convenient to bring them into the room. Or order sheets with the expectation that you will cut them yourself.
Removing the floor
Before starting the dry screed process, the floors must be removed. The first board must be removed carefully. After the first board is removed, the jack is moved under another board so that it does not shoot out and injure a person; it must be secured from above.
When all the boards are removed, you need to remove all the posts. Then you need to level the existing soil and determine the lowest point with the water level. It is worth pouring sand in layers of about ten centimeters, and then compacting it.
To compact it, you can wet the sand with water, but you must first wait until it is completely dry before carrying out other work.
Then lay roofing material or whatever was picked up to replace it on the surface. We cover it with film. We seal the joints with tape. A board is laid on top.
Of course, you can also use a concrete screed, but only if this room does not need to be used immediately. The only disadvantage of such a coating is the possibility that the chipboard may become deformed during the off-season.
Making a concrete screed
A concrete screed can also save your situation and it can also be used on a wooden floor. To prepare the solution you will need M400 cement, C3 type plasticizer (you can add a little washing powder to the solution instead), sand.
First of all, you need to close all the cracks and holes on the boards. To do this, you can use putty and foam, and treat the joints with silicone sealant.
Then you need to lay the film and cover all joints with tape. It is necessary to set up lighthouse slats. This is difficult to do, since cement has poor adhesion to the film. Then fill everything with the prepared solution. For greater strength, you can put a reinforcing mesh
It is very important to ensure 100% separation of the floor from the concrete screed
This video will explain to you how to make a screed on a wooden floor.
We use plywood
A wooden floor, in any case, will deform over time. If you decide that it’s time to smooth out external changes, then before laying a new covering, you need to level the floor, that is, make a screed.
This is done in order not to damage the material that will be laid on top.
If desired, you can make a screed on a wooden floor with your own hands. It's not as difficult as it might seem. In order for everything to work out as you expect, it is enough to follow all the recommendations.
Leveling a wooden floor can be done using sanding, PVA glue and putty, a self-leveling mixture or using plywood.
We could also talk about what devices should be used for screeding on a wooden floor, but this depends on the specific type. For example, if it is dry, you will need soil or sand, roofing felt or its substitute, film for sealing and chipboard sheets.
But with a cement screed you will need: putty, foam, sealant, film, slats and mortar. For any type of leveling, levels will be needed to determine the evenness of the surface. First of all, always familiarize yourself with the information related to this work, or better yet, entrust the matter to the hands of professionals.
Devices for screeding floor boards
Do not think that devices for screeding plank floors are an invention of recent years. Our grandfathers and great-grandfathers also wanted a flat floor. Old textbooks describe ways to eliminate cracks during installation. For this purpose, metal staples were used - ordinary or of a special design. Modern devices and techniques are just variations of old methods.
You can also tighten the boards using a regular metal bracket. It's the old wayBowrench and Special Automation
We describe these two devices together, since the Belarusian Spetsavtomatika made some changes to the Bowrench design, which is produced by the Americans. But, in essence, it is also a device.
You can tighten the boards using Bowrench
So, there is a part with two protrusions that is fixed to the joist. A metal stop and a handle are movably connected to it. By pressing the handle, we ensure that the board fits tightly and install the fasteners. The disadvantage of this device is that it blocks access to the end of the board. When laying a tongue and groove board, you will have to move it several times if you need to fix it to each support.
Logs can be of different thicknesses. To be able to “rest” against them, there are replaceable nozzles. The stop can be easily removed: you need to remove the two studs that secure the mounting bolts. However, the set consists of three or four attachments, so there are not many options.
The Belarusians have made some changes to the design: one part of the joist grip is movable and adjustable
In the device produced by Spetsavtomatika, the log grip is adjustable. There is an adjusting bolt at the end that allows you to extend or retract one of the clamps. There are more adjustment options, but there is also a higher chance of damage. In operation, both are quite convenient, although the “American” is more refined. But the difference in price decides the matter - Bowrench costs 3.5-4 times more.
How to tighten floor boards using a clamp and wedges
You can tighten the floor boards using a clamp and two wooden wedges. The clamp is fixed on the joist at some distance from the board being installed. Two wedges are made from a piece of board 40-50 cm long by sawing the piece diagonally.
A device for tightening boards from a clamp attached to a joist and wedges that press the board
The clamp is installed on the joist, turning the arc towards the board. Wedges are installed between the arc of the clamp and the board. They hit the wide side of the wedges with a hammer or sledgehammer until the gap between the two boards disappears. Then you can fix the board. If you need to install fasteners in a tenon or groove, a “window” is made in one of the wedges, which is placed above the joist and through which a self-tapping screw is screwed.
Thrust board and wedges
The previous method is good for everyone, but the board is attracted only in one place. You can, of course, install several clamps, but this is time. And there are usually not many sufficiently powerful vices on the farm. The problem can be solved using boards and similar wedges.
A support board about a meter long is nailed at some distance from those being mounted. They are nailed to the joists above which it is located. It is not necessary to drive the nails all the way to the heads, but the support should hold well. The distance for installing the support is chosen so that three or four boards can be laid without moving it.
Backing board nailed to joists and wedges are another way to hold floor boards together.
A piece of “lining” with a window through which you can tighten the self-tapping screw is attached to the board being installed. In order to be able to tighten the floorboards, scraps are inserted between the support and the wedges. First you need long pieces, then smaller ones. The entire structure is assembled so that the wedges stand in such a way that by knocking them down, the boards can be held together.
The principle of flooring and sequence of actions
The plank flooring technology is as follows:
- The smoothest board is selected. When fixing, a tenon is cut into a groove; when fastening into a tenon, the protrusions are cut off.
- This board is nailed along any wall. The flat side should be facing the wall. They retreat from the wall at least 1 cm, fix the tongue-and-groove board right through to each joist. The second board, into which nails (or self-tapping screws) are driven through, is located on the opposite wall.
- The second floorboard is laid, the tenon is driven into the groove. A piece of board is used, inserted on the other side. Tap it with a hammer to ensure there are no cracks. You just won't get a perfect fit. Adaptations are needed here.
- Using any of the devices, the board is attracted to the one already placed so that there are no gaps. Having achieved a tight fit, the boards are fixed. Then the device moves further, fastening the floorboards along their length.
- The last board is cut along the wall so that there is a gap of 1 centimeter between the wall and the edge. The board is placed at an angle and lowered onto the base. Spacer wedges, which are driven between the edge of the floor and the wall, achieve a tight fit. The end board is fastened, as already written above, with nails all the way through.
Devices for joining floorboards are made from scrap materials, and some are factory-made.
How to lay a floor step by step instructions
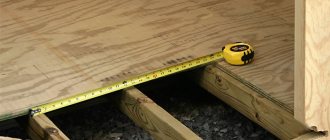
To make your own floors with joists, you need to develop a plan. In the plan, you can indicate the parameters of the beams, all kinds of preparatory work and devices that will be useful during the installation process.
Tools required for work: hammer drill, drill, wrench, hammer, jigsaw, axe.
You will need:
- Axe.
- Rule (or level).
- Hammer.
- Jigsaw (or saw).
- Drill.
- Screwdriver.
- Claw hammer.
- Wrench (size: 13-14).
- Board.
- Logs (dimensions: 50×50 mm).
- Insulation.
- Anchor bolts 1 cm.
- Self-tapping screws 5 cm.
- Nails 7 cm.
The beams are laid at a pre-calculated interval between them for sound insulation. A level should be used to ensure the surface is as level as possible. If the surface is concrete, then anchor-type bolts are used to fasten the logs. If the base is made of any other material, then dowels are used.
What are the advantages of wooden joists?
The log does not require any additional care. In addition, floors on joists have a presentable appearance.
The advantages of lag include:
- no effort is required to make the floor level;
- the beams have thermal insulation properties;
- installation is done quickly, in several stages;
- excellent sound insulation;
- possibility of locating communications.
Laying thermal insulation
As described earlier, logs are mounted with a certain step. Insulation (super-thin basalt fiber or expanded polystyrene) is placed in the remaining gaps. You can use roll insulation for these purposes. In addition, expanded clay can be used for the insulating layer.
Clear flooring
Laying boards on joists.
Laying the wooden beam begins from the corner part of the room. The first row is positioned tongue-and-groove relative to the wall, while the gap between the wall and the joist should be no more than 1 cm, since deformation of the wood is possible under the influence of the environment.
Next, a row of lags is laid offset relative to the first row by approximately several beams. In order for the boards to be firmly attached to the base, you need to lightly tap the wood with a construction hammer, which is adjacent to the end of the beam.
You attach the boards along the wall and secure them with screws. They may be on the surface, but no one will see these details - the baseboards will hide all the imperfections.
Thus, all deformed boards are covered with this decorative element. Irregularities will also not be visible. However, this does not mean that you do not need to follow the instructions; over time, if installed incorrectly, the structure will collapse.
Do-it-yourself floor leveling
Chipboard floor on joists.
Surely you have encountered a similar problem. It is especially often observed in old houses, where the height can exceed the level of evenness by up to 20 cm. Concrete screed is not always the solution: the structure may not withstand such a load. Here it would be wise to use adjustable lags. The installation process is carried out according to the following scheme:
- Special bolts are screwed into the drilled holes in the joists. There should be 5 such holes for every 2 meters of the beam.
- Plan the gap you want to make between the joists, lay them out and secure them.
- For dowels, drill small holes. This must be done so that the drill reaches the depth of the rack bolts.
- Next, you should check the surface for evenness. Cut off the excess parts of the post bolts. After this, hammer in the nails.
- Lay the floor on joists. This is the final stage of work.
Finishing work
Do-it-yourself subfloor on joists.
Now that the main work is done, you can begin to complete the installation of the joists. Your task is to get rid of irregularities on the surface, as well as eliminate roughness. A scraper or grinder is ideal for such work. You start the process with sandpaper, which will effectively and quickly remove all excess. Then you should take sandpaper, which will polish the surface of the base.
To increase the service life and wear resistance of such a floor, you need to cover it with one of 3 types of impregnations:
- Oil impregnation.
- Varnish intended for parquet.
- Mastic (preferably wax).
You have familiarized yourself with the material on laying lag, all that remains is to get to work. Such floors will delight you with thermal insulation properties, durability and long service life. You can achieve a good result if you strictly follow the installation diagram. Despite the simplicity of the work, installation has its own characteristics and nuances. Today, craftsmen prefer to lay floors with joists, and for good reason - they will create a more impeccable appearance in your home.
Elements for fastening
How can I attach a board to the joists or subfloor? Today, manufacturers offer various types of elements so that the flooring material can be properly fixed. The most common are:
- nails;
- self-tapping screws;
- screws.
Nails are often used to install floors, especially if the material used is oak or larch. But they tend to break out during intensive use, which can lead to damage to the surface.
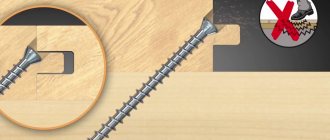
Self-tapping screws securely fix the wooden base to the joists. But, given the fact that they are made of steel, the fasteners are subject to corrosion.
Using self-tapping screws to fasten boards
Screws made of galvanized material have a cutter at the end, which ensures high-quality and fast screwing. You can use these fasteners for floors made of any wood. The coating prevents the screw from rusting even when in contact with moisture.
You can use any type of fastener for wooden floors, the main thing is to take into account some points during work:
the distance between screws or nails should be no more than 25 cm; the boards are pulled together as much as possible, but it is important not to forget about the technical gap of 2 cm, which is necessary in case of wood expansion; if a non-galvanized fastener is used, then its caps must be treated with sealant.
A device designed for joining floor boards together with your own hands is a great help. But, in addition to this, to install the floor you will also need a level that is at least 1 m long. It will be convenient for them to check the evenness of the exposed joists. This tool is also useful for preparatory work.
It is very important to have a chisel, a screwdriver, a metal hammer and a hacksaw in your arsenal
When laying flooring, it is a good idea to have a cutting machine, especially if the flooring will be laid over a large area. This tool will make the job much easier. It performs various functions. They will be able to cut off excess pieces from the boards or make a cut not in a straight line, but along an oblique line. The advantage of this tool is that the blade size can be adjusted. This helps with large and wide boards. The machine makes very precise cuts, which is very valuable when laying floors.
Cutting machine for work
To make a cut at a certain angle, you should set the required angle on the scale and fix the blade in the desired position. If millimeter precision is required, this tool is simply irreplaceable. You need to step back a little from the edge, then mark the line where the cut should take place, fix the disk and only then turn on the machine.
You can use this tool if you have a board that is too wide. To do this, attach a special stand to the cutting machine. The frame will extend and thereby support the long board.
Second stage installation of beacons
Not every instruction describes the installation of beacons, but if you do not have experience and special equipment, it will be difficult to level the mixture relative to the horizon without errors. Not only leveling, but also walking on the loose layer is impossible, since the foot gets stuck and the even layer of backfill is disrupted.
A certain transitional technology using beacons is proposed. To do this, you will need a U-shaped profile, turned upside down with sharp edges. In this position, the profile is laid flat on the floor, and expanded clay is poured between the edges. Then the contact between the profile and the gypsum fiber sheets will be minimal, which means that the soundproofing benefits of the dry screed will not be impaired.
Base requirements
The filling technology requires compliance with the following requirements:
- Strength and integrity of the rough coating. Before installation, a number of surface preparation activities are carried out:
- small cracks are sealed with cement mortar;
- the entire surface is carefully tapped, any voids found are cleared and sealed with cement mortar;
- the prepared base is covered with a layer of primer, which will strengthen the old screed and prevent the appearance of fungus or mold on the surface.
- Compliance with the standards for the thickness and weight of the floor, since not all floors can withstand increased load. This is especially true for multi-storey buildings. And an increase in the thickness of the base will affect the height of the ceilings, which will affect the appearance of the entire room.
Features of floor screed using various devices
You can buy professional tools at any hardware store. Since it is not cheap, many home craftsmen make do with what they have on hand. Some methods of screeding floorboards are quite labor-intensive and require carefully thought out and precise markings.
To avoid spending money on such an expensive tool, you can use a car jack.
The principle of operation is the same: one side of the jack rests, for example, on brackets or a wall, the other on the edge of the board. The only significant drawback is that such a device is difficult to install correctly. Among the advantages, it should be noted that in this way you can compress several floorboards at once without much effort.
The old method of compressing boards using wooden wedges, which our ancestors used, is also relevant. For emphasis, modern craftsmen use staples rather than bars. The hardware is subsequently easier to dismantle (remove) than to remove the nails to free the persistent wedge or block. And the work process is faster.
As for the clamp, for a one-time job it is too expensive to then lie around in the garage after installation. You also need to make sure that it is securely fixed so that it does not fly off later.
see also
Comments 34
I’ve been a carpenter and carpenter since I was 18, I’ve never seen anything like this, if necessary, I’ll cook something like this for myself, thank you for the useful advice!
Yes, sure. Suitable for installing floors.
I may not be speaking on topic, but isn’t it easier to immediately find normal material, in this example, not bent, but straight boards?
on this topic. Sometimes you buy straight ones, but when they sit in a warm place they become bent. This is a tree, it is alive, its fibers are arranged differently.
And if they find themselves in the hot sun, they’ll be a total mess, they might become a screw. And all that’s left to do is burn them in a bathhouse or donate them on an airplane.
I don’t argue with this, because I myself, for example, take a very long and careful approach to this process)) and, accordingly, I try not to buy it in advance, otherwise it’s very difficult to store it, no matter what happens to the material))
The post is given to study the concept of this product.
As an option (for vapor barrier), place a rail over the boards on which to rest, and modify the device. In short, you are getting wiser.
I think with a vapor barrier there should be a counter-rail that you can cling to.
Yes, and the tool can be improved.
The rail is 25x50mm, flimsy considering the quality of our material. Yes, and we are considering a ready-made device, not a homemade one. Can a homemade product be designed to suit the circumstances and then rented out?
The post is given to study the concept of this product. By the way, it is patented. I don't see any point in buying it. There are deals for 300 rubles from new metal and 1 kg of 20 rubles - the price of metal taken in ferrous metal. I think this is 30 rubles. Two and a drill and four bolts with furniture heads will save those who do not have welding.
Comrades, we are going the right way! They have their own equipment for each type of specific work.
But it’s as if we don’t? It all depends on the wishes of the specialist. Ours grinds out devices for every operation. I personally went there and took the drawings.
Comrades, we are going the right way! They have their own equipment for each type of specific work.
And your specialist
And given the quality of our material, it’s probably better to press through a piece of floorboard, which limits the length of the canvas. The wall will interfere with the end boards.
You can increase the length of the stop and that’s it
They brought packs of floorboards, after drying, they were pulled together as expected - these were six-meter rectangles. They unloaded it with cartoons, everything was ok. They began to cut it to fit the size for installation, but 20 percent of it was clearly defective, either the groove was wrong, or the tenon was crap, or the propeller. I would kill him. They pressed with a wedge, the wife was the load, and the outer ones, in the old fashioned way, with a wide chisel.
The quality of the material is a problem. The prices are huge, but the service and quality are lacking.
Well, what country do we live in? Most frame projects are crap, with floor joists and rafters 25x150. The builders are mowing around the black, eye and eye. If you build it yourself, you won’t find good material during the day with fire.
Builders are different. And I agree with the quality of the materials.
By the way, in our village the forest costs 6,000 rubles, in the city it was 5,000 rubles. Only in the city I came and picked out what and how much I needed, but here they are showing off, we don’t want to order, take only 1 cubic meter, sizes are only 6 and 3 meters. Quality in favor of the city!
It’s an interesting gadget, but it’s limited in use (floorboards on joists without insulation). IMHO. Probably not suitable for attaching floorboards when insulating the floor. It will tear all the vapor barrier. The skull beam above the vapor barrier is only 25mm.
There are restrictions, of course.
It’s an interesting gadget, but it’s limited in use (floorboards on joists without insulation). IMHO. Probably not suitable for attaching floorboards when insulating the floor. It will tear all the vapor barrier. The skull beam above the vapor barrier is only 25mm.
Yes! I didn't think about the vapor barrier.
A good tool, simple and convenient. If you rearrange the stops, the handle will be on the other side, although the lever will be smaller. Thank you! The ceiling will be fixed soon.
It's good if it's useful. Unsubscribe. The main thing is to do it in advance.
The person says correctly, but what about vapor barrier?
Do you think everyone makes insulated floors?
Apparently I didn't build according to fashion. I have basement floor slabs with “foil” on them, then a beam leveled at the liquid level and bolted to the slab, everything is covered with expanded clay and sawdust along this beam. And the subfloors are already screwed to the timber (50*75) with self-tapping screws. Then chipboard slabs and a finishing coating (linoleum, carpet or laminate).
The slabs also made it possible to pour a “warm floor” connected to the heating system in the bathroom and at the entrance to the house (where the shoes are kept).
Well, this is in modern, global terms. The technology here is still grandfather’s, publicly available.
But I achieved what I wanted - the child plays on the floor, and I walk barefoot, I love it so much. The floors are warm. With parents, friends, mother-in-law, I wouldn’t say that.
Doing it yourself will be cheaper.
So that's what we're talking about.
If you do this “for life” then there is a point in buying... if you do it for the occasion... then there is no point IMHO
When building a house it was necessary. Nowadays it can only sometimes come in handy at sabbaths.
Methods for fixing floorboards
Floorboard with grooves for secure fixation
Boardwalks come in single-layer and multi-layer construction. In the first case, a layer of boards 25 - 35 mm thick is laid on the joists resting on the beams. There are elements with grooves and tongues (tongue-and-groove), others are distinguished by vertical side surfaces. Laying a tongue-and-groove floor differs from attaching planed rectangular elements.
A two-layer finish includes a face covering that is placed over the subfloor components. The first layer is made with a simple slot or substandard board installed on logs, while the width of the elements is 75 - 145 mm.
Finishing boards are connected in the following ways:
- secret method;
- on glue;
- using clamps.
Secret method using screws or nails
Secret method of fixation using self-tapping screws
Nails are cheaper, so their use is justified over large areas. Hardware forms a permanent joint, which, when disassembled, leads to cracks and destruction of the board. When loaded, the nail becomes loose, the floor creaks and springs. When humidity decreases, lumber dries out and the heads of hardware become exposed.
Self-tapping screws have the best application characteristics:
- it is possible to disassemble the coating, while boards and hardware are reused;
- ensure a tight fit of the boards to the base.
The cost of self-tapping screws is higher; fixation will require work with a screwdriver, and not just a hammer. The hardware is twisted at a distance of 25 - 30 mm. The boards are ideally joined using a secret method, but you need to remember that 8 - 10 mm of free space is left along the entire perimeter to the walls. The head of the screws is recessed into the body of the board, and a piece of wood is inserted into the hole at the top and sanded. Flooring manufacturers sell such plugs along with their products.
Using glue
Laying floorboards with glue
The technology is used when installing plank flooring on concrete without cushioning material. Cracks and height differences on the surface of the screed are not allowed, and it should not peel off or move under pressure. To eliminate defects, cracks are repaired and the base is primed.
One- and two-component adhesives are used. The first type of polyurethane composition is used when installing wide lumber, and the second type is intended for narrow boards.
Sequence of actions when gluing:
- cut blanks of boards;
- apply the adhesive composition to the concrete base with a spatula;
- put 2 - 3 longitudinal elements, they are pressed against each other and to the floor;
- work continues after the glue has set;
- the last part is cut to the required width.
Fastening with clamps
This method is considered fast because several parts are connected at once. In this case, each element is not attached to the joists, but hardware is inserted into the layer of boards.
Bonding is done with different compressions:
- Smolyakov bracket;
- construction compression;
- lever-toothed;
- movable and wedge bracket.
Work is carried out with wooden wedges along the thickness of the board with a cone of 15 - 20°. The spacer counter wedge is pressed to the end side, and the working part is inserted between it and the bracket itself. The first type is made from any wood, and for the worker they take hard wood, because they beat it to compact it.
The lumber is laid outward with a groove so that when compressed, the ridge of the board does not deform. The Smolyakov bracket is distinguished by three sharp ends, two of which serve as stops. The first board is placed against the wall and secured to the joists, then several panels are joined side by side, connecting the grooves and protrusions. The brackets are attached to the joists so that the narrow ends of the wedges can be inserted. Knock on the wedges until the boards are tightly connected, then tighten the screws at an angle or hammer in nails.
Should I fix the board in a groove or in a tenon?
When installing tongue-and-groove floorboards, two fastening methods are often used. Both tenon and groove fasteners are used. Installation in a groove is simpler, but it is fixed at about 1/3 of the thickness of the board. After drying, this distance may be small; the tenon may crack. This kind of trouble happens often.
Fixing a tongue and groove board into a tenon is more reliable. But fastening will take more time to find the angle at which the head of the nail or self-tapping screw “sinks” into the wood. Otherwise, the tenon will not fit into the groove. With this installation method, you will need to pre-drill the holes, otherwise cracks will develop.
But with this method, 2/3 of the thickness of the board is “grabbed.”
And this is more reliable than installing fasteners in a groove.
How to tighten floor boards when laying wooden floors
How to tighten floor boards when laying wooden floors?
Please tell me what can be used to tighten the boards when laying wooden floors? I know about staples and wedges too, but maybe there are some more modern devices. If possible, post a picture of these devices and the addresses where these devices can be purchased.
They advised me that a tape tie for laminitis could be used for these purposes; anyone who has tried it is better to use a jack or a tie.
Somehow I was also interested in this issue. This is what the bourgeois came up with:
And here's how this thing works
You can buy it on Amazon. It costs about $65.
Unfortunately, I did not find this in Russia. You can, of course, if you wish, construct such a thing yourself, there is nothing complicated there. Yes, you can order it from Amazon, they also send it to Russia
In general, I am a supporter of staples and wedges. If you get the hang of using them, you don’t need any more equipment.
Thanks Meehan. I agree about the staples and wedges. But the devices are more convenient. Maybe there are some homemade ones. Maybe someone can tell me?
Yes, now, of course, many different devices have appeared and the prices are also different, people are used to working comfortably and having everything at hand.
I want to tell you how the old carpenters used to lay the floor and they didn’t have any jacks or special tools at hand, and they used an ordinary ax to pound nails with - these were the specialists!
This is done like this: the first board is placed under the wall and nailed, then the second board is pressed against the first by an ax, which, resting its tip against the beam, pressing the blade towards the board, presses it against the first.
The first row of nails pounded towards the first board, and when they hit them, they additionally pressed the board to the board, and the control nails of the second row were driven straight.
And so, board after board, it didn’t turn out bad, no worse than when using special tools.
When laying wooden floors, it is advisable to tighten the floor boards so that the gaps between them are minimal.
There are many ways to do this, for example using:
- wedges and various staples;
- ax and hammer;
- special clamps;
- pry bar or jack.
But it is best to use a special device for screeding floor boards, as in the pictures below:
I didn’t find any special devices for screeding floors in stores, so I found an old Soviet hydraulic jack, which I could easily use to pull together at least five boards at once, whatever, but it has enough strength. I found a similarity of such a jack on the Internet, and I’ll post this photo. So, I think this option is the cheapest and most effective.
Car jacks were used with my father-in-law. Very convenient if the boards are not completely level.
Thanks builder. Can you give more details?
The technology is obvious. Bars were nailed onto the joists, and jacks were inserted between them and the board being laid. When the board was pulled together well, it was screwed on with self-tapping screws at an angle. And so on with the next board. As the boards were laid, the bars were either sawed off or torn off and new ones nailed.
Thank you very much, builder. But still, maybe there are other devices besides jacks?
How many times should the floor be held together?
You will need to pull the floorboards together to avoid gaps and cracks at least a couple of times. The first time is during the initial installation, the second time is when reassembling the boards. Why is a bulkhead required? During use, the tree dries out and decreases in size. The result is the appearance of cracks.
To eliminate them, you have to disassemble the floor, and then pull the boards back together, adding one or two floorboards.
This is the process of refinishing a wooden floor.
When laying and redoing, you need a tool to pull the floor boards together.
This is why craftsmen advise using self-tapping screws rather than nails when laying floorboards - they are much easier to pull out, and the board is not damaged when pulled out. But when removing the nails, it will not be possible to leave the wood without damage.
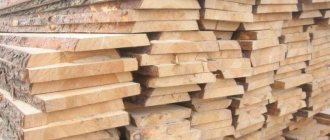
Purchase, transportation and storage of wood flooring material
Wood is a material that is afraid of moisture. The purchased boards and timber for the floor should be stored at the seller’s place under sheds, or better yet, in closed warehouses. The boards should not be exposed not only to precipitation, but also to direct sunlight. When transporting boards and timber, it is also necessary to prevent the material from getting wet.
Important! In the room where it is planned to lay a wooden floor, all wet work must be completed, and in winter the heating must be on; if a screed was made in the room, it must dry completely (28 days). Before installing a wooden floor, material for work stored in open areas or at low temperatures must be kept in the installation room for at least 14 days
Before installing a wooden floor, material for work stored in open areas or at low temperatures must be kept in the installation room for at least 14 days.
In the room where installation will be carried out, the air temperature should be no lower than 8 degrees and no more than 20 degrees from the constant operating temperature. Of course, it is better that the temperature in the room when installing a wooden floor does not differ from the temperature of the subsequent operation of the room.
Choosing materials for plank flooring
Warm floor under a wooden board
The quality of the material determines the comfort of living, the budget for repairs and operation, and the service life of the flooring.
Dimensions of tongue and groove boards
When manufacturing sheet piles, manufacturers are required to comply with the requirements of GOST 8242:
- marking BP or DP - block and floor covering board, respectively;
- lumber thickness - 2.7 cm block, 2.1 cm, 2.7 cm or 3.5 cm board;
- tongue width - 4 - 6 cm block, 6.4 - 14 cm board;
- dimensions of the locking connection - groove 6 x 7 mm for a block, 7 x 7 mm for a board 2.1 cm and 2.7 cm, 7 x 10 mm for a board 3.5 cm thick;
- board length – 2.1 – 4 m for hardwood, up to 6 m for pine.
Lumber quality
The tongue and groove is made from edged boards of Extra, A or B grade, the output parameters are controlled in accordance with GOST 8242:
- integrity - boards 6 - 14 cm wide are usually solid, wider products are glued using furniture board technology;
- cleanliness of processing - roughness 120 microns for varnishing, 200 microns for painting, back surfaces of lumber have 500 microns;
- humidity – 8% when packed in film or 12%;
A wide board is more convenient to work with and is usually made by gluing, so it is less susceptible to warping. Coniferous species pine/spruce are considered budget, larch and cedar are valuable species, by default impregnated with a natural antiseptic. A solid-length tongue and groove made of hardwood without splicing is always shorter than a coniferous one. This is due to the structure of the wood.
Prohibited breeds for flooring are:
- linden, poplar for the entire range;
- BP-27 and DP-27 made of aspen and alder are suitable exclusively for residential premises;
- DP-35 is not made from alder and aspen.
Why do floors creak?
You need to check the flooring by applying intense pressure, visually inspect the floor, cracks.
A building level or rule will help you find the problem area: creaking usually occurs in places of greatest differences in height. In this case, it is best to remove a couple of floorboards and look under the flooring: this way you can accurately assess the condition of the joists, the degree of their wear, and the quality of the rough foundation.
Checking the levelness of the base
Creaks near the wall are often caused by incorrectly fastened or dried out skirting boards. Inspect them carefully, pressing your hand in several places, check whether nails come out of them when pressed, and whether there are cracks in the material. To make sure there is a gap between the boards and the wall, you should carefully remove one of the plinth fragments.
Inspect the baseboard along its entire length
So, when the reason is determined, you can choose the optimal method of strengthening the floor. There are several effective methods that have long been tested in practice by home craftsmen.
| Ways to strengthen the structure | Causes of squeaking | Peculiarities |
| Using dowels | Small gaps in the flooring, loose end connections | Minimum labor costs and financial investments with high efficiency |
| Strengthening with anchors | Gaps between the subfloor and joists | The method is expensive, but very reliable |
| Pulling with self-tapping screws | Loose connection of floorboards to joists | Economical and fast method, no need to spend a lot of effort |
| Floor bulkhead | Worn material, drying of floorboards, presence of large cracks and other damage | The method is time-consuming and labor-intensive, but it allows you to effectively eliminate squeaks and other defects |
| Bonding floorboards | The presence of wide cracks in the flooring as a result of drying out | The method is effective and durable, but requires some experience and physical effort |
| Foam blowing | Small gaps in the floor, loose fit of elements | Expensive, but quick and easy. The method allows you to remove squeaking for a maximum of 3 years |
| Using self-tapping screws as supports | Deflections of boards due to large distances between joists | Easy to implement, but not suitable for high traffic areas |
What wood is best to use?
The most durable wood for flooring is considered to be Siberian larch and oak. They steadfastly hold the line in the face of all the adversity that befalls them. Boards made from softer aspen or alder are placed in rooms with little traffic: in children's rooms, in rest rooms. Lumber from pine, fir, and spruce is rarely used for flooring. Most often they are used to construct a ramp, a rough foundation for finishing material.
The geometric parameters of lumber are selected taking into account the personal preferences of future owners. Based on strength criteria, they often prefer boards with a thickness of 40 mm. However, it should be remembered that when buying thick, rather expensive boards, you should not save money by cutting costs by purchasing raw material. A thick floorboard that has not been kiln-dried can cause the screws to “fly out.”
2nd grade lumber - boards with knots and a bright structural pattern
The choice of a certain grade of lumber depends on the purpose of the room, the goals of the owners and the intended methods of subsequent finishing. High-quality products have a smooth surface with a beautiful structural pattern, which after installation can only be opened with varnish. There are lovers of the natural beauty of wood with a pattern of knots; they will like grade 1 or 2. It makes no sense to buy material higher than grade 3 for painting.
They prefer to make floorboards from tongue-and-groove material - boards with tongue-and-groove devices for tight joining and with longitudinal ventilation vents
Non-grooved material is now rarely used. Boards with straight edges, connected end to end, will disappoint the owners with the curvature of the surface and cracks after a short period of operating time.
Floor board tightening device, pair
The resulting wedges are used as a kind of stop, with the help of which the boards can be tightly “fitted” to each other before fixing them to the base of the floor.
In a similar way, the floor board is screeded using staples, which also serve as clamps and stops during installation. In this case, the bracket is driven into adjacent boards, ensuring their tight fit to each other. The deeper the bracket is “recessed”, the stronger the screed effect will be.
Both methods are successfully used both with the traditional option of laying a wooden floor on logs, and with adhesive installation of the flooring using tongue-and-groove joints of elements.
In addition, there are so-called “old-fashioned” methods that allow you to achieve the desired result without the use of any additional tools or equipment. It is enough to use the most ordinary ax as a stop, which provides the necessary force to move the boards, and quite effectively tightens the boards no worse than wedges or staples.
What is board bonding?
When installing a wooden floor, it is necessary to press the boards as tightly as possible to each other. This is not so easy to do - they will not have ideal geometry. When drying, they bend in different directions. During installation, they must be attracted to each other without gaps, and then fixed. Manually, without devices - this is not possible, because special devices or improvised means are needed.
Screeding floor boards is the elimination of cracks and gaps by mechanically tightening the boards
This process (pressing the boards against one another) is called bonding or floor screeding.
Laying on a plywood base
Joists, screed or an existing wooden floor can be used as a base for plywood. Installation of plywood is done using dowels, screws or glue.
When laying boards on a plywood base, choose moisture-resistant plywood with a thickness of 18 mm or more
Table 5. Laying boards on a plywood base
| Illustration | Description |
| Plywood sheets are glued to the cleaned and level screed. | |
| For gluing, a 2-component adhesive composition specially designed for these purposes is used. Apply it in a thin layer using a notched trowel. | |
| Plywood is laid with seams staggered in each subsequent row. Holes for dowels are made in each sheet in three places - along the edges and in the center. In this case, the hole should be located at a distance of several centimeters from the edge. | |
| The plywood is pulled to the screed with dowels. | |
| After laying, the plywood is sanded. | |
| After this, use a vacuum cleaner to remove wood dust. | |
| Before laying the boards, prepare an adhesive solution. | |
| Starting from the corner, apply glue with a notched trowel. | |
| When laying diagonally, work begins from the corner, not forgetting to leave a gap from the wall. | |
| Additionally, the board is fixed with a self-tapping screw to the plywood base. |
Screed using homemade wooden wedges
The method is effective, guaranteeing high reliability and good results. You don't need a floor planking tool to do the jointing job, just a couple of strong wooden wedges and a regular hammer.
Wedges are made with a hacksaw, and from a floorboard or any other board 150 mm long. Saw with a cutting angle of 10 degrees and the wedges are ready. How to join together boards into a shield with wedges:
- Place 8-15 tiles on the joists, then attach the trim to the last floorboard.
- Place a couple of wedges on the joist above the already laid piece of floorboard. You can use wedges without cutting, but then the “working” wedge must be supplemented with a ridge on one side to fit into the groove of the floorboards. The second wedge is called “intermediate”, it has no grooves and is 15-20 mm thicker than the working one.
Important! You need to use wedges at 2-3 points at once along those floorboards that need to be joined together - this way the screed will be much more effective.
- Close the excess gap with a piece of block, fix the thrust block between the wedges and the space that is not covered by the dies, fastening with self-tapping screws is allowed so that the block is held as firmly as possible.
- Use a hammer to strike the end of the intermediate wedge - this will ensure simultaneous tightening and compaction of all floorboards.
Important! The permissible gap between bonded floorboards should not exceed 1 mm.
- After the boards are united, they are attached to the joists with self-tapping screws, screwed in at an angle of 45 degrees. Long (up to 75 mm) nails can be used.
- Remove the wedges by hitting the intermediate one from the end side.
Article on the topic: Methods of washing shoes by hand, in a washing machine or dishwasher
A coating of any width can be spliced in this way, carrying out the procedure for every 8-15 boards. When using tongue and groove dies, make sure that the joints match. And if tongue-and-groove timber is laid, the last 2-4 elements are spliced together without using a board to hide the gap. For the floorboard closest to the wall, remove the lower edge of the groove, use a wedge located between the outer board and the plywood - this will protect the wall panel from deformation.
We also recommend that you familiarize yourself with how to install a tongue-and-groove board yourself.
Using wedges is the easiest and most affordable way to quickly join all floor boards. In this case, the size, material and area of laying the floorboards does not matter.
Floor fixing methods
After compressing the floorboards, it is important to secure them correctly and carefully. If they come apart they will start to creak.
There are 3 methods of fixing wooden flooring:
- Adhesive (only suitable for plywood flooring);
- Secret (hardware is hammered or screwed not vertically, but at an angle into the end of the board);
- Clamping (after screeding, the floorboards are fixed with special self-tapping screws or self-tapping screws).
Thus, when choosing a tool for floor screeding, you need to rely on the feasibility of spending your budget and time. Sometimes it is enough to use the help of craftsmen who already have their own tools and everything necessary for high-quality work. If you want to save money on hiring specialists, then you need to purchase everything you need yourself and decide on the method of screeding. If you have work experience, things will go quickly, because there is practically nothing complicated about screeding a wooden floor!
Methods for tightening floorboards
The tool for tightening floorboards, their number, and type will depend on the method by which the floorboards will be tightened. Regardless of the choice, the boards must fit snugly both to the joists and to each other, that is, without cracks or distortions. Otherwise, the occurrence of a squeak cannot be avoided.
The joining of boards together is distinguished by the use of various devices, among which the following should be highlighted:
Regardless of the choice of devices for tightening floorboards, you must strive to ensure that the floorboards can subsequently be firmly fixed with nails or self-tapping screws. Otherwise, all efforts will be in vain; problems associated with poor-quality installation will sooner or later still appear at the most inopportune moment.
What is a dry screed?
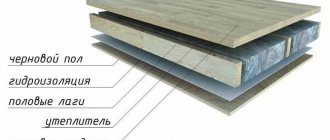
A floor screed is a kind of base, which is a horizontal, leveled surface, ready for laying the final finishing coating. It allows you not only to level the subfloor, but also to make it stronger, and also (in certain cases) to insulate it, provide waterproofing and lay some communications. A screed is installed on the surface of the already finished interfloor ceiling in the house.
What is dry screed
The rough base can be made of a cement-sand mixture (the so-called “wet” version), or it can be made of lighter materials (for example, chipboard, plywood, plasterboard, etc.). It is in the latter case that it is called a dry screed, since the manufacture does not require the use of mixtures with water or with the addition of other liquids. A dry screed is a lighter analogue of a wet screed; it can be made faster and easier than a cement base.
Dry floor screed and installation of gypsum fiber boards
Dry screed belongs to the category of “floating” bases for finishing floor coverings, since it does not have a rigid connection with the ceilings and walls in the room. All its parts are laid dry.
"Floating" dry screed
Video description
The video shows how to mix a floor screed solution with your own hands:
Laying the screed
So, let's move on to the main question of the article - how to properly make a floor screed. This stage takes the least time when compared to preparation. The process itself is not that complicated, although there are subtleties:
- The finished solution is poured onto the floor between the mounted beacons.
- Spread evenly with a trowel.
- Next, the mixture draws on itself as a rule. In this case, the instrument must be placed on two or more beacons. The rule is that when pulling the solution, it moves from side to side.
- If a hole or depression has formed on the leveled surface, then a solution is added to it with a trowel, which is also drawn out at this place using the rule.
Filling the screed along the beacons The process should be continuous and start from the far corner, moving to the front door.
If the screed is laid in two layers, the first one should give maximum evenness without gloss. It forms after applying the second layer. If pouring is carried out on a heated floor heating system, then several nuances must be taken into account:
- heating pipes must be firmly attached to the base floor;
- the latter must be cleared of debris and primed;
- the heating system will be filled with cold water;
- the beacons can not be dismantled, but left inside the screed;
- if there is such a need, then they are removed after 3-5 days and the seams are sealed with the same solution as the screed.
Tools and protective equipment
Despite the complexity of the work performed, not such a large number of tools are needed to remove the screed. The list is below:
- depending on the chosen method - hammer drill, hammer or sledgehammer, jackhammer, grinder, etc.;
- grinder - for cutting reinforcing bars, if there are any inside the screed;
- vacuum cleaner - for collecting fine dust;
- large and durable bags for collecting and removing garbage.
Dismantling a floor screed with a jackhammer
It is also important to purchase personal protective equipment. These are gloves, a respirator, safety glasses, a work helmet, and headphones.
The work ahead will be very dusty and dirty, so it is better to protect yourself as much as possible.
It is important to prepare the premises and foundation before starting work. To do this, initially all pieces of furniture and household items are moved to another room and covered with plastic film so that dust does not settle on them
And the latter will fly in large quantities throughout the apartment. Skirting boards, old flooring - laminate, fiberboard, linoleum, etc. are also removed. If the covering is to be used again, it should be removed very carefully. If it is very old, then you don’t have to try and completely destroy it and throw it away.
Dismantling the laminate
Preparation of the solution
The next stage on the topic of how to make a floor screed with your own hands in a private house or apartment is mixing the screed mortar. Until recently, it was made from individual ingredients, which were also purchased separately. Today everything has been simplified, that is, you can purchase a ready-made dry mixture, dilute it with water to a homogeneous consistency and start pouring. The whole process is described on the packaging.
Self-preparation is sometimes also used if it is necessary to pour a thick concrete screed over the ground. For this, a classic mixture recipe is used, which includes:
- 1 part cement M500;
- 2 parts sand;
- 3 parts crushed stone;
- 0.5 parts water.
Do not mix the solution with shovels. This is no longer modern, and the quality of such a solution may not meet the requirements. The best option is mixing in a concrete mixer with the addition of plasticizers, which increase the strength of the solution by 20-40% and frost resistance by 50%.
Mortar parameters and rate of strength gain
Each technique involves working with certain solutions. However, sometimes when discussing types of screeds, the emphasis is not on technology, but on the composition of the mixture:
- Cement-sand.
- Concrete (in addition to sand and cement, the composition includes crushed stone).
- Lime - not recommended, but sometimes used in economy-class construction.
- Gypsum is less durable than cement-sand, but dries faster.
- Expanded clay.
- Arbolite (with organic filler, for example, sawdust) - are outdated due to the availability of slab insulation for floors such as high-density polypropylene polypropylene.
| Strengthening rate of semi-dry screeds | ||||||
| Type and content of plasticizer, % | Water/cement | Setting time, min | Ultimate compressive strength, MPa | |||
| S-3 | Trisodium polyphosphate | Start | End | After 2 hours | After drying | |
| — | — | 0,41 | 8:00 | 11:00 | 5,3 | 13,8 |
| 0,3 | 0,03 | 0,36 | 24:40 | 36:30 | 8,5 | 16,1 |
| 0,5 | 0,06 | 0,3 | 20:30 | 27:20 | 11,0 | 25,9 |
| 0,8 | 0,08 | 0,27 | 21:00 | 29:35 | 15,1 | 29,2 |
| 1,0 | 1,0 | 0,25 | 22:20 | 33:00 | 16,0 | 30,6 |
Delays in the distribution and leveling stages, as well as errors in calculating the amount of added water and plasticizer, lead to defects: the screed cracks and/or does not gain the design strength. Compliance with technological requirements guarantees the quality of work and provides significant advantages over traditional (wet) leveling. For example, you can finish finishing walls while walking on a new screed within 24 hours, and laying the final floor covering in 7 days.
The amount of fiber does not affect the setting time. The approximate value, tested in practice, is 0.6 - 1.0 kg per 1 m3 of cement-sand mixture. A larger amount does not have a positive effect in reducing the risk of cracking.
Screed care
The day after pouring the screed, when it has already hardened, it is necessary to remove irregularities, sagging and other defects. To do this, use a rule, scraper or spatula
It is important not to delay this procedure, since if the screed gains strength, then it will be incredibly difficult to complete this work, but a fresh screed can be easily trimmed
Also, in order for the cement-sand screed to be strong and last a long time, it is very important to retain water in it during the period of strength development. For this purpose, after eliminating the unevenness, the screed must be watered a little and covered with plastic film, which will create a greenhouse effect and will not allow moisture to evaporate.
It is advisable to keep the screed under such a greenhouse for several days. The full strength of the screed lasts 28 days.
As for the removal of beacons, opinions are divided here. Some of the builders remove them, filling up the grooves left by the lighthouses with new mortar, and some leave them. Those who remove beacons justify their position by the fact that concrete screeds and metal beacons have different coefficients of thermal expansion, so cracks can form with significant temperature changes. I believe that the temperature in a heated room changes little throughout the year, so the beacons can be left and not have to do any extra work.