Have you ever encountered the topic of “correct” or “wrong” frame house popping up in discussions on forums? Often people are pointed out that the frame is wrong, but they find it difficult to really explain why it is wrong and how it should be. In this article I will try to explain what is usually hidden behind the concept of a “correct” frame, which is the basis of a frame house, just like a human skeleton. In the future, I hope we will consider other aspects.
Surely you know that the foundation is the foundation of the house. This is true, but a frame house has another foundation - no less important than the foundation. This is the frame itself.
Preparatory work
The technology for installing the floor in the structure under consideration involves the creation of a two-layer structure consisting of a base and direct wooden materials.
Traditionally, flooring is laid on joists or on top of floor beams. When choosing a specific method, you need to take into account, first of all, the features of the room being equipped and its location. Before use, all wooden components are impregnated with special antiseptic and fire retardant agents. The base of the future floor structure must be waterproofed. Penofol is perfect for this job. If you do not have a sufficient budget, you can also use plastic film.
penofol
Thermal insulation of walls - choice of material and its installation
Properly selected insulation for a frame house provides not only a comfortable microclimate in it at any time of the year. Low thermal conductivity and proper placement of the material significantly reduce energy costs.
One of the main thermal insulation materials used in frame construction is mineral wool. It retains heat well, provides high-quality sound insulation, but is afraid of getting wet and releases harmful substances into the air in small quantities. The optimal density of mineral wool for frame walls is 30-50 kg/m3. m.
When working with mineral wool, the use of personal protective equipment is mandatory.
In terms of performance properties, it is superior to ecowool - cellulose with special impregnation. It is not afraid of getting wet, is environmentally friendly and non-flammable, and perfectly fills all voids. However, you will have to hire experienced specialists to install ecowool.
Polystyrene foam is a moisture-resistant and economical material that does not emit any substances and does not shrink. However, its fragility, which increases at low temperatures, and flammability make it unclaimed in frame construction. Much more practical and more resistant to external influences is the “relative” of polystyrene foam - extruded polystyrene foam.
Any insulation is placed between the frame posts so tightly that there are no voids or gaps left.
Does the foundation matter? Foundation preparation
The lower trim largely depends on the quality of the foundation. Therefore, before working with timber, you should check the geometry. The difference in the foundation, as we wrote earlier, should be no more than 1 cm. It is also worth checking the angles, they should be exactly 90 degrees. Skewing in one direction or another will complicate the installation of the house frame.
Before tying, it is necessary to waterproof the foundation. The easiest way is to use roofing felt, which is attached with mastic. In America and Finland, sometimes in addition to waterproofing they put a layer of insulation.
The foundation must be prepared for future work with piping at the pouring stage. When it begins to harden, it is necessary to sink anchor bolts or wooden plugs into it, with the help of which the timber or boards will be attached to the base of the house.
The distance between the bolts should be no more than 1.8 meters, or better yet, one and a half meters.
In addition, if any distortions were previously noticed, they need to be leveled. If the height of the foundation varies, use a cement mixture to level the surface. If the wood for tying is not perfectly straight and gaps form, chips treated with bitumen or resins can be placed in these places.
Only after all distortions and errors have been eliminated can you proceed to the lower trim.
Roof
Assembled at the final stage of construction. Its strength depends on the correct installation of the logs and the amount of snow that it can hold. In regions with snowy winters, the roof is made more durable.
Installation of roof truss system
We talked about the main components of frame housing. Beyond the scope of this article there are many nuances that professional builders know and take into account in their work. Don’t think that paying for their services is an unreasonable expense. With their help, you will know that the house was built exactly as prescribed by the Canadian methodology; it will not collapse in 10–15 years, but will last for more than a century without problems.
We build a frame house with our own hands
Construction of walls of a frame house.
There are two options for building frame houses:
- the house is assembled from ready-made elements produced in a factory;
- the building is assembled from individual elements directly on the construction site.
Let's consider the second version of a do-it-yourself frame house:
Any construction begins with the development of a project, frame house building in this case is no exception, since it is much easier to foresee all the dimensions and nuances first on paper and then not have to worry about adjusting materials directly on the construction site. If you want to build something very individual, it is better to order design documentation from an organization that builds frame houses, or from a design group.
The project must include floor plans, foundation drawings, sections and facades, as well as floor and roof plans.
Initially, in accordance with the project, it is done. Often a columnar foundation is chosen, in which the elements are connected at the top into one rigid structure by a grillage. This foundation can be done almost entirely independently (with the help of one or two assistants).
When pouring a grillage (or a reinforced concrete slab that will act as a base for the frame), it is imperative to check the horizontality of the top surface.
While the foundation gains the required strength (about a month), you can buy material to build a house (the required dimensions and quantity must be calculated according to the project):
- lumber (sectional dimensions and length depend on the thickness of the wall and the size of the premises);
- waterproofing material for laying it on top of the foundation;
- fire retardant and antiseptic for wood;
- various fasteners for assembling the frame (nails, screws, anchor bolts, etc.);
- for cladding plywood, DSP; OSB;
- insulation;
- superdiffusion membrane for vapor barrier of walls in addition to simple vapor barrier;
- material for assembling the roof of a building (lumber, waterproofing, insulation, roofing material).
- do not forget to prepare a tool for working with wood, a tape measure, a building level, a hammer drill and other necessary “little things”.
The next stage of do-it-yourself frame construction is the treatment of all lumber used in the construction of the house with antiseptics (this will make it possible to reduce the rate of wood decay processes) and fire retardants (the wood will be able to resist the effects of fire longer in case of fire, and the owner will have a few extra minutes to leave the building , which is lit).
Now you can start building a frame house with your own hands. Let's start laying the bottom trim:
Insulation scheme for a frame house.
- lay roofing felt along the top of the foundation;
- then comes the bottom trim beam, which can be joined in the corners using one of the known methods, additionally strengthening the joint with an anchor or nails:
- we check the angles, compliance of the diagonals, horizontality of the laid timber;
- we attach the beam to the foundation using anchor bolts, the pitch of which is no more than 1 meter;
- We check again the corners and diagonals, the horizontalness of the upper surface of the beam.
Next we proceed as follows:
- We install, starting from the corner elements, the vertical posts of the frame. Attach the racks to the beam of the lower frame using steel reinforced corners: to prevent the racks from wobbling, we temporarily fasten them together on one side with a board diagonally;
- Let’s not forget about door and window openings, since the distance between the racks in these places will differ from usual (without openings in the plane of the wall);
- we fix the beam of the upper trim using steel corners;
- we check the horizontal and vertical position of all elements;
- We secure each rack with permanent small-section jibs made of timber: we install and secure the ceiling beams with steel angles;
- We carry out the sheathing, truss structure, and lay the roofing.
- we sheathe the frame of the house from the outside with OSB, plywood, DSP;
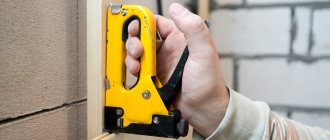
- we secure the vapor barrier membrane with a construction stapler (later we will nail the sheathing over it and secure the siding);
- we place the insulation tightly in the space between the frame posts;
- we cover the insulation with a vapor barrier, securing it to the frame posts with a stapler;
- we sheathe the frame of the house inside with DSP, plywood, OSB.
This is how a simple one is built.
Important points for saving in frame construction:
- Try to save lumber as much as possible. To do this, use scraps of long elements or curved, warped boards for small, short frame parts, if you came across a couple of such boards among the entire supply.
- Reuse materials. For example, boards for temporary bracing can later be cut into small permanent bracings. Or, for temporary bracing, use not good quality boards, but, for example, foundation formwork elements, etc. And it’s very good if you plan the reuse of materials in advance. Then, perhaps, you will be able to order much less lumber than you planned.
- Store lumber so that short pieces and trimmings are always in sight. Then you will not have to cut new short parts again.
- Store lumber carefully, protecting it from contamination and wetness.
- Yes, and more. This is not entirely about saving, but never burn waste lumber treated with an antiseptic, especially in a bathhouse. This is dangerous for your health.
Options for bandaging the corners of the timber box
Corner strapping diagram.
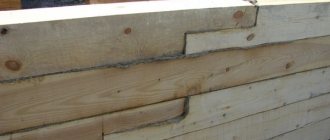
- Half a tree. This is a frequently used method of installing frame frame house frames and walls. It is performed more simply than others: two beams are laid one next to the other so that each of them is one of the sides of a right angle. In other words, the first one is placed in a perpendicular position relative to the other.
- One-sided groove “in the head”. In this option, you will need to make cuts in each of the beams and lay each of them at right angles to the other. The ends of both beams should protrude 10-15 cm beyond the corner point, forming a “cross”.
- In a dressing with a root thorn “in the fringe”. Here the installation process is in many ways similar to the first one, “half a tree”. The difference is that the end of one beam is cut out in such a way that a “spike” 4-5 cm high is formed in the middle. A slightly smaller groove is cut out in the second beam. Next, the lumber is at right angles and the beams are tapped together so that the “tenon” fits tightly into the groove.
- With hidden dovetail spike. This version of the corner connection is in many ways similar to the previous one. But the shape of the “tenon” and groove is different. It resembles a dovetail. The method of connecting the bars is the same, but in this case you need to tap from above, since the “tenon” will be placed on the groove and not inserted into it.
How and with what to fix angles
Scheme for covering the corners of a frame house.
- Anchors. This method is good because the fastening is very strong. Not only are the beams connected to each other, they are also attracted to the foundation, which provides the frame with the necessary rigidity.
- Using 150 mm nails. To fix each corner you will need 4 nails. It is necessary to maintain the required distance from the nail to the edge of the beam. It should not be less than 2 cm.
- Using a wooden pin (dowel). To make this fastener, it is recommended to use dry oak wood. Before installing the dowel, create a hole with a diameter of 2 cm, but slightly smaller than the size of the pin. The optimal shape for such fasteners is square. When hammering in the dowel, you need to leave at least 10 cm above the surface of the beam, as it will be needed for further laying out the corners of the frame house.
General recommendations for choosing specialists
Not all builders know the design features of a frame building. When forming angles, mistakes are often made:
- use timber;
- They simply nail three boards to each other without forming warm bridges.
When choosing a construction team, it is worth learning more about the work schemes and asking questions that arise. If a clear and concise explanation is not forthcoming, the competence of the workers should be questioned.
Only professionals can guarantee high-quality results Source stroyizbrusa.ru
Installation of the top trim
Well, now let's talk directly about how not to mess up and lay the harness correctly. Let's start with typical connections, because no one has ever managed to create a solid contour around the perimeter of the roof from one solid beam.
Longitudinal splices
Let's start with longitudinal joints, popularly called splices. Since the average length of a standard beam ranges from 4000 to 6000 mm, and the load-bearing walls of the average house exceed the mark of eight linear meters, it is impossible to do without correct cuts.
The simplest of them is the “Half a Tree” connection
And "Oblique cut"
These types of splices are as old as the world, have been tested for a long time and, unfortunately, are completely unsuitable for mounting a Mauerlat. Well, unless it fits on an armored belt, but we’ll talk about that a little later.
The main problem with simple connections is their poor tensile strength, while the load transmitted by the rafter system will try in every possible way to disassemble them.
It would be correct to use “Straight patch lock” and “Oblique patch lock” here.
These shorts are specially designed to withstand stretching forces, so they won't let you down. And vice versa, you shouldn’t waste your time trying to create a straight or oblique tension lock, where additional fixation is achieved by wedging it. This is of no use. It's like shooting pigeons out of a cannon. Loud, pretentious, but not effective. In addition, tension locks, for all their rigidity, have a worse tensile strength, but for a Mauerlat this is not a minus at all.
Gusset
The same goes for corner joints. The beloved “Into the Floor of a Tree” does not work here either. Well, self-tapping screws and dowels cannot withstand tearing forces
You only need to mount the beam into the paw.
Pay attention to the diagram. Thanks to the bevels, such a knot can only be broken by breaking the lumber to the living
But, despite this, it is still recommended to strengthen the connection with metal staples. They honestly won't ruin you.
TOP 3 errors
Errors that are most often encountered when constructing corners:
- Lack of insulation. The organization of a corner connection from a solid beam (monolithic method) or from four boards without the use of insulation imparts rigidity to the structure, but does not insulate it. Such corners will freeze, especially over time due to cracking of the array.
- Using the wrong fastener. Self-tapping screws cannot be used for installation. The corners of frame houses are subject to displacement. Nails, anchors or wooden dowels must be used as fastening elements. To speed up the process, professionals use pneumatic hammers and nails in strips. Self-tapping screws can only be used to fasten sheathing sheets. Moreover, they must be anodized.
- Poor quality boards and timber. If wood with a natural moisture level was used during construction, deformation will inevitably occur during drying, especially in the corners. Even well-dried lumber can become unusable if stored improperly. After delivery to the construction site, it is necessary to protect the tree with covering materials.
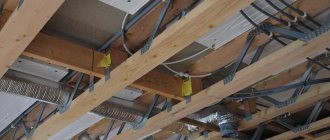
Installation of logs
In addition to supporting the walls, the lower frame serves as the basis for the subfloor joists.
Floor joists in a frame house are edged boards (usually 50 by 200 or 250 mm) installed on an edge with a certain pitch. The presence of a bottom frame made of wood greatly simplifies the installation of the logs, making them more reliable and durable. There are several options for attaching the ends of the joists to the bottom trim:
1. Supported by a block. A block located in the lower part is attached to the harness, on which the end of the log rests. With this method, additional fastening of the log to the frame is necessary, since the block is only a support and does not create a connection with the beam.
2. Using metal plates and corners. In this case, there is a reliable connection between the end of the log and the strapping beam, but there is no support from below, the log “hangs” on the metal part.
3. Installation on top of the harness with direct support on it. This method allows you to reliably connect the log with the harness, creating high-quality support and connection. In this case, the installation of wall frame racks will require an additional tie on top of the joists. The most convenient method for constructing a frame is the platform method: assembling the frame in a horizontal position, followed by lifting it vertically and directly supporting it on the subfloor.
In practice, either the third method (platform) is used, or the first two methods are combined - a support bar and metal connecting elements are used simultaneously. This maximizes the connection between the joists and the frame, allows you to more accurately maintain the plane of the subfloor and simplifies the process of installing the joists.
The distance between the floor joists in a frame house, or otherwise the step, depends on the width of the room and on the results of calculating the loads on the joists. The greater the distance between the walls (span of logs), the smaller the pitch of the floor joists in a frame house.
The largest step is taken when the room width is 2 meters, it is 800 mm. For a room of 2.5 meters, the step is reduced to 600 mm, and for a width of 3 meters or more, the step is taken to be 400 mm. The data is indicated for logs made of edged boards 50 by 150 mm; with a larger section of the boards, the step size increases.
When choosing the distance between the lags with an accuracy of up to a millimeter, you should also take into account the dimensions of the materials - the selected insulation and the subfloor sheathing slabs. This is done to ensure that the consumption of materials is economical (a minimum of scraps remains), with a minimum number of steps to cut the material.
Important! If there are large spans, the use of double joists is required, which are considered as one with a large cross-section
Preparation of vertical racks and selection of boards
Installation of racks is carried out in various ways. The first - the frame is knocked together on the floor, and then lifted and installed, the second involves installing each rack separately. However, the fasteners used are the same.
The main task of the racks is to ensure structural strength. The system must withstand a load of 3-5 tons. Therefore, high-quality material is selected. The maximum stress occurs at the corners. A beam with a cross-section of at least 10×10 cm is prepared for them. The side racks are subject to less load, so a beam with a cross-section of at least 4×10 cm is suitable for attaching and installing the racks to a wooden beam.
You can use timber of a larger cross-section, but this increases the cost of construction. If it is not possible to purchase timber of the required section, you can sew a stand from two boards, for example, 3 cm thick.
Knots of the rafter system
The nodes of the rafter system include all connections between its elements, namely:
- Fastening floor beams to the top frame. Attaching the rafter beam to the top trim. Fastening the racks on the gables to the top trim and to the outer rafters. Attaching the internal posts to the rafter beam and to the ridge. Fastening struts - inclined beams that support the rafters and rest on the beam. Attaching the crossbar to inclined rafters. Fastening the sheathing.
The fastenings listed above can be done using corners or using nails if the elements of the rafter system are connected overlapping each other.
From four boards
In this case, the rack consists of four boards, fastened flat to one another. The inner side of such a connection is strengthened by another board, which not only plays the role of an amplifier, but also serves as a shelf for attaching the interior decoration.
This connection is highly rigid, but the corner may freeze. To prevent this, the middle of the three boards is replaced with separate blocks to break the cold circuit.
Installing the bottom trim
lower frame frame
This is the first layer of boards that is laid directly on the foundation base and is firmly attached to it. The materials have been purchased, the foundation has been poured and maintained, and the framing of the frame house can be installed:
- We check the surface of the foundation and eliminate distortions, if any, as described above.
- We lay a waterproofing layer. We glue the roofing felt using mastic onto the surface of the foundation. Waterproofing will protect your foundation from moisture penetration.
- The binding process begins by marking the corners of the assembled structure. We assemble the first corner from which the entire harness will start. The correctness of the work done can be checked using a construction triangle.
- We begin laying the boards. The corner joints need to be connected by sampling; the most famous and reliable options are “half a tree” and “in the paw”. Before fastening the assembled units, all corners and diagonals must be drawn out. There are several ways to capture these samples.
Let's look at some of them:
1st method. First you need to make a hole in the place where the corner with a diameter of 20 mm will connect. We drive a wooden pin into the resulting passage that corresponds to the size of the hole. The entering end from the surface should be 8-10 mm long.
2nd method. The connection is made by driving in nails. The size of the fasteners used must be at least 150 mm, and the distance to the edge more than 2 cm.
3rd method. Fastening is carried out using studs installed in the foundation or anchors, which are planned to be fixed during the strapping process.
The boards of the bottom trim, in addition to being connected to each other, are also attached directly to the foundation. We transfer the distance of the stud installation locations onto the boards and drill the corresponding holes. We install the boards of the lower trim row.
- Checking for correct assembly. Before fixing the assembled device, we control the horizontality, as well as the accuracy of connecting the corners using a construction square.
- Fastening the tested and assembled strapping device is carried out in three ways:
- The installed boards are fixed on studs with nuts, and be sure to place washers under them. Their use is mandatory because the nut being tightened can become embedded in the wood.
- if the studs were not laid in the foundation, fastening must be done using anchors. The installation location of the first anchor will depend on how the corner joints are fixed. If they are connected with nails or pins (methods 1, 2), then the position of the anchor will be on the line of the internal contour of the foundation. And the 3rd method involves placing the anchor strictly in the middle of the corner. The spacing between anchors will depend on the length of your walls. It must be at least 1 meter, but no more than 2.4 meters. Short walls should have at least two anchors.
- The connection of the lower frame with the foundation is carried out by driving nails into wooden plugs installed in the foundation. This method is the most reliable of the three.
- After all the boards are fastened together and fixed to the foundation, the assembled structure is checked again for correctness in level, then holes are made in the lower frame for the frame posts.
The installation process, which involves the lower frame of the frame house, can be considered complete. Now you can begin installing the frame posts. The top trim is laid only after all work on the construction of frame racks has been completed.
Design and purpose of the harness
Houses built using frame technology are lighter in weight compared to their counterparts made of wood, concrete blocks or brick. Most often, they do not require the construction of complex monolithic foundations. It will be enough to equip a strip or pile-screw base.
Pillars and piles are designed to support the building, protecting it from contact with the ground, preventing moisture from entering from the outside and providing ventilation for wood structures. Since these elements are located separately, their common connection is required. For this purpose, a grillage is used, which acts as a framework for the foundation. For frame houses, the function of tying the structure itself and the foundation is combined only by the lower tying, and the grillage is not used.
Using timber, logs, boards or a metal channel, a strapping is installed, guaranteeing the strength of the entire structure of the house. In addition, it also serves as the foundation for all the building’s load-bearing elements: frame posts, jibs, panels, walls.
The lower frame of a frame house built on screw piles is designed to distribute the load from the total mass of the building, preventing it from warping or collapsing. In the case where the piles are located at a distance of at least half a meter from the ground level, the mandatory arrangement of the lower trim is required.
For some types of buildings, piping is not mandatory. For example, if the house has a small area and the height of the piles from the ground surface is less than half a meter. In addition, tying is not necessary if a monolithic strip foundation is used. However, if the building has several levels and a complex structure, then the piping of the second floor and subsequent ones for a frame house is mandatory.
What is the essence of frame buildings?
First, let's look at frame technologies. What does "frame house" mean? These are, as a rule, wooden buildings, which are based on a frame. The frame can be made from dry solid or laminated veneer lumber. It is installed on the foundation, fixed to it using strapping. All work can be done with your own hands, since working with wood does not require any special skills that the average man does not possess.
The next stage is insulation and waterproofing. We insulate the frame so that the wall looks like a multi-layer cake. Insulation, most often mineral wool, is fixed on the frame. It is overlapped and glued. You can use rolled, mats, liquid alluvial, polystyrene foam and other types of insulation. The outside of the house can be additionally insulated with foam boards, providing wind protection and sound insulation.
Vapor barrier in a frame house is an important element of the wall. Without it, the wall becomes covered with condensation, and in addition, moisture accumulates at the dew point, which is located at the center of the insulation. As a result, the insulation quickly becomes unusable, and the walls become covered with fungus and mold. Good vapor barrier acts as ventilation gaps, but this applies to modern membranes, not films. Films are significantly cheaper, but not as functional. A properly assembled wall pie guarantees the warmth of the house and reduces its energy loss.
At the next stage, we cover the filling of the wall with OSB-3 sheets. It is advisable to foam the joints, ensuring that there are no cold bridges.
Next we carry out the interior and exterior finishing. The inner wall is most often covered with wallpaper, and the outer side is painted. However, you can also use siding, block house, stone finishing, “brick-like”, “beam-like” and any other.
Methods for constructing a wooden base
The construction of the frame can occur in different ways. Some people assemble the walls one by one on the ground, and only then install them vertically.
Others immediately install a wall frame, then insulate it, insulate it and sheath it. Still others make the frame of the entire building, including the roof, and only after that they begin to make layers of walls.
You can choose any method convenient for you, but for now we will focus only on the construction of the frame.
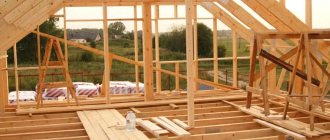
House frame with roof
The basis of any frame building is wood. Her choice must be approached with full responsibility.
This can be a board, technically dried timber, natural moisture timber or laminated veneer lumber.
Glued laminated timber is the most preferable - it does not dry out, does not lose its shape, and is resistant to deformation. In second place is technical drying timber.
And a natural board or timber with natural moisture during the construction of a frame can change its shape and crack when it dries, which will affect the quality of housing.
Do not forget to treat all wooden elements of the frame with impregnations - fire and bioprotection. This will protect your frame from bugs and make your home safer.
Complex frame elements
Various types of wood are suitable for a frame house, but it is better to stick to coniferous wood.
The resin secreted by pine creates additional protection against insects and fills the house itself with a pleasant pine aroma.
In addition, oak, ash and other hard varieties are excellent for installing frames. The section of the timber should be 150/150 mm or 150/200 mm.
Necessary materials
This section discusses the materials needed to build the box.
The choice is made based on local specifics, on which the prices for building materials of a particular group depend. The final price is also affected by the cost of delivery - of course, in forest regions, timber will cost less than in steppe areas.
A wooden beam is used for the frame. There are non-profiled, profiled and glued products. In the latter case, the part consists of several glued boards, the fibers of which are located in different directions, which provides increased strength.
To save money, purchase unplaned lumber, which can be further processed.
The danger is that after covering the frame, the beams twisting around their axis can damage the covering. Such lumber more often develops cracks, which become the starting point for the spread of rot, mold, and pests.
The minimum dimensions of timber for the frame are 100x100 mm.
Materials for external cladding panels can include moisture-resistant plywood, OSB panels, cement-bonded and glass-magnesite sheets.
For internal walls, chipboard, plasterboard, fiberboard and gypsum boards, MDF, and lining are applicable.
The house is insulated with mineral stone and glass wool, various types of polystyrene, and foam insulation. There is a separate article on each type of material on the site.
- Materials and methods of insulating a frame house.
- Technology for insulating a wooden house made of timber with mineral wool.
- The choice of materials and method of insulating the roof of the house.
- How to insulate walls inside a house.
- Ceiling insulation in a private house.
- We insulate the exterior of the house.
- How to insulate the exterior of a house with expanded polystyrene.
- Technology for building a house from timber with your own hands.
- How to properly insulate the foundation of a house with penoplex.
- Types of materials for vapor barrier of floors in a wooden house.
- We choose the option of insulating the house with foam.
To protect the support (mortgage) beams from moisture, waterproofing materials are purchased, which can be pasted, welded, or fixed. The choice depends on the type of foundation. The material is sold in every hardware store. It is worth cautioning only against buying short-lived roofing felt.
Be sure to buy polyurethane foam in cylinders. It is useful for sealing the contact areas of insulation and frame beams, and the joints of sheathing sheets.
To fasten the frame beams, nails, screws, and mounting brackets of various shapes are used.
Insulation of corners and “warm floors”
The corner of the house is the area of greatest heat loss. To minimize them, the “warm corner” technology is used, which is formed from three or four frame posts.
The resulting pocket between them is filled with insulation. The technology depends on the type of connection chosen.
If the Scandinavian or closed method is chosen during construction, it is necessary to insulate the corners before installing the external cladding.
Penoplex, mineral or ecowool can be used as insulation. Mineral wool has a shorter service life and may deteriorate over time.
Additionally, liquid thermal insulation compounds are used, which increase the fire-fighting properties of the structure.
Quality of timber for strapping
Experts recommend choosing products made from wood harvested in winter. They must be free of cracks, chips and places damaged by pests.
Strapping beams with a humidity higher than 18% cannot be used without preliminary drying, as they become deformed after drying. Drying is done indoors, as wood cracks in the sun. Larch is considered the best material for the first crown laid on the foundation, since it does not rot and is not afraid of moisture.
The prepared material must be treated with a fire retardant to increase fire resistance. Especially if it is made of pine, which contains flammable resins. Impregnation with an antiseptic will protect against fungal infection and rotting.
List of strapping requirements
Materials and structures for tying a frame house must meet all the requirements of the technology for constructing this type of building.
The most durable binding can be achieved by using double or triple boards connected to each other. The board must have the same geometry and dimensions and be fastened together using anchors or staples.
The dimensions of the strapping parts (board thickness, beam cross-section or log diameter) are selected based on the thickness of the building walls.
Coniferous wood is the most optimal for lining houses built using frame technology. This is due to its strength characteristics, service life, resistance to temperature changes and exposure to adverse atmospheric phenomena. Coniferous wood resin prevents putrefactive processes and increases moisture resistance. In addition, coniferous wood materials have an attractive price.
Wood material for strapping must be treated with antiseptic substances to protect it from rotting, and a fire retardant must be used to protect it from burning. All this must be done before starting work on the installation of the harness.
The timber or board used should be made from wood with the most straight trunk possible. The wood material does not have to be smooth, but it must have an even geometry.
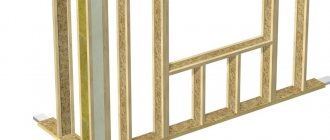
Basic rules for the design and installation of load-bearing walls
Panel structure diagram.
All load-bearing walls must have a frame structure. The distances between vertical posts and their dimensions must strictly correspond to the project. The supporting racks are reinforced with plasterboard, plywood, chipboard or spacers.
Let's consider the junction between the wall and the foundation. See the drawing in Fig. 1. The beams on the support beam can be perpendicular to the wall (A) or parallel to the wall (B).
The junction between the wall and the ceiling is shown in Fig. 2. Beams at beam level can be positioned perpendicular to the wall with anchors (C) or perpendicular to the wall with suspension (D).
The junction between the wall and the roof is shown in Fig. 3
The racks should be located at right angles to the wall. They can be located parallel to the wall in internal partitions or on the roof gable. The beams that support the attic can be parallel to the wall if the covering is reinforced on them. The part of the roof that is supported by the wall should not exceed 2 m in width. Beams should not consist of several parts.
There should be 2 or more studs in the outer corners of the wall frame. The corners of the walls and their intersection points should provide support to the edges of the inner and outer covering. Boards intended for lining walls must have a thickness of at least 38 mm. The width of the boards is equal to the width of the supporting posts of the main frame. All structures must have a bottom trim board. In external walls, it should not protrude above the support by more than 1/3 of the width of the frame.
The top frame of the structure consists of 2 boards, except in cases where:
- there is an opening for a door or window and above it there is a jumper that forms 1 knot with the strapping;
- it is located on non-load-bearing internal walls;
- A single top trim board can be used in a part of a load-bearing wall where the load from the rafters or roof slab acts no further than 50 mm on one side of the vertical posts.
Floor plan for a frame house.
There may be no top trim over openings that have lintels if the fastening between the lintel and the wall is made of wood or strong steel plates. The wooden overlays are nailed to the load-bearing wall section using nails at least 60 mm long.
In the top trim, the joints of the boards should be located above the centers of all vertical posts. They should be in a checkerboard pattern. The distance between them should be more than 1 step of the existing vertical beams.
The top trim boards should be nailed using 2 nails at each end of the board. Nails must be nailed above the racks, and their arrangement must be staggered.
A stand is nailed to the harness. Then we make markings, mark the location of the future location of the first rack. The mark can be applied to both boards. In order for the plywood sheet to be at a given distance from the edge of the wall to the center of the rack, you need to reduce the distance between the racks by 20 mm. If the plywood sheet has dimensions of 1525 × 1525 mm, then there should be a distance of 380 mm between the posts. Then we mark the locations of the posts in the window and door openings that will support the lintels, and mark the location of the main posts. The distance between the racks of the floor beams is indicated in the project. The main pillars of the opening must be equal in length. The height of the racks to support the lintels is equal to the height of the upper border of the opening minus the thickness of the lower trim - 38 mm. We place them on the appropriate labels. Double racks are located on the sides of all existing openings.
All openings are mounted with jumpers for proper load distribution. The lintels are fastened with nails. The boards for lintels must have sections corresponding to the span of a particular opening.
Reinforcing cladding is made on the outside of the external walls. For cladding, plywood, boards or other materials are used. Sheathing sheets are nailed to the frame with nails that are not subject to corrosion.
External wall cladding
Taking on a large load, the outer cladding of the wall frame ensures the rigidity of the structure and its stability during operation. Properly selected building materials for cladding will allow the walls to maintain their shape for many years and withstand negative external factors.
Application of OSB-3 boards in frame construction
OSB-3 boards (OSP-3) are moisture-resistant oriented strand boards of increased rigidity. They are made by pressing and gluing three to four layers of wood chips. In each layer it has a different direction, which gives the material increased rigidity.
Advantages of OSB-3 boards:
- The optimum ratio of price and quality.
- Easy to process - cutting, drilling, grinding.
- Suitable for using various fastening elements - nails, screws, dowels, etc.
- Resistant to splitting even when fasteners are used close to the edge of the slab.
- Do not deform due to temperature changes and various atmospheric conditions.
The main disadvantage is the low vapor permeability. Walls made of OSB boards do not “breathe”.
Of no small importance is the fact that synthetic resins are used for gluing chips. This means that the cladding material can release formaldehyde and phenol into the air.
However, stoves made according to European standards are safe for humans.
Note! The most environmentally friendly material is the one marked E0 and E1
Cement particle boards (CSP)
DSP is a material based on a mixture of wood chips and high-grade cement. To improve its performance properties, special additives are included in the composition.
Cement particle boards have the following advantages:
- Resistant to moisture and, accordingly, to mold formation.
- They are not afraid of rodents.
- Environmentally friendly. They do not release harmful substances into the air.
- Fireproof, belong to the category of low-flammable materials.
- Retains heat well.
- They have good vapor permeability and are breathable.
- When covering the frame, a flat surface is formed.
In contrast to the advantages of DSPs, they also have disadvantages:
- Heavy weight.
- Difficulty in processing the material. Drilling and cutting require a lot of physical effort. At the same time, a lot of dust is generated during the work.
- High price.
The recommended thickness of cement particle boards for frame construction is 12-18 mm.
Fiberboard for external cladding
Fiberboard is wood fibers pressed into a board. As in the production of OSB, they are laid in several layers, in each of which the fibers have their own direction. No adhesives are used. Enough pressure, exposure to high temperatures and resins contained in coniferous wood.
What characterizes this material on the positive side?
- It provides good heat and sound insulation of rooms.
- Environmentally friendly.
- The slabs are light in weight.
- Good vapor permeability.
The main disadvantage of fiberboard is its low stiffness index. When using this material, it is necessary to install jibs and select rigid internal lining.
Note! The recommended thickness of fibreboards for cladding the walls of a frame house is at least 25 mm
Covering the frame with plywood
Plywood is a sheet material made from several layers of veneer that are glued together. In frame houses, regular walls made of moisture-resistant plywood have a thickness of at least 12 mm.
Advantages of plywood:
- not afraid of low temperatures;
- easy to process;
- high compressive strength;
- affordable price.
The disadvantages of plywood include its flammability, the presence of synthetic resins, and its tendency to chip.
Attaching the outer skin to the frame
Attaching the outer skin to the frame is done according to general rules.
- The presence of a temperature gap of 3-5 mm between the plates (sheets) is mandatory.
- Their joints should be in the middle of the frame beam.
- To fasten the sheathing, self-tapping screws 55-70 cm long are used. At the same time, they must go into the frame stud to a depth of at least 40 mm.
- Self-tapping screws are screwed in at a distance of at least 10 mm from the edge of the slab.
- Fixation of sheets or slabs is carried out in increments of 15 cm - along the edge, in 30 cm - in the center.
Since you will be using a huge number of fasteners, stock up on high-quality power tools in advance.
Frame structure
During the process of assembling the frame of the house, the corner and intermediate posts are first secured to metal corners, then jumper links are installed, which ensure the rigidity of the entire frame structure. As an option, the racks are installed on the strapping belts before installing the rough and finished floor of the lower tier. In this case, the installation of the racks is carried out using additional overhead elements - sections of timber are secured with self-tapping screws on the inner sides of the racks and strapping beams. If the racks are installed after the flooring is completed, then grooves are cut into the flooring along the floor beams for installing the racks, then the racks are fastened to the beams and the strapping belt using self-tapping screws. Another option, the most common in the construction of frame houses, is the installation of racks simultaneously with jibs in the form of diagonal supports installed on both sides of each rack; the jibs are secured with nails or self-tapping screws. Such fixation with the help of supports-bevels provides rigidity to the frame already during the construction process.
A more complex and professional method of fastening frame posts is strapping with complete or incomplete cutting. Such cuttings require skill and experience, as precision is required. A simpler option is to attach the racks to additional reinforcing bars, which are nailed perpendicular to the floor beams.
When installing racks, they strictly monitor the accuracy of the dimensions of future walls and partitions - window and door openings in a frame structure require additional rigidity in the corresponding sections of the frame. When installing racks, the openings of windows and doors are first marked using cross bars. These cross-bars receive additional rigidity and connection to the frame after being reinforced at the top and bottom with shorter racks with frequent spacing. These spacer bars provide the necessary rigidity and connection of the frame.
All racks are verified for verticality, and always in two planes - this is a condition for the future stability and strength of the frame structure. The alignment of the racks is approached extremely carefully, the tools are a regular building level or a laser level, but with any tool the control must be constant, and the racks of the frame are adjusted directly during the installation process. After final fastening, another control check is performed to ensure the verticality of the racks in the plane of the wall. The fastening is preliminarily carried out using rack jumpers, ensuring the fixation of the racks in the design position and the possibility of adjustment. Often additional temporary slopes are used, which are dismantled after fixing the wall frame into a single system.
During the process of installing racks, there comes a moment when all the racks are installed and held with sufficient rigidity, and this moment opens the next process - the beginning of connecting the racks with upper straps. The upper frame frame is nailed to the end parts of the racks, and then fixing fasteners are made on metal corners and spacers - diagonally fixed slopes. The upper straps consist of beams of the same width as the vertical post frame. The fastener of the top trim is especially important, since the beams of the top frame will serve as the basis for the beams of the attic floor - that is, they will support the entire rafter system of the frame house.
After the installation of the upper strapping belt is completed, experts recommend carrying out the outer cladding of the house frame. the frame is sheathed with various sheet materials - plywood sheets, OSB and cement-bonded particle boards. Installation is carried out using self-tapping screws, the sheathing sheets are attached to the vertical corner and intermediate posts of the frame. These sheathing sheets will provide the necessary spatial rigidity to the frame of the house during the construction process.
The installation of attic floor beams and roof structures of a frame house proceeds only after a complete check of the wall frame for strength and stability. The entire structure must be stable and connected, the verticality of the racks in the planes of the walls and in the perpendicular plane must be absolute, all fastenings are made according to a constant pattern.
Building the frame of a house is a responsible job, although it is completed quite quickly compared to other construction processes. As a rule, they do not work on a frame structure alone, although one worker is quite capable of handling light elements of a wall frame. But when working as a team, it is quite possible to bring a frame house under the roof during one spring-summer period, and complete the finishing work and wiring safely under the roof.
Installation of non-corner posts
- Fastening with steel corners. The most common method, characterized by simplicity and relatively low time costs. It is considered to be the most reliable, since the timber is weakened due to cutting under the rack. A significant disadvantage is the increase in construction costs. Therefore, the option with corners is more expensive. Experts recommend fastening with galvanized wood screws.
- Fastening using cutting. Markings are applied to the surface of the beam of the lower junction and grooves are arranged corresponding to the size of the rack. Their depth can reach 50% of the height of the beam.
Whatever fastening method you choose, non-corner posts must be secured with temporary jibs. Otherwise, the structure may become loose. Usually two small jibs are installed for one rack, but you can install one long one for several.
Top trim connection
When building a frame house with your own hands, the builder will probably face the problem of joining lumber, since the length of standard products will not be enough. The same problem arises when installing the top trim. As a rule, the standard length of a board or beam is not enough to cover the entire length of the wall. Therefore, they have to be “grown up.” In addition, the strapping is joined at the corners and in places adjacent to the perimeter of the internal walls. And there it is necessary to ensure a strong and reliable connection of the individual parts of the harness into the whole structure.
Connections of boards or wooden beams are usually made in various ways.
- At the joint. This is the simplest and most accessible way to attach two wooden parts at an angle of 90º during DIY construction. Used to connect the top trim of external walls and internal partitions. The connection is made in two ways: tightening with nails or self-tapping screws through the plane of one board to the end of another, or using metal corners. If the first option is suitable only for single boards, then the second can be used for double/triple boards, for timber, as well as a board + timber combination.
- 45º-degree joint, also called “miter joint” Actually, the joint itself is made at a right angle, but it got its name from the fact that the parts to be joined are cut at an angle of 45º and tightened with self-tapping screws. The result is a fairly strong connection used at the junction of internal walls. A variation of this joint is used to lengthen boards or timber. In this case, the cut is made at an angle of 20-30º to the center line of the wooden products, but from opposite sides.
- Half-tree connection. Traditional connection for the construction of log houses. At a distance equal to the width of the parts being connected, cuts are made from their ends to half the thickness of the parts. The excess part is chipped off, and the boards or beams are pulled together with nails or self-tapping screws. This connection is used both to lengthen wooden parts and to connect them at an angle of 90º.
- Tongue-groove connections. They form the most complex, but also the most durable connections. There are many options: comb, oblique comb, dovetail, etc. But the problem is that making such connections with your own hands, without the appropriate equipment, is very difficult. In addition, all the necessary cuts and adjustments take an unacceptably long time.
Organization of internal corners
The angle between the outer and inner walls of a building is made in several ways.
Correctly organizing the corner from the inside is no less important than from the outside Source indeco.ru
The first option is the following:
- between 2 beams, one regular beam or three short ones are installed (in the top view the letter “P” is obtained);
- A wall element is attached to the middle beam.
Second option (especially heat-intensive):
- the outer wall at the junction with the internal stand is made up of horizontal bars 50x50, located between the vertical bars, with a pitch of 60 cm;
- A vertical post is installed to the horizontal bars, forming the edge of the inner wall.
The blocks are knocked together only with 90mm nails every 50-60 cm.
As practice shows, not all construction teams offering services to individuals are proficient in the technology for making corners.
What is a subfloor
This is a plank covering that is located in the space between the joists and provides a level surface for the installation of the finished floor covering. The construction of the subfloor involves the use of insulation, which makes it possible to additionally heat and sound insulate the building from below. And only in the attic is the rough flooring made the main one, since there is no need to spend extra money on parquet, laminate or floor boards.
When choosing a material for a subfloor, only minor attention is paid to quality, so you can purchase inexpensive types of wood. The subfloor experiences almost no load
On top of it there can only be a layer of insulation (it is very light), as well as a front covering. After completing all installation work, it itself will be completely hidden, so its appearance is also unimportant
The subfloor experiences almost no load. On top of it there can only be a layer of insulation (it is very light), as well as a front covering. After all the installation work is completed, it itself will be completely hidden, so its appearance is also unimportant.
Briefly about the main thing
Summing up can be summarized as follows:
- The jib is an important element for creating frame rigidity.
- It is better to use a piece made of high-strength wood. This will slightly reduce the cost of construction and lighten the entire structure.
- During installation, you need to correctly position the part in the frame. It is necessary that the ends of the element are cut into the harness.
- All work should be carried out only with nails.
- The use of temporary jibs is permitted, but only if the structure is subsequently sheathed with OSB boards.
In general, the use of supports and its proper placement will guarantee that the constructed frame house will serve its residents for many years without reducing its strength parameters.
Construction stages
Every home construction begins with the selection of a project. You need to consider everything that is necessary for your family in a new home:
- bedroom;
- living room;
- dining room;
- guest room;
- kitchen;
- children's playroom;
- men's office;
- wife's boudoir;
- pool;
- pantry;
- cellar;
- laundry room;
- maid's room;
- billiard room;
- smoking;
- bathroom;
From this incomplete list, you need to select the required number of premises, their area, decide on the number of floors, and develop a project:
- If there are no problems with soil water, sand and the soil is quite suitable for building a house, you should start laying the foundation. Fortunately, frame houses are not heavy and you do not need a powerful foundation. Recently, foundations on screw piles have become popular. But you can also use a traditional shallow strip foundation.
- The next stage is one of the most important. The frame of the house is built from timber of at least 100 x 150 mm. For fastening, notches are made at the ends of the beams so that they overlap each other. The connections are fixed with dowels. In some cases, the corner fastenings of the beams are secured with metal corners.
- Once the frame is ready, you can begin laying the floor. First, a subfloor is laid on the beams. The cheapest unedged board is used for it. Logs are laid on top at a distance of 60 cm from each other. Heat-insulating polystyrene boards are laid between them, and a waterproofing film is placed on top. Then the finished floor boards are laid, which should preferably be impregnated with agents against the influence of dampness, insects and rodents.
- Now you can start sheathing the house. The outside of the house can be sheathed with boards or panels, with plywood or plasterboard on the inside. Of course, it is better to use drywall for plaster. It is imperative to lay a layer of hydro- and thermal insulation between the inner and outer cladding. Recently, SIP panels have appeared on sale, which include three layers: two sheathing panels and an inner insulating layer. They are comfortable, practical and durable.
- To arrange the ceiling, beams of 100x80 mm are used. The beams are sheathed with boards, plywood or plasterboard on the inside using nails or screws. The outside is covered with boards. Thermal and waterproofing should be laid between the layers.
- For windows, you can use any double-glazed windows. One has only to take into account that in standard cases the window should not occupy more than 20% of the wall area. An opening for the window is simply cut out in the wall, where it is inserted and secured. The cracks are filled with polyurethane foam.
- The roof covering is laid on the rafters. Typically, the roof slope is made at an angle of 35-45 degrees. The following roofing materials can be used: corrugated sheets, slate, ondulin, ceramic tiles, polymer tiles, bitumen tiles, metal tiles. It is imperative to install a waterproofing film under any roof.
- The final stage can be considered finishing external and internal work. Interior finishing works are so varied that there is no point in talking about them in this article. Siding is often used as exterior finishing. It can be metal, wood, plastic. Usually plastic is used. It is lightweight, inexpensive and durable. But no less popular are plaster, lining, stone, and clinker tiles.
Of course, this is an approximate and simplified list of steps.