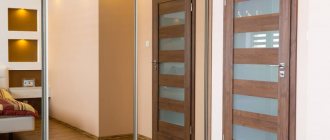
Professional builders know that installing interior doors requires more careful compliance with all the requirements of the instructions for their installation than when installing an entrance door, where various mistakes can be hidden under the slopes. You won't be able to pull off this trick on interior doors. The slightest errors in calculations, both when taking the parameters of the opening and block, and when cutting down risers and crossbars, inevitably lead to a negative result, which, in most cases, cannot be corrected.
To prevent such a situation, we will analyze in detail how to assemble the door frame of an interior door at home, and then install it in the doorway. There is nothing complicated here. All you need is patience and attentiveness.
Preparatory work
Preparatory work for replacing interior door frames consists of several stages:
- the doorway is measured;
- the door block is selected;
- materials and tools are purchased;
- the old box is dismantled;
- a new door frame is being assembled.
Taking measurements
To take measurements, you should have a tape measure, a sheet of clean paper and a pencil (pen) at hand. Measured:
- opening height - the distance between the floor and the ceiling (position 1 in the figure);
- width (2) - the distance between the side elements of the opening;
- wall thickness (3);
It is also noted in which direction the doors will open. The height is measured along both side slopes. The smallest value is taken. The result obtained is also rounded down to the nearest centimeter. The width is measured in several places (see diagram) - only in panel houses the width of the opening is the same along the entire height. As in the case of height, the size of the narrowest part of the opening (indicated by a green line in the figure) is taken as a basis.
Box selection
When ordering a door block, you need to remember that there is a direct relationship between the width of the doorway and the width of the door leaf - this is the main indicator in door sizes. For example, in an opening 93 cm wide, it is even theoretically impossible to insert a door with a leaf of 90 cm. For doors with a leaf of 70 cm, the opening will be too wide. The ideal option is an 80-centimeter canvas.
We will summarize the dependence of the door leaf on the size of the doorway in a table.
| Doorway width, mm | Door leaf width, mm |
| 670 — 700 | 600 |
| 770 — 800 | 700 |
| 870 — 900 | 800 |
| 970 — 1000 | 900 |
From the given figures it is clear that with the lower value of the opening width (67 cm, 77 cm, etc.), it will be difficult to push the door frame into the doorway - there is only 10 mm left (60 cm panel + 6 cm, 3 cm each each, racks).
It is most convenient to work when there is a gap of 3 cm on each side between the wall and the box.
For information: the frame and the door leaf do not have to be made of the same material. For the box, it is preferable to buy timber made of natural wood, and MDF canvas covered with eco-veneer.
Features of wood of various species
When producing wooden doors, you need to know the advantages and disadvantages of the material. The final result depends on this. The main difference between wood is its hardness. Soft woods are easy to work with, but are less resistant to moisture. This material is suitable for interior doors. It is difficult to process hard wood with hand tools, but the material is more resistant to moisture. This wood is suitable for making entrance doors.
When talking about wood species, it is worth considering the resin content of the material. Larch takes first place in this regard. A product made from it will withstand dampness for a long time. Resin protects against rotting.
The following requirements apply to choosing a board:
- minimum number of knots;
- wood moisture content no more than 15%;
- perfect evenness.
For outbuildings, used material taken from the dismantling of old buildings is suitable. It is better to make beautiful doors to the house from a new board.
Hardwood
- Birch is quite hard and difficult to process, but has an attractive texture.
- Beech is characterized by increased strength, but deforms when humidity changes.
- Alder is soft and rots quickly in high humidity.
- Oak is hard, tends to split, but is resistant to dampness and beautiful.
- Walnut has an interesting texture, is easy to process, and is not afraid of moisture and mechanical stress.
- Maple is moderately hard, can be processed well, and has moderate resistance to moisture.
For the manufacture of wooden entrance doors, oak or beech is most often used.
Conifers
- pine is considered the most popular . Soft wood is easy to process, but does not withstand moisture well. The material is best used in the manufacture of wooden interior doors.
- Larch is characterized by a beautiful texture and high resin content. Solid wood perfectly resists moisture, which makes it possible to use the board for assembling entrance doors.
- is knotty, lighter and softer than pine, and slightly inferior in strength.
Required materials and tools
To replace the frame in an interior door you will need:
- door frame made of wood, MDF (both options are sold assembled or as a set of elements) or profiled metal (can only be purchased assembled);
- platbands (wooden, MDF, plastic);
Attention: the door frame can be telescopic, i.e. with a groove for fastening platbands. In this case, the platbands should also be telescopic - with a ridge.
- wood screws when installing the box on a plasterboard partition;
- self-tapping dowel for a brick or concrete wall;
- anchor bolts for a metal box;
- polyurethane foam for attaching the box to the walls;
- special nails for fastening platbands - colored, with a small head;
- vertical and horizontal bars for spacers;
- spacer wedges;
- an electric wood cross-cutting machine with a round rotating mechanism for cutting at angles of 45o and 90o (can be replaced by a hand saw for wood with a fine tooth and a special device for cutting at an angle - a miter box);
Electric cross-cutting machine.
Miter box.
- an electric drill (screwdriver) with a set of wood drills (for a plasterboard partition) or with a Pobedit tip for a brick or concrete wall;
- chisel for forming a recess for hinges;
- Phillips screwdriver or screwdriver with a set of bits;
- roulette;
- axe;
- level;
- plumb line;
- construction pencil;
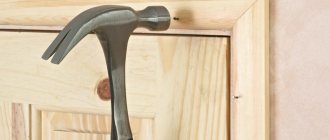
- hammer;
- construction knife;
- crowbar (crowbar);
- a grinder for dismantling a metal door frame or a hacksaw for metal.
The given list of tools is universal and allows you to install a door frame made of any material.
Removing the old door frame
Any interior door consists of vertical frame posts, an upper cross beam (crossbar), a threshold (not always) and a door leaf. Dismantling the frame always begins with removing the door leaf from the hinges. To do this, a crowbar is placed under the door, which is open at 90o.
A solid object is placed under it to create leverage. The door leaf is lifted and removed from its hinges. It is better to do the work together so that the door does not fall. If the blade does not lift, the hinges are lubricated with anti-corrosion lubricant.
Further actions depend on whether the box is kept or thrown away.
Fast, destructive way
If the door structure will not be used in the future, all dismantling work is carried out quickly:
- The platbands are removed with an ax - the tip of the ax is driven with a hammer between the box and the platband until a gap appears. After this, the ax is moved closer to the fastener and rotated until the platband moves away from the box completely. Instead of an ax, you can use a nail puller;
- each vertical post is cut in the middle, after which it is turned out of the doorway with a crowbar;
- the threshold is also cut and removed with a crowbar;
- the fasteners are cut flush with the wall using a grinder or a hacksaw.
Gentle way
The easiest way to preserve the door frame with your own hands is to dismantle it. Step by step it looks like this:
- platbands are removed;
- the hinges and the latch bar are unscrewed - there is a hidden fastener underneath them;
- Use a screwdriver at low speed to unscrew the screws (the nails are removed with a nail puller). If they do not unscrew, then cut them off with a grinder or a hacksaw;
- The polyurethane foam is cut out with a construction knife;
- the door frame is carefully removed from the opening and disassembled.
When dismantling the doors, you must remember that a wall damaged during disassembly of the frame will cause problems several times greater than a few minutes spent on careful work.
Self-production
We will do this option:
The task of making a wooden bathhouse door with your own hands is quite realistic, you just need a certain tool. Below is a list that gives a simple/mechanized attachment:
- saw / jigsaw;
- planer/thicknesser;
- screwdriver/screwdriver;
- quarter plane/milling machine attachment;
- sandpaper/belt sander;
- chisel or chisel;
- hammer;
- roulette;
- level;
- square;
- pencil.
If you prefer ready-made tongue and groove floor boards, then some tools will not be needed. Otherwise, you need to adjust the geometry of the boards to one standard, and then cut quarters on both sides in a mirror-like symmetrical manner:
An alternative to laying boards overlapping can be a tongue-and-groove connection (otherwise known as tongue-and-groove), but this requires a milling machine (or a finished board with tongue and groove).
The quarters are cut either with a plane (with the mentioned attachment) or with a milling machine.
Finished boards can be glued together with PVA. To compress the joints, a wedge or its equivalent is used: a frame or two stops, between which our canvas is wedged. After 12 hours the canvas is ready.
The resulting shield still needs to be secured with wedges. To do this, you need a beam, which is given a trapezoidal shape in profile, and which slightly narrows from one edge to the other. The length of the beam is 20-30 cm greater than the width of the door. There should be two such wedges.
A dovetail groove is cut under each wedge on the door. You can do this with a router and then select it with a chisel. If the wedge is not trapezoidal in profile, then the groove may not be widened. Then you can cut it with a jigsaw.
The wedges are driven into the grooves, after which a through hole is drilled at the beginning and end of the wedge for a wooden dowel - 4 dowels in total. They are hammered and trimmed. The wedges are also cut to the width of the door.
It is customary to install an oblique spacer (brace) between the wedges, which is necessary so that the door does not subsequently become deformed.
Finally, the canvas is sanded.
All that remains is to make a door frame and hang the panel on hinges or awnings. The easiest way to make a box is from ready-made box timber, where a quarter has already been selected. Or from ordinary timber, but you will have to cut a quarter yourself.
The box for connecting the planks is either edged at 45 degrees, or a tongue-and-groove design is made, or, in the most primitive case, it is simply attached end-to-end with self-tapping screws. (The ends at 45 degrees are fastened obliquely)
IMPORTANT! The sauna uses self-tapping screws only with anti-corrosion coating.
When choosing hinges, take stainless ones, preferably brass. Suitable designs are overhead and mortise. For more information about hinges, see the article about door fittings.
Box assembly instructions
Manufacturers of interior doors offer two options for their products: assembled and in the form of a set of elements. Many people prefer to buy a ready-made door block. However, assembling a door frame yourself is not such a difficult task.
You can assemble the box using 3 technologies:
- into a tenon - the manufacturer has cut out the tenons and groove in advance. Only carpenters with experience can independently prepare the racks and crossbars for assembly into a tenon;
- at an angle of 90o - the simplest option;
- at an angle of 45o - a more complex method. But the difficulties are compensated by the beautiful appearance of the joint between the rack and the crossbar.
Tenon assembly
Assembling the frame on a tenon is rare - door manufacturers do not want to do unnecessary technological operations that increase the cost of the product. But, nevertheless, you can find them on sale. Assembling such a box is simple: on the floor, the crossbar is inserted with a tenon into a groove in the racks, after which the entire structure in each corner is fastened with a long wood screw, tightening and strengthening the box. It is better to drill a hole for the hardware, but of a smaller diameter.
At an angle of 90o
Assembling the frame at a right angle is the easiest and fastest way to install the load-bearing part of the door block. There are only three operations:
- the posts and crossbar are cut at an angle of 90o to the required size;
Attention: when measuring the racks and crossbar, it is necessary to take into account an important point: the crossbar will be attached to the racks or between the racks and will make allowance for the thickness of the box elements.
- using a chisel and saw, a part of the vestibule is selected (see photo);
- the box is assembled on the floor into one whole. The posts and crossbar are fastened together with self-tapping screws - 2 (in wide ones 3) at each end (see photo).
At an angle of 45o
The connection of the racks with the cross member at an angle of 45o, provided that the ends are cut correctly, looks very beautiful. The technology of work is simple:
- the elements of the box are laid out on the floor;
- the racks and crossbar are measured - no correction is made here for the thickness of the elements, as when assembling at right angles;
- the ends at the top of the box are cut at an angle of 45o. For work, be sure to use a miter box or a circular saw with a rotating mechanism;
- the structure is assembled into one whole;
- the ends are attached with self-tapping screws - two for each.
What it is
The term "telescopic" is usually applied to objects consisting of several parts that extend from each other. A door frame of this type, in accordance with the definition, is assembled from several slats, only they do not slide out from each other, but snap into place using a system of grooves, forming a single whole. Thanks to this connection, the parts of the block are easily adjusted, and the end result gives a perfect rectangular shape. Today, two types of telescopic block are produced:
- The design of the box and platband as a single whole;
- Two separate components - a box and a platband, connected by grooves.
Instructions for installation in the opening
Installing an interior door frame yourself does not create any big problems. Detailed instructions are available even for a beginner in the construction business. The step-by-step installation process is as follows.
Step 1. At a distance of 20 cm from the top and bottom of the supporting post, loops are placed and outlined with a pencil. Use a chisel and hammer to select a groove for them. Sometimes the same operation is carried out for the lining under the tongue of the door handle on the opposite pillar, for additional fastening of the frame.
Step 2. The door frame is installed in the opening and secured on the sides with several wedges. The main thing here is to prevent the vertical posts from touching the wall. Otherwise, it will be difficult and sometimes impossible to align the box vertically and horizontally. If the wall is uneven, then you need to navigate by the part that protrudes inside the doorway.
Attention: the threshold is installed only in the doors of the bathroom and toilet. In a box without a threshold, a spacer is placed at the bottom so that when foaming the gap between the wall and the studs, they do not go inside the door. Removes before hanging the door leaf.
Step 3. At this stage, it is important to position the box correctly so that the vertical posts have a perpendicular angle (90o) to the floor along the entire circumference. A plumb line, a level (both tools can successfully replace a laser level) and wedges will help here.
When driving wedges, you need to constantly monitor two things:
- so that the box does not change its position in space or move;
- so that the vertical posts do not bend inward due to high load.
If the box is deformed, the problem is solved with the help of spacers. If this operation does not help, the wedges are gradually knocked out in the opposite direction, removing the load from the beam of the racks.
Step 4. In the selected grooves for the hinges, holes with a diameter of 4 mm are drilled through the box. Wood screws are inserted into them and screwed into a block in the wall. There is no need to wrap them all the way yet.
If the wall is brick or concrete, then a hole for the dowel is drilled through the door frame, after which a self-tapping screw is also screwed in.
Attention: many apartment owners, when replacing a frame in an interior wall made of foam or aerated concrete, screw in self-tapping screws. The accumulated experience suggests that here, too, the best option is self-tapping dowels.
Step 5. Wooden blocks or wedges are inserted near the screwed-in hardware (needed in order, firstly, to give stability to the entire structure, and secondly, to prevent the stand from bending in the opposite direction when screwing the screws in completely) so that the structure stands level. After this, the position of the box in space is checked. If a shift occurs, it is corrected. After this, the screws are screwed in until they stop.
The position of the box is checked again. Here it is better to play it safe than to discover a distortion at the final stage - in this case, you will have to redo all the work.
Step 6. The door frame is attached to the wall with foam. First, the joint on the hinge side is foamed. Work is carried out from top to bottom. The foam is applied evenly. On the latch side, the joint is foamed with a small snake to prevent deformation of the rack.
Step 7. At the final stage, you need to secure the door leaf to the frame. It takes two people to hang it: one screws the hinges to the frame, the other holds the sash. There are a few little tricks here that will make the job easier:
- the hinges are first screwed onto the box;
- It is better to put a wedge under the door so as not to keep it hanging;
- The top loop is attached first;
- When attaching the lower hinge, the upper and then the lower screws are screwed in first. The rest of the fasteners are tightened after the operation of the door leaf is checked;
- along the entire perimeter the distance between the frame and the sash should be 3 mm. If it is necessary to achieve tightness, then glue the seal.
Step 8. The door is closed, after which its position is checked again. If everything is done correctly, the box is attached to the wall in the latch area. The self-tapping screw is screwed in under the bar, but not all the way. A wedge is driven in around it, after which the fastener is screwed in until it stops.
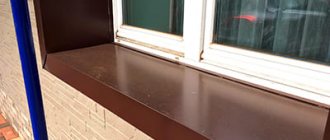
The structure is finally foaming. After the foam has dried, its excess is cut off with a construction knife, an extension is installed if the wall is wide, and platbands are attached.
Foamed gaps.
We looked at how to install a wooden door frame. A door made of MDF is attached in the same way.
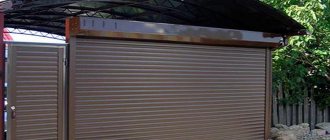
There are some differences when installing a metal box made of metal profiles:
- the box is installed in the opening and fixed with wedges;
- its geometry is checked;
- Through the box in the wall on the side of the hinges, two holes about 15 cm long are drilled for anchor bolts. The drill is taken of the same diameter as the anchor;
- Using a hammer with a metal insert, the anchor bolts are driven into the hole. Hit the insert with a hammer until there is a characteristic click, indicating that the anchor is seated on the outer wall of the box;
- The bolt is tightened with a spanner wrench. At the same time, the verticality of the box is constantly checked. If necessary, the anchor is released;
- a similar procedure for installing an anchor, but only one, is carried out from the handle side;
- the door leaf is installed.
The process is very similar to installing a metal entrance door, which you can read about in the work “How to install a metal entrance door yourself?”
In addition, the box can be installed on metal hangers, which are used for lathing under plasterboard and special installation systems, the installation principle of which can be seen in the photo.
Special mounting system.
The procedure for installing the box on the hangers:
- from the outside of the box, three hangers are screwed to the risers using self-tapping screws (two per hanger);
Mounting on hangers.
- the box is installed in the opening and fixed with wedges;
- using a laser level (plumb and level) and wooden spacers, the vertical and horizontal of the box are displayed;
- the ends of the plumb lines are attached to the wall;
- the gap between the wall and the box is foamed about halfway. After the mounting foam has dried, the joint between the door block and the wall is completely filled with foam.
This type of fastening has many disadvantages, and therefore craftsmen who value their reputation do not use this type of fastening in their work.
Warming the bath from the cold
Insulation from the inside is a mandatory aspect when building a bathhouse. This step will help reduce heating costs, maintain the desired temperature and speed up the heating of the room.
Thermal insulation materials are usually divided into two types:
- organic origin;
- inorganic origin.
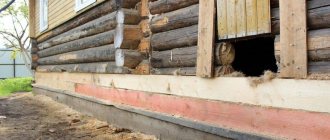
Not only the thermal insulation and moisture-resistant characteristics of the insulating material, but also its environmental friendliness are considered a very important factor. In order to prevent heat from escaping outside, the base is often sheathed with foam boards, secured with glue. To insulate the walls of the bathhouse, lathing made of bars is used. If necessary, insulation is sometimes placed not in one layer, but in several at once. Sheathing with clapboard is the last stage, in which a small gap is left to prevent the material from rotting.
A few tips for novice carpenters
People say that “the first pancake is lumpy.” Therefore, those who have done the work of installing the box themselves for the first time should not be upset by the mistakes made, which in most cases can be easily corrected.
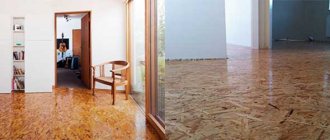
- An unsightly joint between the laminate and the door threshold can be hidden with a plinth or metal trim.
- If the doorway turns out to be smaller, it is easier to trim the posts and crossbars of the frame, but on the condition that you can adjust the size of the door leaf. Otherwise, you will have to widen the doorway.
- If the width of the casing is not enough for the gap between the frame and the wall, the latter is plastered and then finished with the same material that was used before the door was installed. Therefore, in new buildings, doors are installed first, and then the walls are finished.
- When installing a box made of wood or MDF into walls made of concrete or brick, first drill a hole in the rack with a drill or screwdriver, and then drill the wall with a hammer drill.
- Special mounting systems simplify the process of installing the box - there is no need to use wedges. Detailed instructions for their use are included in the packaging.
- In new houses, the door cannot be attached directly to the wall due to possible shrinkage. Here, first a wooden block is attached to the opening, and a door block is attached to it.
In conclusion, installing a door frame in an opening is not such a difficult job that can be done by yourself in just a few hours. But the effect of this is significant - the family budget will save approximately 3,000 rubles on each door (the average price for installing a door frame by professional builders is indicated).
Video: how to install an interior door frame with your own hands
For those who need to not only understand the process, but also clearly see the installation of the box, you should watch the introductory video. In it, the author gives clear instructions in which he explains all the nuances and difficulties associated with installing the telescopic box.
Don't miss: Destruction of obsolete products
Watching the video instructions, you can understand that such a box is easily assembled and mounted to any material (including aerated concrete). This procedure does not require expensive tools and materials; it is enough to follow simple instructions and get the job done efficiently.
When a consumer is faced with the choice of buying a Euroblock or a classic box, then it is worth choosing the first option and, by paying a little more, get high-quality work and aesthetic pleasure.
Post Views: 2,446
Insulation
If the entrance door to the bathhouse is made of boards or lining, then it must be insulated to reduce heat loss during heating. For insulation, felt, batting or polyethylene foam is used. The material must be measured according to the size of the door, cut and secured to the canvas with furniture staples or nails, leaving free edges at least 5 cm wide.
Leatherette is good for door trim. The material is cut in such a way that the edges can be folded under the insulation by 2-2.5 cm. To ensure that the upholstery lies flat, the material must be fastened from the middle. The fasteners are decorative upholstery nails with large heads. To form a convex pattern between the nails, you need to pull the line tight.
Along the perimeter of the door you need to attach leatherette rollers, inside of which there is insulation. The edges of the rollers are nailed to the door with decorative nails in small increments (5-10 cm). The seam can be made decorative: hammer nails tightly, in 2 rows, in a zigzag, etc.
Conclusion
As you can see, making a door with your own hands is not so difficult, in any case, a person who is not afraid of a hacksaw and a hammer can handle such a task. In the video in this article, the craftsmen reveal their subtleties and give recommendations for arranging doors, so study our instructions, watch the video and don’t be afraid, everything will work out for you.
Sources:
- https://o-dveryah.ru/derevjannye/kak-sdelat-iz-dosok-svoimi-rukami/
- https://DomZastroika.ru/dveri/vhodnye/izgotovlenie-derevyannyx.html
- https://stroyday.ru/remont-kvartiry/okna-i-dveri/kak-sdelat-dver-iz-dosok-svoimi-rukami.html
- https://roomester.ru/dekor/dveri/derevyannaya-dver-svoimi-rukami.html
- https://kachestvolife.club/stroitelstvo/dveri/poshagovaya-instrukciya-izgotovleniya-derevyannoy-dveri-svoimi-rukami-kakie-instrumenty-potrebuyutsya
- https://doorchange.ru/svoimi-rukami/kak-sdelat-dver-samostoyatelno-2-varianta-dostupnyh-novichku.html
- 1
From “old-fashioned” schemes to modern ideas
So, it is advisable to make the height of the entrance bath door no more than 160-170 cm, so that precious heat does not escape into the street. The optimal distance between the jambs is 60-70 cm, and the width of the door is made of such dimensions that will prevent heat loss as much as possible. It is advisable to make the doors to the bathhouse with your own hands single-leaf - so that they open outward.
In total, there are two doors in the bathhouse - one at the entrance to the bathhouse, the second to the steam room. But it happens that the dressing room is also a washing room, especially when the bathhouse, due to budget limitations, was built to be quite miniature. By the way, if glass is needed in the door, then you can only take it special - tempered. Further, the door itself should not turn out to be too voluminous or massive - its main task is thermal insulation, and not protecting something valuable from thieves. Yes, it won’t be difficult to break one from the outside - but even in the event of a fire, vacationers themselves can easily demolish it. And it’s hard to imagine what would happen if a person choking on smoke tried to open a stuck door to a bathhouse, which was made using the latest technology with maximum protection.
The ideal material for making a bath door is wood. It was from this that everything was always made in the old Russian baths - because it perfectly withstands all changes in air humidity and temperature. The handle for the door to the bathhouse can also be made exclusively from wood - otherwise you can get seriously burned. And, by the way, plastic to wood in this case is not the best alternative. But it is advisable to treat the inner surface of the door with antiseptics - the same as for the walls of the bathhouse. But not with drying oil or varnish - all of them will release toxic substances into the hot and humid air that those who are taking bath procedures at that moment breathe.
The most proven option for a do-it-yourself bathhouse door is tightly knit linden or aspen boards, always in one layer
As soon as the base is ready, the door needs to be insulated - this is important. Moreover, the insulation must be thorough - from cotton wool, tow, polystyrene foam, felt and mineral fiber
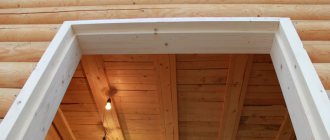
The outside will be covered with boards or dermantin, or, in extreme cases, with simple plywood. But under no circumstances should the bath door be heated or deformed by humid and hot air.