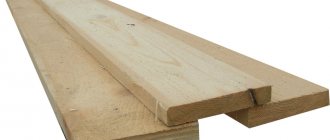
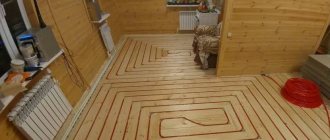
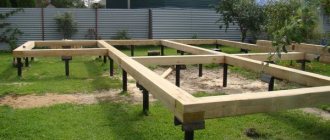
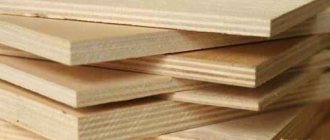
Plank floors, a traditional and long-known method of installing flooring, including finished flooring, have again begun to gain popularity. Installation is simple and does not require special skills, however, the durability of the coating and its performance properties depend not only on the quality of the floorboard, but also on the method of its fastening. Today’s material is about how to choose and use the right screws for a floorboard, as well as other ways to fix it.
Self-tapping screws for floorboards - operating principle
Flooring fixation methods
To attach the finishing coating, waterproof glue is used, which has high adhesion to wood.
What methods of attaching floorboards will be the most reliable? In the process of facing the rough base, the following methods of attaching boards to the floor can be used:
- Glue. This method is suitable exclusively for cladding concrete and wooden bases represented by plywood sheets. To attach the finishing coating, waterproof glue is used, which has high adhesion to both wood and mineral substrates;
- Clamping. To lay the boards, a special tool is used, thanks to which the adjacent floorboards are pulled together efficiently. Using such a tool, you can press the boards close to each other, and then secure them with special screws;
- Secret. Often, boards are attached to the subfloor using special screws or nails, which are driven into the edge of the floorboard at an acute (45 degrees) or right angle.
Obviously, the most universal method of fastening is secret. Why? It can be used when finishing any type of base:
- wooden logs;
- concrete screed;
- metal coating.
Galvanized self-tapping screws can be used to cladding a car body with wood without any problems. But for this you need to choose suitable fasteners, which we will talk about a little later.
Base requirements
Laying plank flooring is possible on different types of bases in the form of:
- Concrete slabs with a layer of leveling screed.
- Lags located on brick supports or on floor slabs.
- Plywood base.
- Existing old floor.
- Rough base made of low grade lumber.
Laying on joists with insulation
Note! Regardless of the type of base, the boards are given time to acclimatize before laying. To do this, they are brought into the room where installation will take place for several days - the material must get used to the microclimate so that after fixing the boards, they do not become deformed. The optimal indoor humidity is about 50%.
In addition, the base itself must have a humidity level of no higher than 12%
Methods for tightening floorboards
An example of tightening using a clamp and wedges.
Which device is best to use for tightening boards? To prevent gaps from appearing between the floorboards during operation, even at the stage of their installation you need to take care of the high-quality tightening of the boards. Which tool is suitable for these purposes?
What methods are there for joining floor boards together?
- Wooden wedges. A wooden block is placed at a right angle to the board, after which it is tapped to the already fixed floorboards using a hammer;
- Clamps. In this case, the clamp plays the role of a spacer. A block is temporarily attached to the joists, against which the tool “rests,” creating sufficient pressure to press the floorboard against the adjacent plank;
- Jack. This tool, like the previous one, is installed between the bars nailed to the joists, which allows you to create sufficient pressure to tighten the boards on the floor.
Also, for high-quality tightening of planks, the following can be used:
- mount;
- metal staples;
- bowrench.
Fastening with clamps
Some types of boards come with special clamps that fit into a slot on the inside of the board. These elements are designed to connect boards to each other. So, how to lay a floorboard using this fastening method?
To do this, you should adhere to the following technology:
- Waterproofing material is laid on the subfloor, which should be secured to the walls with construction tape.
- The clamps should be driven into the cracks of the boards laid in the first row using a hammer. This is done in the direction of the tongue.
- The ends of the planks are coated with glue, and then the first row is laid.
- Wedges about 1 cm thick should be inserted between the wall and the boards.
- Clamps are also attached to the second row of boards. The floorboards are secured in place by gently tapping a hammer through a block along the edges of the row.
- The remaining rows are laid out similarly.
- Then the wedges between the wall and the covering are removed.
- Installation of baseboards is in progress.
What is Bowrench?
This device can be used for arranging the floor of a car body or the base along the joists.
Bowrench is a special device for tightening floorboards with uneven edges. The tool is made from a profile pipe with a square cross-section. It consists of three main parts:
- metal handle;
- support bar;
- tightening guide.
The support bar and the tension guide are fixed at a short distance from each other. In this case, metal rods are attached perpendicularly to the support bar, thanks to which the tool is securely fastened to the joists. As the handle turns, the tension guide creates pressure on the floorboard. As a result, the board is firmly pressed against the already fixed planks.
Such a device can be used to arrange the floor of a car body or the base along the joists.
Application area
Currently, the main area of application for wooden floors is the construction of small private houses. Especially often, floors on logs are installed in wooden houses and log houses, in which the floors between floors are made of beams.
Especially often, floors on logs are installed in wooden houses and log buildings, in which the floors between floors are made of beams
Much less often, wooden floors are laid in city apartments with reinforced concrete floors. However, the technology is still used, especially in cases where pouring a full leveling screed is impossible for some reason.
Wooden floor in the apartment
Sometimes plank flooring is a finishing coating and part of the designer’s idea when creating a renovation concept. In this case, beautiful wood species such as oak, larch or pine are chosen for the flooring. The boards are thoroughly polished, impregnated with an antiseptic and covered with varnish or wax. The result is a very beautiful and durable coating that pleases the eye with the natural texture of wood.
Natural wood floor
Wooden floors can be used even when arranging wet rooms, such as baths and bathrooms. However, this is done infrequently, as it requires careful selection of wood, reliable waterproofing and impregnation of the boards with very expensive solutions that prevent moisture absorption.
Wooden floor in the bathroom
Fasteners
Self-tapping screws, as a rule, are made of ordinary steel.
How to attach boards to the subfloor? Modern manufacturers produce various types of fasteners that can be used to fix floor boards. The most popular ones are:
Device for pulling or joining floor boards
- Nails. Experts recommend fastening floorboards with nails only when laying the covering on joists made of very durable wood (oak, larch). During intensive use of the floor, nails tend to break out, which leads to damage to the coating;
- Self-tapping screws. Self-tapping screws can be used to securely fix the boards to the metal underbody, wooden bases or joists. However, self-tapping screws are usually made of ordinary steel. Therefore they are susceptible to corrosion. To protect the metal from rotting, self-tapping screws are deliberately “recessed” into the wood, after which their heads are treated with sealant;
- Galvanized screws. Special screws have a cutter at the tip, which allows them to quickly screw into wood of any density. They are also in great demand when covering car bodies with wood. Moreover, such fasteners have a special coating that protects them from corrosion.
Installation requirements
The floor structure is subject to serious loads more often than others. In this regard, poor-quality fixation of the lamellas leads to their rapid loosening and the appearance of squeaking. Over time, if no measures are taken, the gaps between the boards will increase, and the gradual destruction of the structure will begin.
Wooden floor in the interior
Therefore, when installing a plank floor yourself, special attention should be paid to the choice of fastening method, taking into account the purpose of the room and the upcoming loads. To make the structure rigid, strong and durable, you need to follow some recommendations, which will be discussed below.
When making a plank floor, the following should be considered:
- The flooring is manufactured using the floating method, which means that there must be a gap of at least 1 cm between it and the perimeter walls, as well as protruding structural elements.
- Logs are an important part of the structure, affecting the evenness of the future floor, so special attention is paid to their location in space - the elements must be located in a single horizontal plane.
- When joining lamellas along the length, the joints are placed staggered (in a checkerboard pattern). Each joint should be located in the center of the joist.
- When choosing a board, first of all, take into account its humidity level - high-quality dried material will not bring unpleasant surprises.
Construction of a plank floor on joists
Features of screws with a cutter
An example of a wood screw with a drill at the end.
In the process of fixing the floorboards to the base with nails, a hole is first drilled in the wood. This way you can prevent the boards from cracking. The procedure for covering subfloors with wood can be simplified by using special screws with a cutter at the end.
Their advantages include:
- Presence of a protective layer. Fastening elements can be safely used for cladding the car body and open areas. They have a protective layer that prevents the metal from oxidizing even in direct contact with water;
- The presence of a milled tip. The screws are made with a milled edge, which allows them to be easily screwed into wood without first drilling a hole;
- Lack of threads in the area near the “cap”. Self-tapping screws do not have threaded threads near the head, which ensures a more durable tightening of floorboards with joists.
What are they needed for?
Laying wooden beams as lathing under the future floor allows you to strengthen the entire floor structure as a whole. In addition, noise and heat insulation materials are placed in the distance between the joists, which greatly improves the characteristics of the floor.
Properly installed beams and the distance between them ensure sufficient ventilation of the underground space of the house, which means that the wood will not rot over time. Especially if the building is located on an area with high groundwater. How to properly install logs and calculate the optimal distance between the sheathing beams is discussed below.
Important Tips
Scheme for fastening floor boards with screws
Whatever types of fasteners are used to fix the floorboards, during the installation process it is simply necessary to take into account the following points:
- The distance between nails (screws) during fastening of boards should be 25 cm;
- The floorboards should be pulled together as much as possible, but a technological gap of 20 mm should be left between the boards and the walls in case the wood expands;
- When using non-galvanized fasteners, it is advisable to “recess” their heads into the wood, and then lubricate them with silicone or sealant.
Floorboard: sizes and recommendations for selection
The first criterion for choosing a floor board is the specifics of its further use (for rough or final floor covering). Before you go shopping, you need to decide where and for what the material will be used. In addition, the length and width of the floorboard is of great importance. After all, the service life of the coating and its resistance to loads depend on how correctly the size is selected.
How to choose the size of the board depending on the length of the room:
| Room length (m) | Board thickness (mm) | Distance between joists (mm) | Section of timber for logs (mm) |
| 2 | 20 | 300 | 110x60 |
| 3 | 25 | 400 | 150x80 |
| 4 | 30 | 500 | 180x100 |
| 5 | 35 | 600 | 200x150 |
| 6 | 40 | 700 | 220x180 |
The length of the board should be selected in such a way as to ensure a minimum number of joints and minimize the need to cut the boards. The less waste the better.
If we are talking about arranging a country house, the thickness of the material used should be at least 35-50 mm. 35mm floorboard is considered standard and is often used in homes. In the case of finishing floors with increased loads, for example, in a gym or where many people pass daily, it is recommended to use 50 or 70 mm floorboards.
The length of the board must be selected so as to ensure a minimum number of joints
The width of the board should be selected with a small margin. This allows for periodic sanding of the floor to return the surface to its original appearance. But the required length of the board should be determined as accurately as possible.
Nail technology
The photo shows the process of screeding block parquet with reinforcement with nails. The work is performed using a compressor and a special compressor hammer.
This solution helps to easily strengthen block parquet using the shooting technique.
The presented strengthening method is used for the adhesive method of laying block parquet, artistic parquet, parquet boards, when installing skirting boards and in other directions.
Floor screed tools
For work you need several basic tools:
- Cordless screwdriver (corded drill) and wood drills. Allows you to prepare holes for self-tapping screws to reduce stress in the wood structure. Convenient for tightening self-tapping screws, but you will need a cue ball of the appropriate configuration (usually a “cross”);
- Hammer and nail puller, if nails are supposed to be used;
- A pair of gloves, a protective mask, goggles;
- Jigsaw and file for it. Essential for quickly sawing deck components;
- Glue and brush. The brush is also suitable for applying paintwork, if provided;
- Level, square, tape measure. A level will do;
- Pencil for marking. The most convenient thing is an ordinary pencil, since it can always be erased from the board, removing unwanted marks after marking.
What wood is best to use?
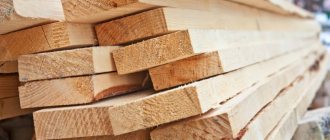
The most durable wood for flooring is considered to be Siberian larch and oak. They steadfastly hold the line in the face of all the adversity that befalls them. Boards made from softer aspen or alder are placed in rooms with little traffic: in children's rooms, in rest rooms. Lumber from pine, fir, and spruce is rarely used for flooring. Most often they are used to construct a ramp, a rough foundation for finishing material.
The geometric parameters of lumber are selected taking into account the personal preferences of future owners. Based on strength criteria, they often prefer boards with a thickness of 40 mm. However, it should be remembered that when buying thick, rather expensive boards, you should not save money by cutting costs by purchasing raw material. A thick floorboard that has not been kiln-dried can cause the screws to “fly out.”
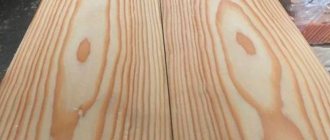
2nd grade lumber - boards with knots and a bright structural pattern
The choice of a certain grade of lumber depends on the purpose of the room, the goals of the owners and the intended methods of subsequent finishing. High-quality products have a smooth surface with a beautiful structural pattern, which after installation can only be opened with varnish. There are lovers of the natural beauty of wood with a pattern of knots; they will like grade 1 or 2. It makes no sense to buy material higher than grade 3 for painting.
They prefer to make floorboards from tongue-and-groove material - boards with tongue-and-groove devices for tight joining and with longitudinal ventilation vents
Non-grooved material is now rarely used. Boards with straight edges, connected end to end, will disappoint the owners with the curvature of the surface and cracks after a short period of operating time.
