A useful quality of plywood is its ability to resist shrinkage and deformation. According to many craftsmen, the ideal parquet substrate is the FK brand with a thickness of 10 to 12 mm.
This moisture-resistant plywood is laid in two layers. The total thickness of plywood for parquet will be 20 or 24 mm, respectively.
Some experts are confident that one 10-12 mm level will be enough.
In what cases does parquet need a plywood base?
Most floor coverings - not only parquet, but also laminate, tiles, and even linoleum - must be laid on a previously prepared and leveled floor. An exception can be considered the arrangement of classic floorboards; the use of guides allows you to compensate for unevenness of the base within a wide range.
For parquet, the critical level difference is considered to be 2-3 cm per linear meter of floor . If the accurately measured slope is large, it is necessary to perform a fresh screed. Simultaneously with the cement stage of work, floor insulation can be carried out, but high-quality waterproofing of the base is much more important.
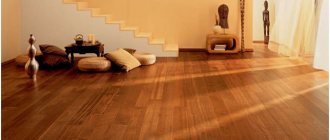
For high-quality installation and good results, it is recommended to use Barlinek parquet boards.
Laying parquet on plywood is caused not only by the need to obtain a perfectly flat surface with identical and durable joints. It is plywood that provides optimal dryness to the parquet “substrate”, which is an indispensable condition for the durability of the finishing coating. Without a plywood base, parquet slabs can be installed on self-leveling floors - and then only if their humidity is low.
You can estimate the moisture content of a cement floor at home without complex instruments. True, the “payback” will be the long-term nature of the measurements. It is enough to place several pieces of dense transparent cellophane measuring 1x1 meter on the screed and press them around the perimeter with bars or strips. It is necessary to ensure that there is no ventilation from under the cellophane, otherwise the impromptu measurement will be inaccurate.
If after three days the central part of the transparent cellophane of all fixed pieces has not fogged up from the inside, the humidity of the floors is minimal, it is permissible to lay parquet tiles directly on cement. If at least one of the “tested” squares is covered with drops of moisture, if there are traces of fog under it or at least a hint of dew, you cannot do without installing a plywood base.
Mounting method
To lay plywood on the screed, you need to buy glue and dowel-nails. If you simply glue the slabs to the base, after a while the bottom layer of veneer will peel off.
It is impossible to press sheet material with dowels alone onto a screed with, for sure, unevenness on its surface. Therefore, dowels and glue in this case rationally complement each other:
- inexpensive mixture of KS (universal construction adhesive) does not cause budget overruns;
- glue fills voids/unevenness in the base, ensures full support of the plywood on the screed;
KS universal construction adhesive.
- dowels attract structural materials to each other, providing a long service life.
Standard dowel-nail.
Expensive two-component mastics in this technology, apart from unreasonable cost overruns, do not provide any advantages.
Under normal conditions, a 6x40 mm dowel-nail is used. The fastener passes through the screed and is attached to the slab.
For plywood thicknesses greater than 20 mm, longer fasteners are used. If the slab under the screed is made of cellular concrete or with light fillers, anchors, including chemical ones, are used instead of dowel-nails.
Plywood for parquet - main varieties
The building materials industry produces a wide range of plywood sheets. Our task is to choose the optimal base for parquet from this assortment. First of all, let’s pay attention to the brand of plywood, as can be judged by the letters in its name:
- FC – medium degree of moisture resistance, layers are glued with compounds based on carbamide resins. FC plywood is recommended for rooms with low humidity – both the floors themselves and the air;
- FSF – increased moisture resistance, glued with phenol-formaldehyde compounds. FSF sheets are acceptable for installation on terraces and verandas, i.e. compatible with external use;
- FB is the most expensive and moisture-resistant plywood. B denotes impregnation with bakelite varnishes, and all layers are impregnated. Its resistance to environmental humidity is superior to any parquet, so it can be used as a base according to the residual principle;
- FLC (similar FOF, FLB are less common) - plywood coated with a special film and impregnated with synthetic compounds. It is quite attractive from an aesthetic point of view and can be used as an original decor along with parquet.
Plywood of the FSF and FK brands is best suited as a standard base. It provides a reasonable repair budget and high-quality parquet installation at different humidity levels of the floor and the surrounding air.
When choosing between coniferous and birch plywood, two circumstances should be taken into account. Coniferous sheets weigh less and are easier to install. However, their birch counterparts are better able to withstand scraping and sanding during installation. All other things being equal, the answer to the question: “Which plywood for parquet is better – birch or coniferous?” consists in choosing birch sheets.
TOP 3 largest plywood producers in Russia
| Photo | Name | Rating | Price | |
| #1 | SVEZA | ⭐ 98 / 100 | More details | |
| #2 | Syktyvkar Plywood Plant (SFZ) | ⭐ 94 / 100 | More details | |
| #3 | Arkhangelsk Plywood Plant | ⭐ 91 / 100 | More details |
Plywood production in Russia according to Rosstat
In the Russian Federation, more than 30 enterprises are engaged in the production of plywood.
Production capacities of the largest European plywood companies
Important! Russia occupies a leading position in the birch plywood production segment (except for the Russian Federation, it is produced only in Finland and some other neighboring countries).
The main volume of plywood is produced in the Northwestern District. This is due to the location of forest resources.
Arkhangelsk Plywood Plant
The production capacity of the plant is 125 thousand m³/year. Plywood is produced in four grades, thickness from 3 to 36 mm, main formats: 1830x1525 and 1525x1525 mm (sheets of other sizes can be produced upon request). The main line of plywood is general-purpose material of the FK and FSF brands. Low-flammability plywood boards, which have slow flame propagation, moderate smoke-generating ability and explosion safety, have also become very popular. 80% of all products are exported to other countries.
Arkhangelsk Plywood Plant
Syktyvkar Plywood Plant (SFZ)
The plant's productivity is 180 thousand m³ of plywood per year. Products are exported to many CIS and European countries, as well as to the USA, South Korea and Saudi Arabia. Sheets are produced from birch veneer, as well as with alternating layers of birch and aspen.
Syktyvkar plywood plant
Sheet characteristics:
- thickness 4…40 mm (3…29 layers);
- toxic substance emission class - E1;
- typical dimensions: 2500 x 1250, 2440 x 1220 mm.
The product line includes: standard and increased water resistance plywood, laminated material, coating prepared for painting.
Plywood production at SFZ
SVEZA
This holding includes six plywood factories.
SVEZA
The consumer is offered a wide range of sheet materials:
- laminated;
- with an outer layer of valuable wood veneer;
- with ultraviolet coating;
- intended for painting;
- lined with anti-slip coating;
- with a wear-resistant outer layer;
- polished and untreated;
- standard FC (for interior work) and FSF (for exterior and interior finishing).
Birch plywood SVEZA
Products are produced in all five grades, with a thickness of 4...40 mm and a density of 640...700 kg/m³. Formaldehyde emission class is E1. Plywood is supplied to 80 countries. The factories have installed modern equipment from the largest foreign manufacturers (RAUTE, Hashimoto, Holzmann, etc.).
Products of SVEZA Holding
Prices for SVEZA plywood
SVEZA plywood
How to lay parquet on plywood - step-by-step diagram
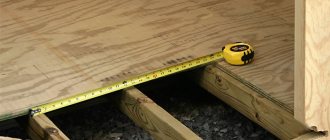
Step 1: Marking the ground
It will look smooth on paper, but it makes more sense to lay the plywood directly on the floor in the form of ready-made square sheets - initially without fasteners.
The size of the squares should be such that there are no interparquet seams on the lines of their joints. For example, if the tiles have a size of 15x15 cm, plywood sheets should be cut with a side of 70 cm. Sizes larger than 80 cm are not recommended to be used due to the possible “windage” of the sheets during fastening. The placement of plywood squares on the floor should imitate brickwork. The displacement can be either half the sheet or only 20-30% of its size. The main thing is to ensure that the seams from the longitudinal and transverse sheets do not converge at one point. Along the perimeter of the room, cut sheets are installed last.
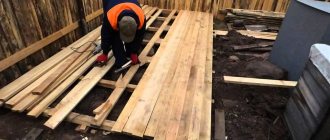
Step 2: We can easily handle it with a jigsaw and deftly cut it with a hacksaw
Standard plywood sheets have sizes of 125x125 and 125x250 cm. Naturally, you want to cut them with minimal waste and maximum accuracy. To do this, it is best to use an electric jigsaw and a wide workbench - cutting 12 mm thick plywood into squares of 60 by 60 or 75 by 75 cm will take no more than half an hour.
Laying technology step by step
Installation of plywood on a screed under a parquet board is carried out in six steps. All operations are available for self-production. Minimum set of tools for this:
- markings - ruler, pencil, square, marker;
- cutting - hacksaw, hand-held circular saw, jigsaw;
- installation - spatula-comb with a tooth of 4 - 6 mm, hammer drill, screwdriver, hammer;
- sealing seams - a gun for sealant in tubes;
- finishing - an orbital, belt or vibration sander.
Usually all this tool is available in the arsenal of a home craftsman.
Preparing the base
Before laying plywood, the concrete screed must meet the following parameters:
- unevenness within 2 mm/m²;
- absence of dust, grease stains;
- humidity not higher than 4%;
- no cracks or delamination.
Treating the screed with deep penetration primer.
Before installation, the screed is vacuumed and thoroughly primed; it is advisable to do this the day before installation. When using a spatula with a tooth height of 6 mm to apply glue under the plywood in the following stages, the layer thickness will be a maximum of 3 mm. Therefore, irregularities larger than this size will remain unfilled.
Film screed test for moisture.
Humidity is checked using the standard method - for 12 hours, a piece of plastic film must be secured with tape around the perimeter of the screed for 12 hours. Work can only begin when there is no condensation under the film. Otherwise, the structure needs to be dried naturally additionally. Evenness is checked by the two-meter rule.
Cutting plywood sheets
At the slightest change in humidity in the room, the plywood begins to warp if it is rigidly screwed to the base. Therefore, laying this sheet material on concrete in large pieces is not allowed.
Depending on the size of the slab, you should use pieces with sides of about 60 - 70 cm. For example, a sheet of 122x122 cm cut into 4 parts will have a format of 61x61 cm. And for a sheet of 152.5x152.5, the pieces will have a size of 76.25x76.25 cm, respectively.
Installation of sheets
The prepared pieces of slab material must be glued, then additionally secured with dowel nails, taking into account the following requirements:
- the gap around the perimeter from the wall is 10 mm;
- seam width between sheets is 4 – 5 mm;
- displacement of transverse seams by 2/3 - 1/2 in adjacent rows.
Plywood layout diagram.
You can start gluing from any area, since you can walk on the rough plywood flooring right away.
Laying is carried out in rows, so before installing the first sheet, a line is drawn along its outer edge along the wall.
Then, using a notched trowel, glue is applied to the screed for one sheet of plywood or for a whole row, depending on the qualifications of the home craftsman.
Next, plywood is laid, the distance between its edge and the wall is 10 mm.
Installation of the first sheets.
Rows of holes are drilled for dowel-nails with a pitch of about 200 mm between them and between hardware in the rows. Under the fastener heads, a countersink is first performed to 1/4 of the thickness of the sheet material.
Fastening plywood with dowels and nails.
Less commonly used are self-tapping screws with a wide head and dowels without a flange at the top. This option is cheaper, but the labor intensity of the work increases.
The parallelism of the outer edge of all other slabs in the same row is controlled by the 2 - 3 m rule.
The heads of the self-tapping screws are recessed into the countersunk holes with a special punch.
Recessing nail heads into plywood.
Then the entire area of the room is filled with pieces of plywood of the same thickness using the same technology. The technique is described in more detail in the video below:
Putty of self-tapping screw heads
To smooth the base layer for laying block parquet, wood putty is used.
Two-component epoxy compounds are not economically viable for these purposes. And gypsum plaster and putty mixtures on wood are not used, in principle, as they conflict and are destroyed after just a week of use. You can mix small sawdust with PVA glue yourself to solve this problem.
Only the heads of the dowels and nails are sealed with putty, but not the longitudinal-transverse seams between the plywood slabs.
Sealing seams
On the one hand, the seams act as a compensation gap. That is, they cannot be filled with hard material - grouts, putties. On the other hand, leaving them empty is also a wrong decision. Since they will appear under the linoleum, after a couple of months, an uneven subfloor will cause accelerated wear of the carpet, laminate, and parquet.
Taking into account the seam spacing of 60 - 70 cm, the locks in the laminate will gradually break out, and individual planks in the parquet carpet will warp. Therefore, the seams are filled with inexpensive sealant. You can use a “liquid plug,” but this option costs at least two and a half times more.
Acrylic sealant for wood.
The cheapest is acrylic sealant, which is also considered the safest from the point of view of environmentalists. The composition is ideal for wood; it is usually used to seal the crowns of log houses. To reduce the consumption of sealant in the cracks, you can first lay a special cord for log houses.
You can use damper tape or sealant around the perimeter of the walls. In the first case, the tape must be secured to the walls before laying the first sheet.
Cement strainer
Before you start laying plywood sheets, you need to level the floors. It is better to use a cement screed for this. In this case, you need to follow the technology - after applying the screed, you need to wait at least a month or a month and a half until it fully gains strength. The waiting time depends on the microclimate in the room - humidity level, temperature, as well as the thickness of the screed. Waiting for complete drying is necessary in order to avoid the appearance of condensation under the plywood sheets, because the accumulation of dampness under the wood is a direct path to the formation of mold, mildew and rot.
There is one simple way to check the moisture level of the base. We place a piece of polyethylene measuring one meter by one meter on the concrete floor, and press the edges of its sheet to the floor. We leave the film in this state for three days, after which we inspect it. If its inner surface remains dry, then the concrete has already dried sufficiently and you can begin laying plywood. If droplets of condensation have formed on it, then it is too early to lay the plywood.
Substrate hydro- and thermal insulation
The most important point is the arrangement of the substrate and waterproofing.
- The waterproofing film is spread in strips so that the elements overlap by 15–20 cm. It must also be placed on the walls to a height of at least 5 cm.
- A heat insulator consisting of foamed polyethylene, polystyrene or cork is placed on top. The individual strips are connected to each other with tape.
- A compensating gap of 10 mm wide is left between the heat insulator and the wall.
For the glueless method, nothing else is required, and when using glue, the top layer of the backing is moisture-resistant plywood, attached with dowels to the base.
Parquet board, what is it
Parquet boards as a type of flooring appeared in the early 40s of the last century. It was created as a cheap and practical replacement for expensive parquet that requires skilled craftsmen. These days it is experiencing a rebirth. The main reason for this is absolute environmental safety, because the coating is made exclusively from natural wood.
Externally, the parquet board is similar to the usual laminate, but differs from it in its internal structure. If you look at it in section, you can see three layers of planks of different thicknesses, the direction of the fibers of each of which is perpendicular to the previous one. This design ensures the strength and reliability of the material.
Upper layer
The top (front) layer primarily creates the floor pattern. The lamellas from which it is assembled are selected according to pattern, shade and texture, and boards are selected without defects or damage. Some types of boards are covered with valuable wood veneer. In a sense, this is a piece product that allows you to create a luxurious and unique floor without any special investment.
In addition to its purely decorative function, the surface is resistant to abrasion and insensitive to constant pressure. That is why the top ball is made of hardwood, the layer thickness reaches 4 mm or more.
An additional advantage of the material is that it is completely ready for installation and operation. The front side is sanded from the factory, impregnated with protective compounds and varnished. All that is required from the consumer is to prepare the subfloor and lay the covering correctly.
Middle layer
The job of the middle layer is to distribute the load evenly. The best material for this is coniferous wood. Longitudinal fibers give the material bending resistance, which ensures the durability and reliability of the coating as a whole.
The middle layer is assembled from planks about 7 mm thick. The width of each of them is up to 30 mm, the package is assembled with glue. Among other things, connection elements are formed in the middle layer, thanks to which the parquet board will be installed.
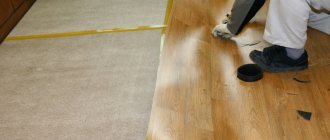
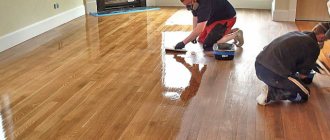
Photos of the scraping process
- https://viascio.ru/poly/ukladka-parketnoj-doski-na-faneru
- https://centro-pol.ru/ukladka-parketa-na-faneru.html
- https://remontami.ru/ukladka-parketa-na-faneru/
- https://openini.by/poleznoje/o-parkete/kak-podgotovit-osnovanie-dlya-ukladki-parketnoj-doski
- https://polspec.com/parket/kak-ukladyvaetsya-fanera-pod-parketnuyu-dosku-tekhnologiya.html
- https://parketklub.ru/cziklevka-fanery-pod-parket
- https://www.servis-parket.ru/ciklevka-fanery/
- https://profmaster-msk.ru/ciklevka-parketa/ciklevka-fanery-pod-parket/
Published: 08/18/2017