The lower crown of a timber frame requires increased attention, since it will be closest to the soil, and it is this part that is exposed to the most frequent contact with moisture. It is installed directly on the foundation of the future building, so it will come into contact with an aggressive environment that can cause rapid rotting of the wood. There are special methods of protection from moisture to avoid premature destruction of the lower crowns of the log house.
How to apply impregnation correctly
Before applying any product, the surface is thoroughly cleaned and, if necessary, sanded.
High-quality finishing of the walls and ceiling with wooden lining, and the floor with boards will increase the service life of the bathhouse. In addition, it will give the room a neat, finished appearance. However, the lining, the floorboard, and other finishing materials still need to be covered with protective agents. How to carry out interior decoration of a bathhouse or sauna, read here. Varnish, oil or other product is applied in several layers using a roller. Difficult areas in the corners and between the crowns are treated with a brush. Each new layer is applied only after the previous one has completely dried! When using oil, remove excess product before drying. Such processing should be carried out every 4-10 years, depending on the type of materials and the quality of work. To get long-term and reliable results, turn to professionals!
“MariSrub” craftsmen will select high-quality and reliable impregnations and quickly and reliably process the bathhouse. We provide a full range of services. It includes the design and construction of a bathhouse or house with a foundation and roof, production of lumber for the project, installation and connection of utility networks, and complex finishing. We offer insulation and waterproofing of baths, protective treatment of materials in several stages! We guarantee high quality work and strict adherence to deadlines.
General provisions
Many people believe that correct installation of all building elements, proper ventilation and the use of only high-quality tree species can prevent adverse effects on the walls of the steam room. And this is better than treating the walls in the bathhouse with some kind of antiseptic, since there will be no danger of the enzymes in the solution evaporating into the air at high temperatures.
Do-it-yourself ventilation arrangement
Absolutely right. Good air movement can overcome dampness in the bathhouse and prevent mold and fungi from developing from the inside. But this is not the only problem.
- The effect of “warping” of boards due to constant exposure to high temperatures. The most vulnerable finishes are on the ceiling and near the stove.
- Darkening and contamination of the wood surface with frequent use, making the interior look like the inside of a “black” bathhouse. This is especially true for shelves.
Type of “black” bath
- Pest attack. External timber walls are also susceptible to this.
- Stagnation of dampness in the absence of ventilation or an error in its design.
Thus, we can come to the conclusion that processing is still necessary in most cases. It will definitely be able to extend the life not only of the interior lining of the bathhouse, but also of the wooden walls outside the building.
Moreover, current solutions:
- Environmentally friendly even at very high temperatures.
- Heat resistant.
- Excellent protection from dirt.
- Drive away possible pests.
- Increases the strength of the material.
Let's consider the recommended compositions for various elements of baths and saunas.
Types and applications of solutions
You should not treat all surfaces of the building with the same solution. You should proceed from the proximity of the product coated with the protective composition to the person during the bath. So, for example, when choosing what to treat the lower rims of a bathhouse with, there is no point in overpaying for an expensive and harmless composition, because they do not come into contact with people.
Composition for the lower elements of the bath
Treatment of the sauna base
To sufficiently protect this element of the building, any antiseptics available for sale on the shelves of hardware stores are suitable. Their main task is to protect against mold and pests.
If their price and the unknown quality make you doubt, then you can use the following recipe and prepare the solution yourself:
Heat the bitumen in a bucket until it boils.
Bitumen should be heated until it boils completely.
- Remove the bucket and set it away from the fire.
- Mixing thoroughly, pour diesel fuel until a black liquid mass is obtained in a cold state.
- The result is an inexpensive and excellent antiseptic, which is the best answer to the question of how to treat the lower crown of the bathhouse.
This homemade solution is also perfect for treating logs in a bathhouse. Because the underground is also not a bath element in contact with people, but is often located in increased dampness.
Wall treatment
Coating the timber with an antiseptic
In the case of interior wall decoration, you must remember that while visiting the steam room you will have to breathe what you treated them with.
The most common and trustworthy are:
- Antiseptic “Sauna”, made on an acrylic base. Creates a transparent polymer layer that:
- Does not allow air, dirt and water to pass through.
- Eliminates pathogenic microorganisms common in everyday life that cause infectious diseases in the human body.
- Improves the aesthetic appearance of wood surfaces.
Sample of water-based antiseptic
- Natura. Creates a translucent water-repellent coating for wood. There is a possibility of tinting with a wide range of shades.
Now you know how to treat the walls in a bathhouse without fear of subsequent poisoning.
Shelf processing
Shelves coated with a protective layer
The peculiarity of shelves and benches for a bath is that they are touched by human skin. Consequently, when a polymer layer appears on them, there is a risk of burns. This leads to the need to use solutions that are well absorbed into the wood pores.
These include such oil compositions as:
- Sauna Natura;
- Supi Laudesuoja;
- Eurotex "Sauna".
Impregnation for baths and saunas inside
If external impregnation has already become more or less clear, you can move on to the extensive issue of internal impregnation.
How does internal impregnation differ from external impregnation? If we are talking about antiseptics, then the degree of aggressiveness. After all, all antiseptics are poisons not only for mushrooms or insects, but also for people. It’s just that now these are low-toxic substances, but before there was a nightmare of arsenic and chromium. However, indoor antiseptics should be even safer.
If we talk about impregnations for wood in a bathhouse for interior work, then these are not paints, which can be more harmful if used outside. Impregnations will differ only in the presence or absence of additives that protect the wood from the sun and other environments. Such additives are not needed indoors.
For lining
Lining is a thin profiled board. What is it impregnated with and why? Of course, any wooden part when moistened is at risk of infection by fungi that cause rotting or mold. the washing room and (attention!) near the floor in the steam room needs antiseptic protection .
Impregnation for lining in a bathhouse
Let us explain: the temperature near the floor, even in the steam room, is not that high, and the lower lining often gets wet. An antiseptic may or may not be used if it is replaced with high-quality ventilation and drying (see the section on ventilation), as well as some life hacks, the point of which is to prevent the lining from coming into contact with the floor.
So, if an antiseptic for lining is needed, it is in limited quantities . In the washing room, a primer for (interior) acrylate varnish will be sufficient.
We also recommend reading the article about all types of lining treatment in a bathhouse, inside and outside, or watching its video version below.
For boards
Lining is also “boards”. But even with ordinary edged (or even unedged) boards, a bathhouse can be sheathed inside and out. low-cost option , so we will not say that such a bathhouse should be covered with compounds purchased for a lot of money from the Finns.
Impregnation for boards in a bath can be quite inexpensive if you use an old and proven recipe for a mixture of linseed oil and wax . Watch the video, which clearly demonstrates the process of preparing such a composition and its application in practice. And note: the owner of the bathhouse was happy to cover it with it inside and out!
For floors
Again the same point: impregnations are antiseptic and water-repellent. Both are in demand for floors, because there is dampness from the underground, and moisture from the steam room and washing room (you shouldn’t think that if water doesn’t pour onto the floor, then everything is dry, there is also moisture in the air, which condenses instantly, if there is a cold surface).
There is a lot of moisture in the bathhouse. Therefore, it must be dried and protected. We recommend covering the floors with some kind of interior antiseptic, but on the condition that the seller or manufacturer was able to assure (or better yet, prove) that this antiseptic protects not only from mold, but also from rot. We have said more than once that these are different types of mushrooms that require different compositions.
can be applied over the antiseptic . Typically, special paints and varnishes with additives are used for flooring, which increase their wear resistance. In particular, these are urethane and polyurethane additives. They are needed because we constantly wear down the flooring with our feet.
yacht varnish as a finishing coating which is not afraid of moisture. However, here we go beyond the scope of our topic. Because varnishes are not impregnations. We have a separate material about impregnations for bath floors.
On the other hand, using oil to impregnate the floor inside a bathhouse is a bad idea. Of course, there are oils that do not cause slipping. But the fact is that oil impregnations do not provide a coating that is resistant to abrasion. And they give varnishes. Therefore, wooden floors are coated with varnish.
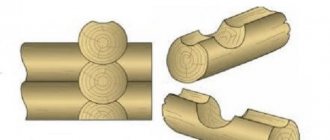
The lower crowns of a log house: we design and build correctly
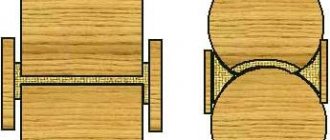
The beginning of the construction of a log house must comply with the classical requirements of construction: before laying the lower crown on the strip foundation, it is necessary to lay roofing felt with bitumen impregnation. It will serve as waterproofing between the foundation and the logs; For the frame crown, it is recommended to choose larger logs than others. It is better to use wood that is least susceptible to rotting. Tying the crowns of a log house involves placing two opposite logs on the bottom, and the other two on top. This laying scheme also applies to the first crown.
The result is an arrangement of perpendicular sides at different levels. If the lower logs of the first crown lie directly on the roofing material and are pressed tightly against the foundation due to slight compression, then the upper ones form a gap the size of which is half their diameter. You can prevent rotting during this installation if:
- coat the surfaces of the lower logs that have been hewn by 4–5 cm with a protective agent;
- lay a compactor between the foundation and the adjacent logs; moss, tow or jute are usually used;
- fill the gaps between the foundation and the top logs of the crown with bricks, timber or halves of logs. Also close all joints with moss or other sealants.
The problem of the formation of large gaps between the upper logs and the surface of the foundation can be solved in other ways: 1. By making a foundation, the perpendicular sides of which are located at different levels. With this method, the rim logs require minimal processing, which ensures their integrity, so they can last longer. 2. By cutting off the lower logs by half, and the upper ones by 4-5 cm. This ensures a tight fit of the lower crown to the surface of the foundation.
At the corners, the logs are joined by notching into a joint, when notches are made at the top and bottom. To protect against rotting, in this case, all hewn surfaces must be carefully treated with an antiseptic and other protective agents. To reduce the effect of moisture, frame timber or boards pre-treated with protective materials can be laid under the lower crowns.
This will not only help further protect them from rotting, but will also make updating easier, since rotten boards are easier to replace than crown logs.
Wet lower rims of a new timber frame
Question:
Good evening, Semenych! We have such a problem. In July 2013, we were supplied with a frame made of profiled timber 10 x 10, on a shallow strip foundation. In August we treated it externally with impregnation. The lower crown along the perimeter was also treated with impregnation. The inside of the lower crown was not treated in the same way as the builders laid the subfloor and said that the log house would dry out anyway. In March of this year 2014, when we tried to insulate the floors of the 1st floor, we discovered that the lower crown along almost the entire perimeter was wet and blackened. We are shocked. The underground part of the house from the ground to the floor joists is 60 - 70 cm high. There is no trace of groundwater. There are ventilation holes along the entire perimeter of the foundation and in the internal partitions. True, along the entire internal perimeter of the foundation there is an earthen fill from the earth remaining after digging the foundation. Tell me what should we do with moisture and blackness?
Alexander, Zelenograd.
Answer:
Hello, Alexander from Zelenograd!
In cases like yours, the first step is to level the surface of the soil under the entire log house. Why level the excavated soil or remove it from the underground altogether? Then lay waterproofing on it (a layer of simple or reinforced polyethylene film, roofing material, rubemast, glass insulation - your choice and pocket).
The number of ventilation holes must be at least one for every three linear meters. And at least two on each side of the house. Although the quantity can sometimes be increased. True, you will have to work with a hammer drill. Their diameter is desirable 15 centimeters, no less. The holes should be open before the beginning of winter, and at first, when the house is not yet inhabited, then all year round.
Then you should dry the subfloor as much as possible, which does not exclude dismantling and removing the subfloor. As well as installation of convectors, heat guns and their other analogues. With long-term continuous operation.
Then, after drying, treat all surfaces with an antiseptic. When this is done thoroughly, then up to three impregnations and no earlier than a day later - twice, not once. You are unlikely to be able to remove the blackness. But if the dark wood is not wet, but dry, then it is not fatal. As an impregnation, choose any one for the subfloor. And the more poisonous their color is, the better.
And the fact that the shabashniki screwed you up is understandable, since they were chasing payable volumes, including laying the subfloor; there was no time for impregnation.
In addition, one of the possible reasons for high humidity may be the penetration of water after flowing down the walls from the outside and accumulation on the base. To eliminate this, you should install ebbs (metal or plastic) along the entire perimeter of the lower crowns (usually above the horizontal joint of the lowest and the overlying crown).
Therefore, do everything urgently; in the intervening time, rot should not appear in the wood.
Good luck!
Construction in Moscow and Moscow region
We work with a guarantee! Wide range of construction services. Foundation, walls, ceilings, roofing, turnkey! +7 (905) 797-20-34
luxurykomfort.ru
Other questions on the topic of log houses:
- All about log houses
- Replacing logs in log houses
- About caulking log houses
Replacing logs in log houses
- Cost of replacing the top rims of a log house
- Replacing a cut-off wall with foam blocks
- Replace half a wall in a log house
- Replacing a rotten wall of a timber house
- Replacement of lower crowns and cracks in logs
- Replacing the lower logs of an already sheathed house
- Rotten places in logs
- Vertical log house made of round timber
- What to do with rotten logs from a log house
- Rotten crowns in the middle of the wall
- Replacing a log frame with a brick or block
- Replacing the lower crowns of a log house
- Replacing rotten crowns with bricks
- How to strengthen a corner in a log house
- When you need a fifth wall in a log house
- Vibrations in the log house
- Remove the three lower crowns of a log house
- Replacing a wall in a log house
- Replacing the lower crown with brick or foam blocks
- Joining logs of different diameters
- Replace the corner of a log frame with sleepers
- Replacing the lower crowns of a log house with a concrete wall
- Rotten log in a log house
- Restoration and cladding of a timber frame
- Reconstruction of an old log house
- Replacing a rotten corner of a house
- Repair of rotten beams in a log house
- Replacing the lower crowns of a log house with blocks
- Replacing rotten logs of a log house
- Replacement of the lower crown of the house
- Replacement of a main wall made of timber
- Transfer of logs in height in a log house
- Alignment and replacement of the lower crown of the log house
- Replacing rotten logs under the window with blocks
- 2 corners rotted at the level of the log house windows
- Cost of work to replace the top rims of a log house
- The log house is rotting next to the vent
- The wall near the log house in the five-wall building has rotted
- Repair of old logs
- Replacing a log house wall with a foam block
- Replacing the lower crown in a wooden house
- Replacing logs in a log house
- Replacing logs eaten by insects
- Replacing the lower crown of a timber frame
- Replacing the lower crowns in the house
- Replacing the top rotted crown of a log house
- Replacement of the lower crowns of the bath
About caulking log houses
- Caulking log corners
- Rules for caulking a log house
- Caulking of an old log house
- Cold corners in a log house
- Caulking and insulation of a log house
- Caulking a log bathhouse over old moss
- How to caulk a log house covered with clapboard
- Should tow for a log house smell?
- How to fix a chopped pediment
- Re-caulking of a log house
- Caulking and log processing
- Re-caulking the bathhouse with moss
- Calculation of the amount of jute for caulking a log house
- Caulking of a log house lined with bricks
- Caulking tight logs
- Dismantling inter-crown insulation
- Log caulking
- Log house for three years in the open air without a roof
- Re-caulking of a log house
- The basics of caulking a log house
- Caulking and sanding of a log house
- Caulk of a log house from the inside
- Do-it-yourself log caulk
- Caulking of a log house made of rounded logs
- Sanding timber
All about log houses
- Log house made of logs or timber?
- Estimate for finishing the log house
- Is it possible to sand a raw round log?
- Strengthen the corner of the log frame from the gun carriage
- The wall of the log house is collapsing
- Forced shrinkage of the log house
- How to fix a crooked timber frame
- The lower crowns of the log house are getting wet
- Correction of a 9-year-old log house
- Rot between the crowns of a bathhouse log
- The frame sank and the window jammed
- Led walls made of profiled timber
- The crown of the log house was turned out
- The dovetail insert moves apart
- Construction of a log house in the South of Russia
- Painting the outside of the log house
- Is casing necessary for small log windows?
- What to do to prevent the log house from twisting during shrinkage
- The quality of the log after 5 years of settling
- Protection of the sauna frame
- Rebuilding an old log house
- Strengthening the fifth wall of the log house
- Bathhouse gables made of rounded logs
- The top crown of the frame was torn out
- How to cut large arches in a log house
- Remaking door and window openings in a log house
- The partition made of logs was torn out
- Repair of an old log house
- Finishing the log bathhouse immediately after installation
- Which interventional insulation to choose
- Lining crowns made of logs with natural stone
- How to beautifully seal shrinkage window openings in a log house
- Tiles and laminate for log floors
- Ceramic tile floors in a log house
- Strengthening the log house
- Align the crown for installation of ceilings
- How to coat a log house after sanding
- Editing the geometry of a log house
- How to install profiled timber in a log house
- Installation of crossbars in a timber house
- New doorway in an old log house
- Reconstruction of a log house
- The bottom beam on the plinth gets wet from the inside
- Treatment of the log house before cladding the outside
- The walls of the log house got wet through and through
- The first crown of a log house made of oak
- Insulation of the stone base of a log bathhouse
- Overcut in the house
- Basement and blind area for an old shrunken log house
- Uneven shrinkage of the frame
- Repair of an old 2-story log house
- What kind of foundation for a 6 by 8 log house?
- How long does it take for a log house to shrink on a pile foundation?
- Increase the height of the log house without removing the roof
- Wind protection between the foundation and the log house
- Problems when lifting an old log house
- Insulation of a log house with sawdust and lime
- How to lay a log house from timber of poor geometry
- Pouring a concrete floor in a log house
- Interfloor ceiling in a log house
- Waterproofing the log house from the foundation
- Renovation of an old log house
- Repair of an old brick-lined log house
- How to strengthen a log house
- When to put a roof on a freshly assembled timber frame
- When to cover a log house with natural humidity
- Support under the log and shrinkage of the log house
- Beetles in logs
- Door in the end wall of a log house
- A team for the construction of a log bathhouse
- The cut of the log on the outriggers of the log house darkens
- Rot on the lower crown of a log house
- Vertical log house
- Which finishing plaster for clay to choose
- Mushrooms on a log house
- Log house without frame and floor beams on slab
- Dry rot of the lower crown of a timber house
- The upper corner of the frame has been removed
- Demolition of a log house wall
- Displacement of profiled timber in a log house
- How to build up log extensions of a log house for a veranda
- The log house was mowed down
- Installing a shrinkage compensator in a finished log house
- Twisted the logs of the log house before assembly
- Log house with nails instead of dowels
- How to protect a log house without a roof from rain
- A set of works on the external finishing of a log house made from central fiber boards
- Repair of a log house after a fire
- Is it possible to put a roof on a log house for the next year?
- Warm joint with sealant for log house
- Insulation and cladding of a log house made of corrugated timber
- Insulation of a log house from the inside
- Concrete floors in a log house
- Shrinkage of log walls old and new
- The procedure for finishing a log house
- How to preserve timber from spring to winter
- What comes first: flooring or door casing
- Dismantling half of an old log house
- Types of beam connections
- Sealing the joint between the roof and the frame from OCB
- Cleaning a log house from old paint
- Connection of two log houses
- Support column in a log house on stilts
- The difference in the shrinkage of a log house between winter and summer felling
- Dismantling and moving a house made of profiled timber
- Supporting floor beams in a log house
- Preparing a log house for winter
- Guarantees when cutting a log house on a plot
- Chop into a bowl or warm corner
- How to lower the ceiling in a log house
- The timber turned blue in the rain
- Preservation of the log house in a non-temporary gathering place
- Consultations on a timber house
- Sheathing of a house made of cylinders without insulation
- Scheme of a log house with outlets and a ridge roof
- How to lay a carriage while lying down
- Reinforced concrete slab on a log frame
- How to assemble a log house from twisted timber
- Repair of a cut in a log house
- Installation of a log house on a columnar foundation
- The chopped gables of the log house are shaking
- Fastening beams in a log house
- The top beam in the log house was driven into the screw
- How to cover a timber façade
- Waterproofing the frame of an old house from the foundation
- A log house without nails is being pulled apart
- Sheathing a log house
- Cutting the lower crown in the log house
- Settlement of a log house made of used timber
- The log house rotted in the castles
- The corners of the log house are rotting
- How to strengthen a log house
- Work plan for interior finishing of the log house
- Log processing procedure
- How to lay a log house in the rain
- Cut the lower crowns of the log house
- Sheathing a log house immediately after construction
- Heating and windows in a new log house
- Processing the crown of an already built house
- Painting a timber house
- Blind area and shrinkage of the log house
- How to enlarge a house made of timber
- Connecting a timber house with a brick extension
- Finishing a timber frame with jute rope
- Diameter of a log for a permanent home
- Treating the log house with an antiseptic during assembly
- Reconstruction of a wooden house
- Connecting timber in cuttings
- Protection of the ends of the timber at the corners of the log house
- How to connect two log houses together
- Cutting a balcony doorway in a log house
- When to casing a newly assembled log house
- Insulation of gables made of lining
- Gaps between the logs of the log house pediment
- How to preserve logs before cutting a log house
- Raise the frame to increase the ceiling height
- Methods for joining timber in the walls of a log house
- Raise a log house to increase the underground floor
- Cladding a log house with clapboard before shrinking in winter
- When to remove the compensating jacks of a log house
- Log house for three years in the open air without a roof
- How to make a cut in a log house
- Make a house from an old bathhouse (timber)
- Moving the log house to another location
- Log house hanging on dowels
- The fifth wall in a log house made of smaller timber
- Should I paint the backing board in a log house?
- Remove mats to increase log ceilings
- The log house does not match the foundation
- Ceiling mats in the log house
- Construction from fire monitors
- How to remove bark from an already assembled aspen log house
- Transporting an old log house
- Connecting internal timber walls with external ones
- How to repair cracks in a log
- Gap between log and foundation
- Alignment of the first crown of the log house
- Stages of arrangement of the assembled log house
- Treatment of the log house after installation in the summer
- Processing the ends of the frame from the outside
- The log house floated - the walls moved
- An old wooden house sank
- Leveling the crowns when assembling a log house
- How to close the opening between the log house and the foundation
- How to straighten a log house
- Sheathe a log house with protrusions with corrugated sheets
- How to process the ends of a log house
- Collecting the first crowns of a timber frame
- Riser frame
- Preservation of the log house during assembly in rainy times
- Forgot to waterproof the log house from the foundation
- Installation of log shrinkage compensators
- Interventional gaps in a house made of profiled timber
- Gaps between logs in a house
- Communications and finishing in a timber house
- Precision when cutting log houses
- Which log house will be warmer?
- Log house made of timber 200 by 120
- Old log house - reconstruction or demolition
- Partitions in a log house
- Internal partition in a log house
- Beginning of finishing of shrunken timber frame
- Double timber construction technology
- Processing the log house from the outside
- Log shrinkage process
- The walls of the log house collapse during shrinkage
- Insulation of a log house from the inside
- How to build a house from sleepers
- The logs were kicked out of the log house
- Supports (pillars) instead of crosscuts in a 9x10 house
- Do-it-yourself timber log house without experience
- Preservation of a house made of rounded logs for the winter
- Embed additional beams into the frame
- Backing crown - installation tricks
- Log house on brick walls
- Sequence of work in the log house
- How to make a load-bearing partition in a log house
- The log house got wet during assembly
- How to seal cracks in a log house
- Align the vertical wall of a log house
- Vents in timber on foundation
- Timber 200 by 200 construction nuances
- The log house turned blue, what should I do?
- How to seal cracks in cutouts from the outside
- You can live on the second floor of a log house for shrinkage
- Replace rotten logs with mortar
- A non-load-bearing log has shrunk
- Replacing logs with boards in a house project
- Vertical supports in a log house for shrinkage
- Does a large log house need recutting?
- Metal tiles on a non-shrunken log house
- Permissible gaps between timber crowns
- Gaps in log beams
- Replacing parts of rotten logs in a log house
- The logs of the log house are shaking
- The log house was poorly assembled
- The gap between the log log and the foundation
- Protect an unfinished log house for the winter
- How to save a log house without a roof
- Log finishing service
- Assembling a profiled log house in the rain
- Gaps when fastening profiled timber
- Sealing cracks in a bathhouse
- Processing timber with a blowtorch
- Butt beam - is it reliable?
- The wall of the log house is littered
- How to align protruding ends in a built timber house
- Transferring beams in a log house in height
- The corners of the log house disappear from the timber during assembly
- The log house is wet, what should I do?
- Does a log house need a fifth wall?
- How to assemble a log house 10 by 11
- Restoring a log house after a fire
- Processing of a log house made of rounded logs
- Extension of a log house when replacing the roof
- Sand under the crowns for insulation
- Methods for lifting a bath to replace the crowns
- Impregnation of the log house inside and out
- The façade of the log house leaned
- Log shrinkage - problems
- Treatment of timber against bugs
- The smell in the house is from sleepers
- How to preserve the light color of a fresh log house
- Estimate for a house made of timber 7 to 9
- Treatment of exposed ceiling beams
- Strengthening the corner of a log house
- What is the dowel pitch?
- Protection of the lower crown of the log house
- How to check the diagonals of a log house
- Which timber to choose, square or rectangular?
- Spruce and pine log house
- Sequence of work when finishing a timber house
- Insulate an aspen log house from the outside
- How to install a casing on a log house
- What to put between the crowns
- Should I trim the paws of a log house?
- What is the best way to impregnate a log house?
- Window opening in a log house - how to seal it
- Gaps in the assembled frame
- Support pillars in a timber house
- How to move the 5th wall in a log house
- Ants and the lower crown of the house
- Sanding and processing of the log house after installation
- Barked or planed log for log house
- Repairing the corner of a log house of an old wooden house
- Should window openings in a log house be closed when it is in storage?
- Consultation on the size and shape of the log house
- Questions about construction from profiled timber
- Log house and foam block on a single slab
- Preparing an unfinished log house for winter
- Longitudinal cuts in a log house
- Cracks in the ends of logs
- Should I paint a log house with tikuril?
- Strengthening the corners of the log house
- How to secure a cross beam in a log house
- Ventilation gap between insulation and frame
- Moss or tow for building a log house
- Shrinkage of a timber house
- Fifth wall in the log house
- How to raise a 6 by 6 log house
- Distance from the corner of the frame to the windows or doors
- How to cut off the protrusions of the corners of a log house
- Log house without nails
- How to clean a linden bathhouse from darkening
- Impregnation of a log house with fire-bioprotection
- Velo log house
- Questions about cutting a bathhouse after installation
- Painting a log house
- Blackness between the crowns of the log house
- Types of cutting corners of half beams or carriages
- Attaching beam supports to a log wall
- Strengthening logs in a log house 7 meters long
- How to sort through the log gables of a log house
- The beam was squeezed out of the wall
- Is a matitsa needed in a 3 by 3 m bathhouse?
- Priority work after installing the log house
- Entrance door in a log house
- Maintaining the level when assembling the log house
- The corner of the log house and the lower log have rotted
- The sequence of finishing a timber frame
- Insulation of a settled log house
- Restoring a burnt larch frame
- Quality of a 40-year-old oak log
- Permanent roof on a newly assembled log house
- Cracks in logs
- What time of year is it better to cut a log house for a bathhouse?
- What and how to make partitions inside a log house
- Ceiling beams in a timber frame
- Installation of a metal door in a log house
- The crown molding of a log house
- Questions about assembling a log house at home
- Turnkey log house for a season - is it possible?
- Arrangement of the subfloor in a rounded log house
- Common roof for a new log house and its extension
- Ventilation system in the log house underground
- How much does it cost to change the lower crowns of a house?
- Finishing the log house after shrinkage
- Reinforcement as a dowel for a log house
- What to rest the floor joists on in a log house
- Attaching timber to a log frame
- Cover an old house with a new frame
- Extension made of foam blocks to a house made of timber
- Wet lower rims of a new timber frame
- House made of sleepers
- How to cover a log house on screw piles with bricks
- How to strengthen the motherboard in a log house
- Birch log house
- Sauna log - pine or aspen
- The lower crowns of a larch frame as a plinth
- Adjusting anchors for shrinkage of the log house
- How to properly assemble a log house
- Octagonal timber frame
- Is a fifth wall needed in a log house?
- An alternative to dowels when assembling a log house
- Problems after shrinkage of the log house
- What to make partitions from in a log house
- Tongue-and-groove slabs as walls in a log house
- Insulation of the log house inside
- How to strengthen floor joists in a timber frame
- Log houses in Kolomna
- House made of timber or frame house
- Insulation of a log house from the inside
- Work plan after shrinkage of the log house
- Squeezed logs out of the log house
- Where to start after installing a log bathhouse
- Rounded log with Finnish profile
- The timber frame is spreading
- How to align the geometry of a log house
- Large gaps between logs
- Are dowels needed for profiled timber?
- Is it worth overpaying for profiled timber?
- Repairing the corners of a log house
- How to cover an unfinished log house for the winter
- The beam bends out of the log house
- Construction of a log house in the rain
- Processing and insulation of external walls of a log house made of timber
- How far can the outer ends of the logs be trimmed?
- Ceiling beams 7.5 m in a house made of timber
- How to attach a room attached to a house
- Technology for assembling a log house from timber
- Waterproofing log walls outside
- Replacement of the lower crown of an old house
- Interior finishing of the corners of the log house in the paw
- Dry brown rot in log timber
- Shrinkage of timber frame
- Roof on only installed log house
- How to fill the gaps between the log house and the outbuilding
- When to install a log house for a house
- How far can the ends of logs be trimmed?
- When should a log house be treated with impregnation?
- Cutting the end corners of the log house
- Leveling timber in a log house
- Protection of the log frame from the outside
- Replacing log walls with stone
- How to seal the gaps between the foundation and the log house
- How to cover a timber house
- How and with what to seal the gap between the foundation and the log house
- Bark on logs - to remove or not?
- Sandwich panel or log house?
- Preservation of log wood
- How to change the lower crown
- Settlement of a log house made of laminated veneer lumber
- Log house repair
- What kind of foundation is needed for a log house made of 9 by 12 m timber?
- How much timber is needed for a log house 9 by 12 meters
- Foundation for a log house with chopped gables
- When to put a roof on a log house
- How to seal cracks in a timber frame
- Log house on the spring
- Preparing a log house for winter
- Oak backing for the lower crown of the log house
- Log house repair
- Photo of a chopped log house
Construction in Moscow and Moscow region
We work with a guarantee! Wide range of construction services. Foundation, walls, ceilings, roofing, turnkey! +7 (905) 797-20-34
luxurykomfort.ru
Construction in Moscow and Moscow region
We work with a guarantee! Wide range of construction services. Foundation, walls, ceilings, roofing, turnkey! +7 (905) 797-20-34
luxurykomfort.ru
Construction in Moscow and Moscow region
We work with a guarantee! Wide range of construction services. Foundation, walls, ceilings, roofing, turnkey! +7 (905) 797-20-34
luxurykomfort.ru
Log houses and their maintenance
All questions to Semenych about construction
Semenych (author of materials)
Our site is regularly updated with interesting and unique materials and articles on the topics of lumber, building materials and works, the author's opinion and knowledge of a real coven with more than 15 years of experience are provided. There is a section - funny stories of shabashniks. If you would like to receive information about this, subscribe to our website's newsletter. We guarantee that your address will not be shared with third parties.
Apartment renovation in Moscow and Moscow region
We work with a guarantee!
Wide range of repair work. Professional craftsmen.
+7 (905) 797-20-34
luxurycomfort.ru
| Country house | Bath |
| For the dacha | Tool |
| Materials | Tales |
| Foundation | Log houses |
| Roofs | Insulation |
| Walls | Siding |
| Floors | Cellars |
| Attics | Doors windows |
| Stairs | Extensions |
| Wells | Toilets |
| Balconies | Loggias |
| Condensate | Flooding |
| Fences | Kennels |
| Sidewalk | Birdhouse |
| Adobe | Carts |
| Garages | Barn |
| Greenhouses | Bath |
| Swing | Brazier |
| Shower | Horizontal bar |
Tools for replacing lower crowns
The bathhouse can be raised above the base using jacks
What exactly is required for replacement depends on the type of repair and the chosen method. The main condition for work is clearing the foundation. The bathhouse must be raised above the base, installed on temporary supports, and then proceed with replacement.
They do this in 2 ways.
- Lifting by crane is rarely used, since repairing the lower crown takes a lot of time. This method is used when the box is removed from the foundation and moved to another area until the work is completed.
- Lifting with jacks - hydraulic or screw. These devices are placed in the corners of the bathhouse and each corner is raised one by one, placing temporary support under it. The work requires more time, but the box can remain on the supports for as long as desired.
In addition to lifting equipment, you need:
- support panels - they help distribute the load;
- bars - this is how you adjust the height of the jack;
- metal spacers - distribute the load from the moving part of the device.
You also need a shovel, a crowbar, and carpentry tools for processing logs. If the foundation is also damaged, a cement-sand mortar will be required to arrange it.
Chemical treatment
A huge number of different impregnations and mastics make novice builders tempted to cover the first crowns of a log or timber house with a thick sealing layer that completely eliminates the circulation of moisture.
The expediency of such an action is very questionable, since complete sealing will lead to the opposite effect - the log will remain stably moist and, as a result, will turn into an excellent incubator for microbiological substances.
But what is really worth doing from the operations of chemical preparation of wood for long-term use is antiseptic treatment, which minimizes the risk of biological contamination of wood.
We recommend not experimenting with the so-called “folk methods of antiseptic treatment (vitriol, old machine oil, etc.)”, since in this case there is always a risk of getting a stable source of carcinogens, emitting them, by the way, not only into the external environment, but and in the underground
In any hardware store today you can purchase inexpensive antiseptics that are certified in government laboratories and have a number of additional useful qualities (for example, almost all antiseptics can be used as a primer before painting).
Among the “ancient” methods of extending the life of the lower crowns of a log house, it is worth mentioning fumigation, which consists of burning logs in an open fire.
The essence of the technique is that when the outer layer of the log is fired, the capillary network of the wood becomes clogged, through which dangerous saturation with moisture occurs
But - what is important - in this case the effect of vapor permeability is preserved, which, by the way, is absent in many polymer sealants
Calculate the cost of painting and insulating your home right now
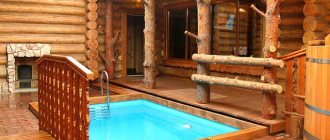
The lower crown of the bath
The lower crown of the log house is most susceptible to rotting
The lower crown of the bathhouse is most susceptible to moisture. Therefore, it often rots very quickly. The entire frame is still in excellent condition, but it has to be replaced. What to do?
First, let's determine why the lower crown of the bathhouse rots very quickly. The causes of rotting must be determined in order to take a number of protective measures even when assembling a new log house.
The healthy condition of the lower crown is influenced by the following constructive measures when building a wooden house or bathhouse, which must be done without errors:
- a waterproofing layer of roofing felt on the surface of the concrete foundation in front of the brickwork of the base. This layer of waterproofing prevents moisture from rising from below and absorbing it into the brick material. Wet brick is not the best basis for the lower log of a log house.
- the second waterproofing layer of roofing felt is placed on the upper level of the brickwork of the base. It is the roofing felt that comes into contact with the wood of the lower crown of the log house. This contact must be made correctly.
- vents in a brick base or concrete foundation in order to provide natural ventilation in the underground.
- to prevent rainwater from getting in and stagnating on the roofing felt (see point 2), it is necessary to make a protective flashing. Its design can be different depending on the chosen material. You can simply cover the joint with a flashing board around the perimeter of the log house. You can make a drain from galvanized steel or buy it ready-made and install it so that it covers the joint and, at the same time, protects the basement part of the bathhouse from rain due to a slight offset from the outer edge of the brickwork. You can make a screed with a slope from cement-sand mortar along the upper edge of the base and stick soft tiles along it.
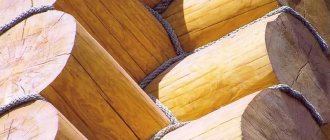
- Treat the lower rims with protective compounds in several layers
The absence of any of the above measures leads to rapid rotting of the casing.
The best way to avoid replacing the lower crowns is to make them from larch. Larch has the ability to harden (turn to stone) even more in the presence of moisture. It is not susceptible to fungi.
If it is not possible to get larch logs and in your region only pine is used for log houses, then you can compromise and find at least a larch board. By placing it under the lower crown, you can solve the problem of replacing the lower crowns in the same way if there were a pair of lower logs made of larch. The option is quite generous in monetary terms.
If you can’t get larch boards, then oak grows everywhere. Oak boards are a good alternative to deciduous boards. In addition, it is easier to replace the board than the lower crown.
Regarding the second point of protective measures: since the waterproofing from the roofing felt layer has a horizontal surface on which the lower log is laid, it is natural that water can stand here in puddles. Therefore, it is necessary to ensure that the surface of the roofing material is not horizontal, but has a slight slope to the outer sides to allow water to flow to the ground.
It's very easy to do:
- cut narrow strips of roofing felt approximately 5 cm wide
- put them 3-4 pieces together
- lay these roofing felt strips in the middle of the width of the plinth (or foundation)
- on top of them, place a layer of roofing felt slightly wider than the width of the plinth. (Usually a meter-wide roll of roofing felt is cut in half, resulting in a width of 500 mm, which is quite enough for waterproofing along the plinth (or foundation).
These additional soft “pads” will give you the following benefits:
- a soft “lining” will close the gaps that have formed between the log and the surface of the plinth due to unevenness of the lower surface of the log itself. In a normal situation, they are either left uncovered and the floor is raised above this joint so that it ends up underground. Or they are plugged with tow, but always from the outside; the joint is sealed with some kind of elastic sealant to prevent the tow from getting wet. This option is not entirely reliable. Better tightness is achieved through a soft “gasket”
- since in the middle it will be higher due to 5 layers of roofing material (4 narrow strips and 1 layer of a wide main strip), then the surface of the waterproofing layer will have a slope for water to drain from its surface.
Even with this design of roofing felt waterproofing, it is necessary to cover the lower crown and the upper part of the base with a galvanized or painted steel drain to prevent any moisture from getting under the lower log (see paragraph 4 of protective measures).
Why do the lower crowns rot faster than others?
Wood rotting is a sign of constant moisture and inability to dry. The lower crowns of the bathhouse are in the most risky position - they are constantly in contact with ground or rain moisture, and a wet base.
If the construction technology is not followed, and there is no waterproofing separation of the lower logs from the concrete base, the lower part of the frame will almost always be wet.
Another negative factor is waste water, which is drained directly onto the floor. Many baths are not equipped with a drainage system, and waste moisture is poured directly onto the floor. Through the cracks between the flooring boards it flows onto the ground and is absorbed into it.
However, over time, the top layer of soil silts up and water stops flowing into the ground. A puddle appears, which remains under the floor of the bathhouse almost constantly. For lower crowns, this is a very dangerous condition, since water evaporates and condenses on all surfaces. The logs begin to rot, but this process is invisible from the outside, which is extremely dangerous.
Expert opinion
Lovkachev Boris Petrovich
Bath master who knows everything about steaming
Another reason for rotting of the lower crowns is the lack of protective treatment. Many users start building a bathhouse without thinking about applying protective compounds - impregnations or external materials. As a result, after some time the lower crowns begin to show obvious signs of rotting and require replacement.
Choosing wood for the bottom trim and first crown
The question of choosing a tree is quite simple - it is larch. Anyone who can afford to make the lower crown of a country house from this tree will be spared from further problems with its durability. The fact is that larch, even being completely in water, only becomes stronger over time. Even the builders of Venice knew about this property of larch. The piles of the houses of this city, which is almost entirely in water, are made of larch and have been in service for hundreds of years.
Rules for the design and processing of the lower trim and the first crown
If you cannot find larch for laying the first crown of a garden house, then for other types of wood you should pay attention to the basic rules for constructing a crown and its processing, which include the following
- waterproofing from the foundation;
- cutting off atmospheric moisture using tides;
- surface treatment with antiseptic preparations;
- end processing.
Waterproofing the foundation is half the success
One of the main requirements when laying the first log or beam on the foundation of a garden, country house or bathhouse is waterproofing this log from the top of the foundation. Usually builders use roofing felt for this purpose, but its service life does not exceed 5 years and the durability of the lower log or timber with such insulation raises reasonable doubts. The best option for this purpose would be Technoelast or Uniflex, or their more economical option - Bikrost. The service life of these multilayer coatings far exceeds the service life of roofing felt.
The second task facing house builders is to cut off atmospheric moisture directly from the point where the lower log or beam touches the foundation. If such measures are not taken, waterproofing the log from the foundation simply loses its meaning. Solving this problem does not pose any difficulties; it is enough to install wide ebbs along the entire perimeter of the country house or bathhouse.
Let us separately dwell on the habit of many builders of placing moss under the lower crown. Its antiseptic properties have been known for a long time and it seems that its use in this case is justified. However, this overlooks the tubular structure of moss and its ability to absorb moisture from the atmosphere during rainy periods of the year. The author sees that this property negates its positive qualities, and the use of moss for additional insulation of a log or beam from the foundation does not seem entirely justified.
How to prevent rotting
The main cause of rotting is construction errors. If they are allowed, then even industrial impregnation will not provide reliable protection against rot and mold. During construction it is necessary to provide:
Drainage of water from the foundation. Water should not accumulate under the floor or near the bath; a good drainage system is required.
Water should not accumulate near the bathhouseSource vodolov.ru- Ventilation holes. Vents will prevent moisture from accumulating. To prevent heat from escaping through them, they are closed during washing.
- Window in the washing room and steam room, wide doors. Through them you can quickly release accumulated steam after washing.
- Quality of materials. A tree without cracks, chips, or signs of rot will remain healthy longer.
- Oven size. It must match the size of the bath. A stove that is too small will not provide the required temperature in the steam room, but will create a humid and warm environment in the corners and under the floor.
- Quality of flooring. If the boards fit tightly, water will not be able to get under the floor.
- Distance from shelves to walls. There should be no gaps between them; this is a direct path to sources of rot.
The bathhouse should be regularly ventilated and cleaned using chlorine cleaners, and the boards should be inspected for rotten areas. This will ensure maximum safety of wooden structures.
This video shows how to clean a sauna perfectly.
Why do logs rot in bathhouses?
The wooden floor in the bathhouse is pleasant underfoot, retains heat well, looks and smells nice. But the conditions for boards in this building are harsh. High temperature and humidity create conditions for harmful processes - rotting and fungal growth. Rotting is visible on the floor boards, but if the pathological process has affected the joists, the problem will not become noticeable soon.
Causes of log rotting:
- Gaps in the floor through which water penetrates under the boards;
- Poor ventilation, lack of windows;
- The oven is of insufficient size and does not provide the required temperature;
- Improper drainage around the building;
- Presence of rotting areas on floor boards.
If the owner does not carefully monitor the wooden floor in the bathhouse, rotting can destroy the structure in 2-3 years.
Signs of rotting logs:
- Crackling and creaking of the floor with intact boards;
- Mobility of boards for no apparent reason;
- The smell of rot and mold that remains even after cleaning.
Rotten joists do not support the floor Source ytimg.com
Rotting beams release harmful substances into the air, this process intensifies at high temperatures. Entering such a bathhouse does not make a person healthier, but harms the respiratory system and skin. If the process has gone too far, the joists may break under the weight of people at the most inopportune moment.
Complete replacement of the lower crowns
Major repairs in the form of a complete replacement of the lower crowns include raising the frame, removing rotten logs and installing new crowns. The work is carried out in the following order: preparatory activities, replacement of the lower crowns and beams.
Preparatory activities:
- maximum lightening of the entire structure (removal of furniture and plumbing, removal of doors and windows, dismantling of the floor and roofing);
- dismantling stoves and fireplaces if they do not have their own independent foundation;
- separation of the chimney from the ceiling and roof, if the stove is not dismantled;
- disconnecting floor joists if they are embedded in the lower crowns to be replaced;
- shutting down all communications.
To secure the crowns along the entire perimeter of the house, boards with a thickness of at least 3 cm are nailed vertically at a distance of 45-60 cm from each other. You can fasten adjacent crowns using metal staples. Fastening is provided on both sides of the wall (outside and inside).
To lift the log house at a distance of 60-80 cm from the corner of the building, an opening 35-45 cm wide is made in the foundation and part of the logs is cut out to form a niche for installing a jack. The following lifting technology can be used:
- With one jack. Each corner is raised in turn.
- Using 2 jacks. First, one wall is raised completely, and after it is fixed, the opposite one.
- On 4 jacks. The entire frame rises at once. This method eliminates damage to the frame, but requires coordination of the operation of the devices.
After raising the corner of the log house to a height sufficient to remove one log, a support is placed under the first crown, which cannot be replaced, mounted on 2 posts. This way the frame is fixed at all lifting points, and the jack is removed.
Unusable logs are knocked off the nigels and removed outside. Then new logs are installed. They are immediately held together with nigels. A jack is again placed under the lower crown, which is used to compact the new logs.
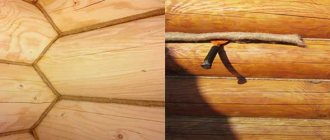
Before completing the work, the foundation is repaired if necessary, the waterproofing between the base and the base is restored, and a new filling element is installed. After this, using jacks, the frame is slowly lowered to its original place, secured with pins.
After the log house is completely lowered, all the cracks between the logs are caulked with moss, tow or jute. The thermal and waterproofing of the base is restored.
Types of protective compounds and requirements for them
It should be immediately noted that after treating the walls with a protective composition, the appearance of the building should not deteriorate
It is important that the wood retains its natural appeal. The protective layer should not negatively affect the technical characteristics of the wood - air permeability should remain at the same level
Also, the protective layer must ensure that the wood can withstand atmospheric influences (precipitation, sunlight, temperature changes), fire and insect pests.
Treatment with impregnations allows you to reveal and emphasize the wood grain
All these issues cannot be solved only by treating the walls with antiseptic compounds. Only comprehensive treatment will help. Using the following means:
- Antiseptics that prevent the appearance of mold and mildew.
- Fire retardants, which increase the fire resistance of wood. During processing, the substance penetrates the top layer of wood and is released when the surface is heated, forming a protective film.
- With the help of varnishes and paints, wood can be protected from atmospheric moisture and sun. To preserve the wood texture and shade, it is recommended to use colorless compounds. Sometimes a colored pigment can be added to enhance the tone of the wood.
The use of protective compounds and coatings allows you to preserve a wooden frame in its original form and extend the service life of structures. There is no other way to preserve the shade and texture of wood. Painting with alkyd compounds and varnishing is only a temporary measure. At the same time, the “breathing” ability of wood with repeated staining is significantly reduced.
The treatment of bath walls is carried out in stages:
- First, the walls need to be prepared - clean and sand the outer layer. At this stage, the damaged wood is removed, the surface becomes smooth - this will allow the impregnation to be applied evenly and ensure its maximum penetration into the structure of the material.
- Then the walls are completely treated with protective compounds several times. Each layer is applied after the previous one has completely dried.
- The last layer is designed to protect the wood from external influences (paint, varnish, stain).
Initially, the logs from which the bathhouse will be built are treated with protective compounds - antiseptics. When the log dries to the optimal moisture content, substances are applied to its ends that prevent deformation and cracking of the natural building material.
Primary processing is carried out at the stage of assembly of the structure
It is a mistake to think that this processing is sufficient. Indeed, during the construction process, logs or beams are subject to adjustment and trimming, so the finished structure also needs careful processing.
But these are only theoretical recommendations. In fact, the protective layer weakens much faster and this depends on the climatic characteristics of the construction region.
How to impregnate the lower crowns in the frame of a bathhouse - timber and logs?
A log bathhouse is an ideal structure for improving your own health. However, unlike other wooden structures, the log house from which the bathhouse is made will be subject to large temperature changes and influences, as well as high levels of humidity. Together, these two factors, if protective measures are not applied, will lead to the destruction of the wooden structure.
Enemies of logs and bath beams
It is worth emphasizing that the most dangerous enemy that a log bathhouse can face is rot, which, if it appears in at least one place, can destroy the structure completely. In addition to rot, experts identify fungus, as well as uncontrolled exposure to insects. At the same time, the most dangerous place in a log house is the lower crowns, from which, as a rule, the process of attack of harmful factors on the tree begins.
However, today there are protective products on the domestic market, using which you can forget about any dangers to your bathhouse for many years. These products are presented by the Neomid company, which for decades has been supplying the market with its developments that protect wood from problems of various levels. Therefore, to help you make the right choice, we will tell you about Neomid’s impregnations in this article.
Neomid 430
This product on the domestic market positions itself as a preservative, environmentally friendly antiseptic that helps preserve log wood in its original form for a long time. Essentially, Neomid 430 is an impregnation that penetrates deeply into the structure of the wood and creates a protective layer that protects the wood from insects and fungal growths. Note that a special feature of this impregnation is its high resistance to precipitation. It is for this reason that Neomid 430 can be used to treat the lower crown of a wooden house and a wooden bathhouse, both outside and inside.
Wood processing with folk remedies
When figuring out how to treat the lower crown of a wooden house or bathhouse, pay attention to folk remedies that have become classic. Their advantages include relatively low cost
However, some processing options cannot be called safe.
1. Copper sulfate. Used for logs with natural moisture. The log for the lower crown is installed on the end, strictly vertically. A rag soaked generously in a solution of copper sulfate is placed on the upper end and covered with a plastic bag. The cloth should be moistened regularly. After some time, the solution of copper sulfate will pass through the capillaries of the wood (this will be helped by the flow of sap in a freshly cut log) and will saturate the log through and through. This can be easily checked by examining the bottom end. Copper sulfate cannot be used to treat the crowns of bathhouses and saunas - when heated, it releases toxic substances that are dangerous to human health.
2. Finnish way. This is how wood structures were traditionally protected in northern Europe, including the lower crowns and the back of the floor in saunas. To make the mixture you will need 800 g of flour (any type), 1.5 kg of slaked lime and copper sulfate, 400 g of table salt. At the first stage, flour is stirred in water, achieving the consistency of sour cream, five liters of heated, but not boiling water are poured in, stirred and filtered. Then the resulting substance is heated and salt, vitriol and, lastly, slaked lime are added. The mounted lower crown is coated with the resulting composition twice with intermediate drying. Such protection will protect the wood from rotting for 10-15 years.
3. Logs or beams of the lower crown are impregnated with oil and propolis. Then thoroughly rub with natural wax. This is a labor-intensive and expensive processing option, but has proven itself over many generations.
4. If construction is carried out from coniferous wood, spruce resin (resin), as well as birch tar, are suitable for processing the elements of the lower crown. The advantage is protection not only from rotting, but also from damage by insects; the disadvantages include:
- unpleasant smell of tar and stickiness of resin;
- impossibility of grinding rims;
- inability to subsequently paint or varnish the treated surface with wood;
- fire hazard – tar and resin are flammable substances.
Typically, only the surface of the crown in contact with the foundation or ground is treated with tar or resin.
5. Tar, bitumen. The resin is heated, mixed with diesel fuel, and the resulting composition is coated with the elements of the lower crown. The reliability of the protective layer has led to the fact that today manufacturers offer a wide range of bitumen-based impregnations and mastics.
6. Drying oil and various types of oils. They protect wood well from moisture. Before application, it is recommended to heat the material to increase fluidity. Processing in several layers with intermediate drying will increase the reliability of the result.
7. Workout. Treating the crowns with used motor oil is a cheap and easy option. Mineral oils are an effective water repellent, and the soot contained in motor oils serves as an antiseptic. The composition is applied heated in several layers, and the previous layer should be allowed to absorb well. The disadvantages include unevenness and insufficiently high quality of impregnation, as well as the unattractive appearance of the treated logs. They cannot be painted in the future.
8. Firing with open fire. An ancient way to protect wood from rotting is to roast (“fumigate”) logs over a fire. This is where the name “hut on chicken legs” came from. Carefully scorch the timber or log using a blowtorch - the burnt layer will clog the capillaries through which moisture could enter the wood.
How to treat the lower crowns of a log house, a bathhouse made of timber - prices and a review of the best products
The lowest crown of a bathhouse or wooden frame, least protected from moisture, rots first. This can be prevented by timely processing of the first link. This article is for those who want to save the lower crown and want to do it right. How to process the lower crown of a bathhouse or a wooden log house made of timber, and how to do it correctly, we will talk below.
Why does the lower crown rot?
Without understanding the reason, it is impossible to prevent rotting of the lower crown and extend its service life. And replacing this link is a painstaking and costly work that requires special knowledge and skills. By determining the cause of rotting, even at the stage when a house is being built from timber, undesirable consequences can be prevented. The main reasons include:
- Broken or improper waterproofing between the concrete pour and the brickwork of the top of the house foundation. Typically, roofing felt is used for these purposes. This way, moisture does not rise up through the pores of the brick, and a damp base under the first crown of a bathhouse or log house is not the best option.
- Broken or improperly installed second layer of waterproofing between the bottom log and the foundation surface.
- “Bleeding” has not been done, and the foundation and lower sections are not ventilated.
- Precipitation fell and stagnated on the roofing material, since there is no protective ebb. It is performed in different ways, the easiest way is to close the joint around the perimeter with a board or rounding. You can purchase a ready-made drain and install it on the basement of the house foundation by slightly extending it beyond the masonry. Another option is a concrete screed along the top of the foundation with a slope from the log house, covered with any roof on top.
- Insufficiently processed lower crown.
The absence of any of the above factors will lead to rotting of the crown of the bathhouse frame.
What crown treatments are best to use?
There are folk ways to treat the lower crown of a bathhouse, and modern compositions such as: Senezh, Belinka, Tikkurila. For greater savings, it is better to use folk and proven means, but the appearance of the treatment in this case will not be the best. For something more decorative, traditional ones are suitable.
The second option is recommended by professionals, as it is safer and more proven. Of course, when purchasing expensive coverage, no one is immune from fakes, the quality of which is not worth talking about. For this reason, most people prefer the old-fashioned methods of processing the first link of a bathhouse and building a house from laminated veneer lumber.
Let's talk about both in more detail.
Folk remedies
- Use a solution of copper sulfate.
To do this, place a log of natural moisture on its end, and tie a bag with a rag heavily soaked in copper sulfate on top. The rag should be in contact with the end of the beam. Under the influence of natural movements of juices inside the wood, the timber will be saturated with salt solution and protrude from below. The rag must be soaked all the time so that it does not dry out. After this, it is well dried under a canopy. Craftsmen suggest soaking the log in a bath of copper sulfate. Let us immediately make a reservation that this method is not safe for health. When heated, copper sulfate releases toxic fumes to humans. - Treat the lower crown of a bathhouse or at home with propolis and oil, then rub it with wax. The method looks a little fantastic, but it is used in villages and is time-tested, although labor-intensive.
- A famous processing method in the West and among the Finns.
It is prepared from ingredients available to everyone: flour (rye or wheat) - 750-800 g, copper sulfate - 1.5 kg, table salt - 400 g, lime (slaked) - 1.5 kg, diluted in 10 liters of water. Cooking: Add water to the flour, stirring constantly, until it becomes sour cream. Heat 5 liters of water until it boils, add water, stirring. Then everything is mixed and filtered. The finished mixture is heated, stirring constantly, adding vitriol and salt. Slaked lime is added last. You need to cover the crown with a warm composition in 2 layers, after the first one has completely dried. Experts say that such treatment at home is enough for 10-15 years. This composition can be used to treat even the bottom of the floor in a bathhouse and entire lumber when building a house from profiled timber. - Coniferous timber is the least susceptible to rotting and can be treated with birch tar or spruce resin.
Such compositions will protect the wood from bugs, but have a strong unpleasant odor; in addition, spruce resin is sticky. After this treatment, the crowns of the house cannot be painted or sanded. This is also a fire hazard, since these substances are highly flammable. Therefore, it is customary to treat with such compounds the part that comes into contact with the ground. - In rural areas, the lower link of a log bathhouse can be treated with motor oil treatment.
The biggest advantage of this treatment is its low cost. Apply it in a heated or cooled state in several layers, allowing the previous one to be well absorbed. 90% of this composition consists of mineral oils, and they repel water well. The soot contained in the used oil protects the logs from the sun and is an antiseptic. But it has already been proven that impregnation in this way is not of sufficient quality, since it does not penetrate the wood evenly. In addition, this coating has a mourning color. - The method of treating timber with bitumen or tar has not become a thing of the past. Underground structures are treated with such compounds heated and mixed with diesel fuel. Today, manufacturing companies offer modern bitumen impregnations and mastics.
- Drying oils and oils, they can only conditionally be classified as folk, since these compositions are the basis of varnishes and modern paints. They last a long time, do not peel or crack. For deeper penetration, it is better to apply warm. This way they will be more fluid.
- Moisture penetrates best from the ends of the link; to prevent this, the ends are “riveted.” To do this, tap the ends of the bathhouse logs with a rubber or wooden hammer. This treatment will help the wood stay dry longer and prevent it from cracking.
- Burning the surface of the timber with a blowtorch.
This method is not safe, but a thin layer of burnt wood serves as a good antiseptic and destroys the capillaries through which moisture enters the wood.
Traditional processing agents
This type of treatment includes all kinds of drying oils, impregnations, and coatings. Let's talk about some of them in more detail.
"Senezh"
Produced by SENEZH-Preparaty LLC. Has been tested and certified by Rospotrebnadzor of the Ministry of Health and Social Development of the Russian Federation. Fire-retardant composition produced in polyethylene canisters of 5, 10, 65 and 1000 kg. Acts as a comprehensive protection for wood, including the lower crown.
Do not use after varnish, drying oil or any other water-repellent composition. Included in group 2 for the effectiveness of fire protection according to NPB 251-98. The protection period is up to 20 years. Does not change the color of wood, does not interfere with air penetration. Has no smell.
It has penetrating properties and accumulates in the inner layers of wood, preventing the penetration of moisture and fungi.
Treatment: Apply to cleaned wood with a roller, brush or spray at a temperature not lower than +50C. You need to apply 2-3 layers, allowing the previous one to dry for 20-40 minutes. Do not treat a frozen link or mix it with other impregnations. Must be mixed before application. Consumption: 600 g/m2 (1.6-1.7 m2/kg).
"Belinka"
Issued by the same name. Has certificates from the Holzforschung Protection Institute. To protect the crown use Belinka Base.
Impregnation – Belinka primer is a deeply penetrating composition of alkyd resin and biocides. Protects wood from fungus, pests, blue stains, and moisture. Creates a protective biocidal layer on the surface. Unlike other compositions. has several types of biocides, which increases the level of protection several times. Available in containers of 1, 2.5, 5 and 10 liters.
Treatment: Apply with a roller or brush to a cleaned surface in 2 layers. Drying time for each layer is 6-12 hours. Application temperature from +10C. It can also be used at sub-zero temperatures, but it will take more than 12 hours to dry. Consumption: 1l / 5-10m2.
"Tikkurila"
Finnish manufacturer. The company has been operating in the paint and varnish and antiseptic products industry for more than 100 years. To treat baths and wooden houses from moisture, fungi, blue stains and mold, use the Tikurilla “Vinha” and “Valti” product lines. These lines are specially designed for unfavorable climatic conditions. They can be used for both external and internal work.
Products that form a protective film on wood are produced under the names “Color Extra” and “Color Satin”. Absorbing protective lines “Aqua Color”, “Color”, primer “Pochjuster”.
Each of the listed coatings are antiseptics and protective agents against moisture and rot. All of them can be colored or coated with wood paints. Available in 2.5, 5, 10, 15, 20, 25, 50, 100 liters. The protection period is 5-10 years.
Treatment: Apply to a cleaned surface using a brush or roller in 2-3 layers. Application temperature from +50C. Each layer should dry for 2-3 hours. Water-based antiseptics can be applied using a sprayer, as shown in the video:
Price for traditional coatings
You can purchase coverings for the crown of a bathhouse or home at any hardware store or market, and even on the Internet. Be sure to ask the seller to show the certificate for the purchased product. Due to the high popularity of these protective products, counterfeits that are unsafe for health began to appear on the markets.
It is easy to distinguish a fake from a quality product:
- Too low price.
- Poor quality packaging.
- Lack of accompanying documentation.
For the convenience of readers, we present the average price for coatings in Russia for 2014 in the form of a table:
Brand and name of coatingWeight, kgPrice, rub.
| "Senezh Ognebio" | 5 | From 310 |
| 10 | From 510 | |
| 65 | From 3 300 | |
| "Belinka Base" | 1 | From 465 |
| 2,5 | From 1,075 | |
| 10 | From 3 785 | |
| Tikkurila paint Vinha | 0,9 | From 450 |
| 2,7 | From 1 800 | |
| 9 | From 3 670 | |
| Tikkurila Valtti-Pohjuste | 0,9 | From 440 |
| 2,7 | From 1 700 | |
| 9 | From 3 580 |
As you can see from the table, Senezh will be the most profitable option for processing the first crown of your bathhouse or home. Tikkurila is the most expensive. Quality in this case depends little on the brand. Which treatment of the first crown to use will depend on your purchasing capabilities. Professional products are safer and quality tested.
Source: https://o-bruse.ru/sruby-iz-brusa/chem-obrabotat-nizhnie-vency
Method #1. Replacing the lower crowns in parts
There are situations when the logs in a log house are partially damaged and do not need complete replacement. In this case, it is enough to remove the rotten area by putting in its place a “patch” made of wood, brick or other materials.
The technology for partial replacement of the lower crowns is carried out according to the following scheme:
- The affected area is cleared of external cladding (siding, lining, etc.).
- Determine the boundaries of rotten wood, mark them with a chisel or knife.
- They retreat from the intended boundaries 40 cm in both directions and install screeds. They are necessary so as not to damage the structure during the removal of rotten wood fabric. For screeding, use bars 40 mm thick and 2-3 crowns high. They are fixed on both sides of the wall, on the sides of the damaged area (4 bars in total). Ties are required if a significant part of the crown is to be removed at a time. For small replacements they are rarely used.
- Cut out the rotten part of the log with an electric or chainsaw. First, a through cut is made on one side of the damaged area, then on the other. The sawn part is removed. For a tighter fit of the insert, notches about 20 cm wide are made along the edges of the opening.
- The opened lower part of the second crown is cleaned and leveled to a flat state (with a chisel). It and the side walls of the resulting opening are treated with an antiseptic.
- Roofing material is laid on the foundation in 2 - 3 layers.
- An insert is made to cover the opening. A section is cut from a log of the same diameter as the logs being repaired. The length should be 1 - 2 mm less than the size of the opening. The insert is treated with an antiseptic.
- Install the insert into the opening and, if necessary, hammer it in with a sledgehammer.
- The gaps between the frame and the insert are carefully sealed with moss, tow, and jute.
Using this method, you can replace not only damaged logs, but also the entire lower crown. To do this, parts are gradually cut off from the crown, replacing them with new ones. The process is quite painstaking, but it allows you to do without lifting the log house on jacks.
You can also replace the lower crown with brickwork. In this case, parts of the damaged log are cut out sequentially, and bricks are laid on the mortar in the resulting openings. Gradually, brickwork will replace the entire lower crown.
How to protect the lower crowns from rotting?
Replacing the lower crowns is a necessary measure, the need for which is the owner’s fault. If he had taken care of the safety of the structure in a timely manner, such problems would not have arisen.
The most effective protection options are considered to be:
creating an air gap between the soil and the lower parts of the log house. To do this, use columnar or pile foundations (in particular, you can lay the lower beam or log on posts made of cinder blocks, or install the log house on a support made of screw piles);
building a higher base that is not hidden under a layer of snow in winter. This ensures that the lower logs are always dry;
laying waterproofing between the concrete base and the lower logs. Use a double layer of roofing felt, fiberglass or other impermeable materials;
using larch logs or timber as the lower crown.
All preventive measures come down to knowledge and compliance with construction technology. For unprepared site owners, it should be an immutable rule to carefully study the rules and features of constructing structures made of wood - in addition to the bathhouse, you will need to do a lot of work with this material, and special knowledge will help save time and money.
When is it necessary to replace the lower crowns?
If a wooden frame house requires major repairs after 50-60 years of operation, then its lower crowns (basement part) may fail much earlier. Accelerated destruction of wood occurs for the following reasons:
- Rotting as a result of frequent and prolonged direct contact with sedimentary and flood moisture, the release of groundwater, the accumulation of penetrating moisture and condensation.
- Damage by microorganisms (fungi, mold, bacteria), insects (ants, bark beetles, etc.) and various rodent pests.
- Destruction under excessive loads.
- Mechanical damage of various types.
The following factors contribute to the appearance of these destructions:
- Absence or poor quality waterproofing between the foundation and the plinth, as well as on the outside of the lower part of the wall.
- An improperly organized drainage system, which causes the accumulation of sedimentary and flood water, as well as moisture formed when snow melts.
- Lack of foundation ventilation (vents or vents).
- Violations during construction - use of low-quality wood, incorrect choice of log diameter, use of undried wood, insufficient antiseptic treatment and anti-rot impregnation of wooden elements, incorrect calculation of loads, violation of the rules for laying the lower crowns.
Neomid 430 eco
Neomid 430 eco is a non-washable antiseptic. It is ideal for treating the lower part of a house in difficult conditions. This product is effective, strong, and will provide treated crowns with protection from insects, beetles, fungi, mold and all other types of wood pests for up to 35 years. Neomid 430 eco can also be used to treat wooden surfaces indoors, thanks to its safe composition. But it is worth taking into account that after application this product tints the wood in a greenish tint, which subsequently changes to a brown color. It is available in concentrated form, which allows you to increase the purchased volume almost 10 times by diluting it with water.