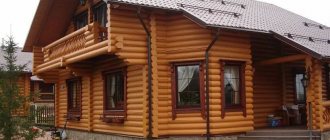
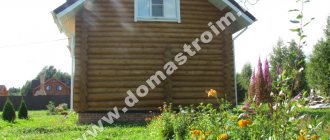
Since garden houses are not intended to be used as all-season suburban housing, but only for staying there during the warm season, their designs are usually lightweight. As a rule, such buildings are either ordinary “frameworks” or cottages built from sip panels.
Another type of building used in the construction of garden houses is self-supporting structures made of tongue and groove boards.
- What is a self-supporting tongue and groove house?
- How to insulate a house made of tongue and groove boards
- Comparing a tongue-and-groove cottage with alternatives
- Price issue
- Environmental friendliness
- Thermal characteristics
- What you need to know about the construction of garden houses from tongue-and-groove boards
- Foundation
- Thermal insulation
Naturally, frame houses also consist of such boards, but in this case they serve only as cladding.
What is a self-supporting tongue and groove house?
For its construction, a tongue and groove board with a thickness of 28 to 90 mm (very rare) is used. What is the essence of the design? Unlike a “frame”, where rigidity is provided by a frame made of timber beams, which, in fact, takes on all the wind and snow load, in a house made of tongue and groove boards, rigidity is achieved thanks to recuts. That is, perpendicular to the connections of all walls. Roughly speaking, the structure is somewhat reminiscent of a house of matches glued together, which we assembled in childhood. So, the more of these perpendicular intersections, the stronger the structure will be. In any case, the house will not rattle when the doors are closed, for example.
Doors and window frames
The installation of doors can begin after assembling 56 crowns. There are strict rules for opening doors and windows. Doors always open outwards. Windows of any type: tilt-and-turn, rotary, hinged - open inward.
Windows and doors can be fully adjusted approximately 23 weeks after the home is installed. During this time, all its parts should sag and become fixed. Double doors and door frames are delivered disassembled, so they are assembled directly on the construction site. Door frames are placed in the prepared opening with force. For double doors, the door leaf should be mounted on hinges. Single-leaf doors are put into place after the door frames and door panels are installed.
How to insulate a house made of tongue and groove boards
A garden house is most often used in the warm season, so there is no need to insulate it as such. In this case, it is enough to simply insulate the board from blowing by covering the cracks with acrylic sealant, for example, or caulking.
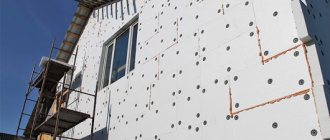
By insulating the walls of the house more thoroughly, it can be easily turned into an all-season cottage . We make a sheathing from wooden blocks and put thermal insulation material inside (ecowool, mineral wool, etc.), we hide all this under siding or any other finishing material.
Comparing a tongue-and-groove cottage with alternatives
As already mentioned, an alternative to garden houses made of tongue-and-groove boards is a timber frame house or a structure made of sip panels. Let's take a closer look at the features, advantages and disadvantages of each of them.
We will evaluate them based on criteria such as cost, environmental friendliness and thermal characteristics.
Price issue
The cost of construction is the most important issue for anyone who has decided to acquire country real estate, even a garden house. Naturally, the price of a set of lumber for a house directly depends on the complexity of the design and configuration of the future house. One more nuance - one-story houses always cost a pretty penny more than two-story houses , for example. The foundation also makes its contribution to the overall construction cost.
So, without taking into account the cost of assembly work and foundation construction, a square meter of a house made of tongue-and-groove boards (in one layer and without insulation) will cost from 6,000 to 10,000 rubles.
A garden house made of sip panels will cost no more than 6-8.5 thousand rubles. Well, the “framework” will cost between 5-8 thousand rubles.
Disadvantages of building material
- Fire hazard . All wooden buildings are susceptible to fire. The structure is destroyed in a short period of time without the possibility of restoration. To avoid fire, it is necessary to treat the tongue and groove timber with a chemical composition. Sometimes this is done during production. However, the presence of a protective layer does not provide an absolute guarantee. Following fire safety procedures is mandatory.
- Duration of shrinkage . The finished structure shrinks completely in 6 months. You will have to wait a long time before starting finishing work.
- Deformation . Many factors can affect the quality and service life of a material: selection of low-quality workpieces during production; improper drying; errors made by workers during the construction of a building. Due to these reasons, the timber dries out and deep cracks form. If the problem is not solved, external influence will lead to complete destruction of the structure.
- Regular care . To extend the life of walls and prevent exposure to negative factors, it is necessary to regularly care for your home. Once every 5-7 years, re-treatment with chemical compounds is required to protect against fire, natural phenomena, mold, mildew, and insects. It is necessary to periodically check the tightness of the fasteners. With proper care, the structure will last 50-100 years.
Environmental friendliness of houses made of tongue and groove boards
Since all three types of buildings are wooden, and wood is known for its naturalness, each of the options under consideration receives a plus. However, there are nuances here too.
- The tongue and groove board is completely environmentally friendly. Wood not only emits ethereal fumes that are beneficial to the human body, but also “breathes.” So the air in such a structure will circulate perfectly. The tongue and groove board has high vapor permeability.
- Sip panel is another matter. Its environmental friendliness is somewhat overshadowed by extruded polystyrene foam. But since it does not directly contact the atmosphere, its harmful effects are minimized.
- A frame house is also theoretically not so environmentally friendly from the point of view of using OSB as internal cladding. Its formaldehyde resins can emit fumes that are at least allergenic. However, the third generation OSB used today fits well with sanitary standards.
Putting up walls
The walls are installed in accordance with the attached diagram and in the specified sequence. First, the half-pieces of the front and rear walls are assembled into place. They are attached to the foundation beam using screws.
Next step: installing beams for the side walls. The first perimeter of the parts should overlap the beam for the foundation, i.e. the parts should protrude through the beam by approximately 35 mm. This protects the house from rainwater. After installing the first perimeter of the parts, it is necessary to control the equality of the lengths of the diagonals. Otherwise, you will need to install the parts again. The wall parts are installed into each other with force, and even using a hammer block. Also, don't forget that it's time to start installing the door and windows.
Is it warm in a tongue and groove house?
We have heard about the wonderful properties of wood to retain heat, but wood itself is not capable of providing proper thermal insulation. And even more so if we are talking about buildings made of boards or panels. Of course, this cannot be done without additional insulation.
- We have already talked about how to insulate a house made of tongue and groove boards. Meanwhile, it is necessary to understand that the thickness of the board itself, as well as the type and thickness of the insulation used, are also important. Even in warm regions, to ensure a comfortable temperature in the house, the thickness of the board used in construction should not be less than 40 centimeters (according to sanitary standards).
- From the point of view of their ability to retain heat, sip panels are simply ideal structures. Such designs did not just live up to the glory of “thermoses”. It's all about the insulation between the slabs. For comparison, the heat requirement per square meter of area in such a house is at least four times lower than what was provided for by Soviet standards for ordinary city apartments. No more than 30 watts per square meter.
- Thermal insulation of frame houses is provided immediately. The insulation is placed in the gap between the outer and inner cladding. This insulation is quite enough to ensure a comfortable temperature inside the garden house at air temperatures up to 25 degrees below zero.
Where and what to bet on
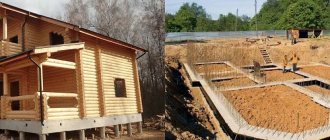
The load on the ground from a sheet pile house is 60-70% less than the load on a frame house of the same dimensions. Therefore, areas with weak soils, for example, swampy or sandy soil with a high groundwater level, are not dangerous for such a house. Any foundation is suitable for it, even a flat concrete base or paving slabs. The main condition for the foundation is that it is horizontal, so that the house stands strictly vertical.
Even when constructing the simplest (for example, temporary) foundation, excavation work is necessary. This includes removing turf, excavating soil (primarily clay), compacting, backfilling with gravel and a sand cushion. The top edge of any foundation should protrude at least 10-15 cm above the soil level.
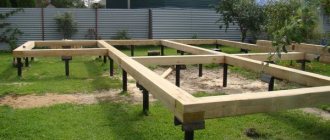
There should be sufficient ventilation holes under the floor of the house. The pitch of the foundation supports for the beams should be 50-60 cm. The beams for the subframe, impregnated with a special anti-rotting solution, are laid on the prepared foundation at an equal distance, in accordance with the layout diagram. Before screwing the timber into a solid supporting structure, its layout must be checked again. To prevent displacement under the influence of wind load, the beams are attached to the foundation with metal corners.
Foundation for garden houses
Most often, developers propose building a regular columnar foundation as a foundation for a garden house made of tongue-and-groove boards. That is, the foundation is made of concrete blocks 20 by 40 centimeters. Considering the lightness of the structure of the house itself, such a foundation is quite sufficient . But there is a nuance. It often happens that during the winter the walls of the house become deformed and the doors jam. This is a direct sign of weak structural rigidity. Due to soil heaving, concrete supports can change locations, thereby affecting the geometry of the load-bearing walls of the house.
As an alternative, a pile or strip foundation is suitable. The piles fastened together with a steel channel will add the missing rigidity to the entire structure of the house made from tongue-and-groove boards.
Thermal insulation of a house from sheet piles
As already mentioned, it is optimal to insulate such a house using the “double tongue” technology. We make the walls of the house from boards in two layers with a gap between them. This gap will serve as a reservoir for insulation and ventilation. When thermally insulating a house made from tongue-and-groove boards, film is not used, as when insulating any other wooden house. The fact is that such a vapor barrier is fraught with the accumulation of excess moisture and, subsequently, rotting of the board. Ecowool is used as insulation for such structures, which has good thermal insulation and vapor permeability . But this is not enough. Additionally, the cracks between the boards must be covered with sealant, otherwise the house will be blown out.
Ideal “shed” for 6 acres
When the craftsman was faced with the question of building a shed, it turned out that it needed to be combined with an outdoor toilet, his wife needed a place to store utensils, and he himself needed a small workshop. The result of the deliberations was the decision to build a multifunctional utility block - all three rooms will be on the same foundation and under a common roof. I decided on the foundation right away, choosing a shallow-depth tape as a reliable, durable and relatively budget-friendly solution. And with the walls I had to “rack my brains.”
Dmitr173 FORUMHOUSE member
Walls. This is where I broke my head - a banal shed made of four stakes covered with boards did not suit me. If you want to hang a shelf inside, the nails will stick out; if you put it on the shelf, it can tear off the wall board. And yet, suddenly the guest will have to spend the night, the guest will look at the world through the cracks in the walls at night. The second half put forward a condition on saving energy resources, that is, all rooms of the future shed should have natural lighting. The best option was found at the next exhibition - a Finnish house made of thin-walled timber.
But in order to adapt the found solution to the concept of budget construction, Dmitr173
adjusted the conditions:
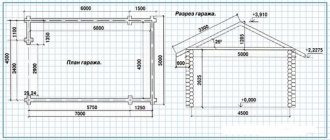
- adjusted the dimensions of the building to fit the six-meter walls;
- I made all the timber myself.
With such introductory works, the barn cost an amount acceptable for the craftsman and became, if not a decoration of the yard, then it quite organically fit into the overall style.
Foundation
Before foundation work, I removed the fertile layer from the building site, after which I dug a trench two bayonets deep according to the markings under the tape. To prevent frost heaving, I filled the trench with sand in layers, compacting each layer and maintaining the level. For the formwork, I used a planed board, which I laid on compacted sand, having previously covered it with a thick film - I first assembled the inner perimeter, tied the reinforcement frame, and then assembled the outer walls.
Despite the lack of experience, the craftsman took the creation of a protective layer as seriously as possible - he used special ones so that the layer of concrete around would be uniform, 5 cm thick. Why bother so much, he explains in detail.
Dmitr173
“Experienced” builders stick the reinforcement directly into the ground, this is absolutely not allowed. First, the reinforcement in the ground begins to rust intensively, second, the very cement laitance that it needs to gain strength leaves the concrete. Clamps to prevent capillary suction of moisture, and the reinforcement was covered with concrete.
Since, according to calculations, about 1 m³ of concrete was needed, which is approximately 2.5 tons, the formwork was additionally secured with powerful supports before pouring.
I laid two layers of waterproofing on top of the tape and made wooden spacers - to ensure ventilation of the underground, I preferred not vents in the foundation, but columns made of spliced boards, screwed to the foundation with anchors with studs. The beds were placed at equal distances along the entire perimeter; before manufacturing, the wife treated the elements with protective impregnation.
Walls
For reasons of economy, I made the tongue-and-groove timber myself, from a board of natural moisture content 40×150×6000 mm. A tenon was cut on one side of the boards, a groove was cut on the other, the board was processed with a circular saw, a plane and a router. I cut the tenon in four passes with a circular saw, rounded it with a plane, but the household router did not cut the groove, it burned out, and I had to rewind it. In order to unload the tool, which was not designed for such an intensive regime, in the future I first went through it with a circular saw, and then cleaned it out with a milling cutter. The process of making tongue-and-groove boards did not cause any major difficulties; difficulties arose due to discrepancies in sizes - the purchased timber “walked” from 135 to 160 mm. For a barn this is not critical, but something more serious Dmitr173
advises making it from calibrated lumber.
To prevent unpainted paint from appearing on the walls after drying, the tenon was painted before installation; to prevent the appearance of gaps between the crowns during assembly, a special cord was laid. The craftsman reproduced what he saw at the exhibition. The rigidity of the structure was increased by fastening the crowns together with black self-tapping screws, 140 mm long. I pre-drilled holes in the timber for them. As practice has shown, where there are no overcuts, the rigidity is not enough, so the window and door openings were reinforced from the inside with special overlays.
He organized natural lighting in the wife’s estate through a skylight - he covered the opening with a sheet of cellular polycarbonate, placing it under the roofing and reinforcing it around the perimeter so that it would not be crushed by snow.
In my workshop (at the end) I installed an ordinary window. In houses made of ordinary timber, due to large shrinkage, windows need a frame, Dmitr173
I simply made an outer frame, like for the doorway, and screwed it to the wall with self-tapping screws. The window itself was fixed using perforated tape, another frame was installed from the inside to strengthen the opening, and the cracks were sealed with foam.
Roof
After assembling the walls, a certain instability of the entire structure was still observed, especially noticeable on the gables. The craftsman decided to strengthen the construction using an unusual roofing system.
Dmitr173
From the inside, I secured the rafters to the gables and connected them to the ridge beam running through the entire building. There are two more beams running parallel to the ridge on each side. If we take an analogy with the frame of a vessel (ship), then a longitudinal system of power frame is used on the roof, and not, as usual, on houses, a transverse one.
Additionally, I connected this entire system by covering the top with OSB, 9 mm thick, at the same time we got emergency waterproofing, for safety reasons, and interior finishing.
Interior work
The base of the floor is a board laid flat, the walls stand on it, and a finished floor made of tongue-and-groove boards is laid on top of it from the inside. The board is painted with two layers of regular floor paint.
Dmitr173
doesn’t like hanging wires, so I ran the electricity to the utility unit underground - I dug a trench, laid the cable in a HDPE pipe, covered it with slate on top and covered it. I connected it via a differential circuit breaker (ABB), since energy-dependent work is carried out both in the workshop and on the street.
The walls and façade were painted with expensive, imported paint, following the manufacturer's instructions, on the inside - a light shade, on the outside - dark. Both the construction technology itself and the selected materials have been tested for years - after six years there are no distortions or cracks, the doors are closed, the expensive paint of a venerable brand is holding up perfectly. The craftsman is completely satisfied with the result.
However, today I would not repeat my “feat”; I would buy a dry planed board or a ready-made tongue and groove one. The built barn, as planned, turned out to be not only functional, but also attractive, and completely different from typical outbuildings.
How good are tongue and groove garden houses compared to alternative solutions? What design features should be taken into account during construction? Which foundation is better to use? How to insulate walls? Let's try to answer these questions.
