Probably, many have encountered such a problem when, when cutting plywood or chipboard using a jigsaw, chips and burrs remain on the surface of the workpiece.
Of course, this quality of cutting is no good. But what can you do to avoid this?
Alternatively, you can buy a high-quality wood saw with a fine tooth. However, this still does not guarantee a perfect cut.
However, there are four ways to saw off plywood or chipboard without chipping or scuffing. Not perfect, but still as neat as possible.
The author of the YouTube channel The Maker shared his personal experience with us. We recommend you take note!
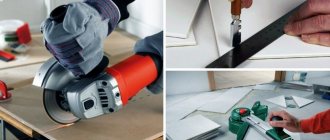
Method 1: Using masking tape
We glue a strip of masking tape onto the surface of the workpiece (plywood or chipboard). After this, we make a cut using a jigsaw.
But it is advisable to use a file with a fine tooth.
This simple method will significantly reduce chipping and scuffing during the sawing process. You can see the result in the photo below.
How to cut chipboard or laminated chipboard smoothly with a jigsaw
To cleanly cut laminated chipboard with a jigsaw, you must adhere to a clear algorithm. It looks like this:
- The workpiece is tightly fixed on the work table. During the cutting process, the sheet should not twitch or play, otherwise it will not be possible to cut smoothly.
- Markings are applied to the surface of the material. If lines must be drawn on the front side, it is better to use a pencil rather than a marker, the traces of which can then be erased.
- The selected attachment is inserted into the jigsaw; preference is given to completely new and high-quality blades from well-known brands. If you have to cut the workpiece clean, you should avoid old and cheap equipment.
- The stroke frequency in the tool is set to the maximum. The angle of the saw blade does not change. The pendulum mechanism must be turned off. It simplifies quick cutting, but most often does not allow sawing laminated chipboard smoothly and with high precision.
- The jigsaw is installed clearly according to the applied markings and pressed tightly against the material, and then put into operation.
- Slowly and carefully guide the canvas along a pencil or marker line, using a backlight and laser pointer if possible.
If you need to cut laminated chipboard without chips or defects, then even when using a reverse attachment, it is better to place the material face down.
When cutting chipboard with a jigsaw, it is recommended to use a special anti-splinter insert. It is a small part with a cut, which is installed in special guides on the sole of the tool. Ideal results can be achieved by an insert whose hole exactly matches the thickness of the canvas. The part can be supplied complete with several tools; it is usually suggested that you make the opening in it yourself.
Attention! To make a clean cut with a jigsaw file on chipboard, it is necessary to prevent the attachment from overheating.
Chips from the cutting line must be removed in a timely manner, otherwise it will not be possible to cut laminated chipboard smoothly
Method 2: using plastic
We cut a piece of plastic of a suitable size and make a cut in it for a jigsaw file. After this, we attach a piece of plastic to the sole of the jigsaw.
We mark the workpiece and then saw it. There will be much less chips and scratches on the surface of plywood or chipboard.
And if you stick a strip of masking tape on the workpiece (that is, combine the first and second methods), the result will be even better.
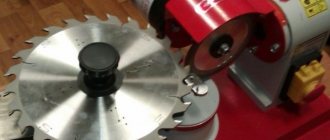
Which jigsaw file to cut chipboard, laminated chipboard
The quality of cutting a board is largely determined by the type of blade. First of all, you need to choose the right blade according to the size of the teeth. Files are divided into several types:
- A and B - such blades have the smallest teeth with small pitches;
- C - the teeth of the equipment are medium in size;
- D - nozzles have the longest teeth.
You can quickly and roughly saw chipboard and wood using the latest type of blades. But if you need to make the cut as evenly as possible, it is better to take tooth sizes C, A or B - they allow you to work with the material more accurately. The pitch should be 2-3 mm, and the length of the file should be about 75 mm.
Standard jigsaw equipment has straight teeth pointing in the same direction. To cut laminated chipboard smoothly, it is better to give preference to reverse blades. Some of their teeth point upward. During the reverse movement, they cut the material, which allows you to avoid chipping along the edges.
It is necessary to saw laminated chipboard using a jigsaw with attachments made of steel grades BM, CV and HCS
Before sawing chipboard with a jigsaw, the selected blade must be carefully inspected. A good canvas should have no traces of corrosion or defects. The high quality of the attachment is evidenced by clear inscriptions and emblems on the surface, as well as perfectly smooth turning on all sides. If the equipment has slightly rounded edges, oblique or blurry prints, then it is made of counterfeit material.
Method 3: using a utility knife
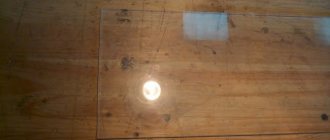
We apply a square to the workpiece, and using a utility knife, cut a line along the cut site. Then we cut the same line on the other side.
The resulting groove should correspond to the thickness of the saw blade.
Next, using a jigsaw, we make the cut. The result is much better than if you saw without prior preparation.
How to cut smoothly with a jigsaw without much difficulty?
To get the best results from your work, you need to know how to cut with a jigsaw correctly.
- The material being processed must be securely fastened. Poor workpiece fastening is one of the main causes of errors when cutting. The jigsaw can jump off, go off the markings, or even go in an arc. By the way, if the jigsaw cuts crookedly, check whether the direction of the cut coincides with the direction of the fibers. If this is the case, then it is better to make the cut with a circular saw.
- When it becomes necessary to make a cut on the inside of the workpiece, you should first drill a hole at the starting point.
- When working with the tool, do not use much force. An electric tool cuts wood quite well and without excessive pressure. If you apply serious force to advance the jigsaw, the saw and motor will become very hot and the risk of damage increases. In addition, excess pressure is the main cause of chipping.
- When cutting hardwood, it is advisable to add a little machine oil to the blade.
- Sometimes you have to work at low speeds. In this case, it is necessary to take frequent breaks from work, as the saw becomes very hot.
With a standard hand-held circular saw it is extremely difficult to make precise cross-cutting of boards. A simple homemade device, easily made from scraps in your home workshop, allows you to get the perfect cut in accordance with the markings.
The saw is designed for perpendicular cuts of boards ranging from 100mm to 250mm wide in 50mm increments, but can be easily modified to suit your needs.
Currently reading: Jigsaw boxes
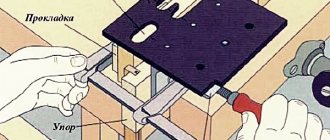
The device in question is extremely simple and consists of only a few parts: a base for the saw, a guide rail, a thrust block and an eccentric clamp that ensures reliable fixation even on lumber that has been loosened with slight deviations in width.
Diagram of a device for a hand-held circular saw.
The homemade product is very easy to use. First, markings are made on the board.
Then a homemade device is installed on top, the lower stop of which is pressed against the edge of the workpiece, and the right edge is aligned with the mark.
Photo of a device for a circular saw.
Next, the plywood base is securely secured by turning the lever of the eccentric clamping mechanism.
Photo of the device - view from the bottom.
Now all that remains is to place the circular saw on the base and make the cut, pressing the edge of the sole against the guide side stop.
Cross cutting of boards using a manufactured device.
The result will be a perfectly even cut that exactly follows the markings.
With this device it is convenient to make many cross cuts when you need to frequently move the tool to a new cutting line, for example, when making grooves in beams. It is also useful if it is necessary to reduce the length of the workpiece by several millimeters, and it will cope with this task no worse than a miter saw.
In this lesson we will show you the basics of working with a regular hand jigsaw. Of course, there are also electric jigsaws, but they cost a lot of money, and working with them is a pursuit of speed, and not a calm, moderate creation of beauty.
For work we will need: a hand jigsaw, a file, a table stand, a clamp for attaching the stand to the table, an awl, a pencil, two paper clips, a sheet of tracing paper, a sheet of copy paper, sandpaper and of course a piece of plywood of the required size. We will cut out a Christmas tree; in this work, in addition to the cutting technique, we will also master the technique of assembling plywood parts into a three-dimensional Christmas tree shape and the easiest way to finish the finished product, using ordinary watercolor paint.
The size of the plywood should correspond to the pattern you have chosen; try to arrange the cut parts more compactly, closer to each other, since everything that remains after cutting, as a rule, can no longer be used in further work due to its fragility. And so we clean the selected piece of plywood with sandpaper, trying to move it along the fibers, since transverse scratches will be very visible on the finished product and are very difficult to remove later, and the treated plywood looks velvety and soft.
The sandpaper should be medium-grit to reduce scratching of the plywood.
Secure the sheet of tracing paper and the drawing using clamps, then use a pencil to copy the drawing onto the tracing paper. This operation is necessary in order not to damage the original drawing when transferring it to plywood.
It should be noted right away that with the current level of distribution and availability of copying machines, for large-scale and complex drawings, it is good to use a copying machine for cutting and the required drawing simply needs to be copied onto a blank sheet of paper and then transferred from there to the plywood.
Having transferred the entire drawing to plywood, we carefully check whether all the lines of the drawing are clearly visible on the plywood.
At the next stage, it is very important to check the future joints of the herringbone parts.
To do this, a piece of plywood of the same thickness as we are using needs to be attached to the drawn groove of the Christmas tree part and make sure that it fits exactly within the drawn boundaries. If the dimensions of the groove and the thickness of the plywood do not match, the width of the groove is adjusted - it is drawn equal to the thickness of the plywood used. Otherwise, when assembling finished parts, they will dangle or simply not fit into each other. This way all grooves in all part drawings are checked.
We take the stand and insert its clamp into the central hole.
We fasten the stand with a clamp to the edge of a table, window sill or workbench.
If your file is not inserted into the jigsaw, then we do this in the following sequence. We loosen the thumb of the lower clamp of the jigsaw (after turning the handle down to the working position). Insert the file into the lower clamp.
The direction of the saw teeth should be as in figure “b” - this is very important.
Then, having loosened the knob of the upper clamp, insert the upper end of the file into it and placing the jigsaw on the stand, press it firmly and screw the knob tightly. The file should be taut. But excessively strong tension can lead to breakage of the file when cutting shapes, and weak tension on the file will also lead to the same. So everything should be in moderation.
The position of the body when cutting should be as in the figure.
When cutting with a jigsaw, you need to smoothly move your hand up and down, up and down, monitoring the position of the file so that it does not tilt from the vertical position.
Method 4: using chipboard
This method is very simple, but also quite effective.
Place a piece of chipboard on top of the workpiece, laminated side down. We fix it with a clamp.
Then use a jigsaw to make a cut. The result can be seen in the photo below.
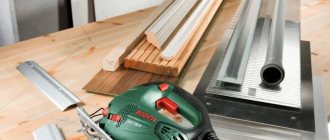
Rules for cutting chipboard, features and recommendations
To cut laminated chipboard you will need the following tools:
- hacksaw;
- sawing machine;
- milling cutter;
- Circular Saw;
- tire;
- electric jigsaw.
You will also need additional equipment for sawing:
- Ruler and pencil;
- masking tape and tape;
- sandpaper.
Cutting laminated chipboard is carried out in the following order:
- Marking the material. To mark the blanks, a ruler and a pencil will be needed to mark points on the sheet of material from the end. Then you need to connect the dots evenly in one line and stick masking tape on top. A good way to saw laminated chipboard without chipping is by using tape, as it helps reduce the number of cracks in the sheet material that occur due to elevated temperature and strong pressure. Cutting laminated chipboard.
- Next, sawing of the chipboard occurs. We choose what to cut the chipboard with and place the tool at the required angle so that the sawn edges of the sheet are even. Cutting laminated chipboard and MDF should be done very carefully and as smoothly as possible.
- Slab processing. If sawn chipboards at home are uneven at the ends along which cutting was carried out, they are processed using a belt sander. In some cases, it is better to immediately contact companies that provide services for the production of custom-made furniture parts according to the customer’s dimensions and cutting laminated chipboard using special equipment. To paste over the edge of a part, a special end edge is used for processing.
Let's sum it up
In today's article, we looked at 4 ways to use a jigsaw to cut a piece of plywood or chipboard with a minimum number of chips and burrs. Choose the method that suits you best and try it!
You can also combine several different methods to achieve the best and highest quality results.
Accuracy problems
Let's look at how to cut smoothly with a jigsaw:
- The object to be processed must be securely fastened. Moreover, in such a way that it would be convenient to make the cut.
- In cases of particular uncertainty or for greater guarantee of accuracy, it makes sense to use guides. When making a straight cut, you can use a wooden block fixed along the marking as a guide. If the cut shape is complex, then the situation becomes more complicated. In this case, you can use patterns, if any, or you will have to reduce the speed of work by more carefully guiding the jigsaw.
- One of the options why a jigsaw cuts crookedly is problems with the saw. It may be dull or have chipped teeth. If you notice that the jigsaw literally turns itself wherever it likes, inspect the saw.
- Jigsaw failure. For example, if the motor runs jerkily, the likelihood of a crooked cut increases sharply. Likewise, other mechanism failures can lead to a decrease in accuracy. Such problems are difficult to eliminate on site, as they require diagnostics and, possibly, repairs.
- Finally, the accuracy of the work is greatly influenced by the skill of the performer. If you are a novice carpenter, do not be discouraged by periodic failures: accuracy comes with experience.
Currently reading: Jigsaw choice
Preparation for work and used auxiliary devices
An electric jigsaw is a universal tool. In professional hands, it can replace several devices at once. Before using it, the technician first always checks that the power cable is not damaged.
The professional then clearly marks the part to be cut. A laser guide is often used, but not every electric tool is equipped with it. If it is missing, the specialist, when cutting, focuses on the marks that are on the sole of the jigsaw.
On a note! Professionals usually cut building materials on a saw table. They purchase it in specialized stores.
Before cutting smoothly with a jigsaw, most craftsmen buy various additional devices, including:
- guide rail – makes straight cuts easier;
- compass with parallel stop - used for cutting along a circle;
- a metal or plastic removable pad on the sole - increases the sliding of the tool along the sawn building material;
Jigsaw base cover Source pacs.ru
- rip fence - used when cutting in a straight line;
- anti-slip liner - reduces the likelihood of chipping on the material being processed and is especially often used when working with laminated surfaces.
In addition to additional devices, for high-quality cutting, the master also selects a suitable cutting blade, taking into account the structure of the material being cut and the operating mode of the power tool. The specialist performs such actions automatically.
Reasons for chipping
When sawing material from bottom to top, the teeth of the file catch and a break occurs. When wood blanks are sawed off, adjacent fibers become entangled. When sawing laminated chipboard , chips appear and the material is destroyed. If you cut 2 layers of a slab at once, the bottom one will be able to be sawed well due to the fact that the top one will not allow chips to appear. Processing accuracy can be increased using the “ Soft Start ” function. With this option, the electric jigsaw gains speed gradually. He moves quietly. The master needs to control the position of the cut point relative to the intended line.
The Soft Start function will help you make more accurate cuts.
Rules for straight cutting
Thus, in order to make a cut correctly and evenly, you must adhere to the following rules:
- Carefully select a file that is suitable for your source material.
- Prepare all necessary auxiliary items.
- Carefully secure the workpiece.
- Take into account the correct positioning of the workpiece so that you do not have to correct flaws - in some cases the canvas is positioned face down.
- Practice the technique of operating the device with the help of professionals or through a training video.
- Follow safety precautions carefully.
In fact, processing products with a jigsaw is not such a difficult task that any novice carpenter can do. Even if an even and neat cut does not work out right away, you should not despair: you need to soberly assess what nuances you may not have paid attention to. And you shouldn’t ignore the advice of professionals who can speed up the process of mastering the art of sawing with a jigsaw and reveal some secrets. Try and improve!
Build quality and wear of jigsaw parts are the reasons for curved cutting
What to do in a situation when a jigsaw cuts crookedly, the cost of which is no more than 2-3 thousand rubles? In this case, you need to thank the manufacturer for the quality of the build. However, there is a compromise here, since manufacturers of household jigsaws indicate recommendations that such a tool can be used for no more than 20-30 minutes. Working hours should be alternated with long pauses. In addition, household tools are not designed for long and hard work, so if the device begins to malfunction, then it is, first of all, the fault of the owner himself.
It’s another matter when a malfunction in the form of curved cutting of material occurs on professional-type jigsaws, the price of which is at least 5 thousand rubles. Rushing to take your instrument to a workshop is the last thing you need to do. To begin with, we begin to independently diagnose and repair them.
- Check for play in the rod on which the head or saw holder is attached.
If the amount of play is more than 1 mm, then it is necessary to look for a breakdown in the rod design. The rod moves along guides, which wear out over time. To reduce backlash and return the tool to normal operation, you should replace the guides or the entire mechanism - Unreliable fixation of blades in the saw holder - this type of malfunction is often associated with wear of the fastening mechanism.
If, after installing and securing the blade in the tool chuck, there is play, it means that you need to check the head and, if necessary, replace it. If the saw holder malfunctions, a breakdown occurs such as blades falling out of the tool, which is associated with wear of the mechanism parts - Malfunction of the guide roller - if it dangles and vibrates, then naturally the jigsaw will not cut smoothly.
It is easy to fix the breakdown by replacing the roller, but first make sure that this is the cause - Blade defect - if the file has a slight bend, then it will no longer be able to cut straight.
The presence of a defect in the canvas may not only occur from the factory, but may also arise during operation. For example, if you press it hard against the workpiece when working with a jigsaw, the blade may jam and bend. The curvature of blades is sometimes difficult to determine by eye, so a new file is installed and the quality of sawing is checked. The choice of blades will require an appropriate approach, so it is strongly recommended not to buy the cheapest blades from unknown manufacturers. After all, this affects not only the quality of the work performed, but also the safety of the master.
This is interesting!
The cause of a curved cut may also be dullness of the cutting teeth of the blade. Make sure that the teeth of the blade are not worn out, otherwise it is dangerous to continue sawing in this way.
Disadvantages of cutting chipboard at home
Also, one of the disadvantages of cutting is the exposure of the inner layer of chipboard, which can also be deformed in case of unprofessional work. To avoid this, use adhesive plastic tape. The adhesive coating and veneer will protect the chipboard from sagging.
As you can see, the process of cutting chipboard is labor-intensive; it requires obtaining certain skills and experience in working with this type of material. Therefore, if you are not sure that you can cut chipboard yourself, seek help from specialists who will do everything efficiently and quickly.
If you decide to do everything yourself, then we will be glad if the materials in the article help you with this, and you can cut the chipboard yourself beautifully and accurately.
Guide rail for jigsaw
The guide for a jigsaw is a simple device, at first glance, similar to a large metal ruler or rule. The main difference between the tire and the above devices is a special groove along which, like on rails, the sole with a jigsaw mounted on it moves. Most guides have rubberized strips that prevent sliding on the surface of the material, and for additional fixation, they are attached with small clamps. The average length of such devices is from 1.5 to 3 meters, and can be increased by another, similar ruler, using an adapter.
To make the line as neat and even as possible, use the optimal file suitable for the material being processed. More visual processes for making and using a homemade guide are demonstrated in the following videos.
Source: instrumentoria.ru
Sawing with a format saw
To cut on a machine, you need to prepare a cutting map in advance (you can use a computer program or manually). We place the laminated chipboard sheet on the machine, correctly resting it on the movable part of the table.
- First, a 5 mm cut is made from the edge of the sheet. This is done to remove the damaged end of the sheet (damaged during transportation).
- Then, using a ruler, set the required size on the table and cut the strip.
- When cutting on a machine, the sheet is sawed to the end along the cutting line. Because you can't drag it back.
- Therefore, it is necessary to place the parts on the sheet strictly along one line.
Recommendations for cutting without chipping
Firstly, as mentioned above, you should use a jigsaw file with a straight cut.
Secondly, in order to better control the cutting process, it is justified to apply a marking line on both sides of the chipboard and check the accuracy of the processing from above and below.
And thirdly, take constant breaks from work to cool the cutting equipment.
Sometimes the solution to this issue can be simply cutting through the laminated layer of material using a mounting knife, and subsequent work with a jigsaw will no longer cause large defects in the form of chips. However, this work requires the performer to have some experience and accuracy.
Video on the topic:
What else do you need to know?
When you plan to saw off everything without chipping on one side, it is permissible to use files with both upper and lower teeth. Most craftsmen prefer small files with straight teeth. Such devices chip less material, but still work quite well. After cutting, it is best to process the ends with emery stretched over even bars. If you don’t have a ready-made crayon of a suitable color, you can mix different crayons, like paints in an artist’s palette, and get a new color.
To cut without errors and quickly, you must always take into account the brand markings. There is no generally binding designation standard yet, but almost all companies strictly follow the classification developed by Bosch specialists. Or at least they list it along with their own abbreviations and terms. CV saws (sometimes referred to as HCS) are well suited for cutting wood and wood-based products.
Hardwood files are intended for processing laminated panels (they are also useful, note, when processing hard wood).
Some inscriptions indicate in which mode the tool works optimally:
basic - a simple blade that allows you to make a clean cut of high quality;
speed - a device whose teeth are set apart (this allows you to cut faster);
clean - a blade that has not been cut (usually gives the cleanest cut).
If the workpiece is relatively thick, it is preferable to have a saw blade with large cutters that are not set apart, then the deviation from the vertical will be minimal. A longitudinal (relative to the fibers) incision is most often made with helical saws. For a transverse one, a straight blade is better suited. When you plan to make a piece of furniture, it is advisable to choose a less productive, but more accurate tool. Since most saws produced today cut the material as it is pulled in, the workpiece will need to be processed from the inside out.
Cutting technology
They begin sawing after securing the workpiece and applying markings. To do this, you need to turn on the jigsaw, set the maximum speed level and adjust the pendulum stroke by setting it to number 1.
You need to bring the file to the marking line, press the side of the platform against the guide and start working. When moving the jigsaw forward, you need to monitor the location of the platform. Do not deviate from the guide. When there are a few centimeters left to the end of the canvas, you need to carefully hold the free edge, avoiding breaking. At this point the process can be considered complete. To prevent the cut from turning out crooked, it is worth remembering a number of nuances:
- During operation, do not press too hard on the electric jigsaw, otherwise the file will break;
- when cutting a steel sheet, you need to choose a tool with maximum power and work at high speed - when heated, the steel softens and becomes more pliable;
- When processing plastic, laminate, organic glass or stainless steel, it is necessary to provide additional cooling for the file and periodically take breaks so that the tool has time to cool down;
- to prevent the plastic from melting during processing, it is necessary to set the minimum speed with a frequency of 1000 rpm;
- the figured cut will be smooth if you choose a narrow file with small teeth;
- After finishing the work, the electrical device should be cleaned of sawdust and placed in a special case.
Professional builders advise adhering to certain rules to help avoid mistakes that will not be easy to correct.
When choosing a file, you need to start from the material you are working with: plastic, thin or thick metal, plywood, solid wood. You should prepare in advance all additional items that may be needed during the cutting, marking and fastening process. Particular attention should be paid to fixing the material to the surface.
Note! To avoid defects, the canvas should be positioned face down.
It is best to try the sawing technique in advance and practice cutting with a jigsaw on unnecessary workpieces, because a crooked line will be difficult to correct. Safety precautions should not be neglected; you should use safety glasses and wear gloves when sawing.
If these recommendations are followed, the process of cutting parts should not be accompanied by unforeseen difficulties.
Features of using a jigsaw
Despite the fact that the principle of operation of a jigsaw is quite simple, there are nuances that you need to know. They relate to cutting modes and materials
I will try to focus on the most common questions that arise for those who pick up a jigsaw for the first time
What can you cut with a jigsaw?
The jigsaw is able to work with materials of varying hardness, while effectively coping with their sawing
It is important to choose the right equipment and cutting modes. Saw blades differ in purpose for cutting steel, aluminum and non-ferrous metals; they are made of tool steel; for sawing wood - from chrome-vanadium or high-carbon steel; for plexiglass and ceramics - from harder materials, for example, an alloy of carbide and tungsten
There are universal files that are used for wood materials and plastic.
If there is a large amount of work to be done with a specific type of workpiece, for example, laminate, it is better to choose specialized equipment specifically for this task. The right choice is the key to quality work. It is worth noting that files are only suitable for working with homogeneous material. You cannot make a cut in a wooden workpiece with metal inclusions - nails or screws, as you can damage not only the equipment, but also the jigsaw itself.
Jigsaw cut thickness
For each tool, the maximum permissible values for the thickness of the workpieces to be cut are determined, and the rules for operating a jigsaw do not allow exceeding the recommendations specified by the manufacturer. For example, the parameters may be 75 mm for wood, 15 mm for metal.