One of the most important operations during the construction of a wooden house is marking and cutting out the window opening. Mistakes at this stage will lead to many problems with insulation or to the need to strengthen the opening after it has been created. This review contains information on how to cut a window in a wooden house and avoid gross mistakes in marking and during installation operations.
Separately, we note that a window in a log house, in terms of its functional purpose, is a more important unit than a similar element in a stone house, since it additionally strengthens the connection between the logs. Therefore, the thoroughness of each stage of its production must be extremely high.
Window as an important power unit at home
Deformation of logs in a log house
A log house, despite its external solidity, is a rather unstable structure. The reason for this is the round shape of the logs and the change in their geometric dimensions during shrinkage and shrinkage.
Under the influence of the weight of the roof and attic in a log house, distortion of the walls in the vertical plane often occurs. If the crowns were laid without additional fixation, the lower logs can be squeezed out either inside the room or outside. In practice, such displacements from the vertical axis can reach up to 3-5 cm, while the entire wall is under significant stress.
If you cut openings for windows and doors in such a wall without installing casing frames, it will simply collapse. Therefore, the entire structure of the window openings is not only a place for installing double-glazed windows, but also a power unit that gives the frame additional rigidity.
Note that this feature is inherent in all wooden buildings, including houses made of profiled timber.
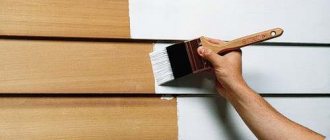
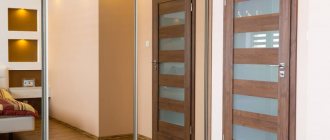
Which windows to choose: plastic or wooden
Today, many owners of country houses choose installations made of wood. Constructions made from natural materials preserve environmental cleanliness, safety and the atmosphere of a log house. Wooden windows are characterized by a pleasant forest aroma and attractive appearance, resistance to frost and temperature changes.
This material “breathes” and maintains a comfortable humidity level in the room. Among the disadvantages, one can note the high cost of products. In addition, wood must be periodically treated with antiseptics to protect living material from the negative effects of moisture.
Some people prefer to install plastic windows in a log house. Plastic is a more accessible, cheap material that is characterized by a long service life, good thermal insulation, and a wide selection of colors. Plastic products do not require special care and treatment, but they heat up when exposed to strong sunlight.
Plastic windows emit harmful substances and have an unpleasant odor. They attract dust and do not allow moisture to pass through, so a greenhouse effect may occur in the room.
If for a cottage you can still choose between plastic and wooden windows, then for a bath it is necessary to use windows exclusively made of wood. The wood does not heat up and does not burn the skin, and does not interfere with the healing effect of the bath. You will find interesting projects of bathhouses, country cottages and country houses at the link https://marisrub.ru/proekts/all-proekts.
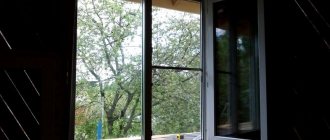
Features of installing windows in wooden houses
Taking into account the factors listed in the previous section, an additional strength structure is almost always installed between the window and the frame - a casing frame assembled in such a way as to counteract both vertical compressive forces and longitudinal ones.
There are three main types of casing frames:
- spiked socket (T-shaped);
- casing into a deck (U-shaped);
- pigtail in the embedded block.
How to properly make and install a casing is described in our other articles; here we note that a T-shaped pattern is most often used to arrange a window opening in a wooden house.
Please note that any casing option should not have rigid connections to the frame (nails, screws, etc.). The casing frame is connected to the opening using a sliding pattern through a tongue-and-groove connection.
Unlike stone houses, a window opening in a wooden building is cut out after the frame has been assembled, which immediately determines an extensive list of problems:
- the need to coordinate all sizes with the characteristics of a particular log house;
- change in the size of the opening due to changes in the structure of the log house during shrinkage;
- when calculating the size of the opening, it is necessary to take into account a large number of indirect factors (type of casing, type of seal, “age” of the log house, type of window, etc.).
It should be separately noted that the assembly of the log house and the installation of windows is carried out by different teams of builders, which very often leads to inconsistency in the technology of laying logs and preparing window openings. This is expressed in the fact that in those places where windows should be installed, when cutting an opening, power fastenings (for example, dowels) are found.
In view of this, it is advisable to study all the information on the issue of how to make door and window openings at the design stage.
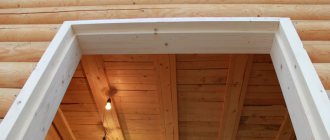
Finishing casing: appearance and technical requirements
The purpose of installing a frame in a house made of timber is to get warm windows for many years. To achieve this, you need the right casing. We have analyzed the offers of leading manufacturers, studied the forums and are ready to share with you conclusions, step-by-step instructions and life hacks.
Appearance
- Polished product impregnated with antiseptic. It is pleasing to the eye and pleasant to the touch.
- On the outside of the box, a quarter is selected for installing a window or door frame
- All parts of the installed casing fit together with minimal gaps.
- The width of the casing is equal to the thickness of the wall. This allows you to install the trim immediately after installing the windows.
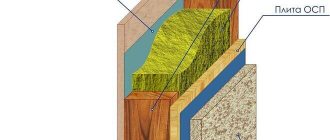
Diagram of the casing of a window opening in a timber house.
Specifications
- The casing moves freely in the grooves selected in the walls and does not interfere with the shrinkage of the house
- Wood moisture content is within 12-14%. This moisture remains in the workpieces after forced drying.
The finishing butt is made from chamber-dried pine or spruce.
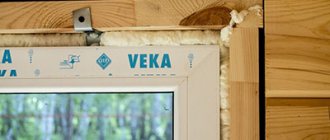
- The groove in the casing for installing plastic windows or doors is selected at the factory and corresponds to the width of the frames of future windows
- The points of contact with the wall are insulated with environmentally friendly insulation.
- The parts of the pigtail are connected to each other without nails, in a self-jamming lock. It will be good if the locks are additionally coated with sealant.
- There is a wind lock under the bottom board, also insulated, for example, with jute fiber.
- In 2022, a glued frame is considered more reliable, that is, made from individual bars glued together under a press.
Proper casing does not require finishing of slopes. That's why it is also called finishing.
The groove for installing a plastic window is clearly visible.
The window sill is part of the casing.
The window looks beautiful. Platbands will give the opening a finished look.
The seam between the casing and the wall is insulated. The lock reliably fixes the casing parts.
The finishing cap allows you to complete the work phase with closing the warm perimeter of the log house in a short time. The cost may be more expensive than the windows themselves.
When to start installing windows?
There are two approaches to creating door and window openings.
Prevention of lateral movement
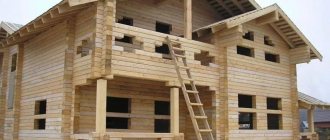
In the first case, they are cut immediately after installing the frame. At the same time, approximately in the center of the future window, one crown is left untouched, so as not to create fundamental changes in the power structure of the house. In the future, immediately before installing the casing, this crown must be carefully cut out.
In the second case, they wait until the end of the period of initial shrinkage of the log house (1-1.5 years) and only then cut the openings. The exception is houses made of laminated veneer lumber, in which you can start finishing without waiting for the end of the shrinkage period (theoretically).
It is difficult to say which of these options is more correct, since it depends on the characteristics of a particular log house, but it can be argued that during the “settlement” of a freshly built house, its future owners’ ideas about the size of windows and their location will change more than once with certainty.
We also note that recently the question “How to increase the window opening in an already finished house?” has become popular. This is a typical situation when new owners move into an old house and they are not satisfied with the format or size of the existing windows.
One of the advantages of a wooden house is that it is not difficult to expand a window if the proposed change in size does not change the strength structure of the house.
Construction of a window opening in a log house
Construction of a window opening in a log house.
- First you need to decide on the height of the window sill. As a rule, it is 80-90 cm. This height is optimal for comfortably leaning on the windowsill. The window opening is cut approximately 5 cm below the expected height of the future window sill, since the thickness of the polyurethane foam layer is 1-2 cm, and the thickness of the window sill itself is 3-4 cm.
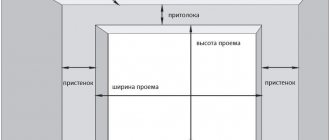
- Next, you need to place the horizontal and vertical lines of the window opening. A building level and plumb line will help with this.
- The lower line of the window opening is placed according to the level, and then the upper one. In this case, the height of the window opening should be at least 14 cm greater than the window itself, since the distance from the bottom edge of the window opening to the window should be left 4 cm for the window sill and foaming, on top - 2 cm for foaming, and for shrinkage of the house - 4-5 cm .
- When marking the vertical lines of a window opening, it is also necessary to take into account that it must be at least 14 cm wider than the window itself, of which 2 cm each goes for foaming, and 10 cm for the casing (jam).
- The window opening is cut according to the markings.
Where to start?
When expanding an existing opening or cutting out a new opening, you should begin by calculating the size of the opening.
As a rule, the initial dimensions are taken as the dimensions of the future window, to which are added:
- thickness of the socket (taking into account the tongue-and-groove joint);
- thickness of the sealant layer (increase the size by 5 mm);
- compensation gap (additional 60-100 mm when determining the total height of the opening).
Please note that the bottom casing strip in windows is often a window sill, the thickness of which may be greater than the thickness of the boards used to make the casing frame.
What is casing
Next, they begin to mark the contours of the openings on the walls of the log house. During this operation, we recommend that you adhere to the following rules:
- the upper and lower edges of the opening should pass through the center of the log (or cover 1/3). This is necessary for the normal operation of the casing and to prevent problems with insulation;
- It is advisable to mark horizontal lines using precise level gauges;
- Make vertical markings only along a plumb line.
If you plan to do the work yourself, you should take care in advance to prepare the appropriate equipment.
The main tool used when arranging window and door openings is a chain saw (or its electric version).
If there are many windows, and you plan to chamfer for installation of platbands, we recommend making a special device based on an angle grinder, with the help of which the time spent on this operation will be reduced significantly.
Method N 1. Installing doors using a special casing
The procedure for carrying out work by installing a special casing is as follows:
- The first step is to cut out the opening intended for installing the door frame. It needs to be cut in such a way that half of the log or beam remains on top and bottom.
- Next, using a cutter, you need to cut a groove at the end of the opening measuring at least 50 × 50 millimeters. You can use a chisel to adjust the size of the groove.
- A beam is inserted into the resulting opening. It is necessary to take into account its length. If the log house is new, then the size of the timber should be 5 centimeters smaller. If the structure has already shrunk, then the length of the beam should be less than 2 centimeters.
In some cases, the timber needs to be strengthened. This can be done using a board with a thickness of at least 50 millimeters, and its width must be no less than the size of the wall.
Sometimes, instead of timber, metal channels of appropriate sizes are used. Additional reinforcement of the opening is important when constructing heavy buildings, for example two-story buildings.
After the beams are fixed in the side parts of the opening, a threshold should be made. To achieve maximum strength, a timber with a thickness of at least 10 centimeters is used, which must be cut in a T-shape.
First working stage: cutting out the opening
Alignment of walls
After the marking is completed, cutting out the opening begins. During this seemingly simple operation, the following rules must be observed:
- the cutting plane must be strictly perpendicular to the longitudinal axis of the logs;
- The cutting line should run in such a way that there are no distortions and spontaneous falling out of the logs.
After cutting the opening, it is necessary to check the condition of the end of the frame to ensure that the vertical axis is maintained. If deviations are noticed, then the next stage of work is leveling the wall.
This is done with the help of special devices that pull the logs into one line.
This screed is temporary and is dismantled after installation of the casing.
Please note that in cases where an increase in wall distortions is detected, it is advisable to install a U-shaped version of the frame.