Painting plywood is considered a necessary measure to protect the material from excessive moisture or other harmful environmental influences.
Currently, plywood is still often used in construction, especially private construction. It is made from thin sheets of veneer, which are glued together with adhesives of various compositions. It is used for the production of furniture, wall coverings, floors, as well as finishing the facades of buildings.
Why is plywood so popular? Durability and environmental friendliness are the main advantages of this type of building materials.
But it’s not enough to just purchase plywood and use it in its pure form for your needs. It is necessary to apply a number of measures thanks to which the plywood board can last a long time. And one of these measures is painting.
Let's look at each stage of painting plywood in more detail.
Water-based acrylic paint
If the building material will be installed in a residential building (apartment), then you can take a closer look at water-based paints, which are suitable for interior decoration.
The use of acrylic paint is widespread: it is environmentally friendly, easy to handle, quite durable, and also allows the use of a wide range of shades. The paint is applied to the plywood in two layers, and both sides and ends are treated. If there is no active mechanical impact on the sheets, then the choice can be made in favor of conventional water-based paint.
Properties of varnishes for plywood
When choosing a varnish, you must remember that its individual varieties may differ in properties and purpose. There are no universal varnishes for wood, and plywood is made entirely of wood, that is, those that will work both on the floors of the house and on furniture or the facade of the house.
Plywood used outdoors requires more protection because it will be exposed to various weather conditions (rain, snow, wind, sun and freezing temperatures) over the years, as well as (more so than indoors) damage from insects, mildew or mold. .
Varnishes for plywood most often provide a transparent coating, but if you want to darken the entire sheet or give it a different color, you can use stain for this purpose. However, although it will provide the wood with protection from moisture, such a coating will be less durable than varnish.
Processing plywood before painting
Before painting, plywood must be completely cleaned of dust and small sawdust. Plywood sheets should be painted along the wood grain.
Do not forget that before preparing plywood for painting and staining, the sheet must dry thoroughly. Everyone knows the property of this material - to warp.
You can avoid the risk of deformation by simply keeping the sheets in a dry room at room temperature for 3-4 days. This is especially true if the material was stored on the street or in a damp construction warehouse. Experts recommend not neglecting this stage and keeping the material for several days in the room where you then plan to paint it.
Initially, the sheet must be sanded to remove any irregularities.
This stage can only be avoided if you purchase high-grade material. It's already quite high quality. For cheap varieties, sanding is highly desirable.
First, use coarse-grained sandpaper (No. 80-100), and then use medium-grained sandpaper (No. 100-120). This improves the subsequent adhesion of the surface to the paint. Do not forget to process the edges of the sheets; if they are too rough, they can be lightly planed and then sanded.
If you need to hide joints, fasteners or very noticeable defects, use putty. This material will also be useful to you if you decide to glue wallpaper onto plywood. Don't forget to sand the putty areas
After grinding is completed, the surface must be primed; most often, drying oil, primers with an alkyd base, or special compounds that fill the pores of the material are used for this.
For large volumes of work, it is recommended to use electric grinders. They will save time, make work easier and improve its quality.
Cleaning and sanding the material
When purchasing raw materials, you should pay attention to its texture: if it is very rough, the material must be cleaned and sanded. Before painting the plywood yourself, experts recommend drying it. Most likely, the sheets of material were sold from a warehouse, and it was often humid and damp there, so the wood could absorb some of the moisture. It is not possible to dry the product quickly, so the sheets of material are sent to a dry and warm place for 3 days.
With this tool you can sand small surfaces. If the sheets of material are large, it is better to use a power tool.
Once the plywood has dried, you can begin preparing it:
- Cleaning. This simple process is carried out to ensure that no large specks or contaminants remain on the surface of the raw material. Plywood can absorb moisture, so do not use water when cleaning. High-quality wood will always have a distinctive pattern - you also need to walk over it and check for contamination. Dirt must be removed using a coarse brush.
- Sanding. This procedure requires perseverance and care. Sanding consists of two stages: the first involves sanding with coarse-grain sandpaper, and the second with fine-grain sandpaper. The important thing here is to achieve not beauty, but a smooth surface. According to the advice of the masters, it is better to use a special grinding machine - this will speed up the work.
After passing coarse grain across the surface, it is necessary to change the nozzle to paper with fine dispersion. This procedure can easily be carried out manually, but it will take more time. Don't forget about the edges of the product - they also need to be cleaned and sanded.
Varnishing plywood
What is a primer used for?
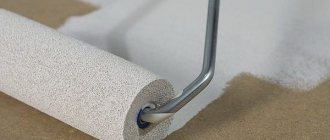
If finishing with plywood sheets is done indoors, then due to fluctuations in temperature and humidity, the wood texture may change: shrink and expand. The primer as an intermediate layer will not allow the applied paint to crack and will protect the base from moisture penetration and the formation of fungus. The primer is applied with a roller.
It is necessary to allow the soil to dry, and then additionally treat the plywood with antiseptics and fire retardants, which will enhance protection against fire and prevent blue stains from appearing. This is one of the important elements of the preparation process if you are going to paint plywood with transparent paint that has low resistance to bioaggressive manifestations.
Varnishing of the product
Sometimes, for further painting, plywood sheets are coated with colorless varnish. Before varnishing, the product is well sanded and its coating is degreased.
After this, the solution is treated with one layer of varnish, and the sheet is left to dry. After drying, sanding is performed again, this will completely get rid of possible surface defects and create a matte finish.
To create a glossy effect, you will need to apply a second coat of varnish. What is the best way to apply the mixture? The final layer of varnish can be applied with a sprayer, this will allow the solution to be evenly distributed over the entire surface. If such a device is not available, varnishing is carried out using a roller, and heavy areas are treated with a small brush.
How to paint plywood
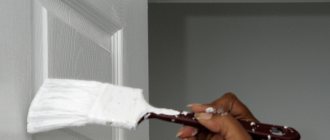
Painting plywood correctly is not difficult. We have already talked about applying paint according to the arrangement of the fibers. You can also take a completely traditional tool: a roller, sprayer or paint brush.
Let's consider in which case it is more appropriate to choose each of these options:
Ideal for saving time and large amounts of space, such as floors, ceilings, facades;
Convenient for painting medium-sized areas, such as a plywood cabinet, for example. As for the material of the roller coat, it is better to choose foam rubber for plywood;
A universal tool that can be found in every home. Ideally paints hard-to-reach places (corners), ends and shaped elements.
Types of varnishes for plywood
Varnishes for plywood can be divided into several categories. The first of these will concern what layer to use for a given varnish.
There are varnishes here: Starter - used as the first layer, because they penetrate deeply into the base. Thanks to the primer, the varnish layer is firmly bonded to the base.
Finishes - These varnishes become the finishing layer that gives the plywood its final appearance. Finish coatings perfectly protect wood from moisture and damage.
It should be noted that not all topcoats require the use of primer varnishes.
Varnishes are classified according to their appearance: matte, semi-matte, shiny. You can also find varnishes on the market:
- Chemically cured two-component - used in areas particularly exposed to moisture, as they create coatings that are highly resistant to abrasion, water and chemicals. However, these varnishes are used less and less, as they contain formaldehyde (with an irritating odor), which is harmful to the environment;
- One-component polyurethane - best suited for heavily used areas, such as a hallway or stairwell. Before using such a varnish, the surface usually needs to be primed with a primer varnish. These varnishes can be applied to old chemically hardened varnish coatings;
- Two-component polyurethane - does not require the use of a primer varnish, so it can be used immediately.
Applying varnish
Sometimes varnish is used instead of paint. The plywood is first cleaned and sanded using sandpaper or a sanding machine, then it must be cleaned of any accumulated dust and degreased. Otherwise, all dirt will be visible under the varnish.
After applying the first layer of varnish, let it dry. Sand the first layer and then cover the surface with another layer. As a result of this approach, varnished plywood becomes dull.
If you want to get a glossy surface, you need to apply another layer of varnish on top. This time it is advisable to apply it using a sprayer to evenly distribute the varnish composition.
Advice from professionals
To properly varnish a glued veneer surface, you should adhere to the following rules:
- The selection and joining of plywood panels should be carried out in compliance with the direction of the fibers.
- For reliable coverage, it is better to choose high-quality canvases without flaws or knots.
- Position and adjust the position of the plywood according to the diagram.
- Sand the surface of the plywood with coarse sandpaper.
- Add the desired shade using stain.
- Sand again.
- Putty the joints and smooth out any irregularities and seams.
- Ideally, the shade of the putty matches the color of the stain. PVA-based putty, tinted with an appropriate dye, is well suited for this.
- After cleaning the seams and joints, all dust must be carefully removed. After this, you can open the floor with varnish in 2-3 layers.
To apply the varnish you can use a roller, brush or spray.
The sprayer is more convenient to use, paints more evenly and quickly. It is better to take a lint-free foam roller. If you don’t have such devices, a paint brush is also suitable, which is convenient for working in hard-to-reach corners.
Masking tape will allow you to make a clear distinction between colors if several shades of varnish are used.
Thus, correctly selected dye, as well as scrupulous and methodical work, will allow you to paint the plywood floor with the highest quality possible and protect it from damage and premature wear.
Wood painting
To paint plywood to look like wood, you can use different shades of stain. If you need a glossy surface, apply an additional layer of varnish on top.
Plywood boards are problematic materials in terms of painting. This is due to the specific texture of the surface, which does not allow for even laying of the paint and varnish composition. Such problems arise with many wood-based materials, but painting plywood is complicated by the presence of pronounced roughness and even burrs on the outside of the board.
Causes
The need for painting is due to the following reasons:
- improving the aesthetic qualities of the material, since plywood after applying correctly selected paints and varnishes looks more attractive;
- ensuring additional resistance of the material to the negative effects of environmental factors.
Let's consider these points in more detail.
Wood-look varnish that emphasizes the depth of the grain pattern
No matter what the price of plywood, this material looks like a regular cut of wood. After applying varnish, the texture of the material stands out favorably, as the pattern of the fibers becomes deeper and more distinct.
If it is necessary that the finishing material does not look like wood, it can be covered with a continuous layer of paint. In this case, the texture will not stand out, and the plywood will look like the surface of drywall, concrete, plastic or other common building materials.
The presence of paint and varnish coating significantly increases the service life of plywood structures. A layer of paint or varnish prevents moisture from penetrating the structure of the lumber. As a result, plywood structures will not rot for a long time and will not crack due to periodic changes in humidity levels.
So, we have decided that applying paints and varnishes to the surface of lumber guarantees certain advantages. All that remains is to learn about what and how to paint plywood.
Features of painting work with plywood sheets
Paint and varnish coatings are reluctant to apply to plywood, which is due to the uneven surface. This applies to a greater extent to materials that have undergone rough factory processing.
Therefore, preparatory activities occupy a special place in this matter. It is not recommended to apply the composition directly to a wood base, as there is a risk of getting a defective coating with obvious defects. Even if you treat the surface with a thick layer, cracks and warping of the paint will appear in the future.
Therefore, painting plywood should be done in several layers, and the base coats are not decorative. They perform the functions of priming and leveling - that is, they prepare the base for applying a full-fledged decorative layer. In some cases, special mechanical processing of the sheets is required so that the primer itself can be laid on them.
Using wood stain
The wood surface should be painted with stain in the same way as with regular paint. The only thing is that this impregnation dries very quickly, so you should work just as quickly, but carefully .
Before completing the work, you must not allow the stain layer to dry, otherwise a seam in this place will be clearly visible, different from the rest of the surface. That is why you should not put a lot of solution on the brush.
To paint a wooden surface with stain, use:
- Paint brush.
- Foam roller.
- Automatic or manual sprayer.
The stain is applied parallel to the direction of the wood grain and therefore should not be applied to another section unless the first is finished. In the place where the two sections are connected, it is necessary to ensure that the applied layers of impregnation do not overlap each other.
Thanks to stain, wood acquires a refined and excellent color . In addition, it protects and enhances the wood grain. After the planed plank floor is laid, it is necessary that it is always clean, otherwise, after applying the stain, all the stains will begin to stand out.
If there are greasy stains on the floor, the stain in this area may not be absorbed into the wood. If the wooden parquet is in good condition and there is no need to restore or putty it, then covering it with such impregnation is an excellent solution to renew the old parquet.
If you need to get a new shade, you can mix several stain colors. You need to stir carefully so that splashes do not fall on the floor, as such stains will subsequently stand out very strongly. It is recommended to mix only compatible components.
Painting methods
Methods for refining plywood differ in both technical tools and the type of paint composition used.
As for tools, a regular brush, a roller, and a spray gun can be used. The highest quality results are achieved with the last tool. A pneumatic spray gun allows you to provide an even coating of paint and varnish.
In this case, the base layers can also be done with a brush - at this stage, maintaining a uniform layer is not so significant. In terms of choosing a coloring agent, everything is not so clear. If emphasis is required on aesthetic value, then, undoubtedly, preference should be given to construction paints - for example, acrylic or pentaphthalic compositions of the desired shade are suitable.
Painting plywood with varnish is also practiced, which involves a traditional set of tools - from a brush to a spatula. The treatment is carried out in several layers with long strokes. There are also special products for bleaching wood, which are also suitable for plywood.
They contain chlorine, sodium or potassium hypochlorites, lime, etc. It is advisable to use this option when working with plywood that is part of the structure of utility premises, rather than residential ones.
Preparation begins with thorough cleaning of the surface. It is necessary to remove both debris and dust, and weak damaged areas of the sheet. Next, you can grind the material. If plywood is being prepared for painting with varnish or the same acrylic paint, then this operation will be mandatory.
A machine with polishing abrasives will remove burrs, loose fragments and simply provide a smooth base. The second stage of preparation will be to create a reliable base for applying a decorative paint layer. For this purpose, primer putty on plywood for painting can be used, which contains strengthening and adhesive components. If you plan to use plywood outdoors, then it would be useful to include water- and frost-resistant additives in the primer.
Painting plywood with stain
How to paint a plywood ceiling
Sometimes plywood ceilings are made in utility or auxiliary rooms. It's pretty cheap considering the cost of the material. If you already have such a ceiling and the question arises of how to paint a plywood ceiling, then know that this can be done with paint. Take latex, acrylic or oil paint and paint over the surface of the ceiling.
What and how to paint a plywood ceiling?
But this is only if the ceiling is flat or is located in a room where its appearance will not confuse anyone. And when you need to make such a ceiling beautiful and aesthetically pleasing, it is necessary to carry out preliminary work before painting it.
Preparing a plywood ceiling for painting
Plywood is mainly used on uneven surfaces where there are significant differences. With its help, the ceiling is leveled and additionally soundproofed. But the plywood itself can be uneven, and there may be gaps and differences at the joints of the sheets, so it should be well treated before painting.
Despite the fact that plywood is made of wood and has high moisture absorption, there are special putties that can be used to process this material. In addition, before working with plywood, you should impregnate it with a primer, which will protect the surface from drawing in moisture. After this procedure, the plywood surface can even be treated with water-soluble putty.
Treating the surface of plywood with PVA glue and drying oil
These two coatings are most often used by builders to give plywood moisture protection. These impregnations are applied to plywood sheets before they are attached to the wall.
•The surface of the plywood sheet is treated with PVA glue several times. Each layer must dry after applying the next one. Therefore, such impregnation may take several days.
•A layer of hot drying oil, heated in a water bath to 55 degrees, is applied to uninstalled plywood sheets, which are dried using a hot iron or a hair dryer. This process is repeated until the plywood is completely saturated.
Veneer primer
Before you learn how and with what to paint a plywood ceiling, familiarize yourself with the pre-priming process.
After the plywood sheets are impregnated and become moisture resistant, they can be mounted on the ceiling. Treating plywood with impregnation makes it possible to protect the surface from rotting and allows the putty to better adhere to it. Only after the primer has completely dried can you begin to paint the surface.
Puttying plywood sheets
Nowadays there are many products on sale that can be used to perform puttying. The best option would be a dry mixture, which is diluted with water or acetone. Using it, it is possible to make the product of the desired consistency.
Using a spatula, the mixture is applied to the ceiling, after it has completely dried, the surface is rubbed. Then apply the second, and if necessary, the third layer. Each of them should not be thicker than 2 mm. After drying and sanding the surface, it is ready for painting.
When purchasing a mixture, pay attention to the characteristics; some of them cannot be applied in more than two layers.
How to paint a plastered plywood ceiling
Now let's talk about how to paint a plywood ceiling so that it lasts for many years. For these works, water-dispersion and water-based paints should be used. They are made both matte and glossy. Both can be used to paint the ceiling. Glossy ones will shine and highlight all the irregularities, so they are best used for perfectly smooth surfaces. But matte ones, on the contrary, will hide all ceiling flaws.
•Water-based paints are well suited for painting ceilings. They are diluted with water, fit perfectly on the surface and have a beautiful appearance after drying. But there is a downside to water-based paints: they cannot be washed with water.
• Waterborne paints are divided into two types: latex and acrylic. They have good characteristics: they protect the ceiling from UV rays and other damage, cover the surface evenly and have a long service life. But their main advantage is that they are washed with water and this can be done more than once.
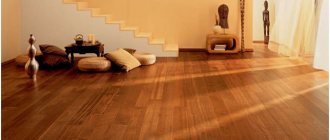
Plywood is a very popular finishing material, especially in your home, where there is no need to worry about possible flooding from above. In addition, this finish is light, strong, very durable and less afraid of water and dampness than conventional chipboard or even wood.
Painting plywood
At the same time, the material is extremely easy to process: painting a plywood floor or wall is not particularly difficult.
Features of the material
This is a multilayer composite material consisting of veneer - a thin slice of wood - glued together. Such a sheet is made from different types of wood, both deciduous and coniferous. However, birch is considered the best because it is durable and not prone to warping.
Veneer sheets are glued together with different glues, which affects the strength, flexibility and water resistance of the sheet. In everyday life, the material most often used is medium water resistance - with urea resin glue.
The veneer is laid so that the direction of the wood fibers of the previous sheet is perpendicular to the direction of the fibers of the next one. In this simple way, the exceptional strength of the slab is achieved. In addition, different types of veneer and different wood are used.
This structure provides a number of features that have to be taken into account when painting.
- If you plan to paint on one side, then it is necessary that this side be made of better wood, so choose a material where the front side is at least 2 grades: 2/4,1/4. The photo shows a 1st grade product.
- If you need to paint on both sides, then you will have to take a higher-grade material: 2/2 at least.
- If you are going to paint plywood with varnish, that is, all the features and even shortcomings of the wood will be visible, you need to purchase material with the front side of grade 1 1/2, 1/3.
Preparation of material
Any plywood is suitable for painting - from a warehouse, already used as finishing. In practice, the material has to be prepared in the same way for the process. You can carry out all the work directly on the surface - the same floor or ceiling, but only if the sheets have not been exposed to moisture. If painting is the result of a leak from above or the influence of general dampness, it is very advisable to disassemble the finish and dry the sheets before work.
- Products from a warehouse, even if stored in the best conditions, must be adapted to the indoor microclimate. For this purpose, the sheets are placed on the floor on bars and dried for a couple of days.
- If a material of at least grade 2 is selected for painting, there is no need to sand it. If the grade is lower, sanding with 80–100 grit sandpaper is necessary. Sand perpendicular to the direction of the wood grain. Be sure to handle the corners. The photo shows the process of polishing the product.
- Putty will be required in cases where the surface must be not only even, but also smooth. Typically, putty is needed when preparing a wall or ceiling for wallpapering. But if the sheet is damaged, especially when painting an already used material, putty is necessary.
- Primer - the composition can perform several tasks, so different primers are selected. To prevent the appearance of fungus, for example, an antiseptic is needed; to improve adhesion to acrylic paint, a deep penetration primer is needed.
Decorative coating
Processing and painting plywood involves several different methods. Options are selected depending on the condition of the material and the requirements of the updated interior.
- Staining – treatment with stain gives both wood and veneer the appearance of more expensive noble wood. The color range of stains is very wide, so you can choose a shade to suit any interior. The stain also acts as an antiseptic.
- Staining and varnishing - usually when painting with stain, the surface turns out to be matte. In some cases, this does not correspond to the style, so after drying, the plywood sheets are varnished.
- Varnishing - if the plywood is in good condition and the veneer on the front side is of a high grade, you can do without using water-based paint or stain, and simply open the floor or ceiling with varnish.
Any varnish can be used - colored, transparent, semi-gloss, glossy, and so on. - Painting plywood with acrylic paint is the most common method, as it allows you to dramatically change the interior. Typically, acrylic water-based compositions are used, since they dry the fastest and are completely safe. Enamels can also be used - for example, for flooring, or for painting exterior trim.
Dyeing technology
The procedure itself is extremely simple and takes less time than preparation. Acrylic paint that meets the requirements is selected, prepared and applied to the surface using a suitable tool.
- A brush is good for painting a not too large area and in cases where it is necessary to apply several layers of paint.
- A roller is more convenient for large areas. The roller you choose is foam rubber, without lint.
- A spray gun is the best tool for painting, as it allows you to cover a large area and ensures the absence of streaks.
The painting of plywood in the video is presented in detail.
Preparing tools and paint
In addition to the main painting tools, which must be thoroughly cleaned, auxiliary devices should be prepared. These will include the same trowel, a construction knife and equipment for supplying compressed air if you plan to use a pneumatic sprayer.
Next, the paint and varnish composition is prepared. Initially, it can be a liquid solution or a dry mixture. In both cases, thorough stirring and dilution with water is required.
It is important to consider that painting plywood will be of high quality only if the solution is uniform. It should be free of lumps and foreign bodies. If necessary, at this stage you can add modifiers to the composition that improve certain qualities of the mixture.
Preparation
Before painting plywood, it is necessary to prepare its surface well. If you have just purchased sheets of plywood, you need to give them some time to dry, because it is unknown in what conditions the plywood was stored. In order for the sheets to dry well, it is enough for them to stay in a room with a dry, warm climate.
So, the plywood sheets have dried. Now they need to be sanded well and the surface cleaned of chips and dust. For best results, it is recommended to carry out sanding in two stages. First, treat the surface with coarse abrasive sandpaper (grain size No. 80). Then thoroughly sand with medium-grain sandpaper (No. 100-120).
Sanding plywood
After this, the cleaned surface should be primed. This is necessary to prevent deformation of the plywood sheets. The fact is that the temperature in the room in which the sheets are located may change, which can lead to expansion or contraction of the product, and this, in turn, can lead to the formation of cracks. In addition, thanks to the primer, the adhesion of the paint to the surface will be better.
Primer for plywood
After treating the surface with a primer, you need to wait a certain time for it to dry. After this, you need to treat the sheets with fire retardants and antiseptics. Thanks to this, the possibility of mold and blue tint appears is eliminated. This is true if the plywood is painted with transparent paint. This paint is not resistant to various biological irritants. Also, treatment with these products helps protect plywood from fire.
Instructions for applying the composition
If the choice falls on a brush or roller, then the actions should be performed smoothly and without jerking. It is recommended to cover as large an area as possible in one pass, which will minimize smudges and make the coating uniform. At the same time, it is better not to limit yourself to one layer - on average, this design is performed in 2-3 passes.
If you are preparing to paint a plywood floor, you should count on 5-6 layers, since this coating will require increased mechanical resistance. The easiest way to work is with a spray gun. It sprays the composition evenly over the entire area and the user can only monitor the abundance of coverage. In this case, leaks are also possible, but this effect can be avoided if you perform intensive movements of the working head of the tool.
Plywood
Furniture is made from plywood and used as flooring. They also decorate the interiors. Several sheets of wood veneer glued together are plywood.
Plywood has gained its popularity due to its budget cost, at the same time as practicality. It is easy to process, strong and durable. In addition, it has a natural composition. But, like any type of wood, in one form or another, plywood suffers from external influences. And, like any tree, it needs protective treatment.
Recommendations as you work
When working with a roller, it is important to monitor its pile. Fur models of this tool leave hairs that will be difficult to remove in the future without disturbing the structure of the coating. Therefore, initially it is better to use a foam roller.
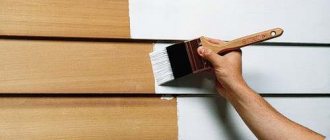
If you plan to work with a heterogeneous structure that has complex areas and large flat areas, then it is advisable to combine tools. For example, painting plywood with a brush will be the optimal solution for working with corners, edges and curved elements. It is better to process a large, flat surface with a pneumatic tool. The direction of the tool at the time of movement should be longitudinal relative to the wood fibers - such a scheme for applying the paint and varnish material will ensure strong fixation of the coating, and will also allow the shade to be preserved for a long time.
Stain - rules for applying the composition and tips for high-quality tinting of wood (110 photos)
Wood stain is a composition with tinting properties. It is used for processing wood; under the influence of stain, the wood changes its shade. Also used when working with fiberboard, chipboard, plywood, MDF. There are two separate types: for indoor and outdoor work. A pigment is added to compositions for external use, which protects the coating from fading when exposed to ultraviolet rays.
Types of stains
If when working with wood you need to give it a different shade, you can’t do without stain. When considering which stain is best for a specific purpose and browsing the options in stores, keep in mind that there are different types. Let's consider each of them separately.
Water based stain
Paints wood in completely different shades: from light to the darkest. Of the existing species, it is the most common. Available in liquid or dry (powder form). The use of powder requires dilution in warm water before starting work; the liquid composition is sold in finished form.
A huge plus when working with such a stain is that it has no odor. This is a very important factor when working indoors. However, it takes 12 or more hours to dry. It can lift wood fibers; additional sanding of the wood will be required.
After processing, varnishing will be required. Acrylic stain belongs to the same type of composition. It is somewhat more convenient to work with, but it is also more expensive.
Oil stain
It is a composition of a mixture of oil and dyes. The most commonly used oil is flaxseed. Distinctive features are easy and uniform application, ease of use, it does not have the property of lifting wood fibers. The dyes in the composition are highly resistant to light and are not subject to fading.
The original surface color retains its brightness for a very long period. The coating is resistant to temperature changes and perfectly protects the wood from moisture.
As for application, you can use a spray gun, brush or rag. The stain dries quickly, within 2-4 hours. Excellent for restoration and minor touch-ups.
Alcohol stain
The liquid consists of denatured alcohol and aniline dyes. Thanks to alcohol, the pigment quickly penetrates into the wood and dries within 15-20 minutes. This type of stain requires fairly quick application to prevent uneven coloring. It is best to work with a spray gun.
Nitromordant
It is produced on the basis of solvents, the properties and action are almost similar to alcohol. It dries quickly, forming a coating that is resistant to sunlight. It must be applied with a spray to avoid unevenness and differences in tone when painting.
Selection of stain color for wood
In accordance with the international color classification, each stain is assigned its own code, as well as a name identical to the type of wood whose shade you will get by applying the composition. But if you choose a stain only based on the name on the label, you risk encountering an unexpected result. This can happen for various reasons.
Manufactured by different manufacturers, stains of the same color can give a different shade. Specialty stores have samples of wood painted with various types of stain. They convey the color as accurately as possible, in contrast to the picture presented on the label, so it is better to focus on them.
Any wood has its own special color, density and texture. All these factors influence the final result, and coloring may not give exactly the effect you expected.
The darker the shade of the wood itself, the darker the resulting color when using the same stain.
Take porosity into account: the softer the wood, the more intense the staining result you will get. The composition will penetrate deeper and faster into the porous structure. If you compare, for example, pine and maple, pine is more porous, and accordingly, the staining results will be different.
The structure of the wood in the form of a natural pattern (veins) also matters when painting, affecting the intensity of the result. For example, when painting oak, pigments easily penetrate deep into the veins, causing them to darken faster than the rest of the wood. The shade on the veins will look more saturated.
Before starting work, it is advisable to carry out a color test on a separate board, processed in the same way as the material for painting. First, treat the entire board in one layer, then apply a second layer to 2/3 of the part, and a third to 1/3. You can see how suitable the composition is for a particular surface.
Photo of stain
Preparing for painting
You can extend the life of the base by painting it. Before painting plywood, it is necessary to prepare its surface for applying the coloring composition. The purpose of preparation is to achieve maximum smoothness and evenness of the surface.
Painting plywood is done in stages.
First you need to sand it with #80 sandpaper. After this, an acrylic-based primer is applied and left until completely dry. Wood putty, made on the basis of acrylic, is applied to the dried primer, just like the primer.
The leveling layer must also dry completely. After drying, it is sanded with sandpaper No. 80-120. The surface is again primed, dried and painted.
Characteristics of plywood.
Primer is used to protect the base from fungus.
The primer is applied with a roller. You don’t have to do any leveling if there are no special requirements for its relief. In this case, the material is primed and painted.
Grinding allows you to remove uneven surfaces and prepare it for further processing. You need to make sanding movements perpendicular to the direction of the wood grain.
If further processing involves opening with varnish, then you will also need to sand along the wood grain with fine-grained sandpaper. The edges of the material can be slightly planed towards the center. They are covered with 2-3 layers of acrylic paint.
The surface is primed and puttied for the following purposes:
- leveling the surface capable of absorption; filling cracks on the inner surface of the veneer; extending the service life of the material; protection from damage.
Choosing plywood for painting
Moisture resistance. I don’t want to ruin the ideal picture, but it is necessary to add a “fly in the ointment” to all the advantages of plywood materials – hygroscopicity.
Hygroscopicity is the property of materials to absorb and retain atmospheric moisture.
Minimizing the weak link (hygroscopicity) among the undoubted advantages of plywood is inherent in the technical manufacturing process. Manufacturers produce plywood grades with moisture-resistant parameters:
- — moisture-resistant plywood for interior work and furniture production.
- FSF – plywood with increased moisture resistance. It is mainly used in roofing work and on objects where wear resistance and resistance to mechanical loads are required.
- FOF – laminated plywood. High moisture resistance is ensured by a special coating on the surface of the plywood sheet.
- Bakelite plywood. In addition to the protective layer, a fiberglass reinforcing mesh is applied to the surface of the sheet.
You can protect plywood from moisture using paint or varnish, but we have to decide on the grade and degree of processing of the material even before purchasing it.
Degree of processing. Let's consider the types of plywood sheets according to the degree of surface treatment. The material is sanded on one side - Ш1, on both sides - Ш2, or not sanded at all - НШ.
Variety The grade reflects the appearance of the sheet surface, therefore, determines the degree of preparatory treatment before painting.
- E (elite) – the best in surface quality. The presence of microcracks, knots and wormholes in the elite grade is unacceptable, so preparation before painting is kept to a minimum.
- 1st grade. 1st grade plywood is inferior in surface quality to elite grades (up to 5 knots less than 1.5 cm in size per 1 sq. m.).
- The 2nd and 3rd grades can “boast” of minor veneer inserts, small dents and scratches, and glue residues on the edges. Knots that differ in color, holes after these knots fall out, cracks up to 20 cm long - a “set” of these varieties. The only difference is the quantity and quality of flaws.
- Grade 4 allows surface defects for any taste and color, while maintaining the quality characteristics of plywood. There are two options for painting 4th grade plywood - give up and paint “as is” or make every effort to prepare the surface, wasting your time and energy, but significantly saving on material.
Such a detailed description of the classification of plywood is given for a reason, for general acquaintance - when purchasing, adding up the components (grade, degree of processing, moisture resistance), you can realistically estimate the costs of your time, labor and finances.
How and with what to paint plywood?
The choice of coloring composition and dyeing method directly depends on the purpose of the material.
The main purpose of painting is to prevent cracking of the material. If plywood will be laid on the floor in a room with high humidity, then it is necessary to coat it with paint on both sides, and treat the edges especially carefully; several layers of the composition must be applied to them.
Plywood painting scheme.
How to paint plywood depends on the location of the work.
If this is a residential area, then it is recommended to choose water-based compositions. Acrylic is good in this case. It is applied easily to the prepared surface and dries quickly, and has almost no unpleasant odor.
If the material will be used outdoors, then the best option is pentaphthalic paint, which is a regular enamel coating for wooden surfaces. The composition is easy to apply and dries quickly.
You can purchase a ready-made composition, but if you wish, you can stay with the basic version and color the composition yourself. Before painting plywood, you need to make sure that it does not have excessive moisture. If the material was stored in conditions of high humidity, it must be dried before processing to normal humidity.
To create an attractive glossy surface, the plywood floor can be additionally varnished. This is not necessary if glossy paint is used. The paint on the surface of the material must be completely dry.
It is very important to decide in advance what to paint the plywood on the floor with. The best option is a sprayer.
With its help you can achieve uniform coverage. You can use a roller, but only without lint, but with foam rubber. If necessary, paint hard-to-reach areas using a brush.
Thus, before painting plywood, it must be prepared for the application of the coloring composition. To cover the base, certain compositions are selected. Processing methods depend on the purpose of the material.
Plywood is used quite often in modern construction and renovation, so painting plywood is a very pressing issue. The peculiarity of this material is in the method of its production.
To make it, thin sheets of veneer are glued together. The adhesive used determines the characteristics of the material, for example, its moisture resistance. Depending on the degree of resistance to moisture, plywood can be regular, moisture-resistant or laminated.
Painting helps protect plywood from rotting and moisture, and also extends its service life.
Painting process
The compounds are applied in a thin layer, avoiding drips and streaks.
Painting plywood is not difficult. It is important to follow the recommendations.
- For large areas, it is better to take a spray gun. If the surface to be painted is small, use brushes or rollers.
- Dilute the paint immediately before the procedure. If the composition dries quickly, make a minimum portion.
- Apply any paints and varnishes only along the wood fibers.
- If a more intense shade is required, apply in several layers, waiting for the previous one to dry.
You cannot apply a thick layer at once: the paint will harden unevenly, flow, and bubbles will form.
How to coat correctly
The stain is applied by rubbing.
There are several options for applying paintwork. The method is chosen depending on the viscosity and hiding power of the composition.
- It is better to apply stains with wax or oil mixtures by rubbing. A portion of the composition is poured onto the surface and carefully distributed with a sponge or roller.
- It is best to apply paint from a can. This way you get a very even thin layer.
- A foam roller is used when applying liquid compositions of low coverage. This allows you to avoid divorces.
- Thick paints and stains are applied with a paint brush to obtain a rich shade and emphasize the structure.
If oil stain is applied in several layers, after the first has dried, you need to sand the surface to remove any raised lint.
Wood imitation
Plywood products can be given the appearance of noble antiquity. There are a lot of methods. The simplest involves using a candle .
- Paint the sheet with the chosen color, apply strokes randomly in different directions.
- After drying, use a paraffin candle to wipe the sheet in the same way - in random or selected places.
- Apply a second layer of paint - a matching or contrasting shade. The plywood is covered evenly.
- While the paint is not dry, wipe the layer with a rag. In areas where there was wax, it is easily erased, in others it remains.
You can apply a third layer of paint or, after drying, varnish the plywood. It turns out to be a very interesting structure.
Features of painting white
Even with high hiding power of paint, it is difficult to obtain a pure white color . Plywood is prepared for this: primed with white mixtures and sanded. Matte paints are used for coating , since glossy ones do not hide, but highlight the slightest surface and color defects.
Drying
Drying plywood is a preliminary stage of work. This is done if you need to paint or varnish material brought from the cold. The sheets are placed in the room where they will be used and kept for about a day. If the material was stored or transported at a temperature difference of more than 10–15°C, it will take 3 days.
Painted plywood dries naturally. Hairdryer is not used .
Preparing for painting
You can extend the life of the base by painting it. Before painting plywood, it is necessary to prepare its surface for applying the coloring composition. The purpose of preparation is to achieve maximum smoothness and evenness of the surface.
Painting plywood is done in stages.
First you need to sand it with #80 sandpaper. After this, an acrylic-based primer is applied and left until completely dry. Wood putty, made on the basis of acrylic, is applied to the dried primer, just like the primer.
The leveling layer must also dry completely. After drying, it is sanded with sandpaper No. 80-120. The surface is again primed, dried and painted.
Characteristics of plywood.
Primer is used to protect the base from fungus.
The primer is applied with a roller. You don’t have to do any leveling if there are no special requirements for its relief. In this case, the material is primed and painted.
Grinding allows you to remove uneven surfaces and prepare it for further processing. You need to make sanding movements perpendicular to the direction of the wood grain.
If further processing involves opening with varnish, then you will also need to sand along the wood grain with fine-grained sandpaper. The edges of the material can be slightly planed towards the center. They are covered with 2-3 layers of acrylic paint.
The surface is primed and puttied for the following purposes:
- leveling the surface capable of absorption; filling cracks on the inner surface of the veneer; extending the service life of the material; protection from damage.
Advantages of using wood stain and its main types
Wood stain is very popular and is designed to add aesthetics and decorativeness to various wood products, change their tone and emphasize texture, and most importantly, to increase their service life. This can be achieved by the antiseptic properties of stains. There are also wood stains that can protect the treated surface from insect pests, mold and mildew.
This article discusses in detail not only what stain is, but also its main types, properties, advantages, and why it is needed.
Features and Benefits
Depending on the purpose and composition, wood stain has the following advantages over a number of other paints and varnishes:
- Possibility of combining shades (for example, dark colors, walnut or pine, light colors, black, etc.).
- Coating with stains strengthens the structure of the material.
- Increasing the service life of products.
- Partially imparting moisture resistance to lumber.
- It makes it possible to both give the wood a noble shade and get a different color scheme (there are a wide variety of stain colors available).
- Preservation of wood structure.
The main advantage of this tinting composition is its deep penetration into the wood. This allows you to preserve the wood texture. Therefore, the answers to the questions about what is better - stains or varnishes, and what stain is needed for, become obvious.
Color palette
There are different colors of wood stain, and it is very difficult to answer the question of how to choose the most suitable one. This material allows you to add almost any shade to wood products. For example, black stain is very popular, which allows you to give the surface the appearance of a black mirror. It is recommended to polish the base before applying it.
Gray stain makes it possible to avoid highlighting the treated product from the overall interior. It is worth painting with it only if the walls and textiles in the interior are bright. Gray can cause depression, and products in this color will look too faded and gray.
Psychologists advise choosing a green stain (colored stain), since this shade evokes positive emotions. Green color is suitable for surface treatment of various interior items. Blue stain allows you to get a very expressive look to the finished product. Choose it to combine with yellow and white tones.
There are more natural wood stain colors on the market. But there is a colorless impregnation that allows you to preserve the surface in its natural color.
Main types
Impregnation for wood varies depending on the composition. Let's look at the most common types of stains:
- Water-based stains. Water stain can be powdered (water-soluble) and in the form of ready-made formulations. It is an environmentally friendly product (regardless of external factors, there are no harmful fumes or smells), and it also has a rich range of colors. If necessary, the product can be easily washed off with water, so it is recommended to apply an additional protective layer (for example, varnish). The main disadvantage is the raising of wood fibers, as a result of which the product becomes more vulnerable to moisture (non-aqueous impregnation is used to eliminate this disadvantage). Water-based wood stains have become the most widespread.
- Alcohol compounds. Available ready-to-use or in dry form (the powder must be diluted). Designed to protect wood from moisture and ultraviolet radiation. This impregnation dries quickly enough, which avoids raising the pile and swelling of the wood.
- Oil compositions. The composition of the stain includes dyes soluble in drying oil and oils. Impregnations of this group can be applied using any method and tool. They do not fill the wood with additional moisture and do not lift the fibers. The variety of colors of wood stains for this group, if desired, allows you to achieve any shade by simply adding dyes.
- Acrylic mixtures. Acrylic-based impregnations are an environmentally friendly, child-safe and fire-resistant product. Acrylic stain is great for all types of wood and dries very quickly.
- Wax stains. Allows you to process painted surfaces. Wax-based impregnations reliably protect the treated surface from moisture. It is important to know that wax stain cannot be used before coating wood with two-component varnishes.
On the video: rules for choosing stain.
Application methods
There are four main ways to apply stain:
- Rubbing painting. The composition is applied to the surface, after which it is rubbed over the entire area. Recommended for use when processing porous wood species.
- Spraying. When staining wood by spraying, a manual or automatic sprayer is used as a tool for applying stain.
- Processing with a foam roller. This method avoids the formation of streaks and helps to distribute the mixture evenly over the entire surface.
- Processing wood with a paint brush. The method allows you to obtain a deeper and richer color of wood, but is not suitable for all types of impregnation.
Next, we will consider in detail how to stain wood. To obtain a high-quality and good coating, you must follow the basic rules for treating surfaces with stain:
- Before painting a surface with stain, it is necessary to remove old coatings from it, and then degrease it better.
- The surface made of coniferous species (for example, pine) must be deresined.
- It is necessary to paint wood with stain and remove excess only in the direction of the wood structure.
- It is recommended to cover the surface with 2-3 layers, while for the first layer a small volume of the mixture should be used.
- After the first layer has dried, the surface must be sanded and the raised lint removed, and then, if necessary, apply subsequent layers (each subsequent layer is applied only after the previous one has completely dried).
The approximate drying time for oil-based impregnations is about three days, and for water-based and solvent impregnations - 2-3 hours (depending on how many layers were applied). It is recommended to divide large areas of the surface to be treated into small areas and paint them in stages. To avoid the possibility of defects forming on the surface, the composition must be diluted. A solvent is used for this.
For water-based impregnations, water is used, for oil-based impregnations, paint solvents are used. Also, before starting work, the surface can be coated with Latek L 601 putty.
Plywood stains perform a purely decorative function. Therefore, if you are in doubt about whether to choose stain or varnish, it is recommended to use them in combination. Before covering the surface of the plywood, it must be moistened, and it is recommended to heat the mixture itself.
After covering the wood with stain, it should be treated with varnish (layers should be very thin to avoid the possibility of smudges). The tool you can use is a brush, roller or sponge. Wood varnish will enhance the protective properties of the impregnation. By following these recommendations, you can easily stain wood at home.
Defects and their elimination
Staining wooden furniture must be done extremely carefully, otherwise there is a high risk of defects forming that are quite difficult to eliminate. But if you know how to get rid of them correctly, then there shouldn’t be any problems.
The main defect is the formation of streaks. They arise as a result of applying a large amount of the mixture and its subsequent rapid drying. In this case, it is necessary to remove the layer of impregnation applied to the wood, then apply a new layer on it, which will soften it, and then remove excess impregnation with a rag.
After the wood stain has completely dried, it can be removed using paint solvents. Before this, the top layer is removed with sandpaper or a plane, since the solvent is not able to remove all the pigment.
You can choose a special remover that will remove the excess layer of coating impregnation from the wood. You can use a hair dryer in combination with a scraper and brush - sometimes this is better than washing.
The most difficult defect is spotting of the product. To remove it, the painted area is treated with a plane (this defect is not washed off with a solvent). In plywood, all face veneer must be removed. To avoid staining, it is better to use a gel stain or first apply a test layer on an unwanted piece of wood to see how the coating behaves on the desired surface. It is worth remembering that the impregnation must be stored in a place away from children.