A plane is a traditional carpenter's tool, a kind of symbol of this profession. The shape of the instrument and the methods of working with it, despite its technical improvement over many years, have not essentially changed.
In order for the process of planing a wooden workpiece to proceed “without a hitch” (as evidenced by the twisted shavings freely coming out of the slot in the plane block), it is necessary to accurately adjust the plane knife and correctly move the plane along the surface being planed.
Planing is a real pleasure when thin and long twisted shavings fly out of the plane.
Having fixed the plane knife with the chipbreaker exposed in the vice of the workbench, lightly tighten the screw. After wedging, the chipbreaker fixes itself due to its springiness.
Insert the knife into the tap hole of the plane and first secure the wedge in its guides by hand.
To determine whether the knife is positioned correctly (its blade should be parallel to the plane of the sole of the plane and slightly protruding above it), you simply need to turn the plane over and evaluate the mutual parallelism of the knife blade and the sole by eye. To adjust (if necessary) the position of the knife, release the wedge, align the knife correctly and fix it again with the wedge.
When planing the faces of workpieces, the knife should remove chips of uniform thickness. To do this, you need to adjust the chipbreaker of a jointer, a double plane (with a double blade) or a sander. The chipbreaker performs the function corresponding to its name and should be installed slightly above (about 1 mm) the knife blade and fit snugly against it.
First, the knife with the chipbreaker fixed on it is inserted into the slot (tap) of the block (body) and slightly wedged. Then set the knife with light blows of the hammer so that its blade is parallel to the sole of the plane and protrudes slightly above it. After this, the knife is finally fixed in the block with a wedge, screw or cam clamp (depending on the design of the plane).
Since during planing the upper part of the worker’s body moves together with the plane, the carpenter must stand on the side parallel to the workpiece being processed, with one leg placed forward. To prevent the plane from tipping over at the beginning and end of the workpiece (then the surface being processed in these areas will be uneven), you should lean harder first on its front handle, and then on the back handle at the exit.
PRECISION PLANE
In modern planes with a metal block, the blade is usually secured with a screw. With another screw (set screw), you can adjust the plane to the required thickness of the chips being removed with an accuracy of hundredths of a millimeter. In addition, such planes are equipped with a so-called knife tilt regulator, which allows you to quickly, just by pressing the thumb on the corresponding lever, correctly position the knife blade relative to the sole of the plane.
EDGE PLANING
When planing the edges of flat workpieces, you should move the plane along an even path along the entire length of the workpiece, leaning evenly on it. In this case, the knife must be secured securely so that it does not vibrate in the block. In addition, you should avoid tearing the chips by cutting in the direction of the wood grain. When processing wood pieces with thin and irregular texture (for example, root), the knife must be sharpened very well. When planing, such a workpiece should be constantly rotated.
It is more convenient to plan a narrow edge using, for example, a piece of board pressed against the workpiece, or plan simultaneously the edges of several thin boards collected in a package. In this case, the supporting surface for the sole of the plane increases.
To prevent the edge from becoming rounded, the plane must be held level, without tilting in any direction.
With Sherhebel you can remove a thicker layer of material in one pass.
Planing the end of the workpiece will be much easier if you hold the plane at an angle to the faces of the workpiece.
Wide wooden overlays, attached with a clamp to both edges of the workpiece, will prevent chipping when processing the end.
The surfaces of short-length workpieces are very smooth with a silky shine after processing with just a sander.
When planing layers, it is necessary to constantly check their processed surface with a steel square.
When processing long workpieces, a jointer has proven itself best, as it can be used to plane even against the grain.
PLANING PLATES
To make a rough but even surface smooth, it is enough to treat it with a sander (a tool with a knife angle increased to 60° for fine planing of hard-to-cut wood) and a jointer. To eliminate unevenness or remove a thicker layer, treatment with Sherhebel will be required. The latter is equipped with a narrow (33 mm wide) convex knife with an oval blade, capable of removing chips up to 3 mm thick in one pass. After this, the surface must be leveled with a sander and “smoothed” with a jointer.
CLEANING THE ENDS
When cleaning the ends of the workpieces, the plane is driven in the direction “away from you”, making short pushes with it. In this case, the wood fibers are cut crosswise, which requires somewhat greater effort and the use of a very sharp knife. To avoid chipping at the edge in the direction in which the end of the workpiece is being machined, you can first chamfer this edge. It’s better to first process one half of the end to the middle, and then, turning the workpiece 180°, the second half.
More than during operation, the blades deteriorate from contact with foreign objects when the plane is not used. During breaks in work, the plane should be placed on its side or with the front of the sole on a wooden stand. During long-term storage or when transporting the plane in a tool box, the knife should be placed inside the block.
Source: niola-td.ru
How to choose and use an electric planer correctly
An electric plane is an essential tool for anyone who deals with wood processing, and during construction or renovation it can become an indispensable assistant. In everyday life, a traditional hand plane is usually enough for a home craftsman, but in a private farmstead or summer cottage there is plenty of woodworking. Baths, outbuildings, fences, benches and other furniture - the list goes on and on.
An electric planer will save the craftsman a lot of time and effort and allow him to achieve good results. Using an electric planer, workpieces are brought to the required dimensions, surfaces are leveled, nicks, burrs and knots are removed, edges are cut, and grooves are selected. A plane, of course, is not capable of “fine” processing of surfaces to perfect smoothness; this will require additional tools. But with its main task - rough processing of wood in large volumes - the electric planer, if the operating rules are followed, copes “excellently”.
As when choosing any power tool, when choosing an electric planer, a master should start from the main tasks in which the tool will be most often involved. An important role is played by the power of the tool, which is directly related to its performance. A plane of greater power plans “deeper”, that is, it can remove a thicker layer of wood in one pass. Manual electric planers are produced with a power ranging from 0.5 to 2.2 kW. Above one and a half kilowatts is, in fact, a professional tool for large-scale work. If you plan to use the plane frequently and in large volumes, it makes sense to take a closer look at more powerful models. But, as always, the rule applies: the more powerful the tool, the more it weighs and the higher its price. It will be convenient to work with a low-power plane while suspended. Medium power models weigh between 2.5-4 kg.
Another indicator is the rotation frequency of the drum, that is, the number of revolutions it makes per unit of time. This value is very important to consider when choosing a plane, says FORUMHOUSE wind1wind: the higher the number of revolutions, the better the quality of the cut. The optimal option that you should focus on when choosing is 15000-16000 rpm.
wind1wind:
– The plane does not create a completely flat surface, but a “wave” with very fine steps. To make this waviness invisible, the number of shaft revolutions and the number of knives on the shaft are increased. These two parameters are very important when choosing.
What is a plane needed and intended for?
A wood planer performs a fairly extensive range of tasks - not just planing to a flat surface.
Planing a board
The following works are possible:
- creating a groove and groove of the desired shape;
- quarter selection (specialized cutout along the edge of the part);
Quarter selection and chamfering
- creating a chamfer or changing its shape and geometry;
- facing and trimming the workpiece;
- creation and processing of flat surfaces to the required dimensions and parallelism;
- bringing the surface roughness to the required value, eliminating waviness.
With a plane you can process workpieces for roughing, finishing and finishing, and finish finished surfaces. The tool is widely used in woodworking in the following areas:
- creation and repair of furniture;
- construction (doors, windows, baseboards, trim);
- restoration work on art and antiquities.
Wherever wood and lumber are processed, a plane will be useful.
Its modern version, the electric planer, is used both at home and professionally. Processing with its help is faster and requires less muscle power. The device is perfectly mechanized - there are many structural adjustments and the ability to install a vacuum cleaner.
How to work with an electric planer correctly?
Many beginners are interested in the question of how to work with an electric planer. At first glance, there is nothing complicated: plug it into a power outlet, press a button, move it back and forth across the surface, removing chips. However, during the first attempts, the result is not always impressive.
When purchasing a tool, you need to check its functionality, completeness and appearance. It is worth paying attention to the sharpening quality of the installed knives. If the kit contains spare knives, you need to check them too. The cutting edge should be smooth, sharp, without gouges or bends. All other settings should be checked at home in accordance with the manufacturer's instructions.
How to put a plane on a workbench
How to properly put down a tool when not in use is a simple question, but not everyone knows the correct answer.
During the work itself, one somehow forgets that the most important part of the plane is the knife. It is a sharp part and, when of considerable length or width, is a valuable part. Preserving it is the main task.
Regardless of how you work and which option, the plane should be placed on its side. The cutting edge is located on the side, without contacting any surface.
How to properly place a plane on a workbench
When storing, ensure that the blade is preserved. It is optimal to store in a special box or tray made of wood or plastic.
Checking and adjusting the position of the front plate
All adjustments to the tool must be made in the off state. The plug must be unplugged from the socket, otherwise you can not only damage the electric planer, but also cause serious injury.
Table of main parameters of electric planers.
When checking the position of the knives, the front plate must be set to the minimum planing depth position using the standard adjustment knob. Place the electric planer on a flat, hard surface with the drum facing up.
To check, you can use a metal ruler or a piece of window glass of suitable dimensions. The drum with knives should be rotated until one of the knives is in the upper position, above the drum axis. The ruler or glass must be laid on the slabs along the plane. The surfaces must be in the same plane.
If the control device on any of the plates is tilted, you need to check the position of the front plate and adjust it. Such a defect occurs during long-term operation of the tool without maintenance. The internal cavities can become clogged with wood dust and small shavings. Excessive force on the depth adjustment handle displaces it from its original position.
To eliminate the defect, you need to remove the handle, the front plate, clean the cavities from dust and chips, and lubricate them. Place the plate in place, check the installation using a ruler, secure the handle, checking that the dial matches the index mark.
Device and purpose
Despite the large number of power tools for woodworking, carpenters and joiners are in no hurry to abandon such a simple and reliable tool as a plane. After all, compared to a grinding machine, it has undeniable advantages:
- the absence of wood dust during work is the main, but not the only advantage;
- the blade does not need frequent replacement , unlike sandpaper;
- no access to the power supply is required - also important, especially in small workshops.
And most importantly, experience and dexterity when using an ordinary hand plane give an excellent result, which is difficult to distinguish from sanding. Only the plane must be correctly assembled and configured.
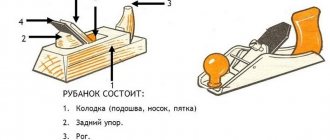
Main details of this tool.
- Frame . All other elements are based on it. It can be wooden or metal, the main thing is that its sole (lower part) must be strictly flat.
- Knife . This is a working body. It must have a good one-sided sharpening at a certain angle.
- Knife clip (“frog”) . It provides the necessary blade reach and, as a result, speed and quality of work.
- Front handle . Needed to hold the tool and set the direction of movement. She is held with her left hand.
- Rear handle. Designed to transmit pushing forces. In some models, its role is played by the body.
- Chip breaker . Installed slightly higher than the knife. It is designed to reduce internal stresses in the workpiece material and prevent chipping on the machined surface.
- Knife position adjustment screw
- A slot in the sole through which the knife interacts with the workpiece (“mouth”). On expensive models, the size of this gap is adjustable.
In simple wooden planes, the last 2 elements may not be present. There are a large number of varieties of this instrument. These are single, and double, and sherhebels, and polishers, and much more. Accordingly, these tools need to be used differently. But fundamentally the designs are no different. Therefore, they are configured in a similar way.
Adjusting the position of the cutting edge
Adjustment of the position of the knives is carried out according to two parameters:
- height of the cutting edge relative to the back plate;
- the size of the protruding part of the knife for planing quarters.
Layout of the drum with blades.
Having installed the ruler or glass, you need to rotate the drum, controlling the gap between the knife and the device at the edges of the slabs. The edge of the knife should lightly touch the tool without lifting it. If the knife clings to the device or does not reach it, the position must be adjusted.
Typically, knives are secured with a special wedge with expansion bolts. Using an 8 or 10 wrench, you need to screw the bolts into a wedge until the bolt moves freely. Then, using the installed eccentrics, align the height of the cutting edge with the device. Tighten (unscrew) the mounting bolts and check the position again. The desired result can be achieved after several repetitions of this operation.
At the same time as adjusting the height of the cutting edge, you need to control the protruding part of the quarter planing knife. The optimal size should be indicated in the manufacturer's instructions. On most models it is 1 mm. The size is set by moving the knife left or right along the axis of the drum. It is important to set the size correctly. It should be the same on all knives. This can be achieved by using a feeler gauge of a certain size or by measuring the distance with a caliper (a caliper with a protruding back) from the edge of the knife to the drum. After adjusting the first knife, you need to move on to the next ones. The operation for all knives is performed similarly. If a knife cannot be installed in the required position, you need to remove the wedge and check the eccentrics for integrity and free rotation.
The adjustment must be completed by checking the free rotation of the drum and the fastening of all knives.
Safety regulations
Be careful when working. Follow a few simple rules.
- Pay close attention to the quality of the workpiece. Working on wet wood is not recommended.
- Do not push out chips with your hands . This can cause you to cut yourself or get a splinter.
- Before planing, you need to set up the tool on a workbench ; you need to place it on its side with the blade in the opposite direction from the worker.
- You need to pass the tool to another person with the blade facing you.
- Dropping the tool is not recommended.
To learn how to put a hand plane into working condition, see the following video.
Preparing for work
The tool can be used in two positions:
Plane sharpening angle diagram.
- stationary position: the electric planer is attached to a rigid, stable surface;
- portable: the tool is moved manually along the workpiece.
Many models come with special clamps and a bracket for the start button. In a stationary position, it is more convenient to process short-length lumber, which can be moved along the tool alone. It is advisable to process long workpieces with a portable electric planer.
The wood must be dried; raw lumber is poorly processed. The board must be firmly secured to a hard surface. The part should not sag under the weight of the plane and shift during operation in any direction. When processing side surfaces on a workbench, it is advisable to install them on special fastenings that protect them from bending and movement. In the area of rotation of the drum with knives there should be no metal elements (brackets, nails, screws) on the surface being processed or fastening elements. Hitting the metal will leave a gouge in the blades, and a protrusion will form on the surface being treated. The knives will have to be sharpened, removing a thick layer of metal, or replaced.
Wood planing. Safe work rules
5th grade
Lesson plan on technology
Lesson topic:
Planing wood. Safe work rules. Lesson objectives : educational
- familiarization with the process of planing with a plane and other tools for performing this operation;
educational
- instilling conscious discipline, accuracy and attentiveness when planing parts;
developmental
– development of skills and abilities to work with a plane.
Material and technical equipment:
for the teacher
: projector, laptop, multimedia presentation “Wood planing”, product samples, lesson plan, technological map
for students
: planes, hacksaws, wood blanks, notebooks, textbooks, sandpaper, squares, rulers.
Chalkboard design:
topic of the lesson, new words, homework.
Lesson plan:
1) organizational moment 1-2 minutes;
2) communicating the goals and objectives of the lesson to students for 2-3 minutes;
3) communication of new material while viewing a multimedia presentation for 20 minutes;
4) physical education minute
5) introductory briefing on safety and definition of the task 3-4 minutes;
6) independent work of students, ongoing instruction 45 minutes;
7) consolidation of the material being studied;
 summing up, final briefing 4-5 min.
Time spending:
80 minutes.
1. Organizational moment (2 min)
— Checking the attendance of students according to the magazine. — Checking readiness for the lesson (availability of teaching aids and writing materials). — Checking the appearance (of workwear).
2. Report the topic of the lesson
(
pre-written on the board). (2 min)
- Setting goals and production tasks for students. 3. Explanation of new material.
3. Explanation of new material (20 min)
Rules for safe work when planing:
A). Securely secure the workpiece on the workbench.
b). Use a plane with a well-sharpened knife.
V). Do not check the sharpness of the blade and the quality of the surface finish with your hands.
G). Clean planing tools from chips only with a wooden wedge.
d). Place planing tools on the workbench only on their sides with the knife blades facing away from you
Planing
wood
- processing a workpiece to the desired size and creating even and smooth surfaces on it.
Planing is carried out using various
plows
(planing tools).
Among the plows, the most common are sherhebels, planes
jointers.
These
The cutting edge of a Scherhebel knife is arched and convex, while that of a planer and jointer is straight.
The plane consists of a block,
knife
,
wedge
,
handle
.
The plane is designed for cutting thin shavings and obtaining smooth surfaces on wood, as well as cutting the workpiece to the desired size.
Plow blocks can be wooden, metal or a combination.
Planers are much longer than planers. They are convenient for obtaining smooth, flat surfaces.
The cutting part of all carpentry tools is wedge-shaped. For example, a plane knife in its cutting part is sharpened in the form of a sharp wedge. The two surfaces of the wedge at their intersection form a sharp cutting edge. This cutting edge cuts the wood fibers, and the front surface of the knife bends the cut layer in the form of chips.
Before planing, you should check whether the tool is adjusted correctly. In a correctly installed knife, the blade is located above the sole of the block without distortion and protrudes by 1...3 mm at the Scherhebel
or by
0.1 ... 0.3 mm at the plane.
The workpiece is mounted on a workbench, clamping or wedging between the stop and the wedge so that the side to be cut is directed upward. With your right hand, take the plane by the handle on the back side of the block, and with your left hand, by the block or handle on the front side. The plane is placed on the workpiece with the blade down and pushed forward. At the beginning of planing, apply pressure to the front part of the plane, and at the end - to the back, so that the surface being processed is flat.
When the plane moves back, it is lifted above the surface. So, moving back and forth, they gradually scrape off the surface being treated until it becomes even and smooth.
If the fibers on the surface being processed are lifted, then the part should be planed on the other side.
The plane must be held firmly so that your hands do not slip off it and hit the sharp side ribs of the workpiece. In this case, bruises and cuts to the hands are possible. The workpiece stops should not protrude above the surface to be machined.
Planing quality control is carried out using a ruler or square against the light.
Tools for hand planing.
After sawing, the workpieces have risks, roughness, and warping.
All these defects are eliminated by planing. In addition, when planing, the workpieces are given the desired shape. For manual planing, wooden planes are used.
A planer consists of a wooden body into which a knife is inserted, firmly secured with a wedge. The wedge rests on shoulders made from the sides of the tap hole. The plane of the tap hole surface to which the knife is attached should ensure a tight fit. Swinging of the knife is not allowed. In the sole of the plane, i.e. in the lower part of the body, there is a narrow slot (span) with a width of (5.7 ± 0.5 ... 1) mm, through which the knife blade protrudes beyond the sole.
For better operation of the plane and convenient movement of it through the material, there is a horn in the front part. The sole of the plane or jointer should be even and smooth. Due to the fact that the sole is subject to abrasion, it is glued from hornbeam, maple, white acacia, ash or beech wood. The horn, stop, wedge, and lining are made of wood intended for the manufacture of the base of the body, and of birch and elm wood. The handles are made from uncoated plywood board PF-A. Glue the sole of the plane and the overlay using waterproof adhesives. Wood for making a plane or jointer must not have cracks, rot, sprouts, wormholes, large knots, unfused knots, resin pockets, etc. The moisture content of the wood must be (10 ± 2)%. The surfaces of the parts of planes and jointers, with the exception of the sole of the bodies (pads) and the surface of the wedge adjacent to the knife, are coated with light waterproof varnish.
Sherhebel (1)
(GOST 14666-79) (Fig. 18,
b)
is intended for rough planing of wood along, across and at an angle to the grain. After planing with Sherhebel, the surface of the wood is uneven with traces of grooves in the form of grooves. This is because the knife blade has an oval shape with a radius of 35 mm. During operation, the knife is released up to 3 mm. When working with Sherhebel, the shavings are narrow and thick. The mass of the Scherhebel is 0.82 kg.
Planer with single blade
(GOST 14664-77) (Fig. 18,
c)
is used for leveling the surface after sawing or for planing it after processing with Sherhebel. The blade of a knife with a width of 40...50 mm is straight, it extends 1 mm. Since this plane does not have a chipbreaker (hump), the chips are formed without breaking, so the surface of the processed wood often gets burrs and sometimes chips. Planer weight 0.9 kg.
Planer with double blade
(GOST 14665-77) (Fig. 18,
d)
are used for fine planing of wood, cutting off the ends, as well as curled wood and wood with burrs. In addition to the knife, this plane has a counter-knife - a chipbreaker. The presence of a chipbreaker improves the quality of planing, since the chips, after separation, rise up the knife, bend and, falling on the chipbreaker, break. The fracture of the chips after separation prevents the possibility of them flake or splitting from the surface of the wood. Planer weight 0.97 kg.
The closer the chipbreaker is installed to the knife, the sooner it will break off the chips, therefore, for better processing of wood, the chipbreaker is placed closer to the knife. But at the same time, it should be taken into account that the chipbreaker cannot be placed very close (less than 2 mm), since the chips will get clogged under the blade and the planing process will be difficult.
In addition to wooden planes, metal sherhebels and planes with single and double knives are used for planing wood (Fig. 19). Planers are a metal body into which a knife is inserted, secured in the body with a screw. The horn and handle are made of wood. The amount of chips removed is controlled by the extension of the knife.
Jointer
(GOST 14670-77) is used for final finishing planing, as well as for jointing individual parts (Fig. 20). The jointer is almost three times longer than the plane, which allows you to plan long parts with it. In the front part of the jointer on the body there is a plug, with a hammer blow on which the knife is knocked out of the body from the tap hole. The knife blade should protrude 1 mm. When wood with a wavy surface is processed with a jointer, chips are obtained in the form of small pieces, and when repeated, continuous thin chips are formed, indicating that planing should be completed, since the surface is smooth. Planer weight 3.25 kg.
Shorter parts are processed with a semi-jointer
(GOST 14671-77), having a shorter body (530 instead of 650 mm).
To clean wood that is scuffed and curled, use a plane with a shortened body - a sander. Sanding teak
It has a narrow slot (5 mm wide) and an increased angle of addition (60°), due to which, when working, it removes thin chips and the surface of the wood is processed cleaner. The knife blade extends by 0.5 mm.
Zinubel
(GOST 14667-79) (Fig. 21) serves to form small, barely noticeable grooves and hairiness on the surface of the wood for gluing (veneering). The knife has a serrated blade. When replacing a serrated knife in a tzinubela with a regular one, it is used as a grinder.
End plane
(Fig. 22) is used as a regular plane and for planing the ends, since the knife installed in it at an angle to the side surface facilitates the planing process and improves the quality of processing. When planing at an angle to the axis of the board, a regular plane can be used as an end plane.
Zenzubel
(GOST 14668-79) (Fig. 23) is used for manual selection and stripping of quarters in carpentry parts. The body of the zenzubel is high (80 mm) and narrow with a straight sole. The presence of a side hole in the body ensures free exit of chips during the planing process and improves the quality of processing. The zenzubel knife is sharpened on the side and bottom, thanks to which it forms a quarter when working. The weight of the zenzubel is 0.38 kg.
Falzgebel
(GOST
14669-79) (Fig. 24) is used for selecting quarters, unlike zenzubel, it has a knife-step sole.
Folding weight 0.5 kg. The tongue and groove pile
(Fig. 25, a) is intended for manual selection of tongue and groove grooves on the edges and faces of parts. It consists of two housings connected by screws, and a knife is attached to one of the housings. The housings are installed at the required distance of the groove (tongue) from the edge of the part. There is a set of knives for cutting grooves of different widths. The length of the tongue and groove is 250, width 20, height 80 mm; weight 1.1 kg.
Gruntubel
(Fig. 25,
b)
is used for removing the groove, as well as cleaning the trapezoidal groove selected by the reward.
Galtel
(Fig. 25,
c)
form grooves of different widths or depths with different radii of curvature. The fillet body has a convex sole. Fillet length 250, width 10...25, height 60...80 mm.
Shtap
(Fig. 25, d) is designed to form roundings on the edges of parts. The base of the body and the knife have a concave shape.
Kalevka
(Fig. 25,
d)
profile processing of the edges of the parts is carried out. The sole has a mirror (reverse) profile shape of the part. There is a set of molding tools for processing different profiles.
Gorbach
(Fig. 25,
f, g)
is used for planing concave and convex surfaces. The body of the humpback fish has a convex or concave shape along its entire length (with constant curvature), which must correspond to the profile (curvature) of the workpiece. The humpback's knife has a straight blade. The length of the humpback is 100..., width and height 60 mm.
Manual planing.
Wood planing work involves selecting material for planing, sharpening knives, setting up tools, planing, and checking the quality of work performed.
When selecting a material, the front side and direction of the fibers are determined, it is determined whether it has convexities or concavities that must be removed by planing, wood defects are identified and it is determined whether they are acceptable for parts made from this material.
The knives of planes and jointers are sharpened on a sharpener with a carborundum or sandstone wheel (Fig. 26). A sharpener for sharpening knives is a metal shaft on which a round sharpening stone with a diameter of about 500 mm is mounted. The shaft is located above a metal trough into which water is poured to wet the wheel during the sharpening process. The shaft is driven by an electric motor.
The sharpener should be equipped with a stop on which the knife will have a support that fixes its position in relation to the sharpening stone, and a protective visor.
When sharpening knives, the sharpening wheel rotates against the blade, while the knife is held with the right hand at the required angle straight, without distortions, evenly pressing it against the wheel, and the knife is supported with the left hand. Sharpen the knives on a wet sharpener until burrs form on the opposite side. If the burrs are insignificant and visible in the form of thin and even stripes, sharpening is considered satisfactory. Large, large burrs are formed when the knife is pressed hard during the sharpening process. Therefore, the knife is pressed tightly against the circle, but not tightly. During the sharpening process, the sharpening angle must be maintained at (25 ± 5)°. If the burrs are not removed from the knife, it cannot be used, as it will quickly become dull.
When sharpening knives on a sharpener, you should stand slightly away from the wheel and work with safety glasses, as the resulting sparks and flying small pieces of stone (abrasives) can get into your eyes.
Knives are also sharpened on fine-grained sharpening stones of the BP type, with the help of which burrs and notches are removed from the chamfer of the knives. The bars should be moistened with a few drops of kerosene or water.
When sharpening with straight-line movements, take the knife by the tail part with the right hand and place the chamfer tightly on the block, and press it against the block with the left hand. Then, with uniform movements, move the knife back and forth along the block while maintaining the sharpening angle (see Fig. 26, d).
When sharpening with circular movements, the knife is also taken by the tail part with the hands and, pressing the chamfer against the block, moves it along the surface of the stone with continuous and uniform circular movements (see Fig. 26,
e).
Scherhebel profile knives and fillets are sharpened on whetstones, and trimmed on whetstones or sharpened with files and trimmed with emery powder and oil (in the form of a paste). Correct sharpening of knives (Fig. 26, c)
checked using a template, a ruler and a square, with the sharpening angle using a template, and straightness using a ruler and a square. A properly sharpened knife should have a blade that fits tightly against the ruler, with no gaps. A knife blade is considered sharp when it can cut hair.
Knives are sharpened with a whetstone - a fine-grained whetstone. Before editing, the whetstone is moistened with mineral oil or kerosene. Since the whetstones become salted during the sharpening process, they are periodically washed with kerosene. The blade on the whetstone is adjusted in a circular motion, but it can be adjusted by moving the whetstone along the chamfer of a fixed knife. The worker applies the knife with a chamfer to the whetstone and moves along it in a circular motion, maintaining the sharpening angle, then he places the knife on the other side of the whetstone and also moves in a circular motion until the burrs are completely removed.
For sharpening carpentry tools (plane knives, chisels, chisels), an electric sharpener ET-1 is used (Fig. 27). The sharpener makes 45 (2700) s-1. The power of the electric motor for sharpening is 0.32 kW, voltage 220 V. A grinding (abrasive) wheel with a diameter of 100 mm is installed on the machine. Machine dimensions 310 X 166 X 205 mm, weight 7 kg.
Setting up planes and jointers consists of disassembling the tool to change knives, installing and fastening the knife.
The plane is disassembled as follows. Take it in your left hand and, lightly hitting the back end with a hammer, loosen the wedge, after which the wedge and knife are easily removed. Then a sharp knife and wedge are inserted into the tap hole and struck at the front end of the plane (on the frontal part) (Fig. 28). The wedge should fit tightly to the knife, the knife blade should evenly protrude from the sole of the plane by the required amount (without distortion). Reduce the amount of protrusion of the blade by hitting the back end of the plane with a hammer, and increase it with weak blows of the hammer on the tail (end) of the knife where the angle of the blade is more visible. The correct release of the blade is checked “by eye” by lifting the plane with the sole up to eye level. If at the same time the blade is visible in the form of a narrow strip - a thread, the knife is “seated” correctly. The knife is installed with the front edge in relation to the horizontal plane (the plane of the sole) at an angle of 45° - for the sherhebel, planes with a single and double knife, zenzubel and folded hebel, and at an angle of 80° - for the tsinubel.
Planing techniques.
Before planing with hand tools, you should carefully inspect the workpiece, determine the direction of the fibers and the front side. Wood should be planed along the grain, as this results in a smoother surface and less effort is spent on planing.
You need to plan by moving your arms to full swing, in a straight line with even pressure on the tool. In this case, the body body should be slightly tilted forward and remain motionless while planing. Planing should be done through the movement of the arms, and not the body, otherwise the worker will quickly get tired.
The workpiece to be processed is fixed on a workbench between a comb (stop) and a vice so that the direction of the fibers coincides with the direction of planing. The workpiece should lie tightly on the workbench without bending.
Take the tail part of the body with your right hand, and the horn with your left hand and install the plane
to the workpiece being processed.
At the beginning of planing (Fig. 29, a, 1)
, press with your left hand on the front of the plane, and with your right hand lightly on the back.
In the middle of planing (Fig. 29, a, 2)
press equally and evenly on the entire plane, and at the end of planing (Fig. 29,
a, 3),
when the plane leaves the workpiece being processed, the pressure on the right hand should be increased so as not to “fill up” the end of the workpiece being processed. If it is necessary to move the plane back, lift its rear part and move it.
First, plan the workpiece with a sherhebel at a certain (acute) angle in the direction of the grain, since if you plan with this tool along the grain, you can remove excess wood.
When processing twisted areas with Sherhebel, you should not remove thick shavings, as wood chipping may occur and the workpiece will become unsuitable for further processing.
After planing with Sherhebel, the surface of the part is leveled with a plane with a single knife. The part is finally cleaned with a plane with a double knife or a semi-joint, which smoothes the surface of the processed block.
Rectangular blanks begin to be planed from the front side, which has fewer defects. After processing the front side, check the quality of planing with a ruler along and across the grain, and if the workpiece is wide, then diagonally. If there are no gaps between the ruler and the edge of the processed workpiece, the processing should be considered satisfactory. After this, the edge of the workpiece is planed with a plane with a single or double knife. The squareness of the edge and face is checked with a square. Then the non-facial face and the second edge are planed, while maintaining the required dimensions.
The bars are planed as follows: they are laid on a workbench and secured; irregularities on the surface of the block are smoothed out with a sherhebel, a plane, and then the surface is smoothed with a jointer, after which the block is turned and the other sides are planed accordingly.
When working with a jointer
(Fig. 29,
b)
take the handle with your right hand, and support the body slightly behind the plug with your left. Having planed one section of the part in width, they move on to processing another section. The jointer planes in one step, without interrupting the chips. When processing very long workpieces, the worker must move forward along the workpiece.
When jointing for gluing, workpieces should be processed in pairs or even three pieces.
When working with a tool, stand at the workbench, tilting the body slightly forward and placing the left leg forward along the workbench, and the right leg in relation to the left at an angle of 70°.
When end planing, first plan one edge of the end away from you (Fig. 29, c)
to the middle of the part, and then with the other towards you (Fig. 29,
d).
With this method, planing of flakes and chips on the surface and edges does not work. To avoid the formation of flakes, it is recommended to process the ends before planing the sides of the bar.
Zenzubel
a quarter is selected (Fig. 29,
d, 4)
according to pre-made markings. The initial selection of the quarter is carried out as follows: take the back of the body with the right hand, and the sole behind the knife with the left, with the thumb placed on top of the body, as shown in the figure. Planing is carried out at a short distance from the marking line (marks) and chips are removed to the depth of a quarter (approximately 3...4 mm). After selecting parts of the quarter along the entire length of the block, use a chisel to work with the full span of the arms, making sure not to go beyond the limits
tags. After selecting the quarter, it is cleaned, for which the rear end of the zenzubel body is taken with the right hand, and its upper part with the left hand.
Falzgebel
(Fig. 29,
e, 5)
the quarters are selected in the same way as with a zenzubel, but without preliminary marking, since the stepped sole of the folding rabbet determines the size of the quarter.
The selection of a groove using a primer
is shown in Fig.
29, d, 6.
Tools for mechanized wood processing.
Manual electric planers (IE-5701A, IE-5708, IE-5707A) are designed for milling wood along the grain. The planer (Fig. 30) consists of a built-in electric motor, the rotor of which rotates in two ball bearings. At the end of the rotor shaft there is a drive pulley, which drives the V-wheel drive into rotation. The rotation of the knife drum (cutter) with two flat knives is carried out by means of a V-belt drive from the rotor shaft. The plane has front (movable) and rear (fixed) panels (skis), cast together with the body. A special mechanism lowers and raises the front ski, thereby adjusting the depth of milling (planing). The plane can be used as a semi-stationary machine by securing it to a table or workbench with the panels facing up and installing a removable safety guard that protects your hands from getting on the drum (mill) with knives.
.
Surface treatment
An electric planer can perform three operations:
Scheme of options for sharpening a plane knife.
- chamfer at different angles;
- select quarters on blanks;
- plan surfaces.
The main purpose of the tool is to plan surfaces of various lengths and widths.
When working, the plane must be placed on the surface of the workpiece with the front plate so that the knives do not touch the surface. Press the start button, after picking up speed (the sound stops changing pitch) begin moving the plane along the surface. The tool must be held strictly parallel to the surface being processed, the movement must be uniform, without jerking or stopping. When starting to move, you need to increase the pressure on the front part, and when exiting the surface to the rear part. The plane should work smoothly, without vibration. If strong vibration occurs or the sound changes during operation, you need to turn off the tool, determine and eliminate the cause of the abnormal operation.
The depth of the passage must be set depending on the processing purposes. If you need to change the size of the workpiece, you can use the maximum size. When leveling the surface, it is advisable to work with a shallow processing depth, achieving the required quality in several passes.
Also, the depth of processing depends on the material. Hard rocks should be passed several times at shallow depths to avoid overloading the tool.
What is done with a plane and its varieties
Each type of plane is designed for a specific task or nuance.
- Planer: needed to level the surface over a large area.
It is distinguished by a long sole and the presence of a double incisor. The first chip is obtained from separate pieces, the second is continuous, finishing. The good thing about the jointer is that it is suitable for almost untreated surfaces.
Jointer
- End plane: used to obtain a finishing surface of the ends.
The main difference is the short length and installation angle of the knife (21 degrees).
End plane
- Additional planer: purpose - high-quality cutting of corners along the edges of the workpiece. For this purpose, an adjustable mechanism is made. The cutting edge is made of high-hardness steel.
- Tongue (groove): used for selecting tongues - narrow grooves at a certain distance from the end.
It has a guide to strictly maintain the parallelism of the resulting groove and the side edge. The depth and width of the groove are adjustable.
Tongue and pile pile
- Zenzubel: for creating features such as long grooves and edges on wood surfaces.
Performs cutting of grooves and grooves, processing edges, quarters and folds. The selector (another name) deepens the intended groove.
Zenzubel
- Rebate: the tool is designed for making grooves for installing glass.
It differs from the usual zenzubel, which is also needed for grooves, in its sole with steps. Parts of the sole can be removable. You can install another special knife on the side - for the quarter wall.
- Sander and double sander: allow you to get a super clean surface. The knife is installed at an angle of 50 degrees (the usual value is 45 degrees).
- Kalevka: figured processing of the edges of the workpiece.
- Tsinubel: a device needed for making small depressions for further gluing of parts (technological increase in usable area).
- Primer: gives the workpiece the specified function of a trapezoidal groove - using a specially shaped knife. The groove is located across the fibers of the material.
There are other, much more specialized, varieties of planes used at the professional level. Including the creation of rounded shapes (for example, a staff gobel).
Additional tool features
To remove chamfers, you need to use a special triangular groove cut out on the front plate of the plane.
The tool should be positioned with the groove at the angle to be processed, launched and moved along the part while maintaining the tilt. The first pass is made along the slot; subsequent passes, if necessary, are carried out in the usual manner.
To make quarters on a plane, you need to install an additional stop to limit movement away from the direction of movement. The second stop, limiting the depth of the quarter, is located on the side surface. The stops must be set to the required dimensions. The distance should be measured from the angle of the cutting edge of the knife in the upper position. The quarter selection is performed in several passes. If the vertical surface of the quarter turns out to be steps, it is necessary to increase the protrusion of the knives beyond the side surface of the plane.
A wide surface of lumber can be processed in several passes. Processing should begin from the left edge, setting the adjustment to the minimum depth. The next pass should be performed offset to the right by about a third of the length of the knives. In this way you need to go across the entire width of the workpiece. If the quality is unsatisfactory, repeat the surface treatment in a similar way.
Technical features of electric planers
Before moving on to the story of how to work with a plane correctly and competently, let’s look at the features of this tool using the example of BOSCH products. The manufacturer has supplemented the tool with special devices that protect both the user and the surface being processed. In the latter case we are talking about the supporting heel. It folds back during operation, but as soon as the tool is lifted, it closes the knives again, so you can safely place the plane on any surface without fear of the knives stopping. In terms of personal safety, the user is also protected from accidental activation of the power tool: the trigger switch starts the electric planer only after pressing a special button located on the handle.
Rules for working with a plane
Any work begins with preparation. The plane as a cutting tool is prepared for work in the following order:
- disassembling the structure to check the condition of the sole and remove the existing coating (if necessary, if the tool is new);
- the sharpness of the cutting edge is checked - it is best to take it out and try it on a piece of lumber;
- the flatness of the sole is assessed - with a ruler or level, by applying it and looking at the light;
If gaps are visible (especially large ones), you can’t wait to accurately remove a thin layer of wood. Suitable for household work, but not for professional processing.
- in case of significant unevenness, the flatness of the sole is restored using sandpaper for metal;
To level the sole, you need to place the sandpaper on something very flat. After that, start moving the sole along the sandpaper in one direction (without a reverse movement).
- the working blade is checked for evenness of the edge - if there are jagged edges, the blade is sharpened;
- The structure is being reassembled.
Adjustment
When the necessary parameters have been checked, the plane should be adjusted. There is also a separate procedure for this:
- the iron is installed in relation to the sole at a certain distance (according to the recommendations for a specific model);
- the piece of iron is connected to the chipbreaker - their ends are placed next to each other and tightened with a screw;
- both elements are additionally fixed with a pressure plate;
- the plane is carried out over the workpiece for testing purposes - this will give a certain result;
- as feedback to achieve the desired result, the relative position of the planer elements is adjusted;
- special attention is paid to the cutter - its reach and symmetry of protrusion on both sides.
When the resulting surface quality and chip quality are satisfactory, work can begin. The basic rules for working with a plane are as follows:
Safety regulations
To avoid injury when planing, you must follow a number of rules.
- Use a tool that is in working order and configured according to the requirements.
- The workpiece to be processed is securely fixed in the workbench.
- If there are knots, act carefully and release the knife blade as little as possible.
- Planing should be carried out longitudinally relative to the workbench.
- When planing, hold the handles firmly with both hands, do not be distracted.
- It is mandatory to disassemble and assemble the tool over a workbench. This also applies to settings.
- It is unacceptable to clear the slot from chips on the extreme side of the cutter, so as not to cut your hand.
- Use a tray to store the tool. Place the plane in it with the sole down so that the blade does not protrude outward.
- Dropping the plane knife is absolutely unacceptable.
- When passing the tool, keep the blade away from you.
- It is unacceptable to check the sharpness of a knife with your hand.
If you follow the rules for using a plane to level the board and safety precautions, the risk of injury during the work process is minimized.
Summarize
As you can see, you can’t do carpentry with just a plane. When processing workpieces, you have to perform a number of operations. Some tools work in pairs, for example, tongue and groove, others are used sequentially: for roughing - sherhebel, for finishing - jointer.
Now you know what woodworking operations each type of plane is intended for. Learn carpentry and improve your skills with the right tools. Order it in our online store!
