Do-it-yourself step-by-step finishing
Proper preparation of all surfaces, structural elements, cladding, and fasteners will allow you to create high-quality clapboard surface finishes. All calculations and measurements are required according to:
- selected type of canvas;
- room dimensions;
- the presence and location of door, window openings, niches or other objects in them.
Fastening the lining is the penultimate stage of finishing before covering with strips, skirting boards and other auxiliary parts.
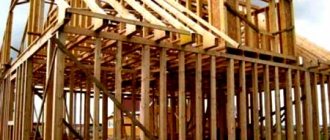
Frame installation
You can fasten the lining without it, but there are no guarantees that the material will retain its qualities for a long time and will not begin to deteriorate due to the lack of a ventilation slot on the back side. Therefore, craftsmen recommend making load-bearing sheathing regardless of the presence of insulation between its bars.
Installation instructions:
- Room measurements. The room is measured around the perimeter, all key locations of corners, door openings, windows, etc. are marked.
- Calculation of the amount of material required for sheathing. To do this, you need to multiply the perimeter of the room minus the openings by the number of steps in the arrangement of the bars. This is done by fixing the panels vertically.
In the case of horizontal calculations, the calculations will be a multiplication of the perimeter of the room, divided by the step width (the number of vertical beams is determined), by the height from the floor to the ceiling. In this case, the amount of material that fills the openings of windows and doors according to the plan is subtracted.If a diagonal or combined method of fastening cladding panels is assumed, then the calculations (as for standard fastening) are simply multiplied by the required coefficient, since the bars must be spaced more often.
- Marking. Using a building level and a plumb line, a control zero line is applied on the wall opposite the door. For vertical fastening - at a distance of 5-6 cm from the floor and ceiling for the first and last plank. For horizontal - in the corner, at a distance of 5-6 cm from the adjacent wall. Tip To facilitate subsequent work on the installation of other sheathing elements, you can stretch a fishing line between the control beams. It will mark the level along the length or width of the wall.
- Measuring and cutting bars. Since it is better to save resources by gradually cutting the bars to the required length, this must be done accurately and from fresh measurements. Let the labor intensity increase a little, but due to this the surface will be perfectly flat.
- Fastening the bars. A block of the required size is leaned against the wall at the marking site. Using a drill with a thin drill, approximately 2.1 mm, as for screwing self-tapping screws into wood, holes are drilled in the block and wall to the depth until it stops. Then these holes are re-drilled with a thicker one (according to the diameter of the unopened dowel casing), and the dowel casings are inserted. Only after this the element is leaned again in the same place and secured with dowels.
Actions are carried out until the installation of all the necessary load-bearing elements of the sheathing is completed.
Before installation, all wooden materials must already have a dried protective coating against rot and harmful microflora.
another article
Fastening the panels
Depending on the orientation of the direction of the canvases, the lamellas can be attached in several ways. The installation mechanism will depend on:
- depending on the type of fastener;
- grade, type of lining itself;
- features of the room being finished, its microclimate, and other characteristics;
- the presence of a heat, steam, waterproofing layer under the finish.
In general, fastening is a cyclical process:
- The location of the first board on the sheathing is checked by level.
- Fixation is in progress.
- The ridge of the next one is inserted into the groove of the previous panel, and the maximum joining density is achieved (how to properly join lining panels?).
- The second board is fixed in the same way as the first, and the next one is taken.
- The process is repeated until all necessary surfaces of the room are completely covered.
separately
Recommendations
Installation of the lining must be carried out in accordance with the rules. At this stage there should be no omissions or defects, otherwise the cladding may turn out to be fragile and will not last long.
Between the planks and the base (wall, facade, ceiling, etc.) there must be a ventilation gap of 1-2 centimeters. It is often overlooked during installation, covering the ventilation space with thermal insulation. For normal ventilation, an empty space must be left between the installed lining and the ventilation layer. If this is not done, the material will begin to get wet, crack, and bend.
If during the work no space was left for ventilation, the casing must be dismantled. If there is insulation, there are 2 ways to create a ventilation gap: you can remove part of the insulation or “build up” the frame, thereby increasing the distance between the base and the sheathing.
During the installation process with your own hands, when aligning the eurolining strips, you must act extremely carefully. In order not to spoil the material when tapping their ends, it is necessary to correctly calculate the impact force. In fact, due to the fear of breaking off the groove, small distortions of the planks are often left during installation. This should not be allowed - the material must be laid perfectly evenly, exactly parallel to the starting plank. Otherwise, the distortion will only increase, causing the entire cladding to be crooked.
If the boards are already installed skewed, you need to find the one that caused the discrepancy. All sheathing installed after it must be removed. Then the uneven plank is leveled and the lining is mounted again.
Wood expands when heated and contracts when cooled. To compensate for the transformation of its dimensions, when laying the sheathing along its contour, a space of several millimeters is maintained. If the installation is carried out without a gap and the boards rest against the walls, the sheathing will be subject to deformation over time. To correct such a mistake, you need to dismantle the baseboards and trim the edges of the strips a little. So, when facing walls, the outer planks should not reach the corners by 5-6 mm. The same thing applies to joints with ceilings and floors.
Often the lining is fixed to the frame using clamps (brackets of a special configuration). Meanwhile, conventional staples can only be used when it is necessary to sheathe interior and dry rooms. For external cladding, as well as for cladding rooms with high humidity, it is better to use nails or self-tapping screws. In such cases, standard staples do not provide a very reliable fastening and the skin becomes deformed as the wood becomes damp, as well as under the influence of sudden temperature fluctuations.
If the cladding of a room with high humidity or a facade is done using not very strong brackets, the fastenings must be strengthened. The easiest option is through fixation using nails or self-tapping screws. It is necessary to take into account that in this situation their caps will be visible on the surface of the skin. If this is unacceptable, then the lining must be removed and laid again using more reliable fasteners.
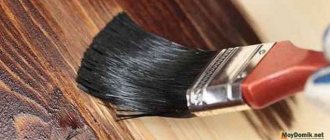
In accordance with the regulations, eurolining must be covered with protective agents after installation. In fact, this is not always done; as a rule, the material performs its functions without special coating. The result of this is the appearance of fungal growths on the surface. If the tree has not yet deteriorated, it is necessary to apply a protective substance to it as soon as possible. If fungus has already formed, the surface of the boards must be treated with a special anti-fungal agent, and then applied protection. In some cases, before applying protection, the surface is sanded to remove damaged wood.
Where to apply
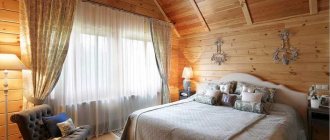
Clapboard finishing is often used in steam rooms and other bathhouses. In this case, choose panels made of linden and alder (for steam rooms) and coniferous wood (for other places). These types of wood are endowed with healing properties, thanks to substances that are released when heated. Boards with knots cannot be used in steam rooms, as the corresponding areas become hotter. For a good aroma, it is recommended to install several pine boards in the area of the stove. The lining treated with protective compounds is suitable for cladding facades; the type of wood in this regard is not particularly important. Interior decoration is a complex task; panels in a uniform color scheme are required. Mahogany lining is used for cladding walls in expensive mansions. The panels are also used to make partitions to divide space: both in apartments and in open areas.
Dimensions for interior lining
The interior lining of the premises with wood makes the interior of the house warm, luminous and very cozy. For interior cladding of premises, experts advise choosing a false beam thickness of 16-22 mm and a width of 140 mm. Material of such dimensions looks much better than, for example, 180 mm wide boards: when using wide false beams, the room is visually smaller. In addition, experts note that if you decorate a small room with such a board, the grain (winding arrangement of wood fibers), which determines the beauty of the material, becomes hardly noticeable. The texture of the wood ceases to look advantageous and, accordingly, the effect of wood finishing, its warmth and comfort, ceases to be felt.
The most popular sizes of imitation timber for interior decoration are: width - 135 or 140 mm with a thickness of 16 or 20 mm (135x16 and 135x20 or 140x16 and 140x20 mm), and for small rooms - 11x140 mm. Premises finished with false timber of such dimensions are difficult to distinguish from those built from profiled timber 150x150 mm. In industry, material of this width has a thickness in the range of 16-28 mm, an economical solution is 16x140x6000. When making calculations, you need to take into account that the working width of a false beam with a dimension of 140 mm is 135 mm (5 mm is the width of the groove). If you are in doubt about what thickness to choose for a given width, remember that the ratio of thickness to panel width of 1: 5-1: 8 with sufficient strength will significantly lighten the board, and therefore the entire structure. At the same time, indoors, high strength boards, as when cladding a facade, are not needed.
Boards with dimensions of 150x20x6000 mm are also suitable for interior decoration. False timber with a working area of 140 mm, thickness 20 or 16 mm is designated as follows: 140x20x6000 or 16x140x6000. In this case, the tenon is not taken into account for the area of the board in the same way as when calculating the material for external wall decoration.
To save material, the calculation of its quantity is done in such a way as to reduce the number of joints during finishing
However, for wall decoration this is not so important, since the joints can always be hidden behind pieces of furniture, paintings, and other decorative elements. But you can’t hide the joints on the facade and on the ceiling either
In order for the joints to look artistic, the length of the imitation timber is carefully chosen - for rooms, preferably 2-4 m, and installation should be calculated from the window. If you plan the joints, then you need to mount the boards in a ladder or herringbone pattern, alternating the seams and the middle of the next board.
When finishing a large section of a wall, the following dimensions allow you to minimize waste:
- 20x135x6000;
- 28x190x6000;
- 20x140x6000;
- 20x145x6000;
- 35x190x6000.
But the most popular length of false beam is 4 meters. Boards for finishing ceilings should be relatively light, of small thickness, optimally 13 mm
The thickness and width of the imitation timber and their ratio affects the natural processes inherent in wood material and occurring in nature - swelling and shrinkage with changes in humidity and temperature changes. For external cladding of a house, boards with a width of 190 mm have proven themselves to be excellent with a thickness of 28 mm (198x28). Thus, the use of false pine timber 190x28 AB when cladding the facade of a house will allow postponing repairs for several decades.
If you do not monitor the ratio of the thickness and width of the imitation timber, their deformation in the finished coating is possible in the form of torsion and bowing like a boat. Russian enterprises produce false beams up to 250 mm wide.
Characteristics of eurolining for walls and its differences
Any wooden lining is made from edged boards, which are obtained after sawing round logs using special equipment. After drying, the board is processed on a milling machine on all four sides to create the required profile and interlocking joints. Finished products are sorted by types and classes, which determine the quality of the resulting products, and then packed into bundles.
Eurolining is manufactured in accordance with the European standard DIN 68126/86. It provides for strict requirements for the geometric shape of the board, the quality of its surface treatment and the moisture content of the source material. Unlike ordinary lining, its European counterpart is distinguished by a wider key joint tenon, which ensures reliable joining of the sheathing elements.
In addition, the panels are equipped with ventilation ducts on the back side that remove excess moisture, preventing the formation of condensation at the joints of the boards with the sheathing elements. This protects the cladding from rotting and the insulation from getting wet. The channels have an additional function: eliminating internal stresses of the material due to changes in humidity and air temperature. In addition, Eurolining has external differences: when installing Europrofile boards, a pattern is formed on the cladding.
Depending on the type of wood and profile, any lining can have a thickness of 12.5-20 mm and a width of 95-135 mm. Classic eurolining has strictly defined characteristics and dimensions:
- board thickness - 12.5 mm;
- total width - 96 mm;
- working width excluding spike - 88 mm;
- board length - from 1.8 to 6 m;
- material humidity - 12±2%;
- number of panels in one package - 10 pcs.
The surface of the eurolining is manufactured according to the “Soft Line” and “Standard” options. The first version of the panel provides for rounded chamfers of the board. The cost of the panels depends on the type and species of their wood and ranges from 100 rubles/m2.
Cork
- 100% environmentally friendly;
- excellent sound insulation;
- magnificent relief;
- solid and expensive look.
This is the case when the obvious visual advantages of a cork correlate with its technical characteristics and the numbers on the price tag. This option is certainly suitable for a respectably furnished wooden house, in which a lot of money has been invested. If you plan to cover the walls inexpensively, then you can use a little trick - use cork to decorate individual wall fragments. In this case, the costs will not be so high - and nothing will interfere with the pleasure of contemplating the spectacular wall cladding in the house. It is better to glue cork to a wall in a wooden house using special contact glue. It grips the sheet perfectly even with low consumption. Of course, before this it is necessary to prepare the surface of the wall itself:
- remove irregularities;
- clean from dust and debris;
- remove any remaining old material.
It is best to thoroughly level the walls before doing this, but if you don’t really want to do this with plaster, then gypsum board sheets will be an excellent and, most importantly, inexpensive alternative.
How to beautifully cover walls?
Before sheathing a house with your own hands, you need to take time to acclimatize the boards in the room where they will be installed. This will take at least two days. Otherwise, the board may warp and become deformed on the wall. It is not recommended to carry out installation at sub-zero temperatures or high humidity.
Stages of lining installation:
- Preparing the walls. It includes insulation and waterproofing.
- Selection of materials, preparation of tools necessary for work.
- Choosing a cladding method. There are four of them: horizontal, vertical, diagonal, shaped.
- Installation of the sheathing on which the lining will be mounted. If necessary, electrical wiring is placed under it.
- Wall covering with clapboard.
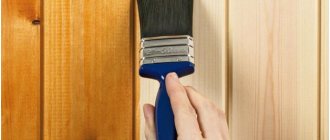
- Applying a finishing decorative or protective coating (varnish, paint).
- Installation of sockets, lamps.
- Installation of skirting boards, window and door frames.
Outside
Step-by-step process of cladding the outside of a house with clapboards:
Installation of a vapor barrier layer. It can be made of several materials: film, foil or roofing felt. The purpose of the layer is ventilation and steam removal. The material is attached to wooden slats 2.5 cm wide, the distance between them is 1 m. A vapor barrier is attached to the top with nails. Holes 2 cm in diameter are made on the entire surface for air movement.
Installation of the frame. For its construction, boards 5 cm thick and 10 cm wide are used. They are placed vertically on the wall, with the end facing the surface. The distance between the frame elements is slightly less than the size of the insulation sheets.
Thermal insulation of walls. The choice of material and its thickness is made based on the temperature indicators of the climate of the area. When working, it is necessary to avoid gaps between the sheets of insulation. If there are several layers, then the joints should be staggered. If the insulation is placed correctly, without gaps and tightly, then additional fasteners are not required. Details on how to insulate a room when working with lining are described in a separate material.
Creating a waterproofing layer
When placing the film, it is important that the rough layer is located outward - this is the only way the material does not allow water to pass through and removes vapors to the outside. Film fastening option - staples
All seams are overlapped and additionally secured with tape.
Installation of the second frame. 3x5 cm wooden slats are nailed to the first base for additional ventilation. At the bottom of the perimeter of the house there is a fine metal mesh to prevent rodents.
Finishing the facade with clapboard. All boards are pre-measured and cut to size. Work is carried out from the bottom up. The first board is positioned with the groove up and the tenon down. It is carefully leveled and only then nailed or secured with a special clamp. The next plank is located in the groove to the previous one. To make it tight, you need to hit it lightly with a mallet. When the grooves of the lining match, the second rail is secured. Subsequent elements are mounted in the same way.
Fastening the boards. When the entire lining is installed and fixed, it must be additionally secured vertically, one board over another. Window and door openings also need strengthening.
Installation of decorative elements.
Painting, varnishing or protective coating.
Fastening decorative material
Fastening the lining begins with the material being brought into the room and left for two days. This time is necessary for the product to fully acclimatize. If installation is carried out immediately, then there is a high probability that the elements will begin to warp - the structure will become deformed. Work is carried out only at positive temperatures and humidity, which is at least 60%.
The lining is first brought into the room and left for two days.
The general technique is:
- Often, boards are installed horizontally. Therefore, the first element is installed at the bottom so that the tenon points upward.
- Fixation starts from the corner, which is located away from the main entrance to the room.
- The first board is well checked for level, the horizontal and vertical planes are taken into account. If even small deviations are allowed, they will become very noticeable when the top panel is attached.
- The first fragment is fixed. The possibility of deviations is checked again.
- Next, the following elements are installed, which are first grooved and then fixed.
But how to cover a wall with clapboard vertically? The procedure is no different from the previous version:
- The elements are placed from the far corner. The first fragment is exposed and secured.
- The following elements are inserted into the groove and fixed. It is important to check that the joint is completely connected. To do this, lightly tap the rail along the edge.
- For this method, a wider rail is used. It creates a beautiful surface with fewer joints.
If you have experience, you can finish the walls in one day (even taking into account the frame). When the installation is completely completed, decorative elements are attached: corners and baseboards. The surface is well impregnated with stain and varnished.
Step-by-step instructions for installing lining on the wall yourself
Before attaching the lining to the wall, watch the video and follow the instructions:
- Coniferous boards are treated (degreased) with acetone, then a disinfectant layer is applied to them, they are wiped with a soft cloth moistened with water and dried.
- To make the surface homogeneous, it should be treated with a solution of peroxide and oxalic acid.
- If it so happens that the package contains a board with minor damage and it is not possible to replace it, you can restore it with a special putty for wood.
- To change the shade of the board, use stain or special impregnation.
- Install only on the sheathing, not on the wall. Let's take a step-by-step look at how to cover walls with clapboard with your own hands; the training video can be watched below, for greater clarity.
Preparation of wall surfaces
Before installation:
- Dry the walls;
- Correct defects;
- Level out uneven walls;
- Prime and waterproof.
Without their implementation, the material may not cope with high humidity. To avoid having to redo everything again later, it is strictly prohibited to ignore these stages of work. Areas with fungal infections must be cleaned and treated with an antiseptic. After they are thoroughly saturated with the raster, their resistance to negative factors, moisture, mold and fire will increase. It is advisable to choose an impregnation with a water-repellent effect.
If desired, the walls can be additionally insulated with thermal or sound-absorbing material. Mineral wool or polystyrene foam is suitable for this. A vapor barrier layer is also required. It is laid before installing the sheathing and heat insulation. It will perform a very important task - vapor isolation.
Installation of frame and heat insulator
Installation of the sheathing is carried out according to the following principle:
- After laying the vapor barrier layer (attached directly to the wall with an overlap of 10-15 cm). Wooden beams are fastened (with self-tapping screws or nails). The design will be more reliable if they are mounted horizontally.
- If the wall is built of brick, it is recommended to fix it with a frame dowel. First, holes are drilled, then the beam is fixed with a dowel.
- After the first sheathing beams are fixed, a thermal insulator will be attached to them. Lay a waterproofing layer on top, it is fixed with staples.
- Then, a new layer of sheathing is attached to the finished frame. Only this time the beams are installed vertically.
The correct installation of the beams is checked by the building level
This is very important because the panels will be attached and aligned to their surface. Wooden lining is heavier than plastic or MDF, so the frame must be strong and stable
Installation of panels
To install the boards level, use a plumb line, level or square. You can calculate the material consumption using simple arithmetic: the total usable area of the room is divided by the area of one lining strip. It is necessary to buy 10 percent more material, taking into account unforeseen errors and their elimination.
The panels are fixed to a pre-installed sheathing. The first board is fixed at a distance (indent) of 1-2 cm from the floor. This gap will further serve as ventilation and protection of the coating from deformation. The same indentation will be made on top.
The planks are fixed with self-tapping screws so that their head extends approximately 3 mm inside the board. During installation, the tenons should point straight up; corner joints can be fastened with corners. The screw caps are hidden (masked) with PVA glue, wood paste, special caps, and plaster.
Before installing clapboard boards on the walls, decide on this parameter:
- Horizontal position. They are chosen when you need to visually enlarge a small room;
- Vertically located lining makes the ceiling lower.
The preliminary preparation and processing of the lining cannot be ignored. This will be considered a serious violation of installation technology. This means that it will not meet the previously promised qualities and advantages. Rules are made to be followed, not just read and forgotten.
Material processing
After purchasing the required number of products and fasteners, the question immediately arises: how to properly cover the walls with clapboard? But this is not a priority task. You need to know that the material needs pre-processing, because no actions other than manufacturing are performed in production. Therefore, the following manipulations are performed:
- Coniferous wood types require complete degreasing. All resin stains are removed. The boards are washed well with acetone (a 25% solution is required). Next, wipe thoroughly with rags previously soaked in water. After all actions, the products are dried.
- To obtain the same surface shade, each fragment is treated with a pre-prepared mixture. It consists of hydrogen peroxide and acid (oxalic). The solution is prepared based on the type of wood.
- All damage, even minor ones, are repaired with putty. It is better to choose a mixture for wood. You can buy it at the store or prepare it yourself.
- If it is necessary to change the shade, then use stain or other special impregnations that preserve the texture of the wood.
Processing the lining allows you to extend its service life and change the color of the material.
Of course, you can find products that will be pre-treated, but their cost will be significantly yours.
On a note! Pre-treatment cannot be skipped. This would be a gross violation of the technology of covering surfaces with clapboards.
Types and characteristics
The lining can be made from wood, MDF (wood waste), and also from PVC (plastic lining).
Made from wood
Wooden lining is the ancestor of all lining, which has not lost its popularity in our time. Wood lining is widely used in both external and internal cladding of buildings. It looks especially respectable in hallways or saunas. Of course, in order for the lining to have a long service life, even in places with high humidity, the basis for its manufacture must be the appropriate tree species, such as linden or alder. Other types of wood (pine, spruce) are suitable for use in more acceptable temperature conditions.
This material can also be different in shape. There are several types of profiles.
The standard profile is a face with equal bevels on both the groove and tenon sides. In this case, the outer corners and edges of the profile are straight and look somewhat rough.
From MDF
This material can be classified as wooden, but relatively speaking. The raw material for its production is finely chopped wood waste or wood dust. Thanks to specialized heat treatment of raw materials, a fairly strong and relatively light material is obtained, the environmental characteristics of which make it possible to use it even in children's rooms and bedrooms.
The undoubted advantages of MDF profiles include an almost limitless range of colors. Due to the ability to externally reproduce not only the patterns of wood, but also the patterns of stone, marble and other materials, the profile has gained particular popularity among people with modest material income.
Plastic
A plastic profile or PVC panel is a strong competitor to the first two types of lining. Often the plastic version is chosen because of its relatively low cost, light weight and the same ease of installation and reliability in operation.
It is successfully used in both external and internal decoration of the house. Although this material is environmentally friendly and can be used in almost any room, it is necessary to realize that such material will not add a certain comfort to the interior of the room. Walls (or some sections of them) lined with plastic clapboard on the balcony or in the bathroom look good. However, in a living room or bedroom, such a design may look somewhat awkward. Where PVC panels look especially attractive is on the ceiling, and then only in common areas, such as the kitchen, bathroom, corridor.
Video description
In the video, the master talks about how he assembled the interior of the bathhouse from lining and stone:
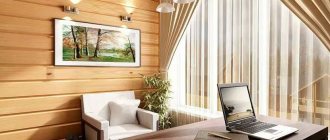
To decorate living rooms with windows facing south, designers recommend choosing lining in dark shades of brown.
To make it look good, it is important to have good artificial lighting; experts advise simply whitewashing and painting the ceilings. If you leave one of the walls in the room painted and cover the remaining three with wood, the design will only benefit from this
On the contrary, you can cover only one accent wall with clapboard, and wallpaper the other three. It will also look very good.
An interesting option for a combined design Source 1povagonke.ru
If you need to use lining to decorate a bedroom or kitchen, it is better to use light-colored lining for painting. If you paint it on top with white or light gray translucent enamel, you will get a cozy space. Light textiles with spot bright accents (tablecloths, bedspreads) go well with it.
In the bedroom, designers recommend finishing the wall with clapboard, next to which the head of the bed will then be placed. For this purpose, lining of any shape, any color is suitable. The main thing is that it is then linked to the overall range of interior content and decor.
Examples of cladding
- There is an opinion that lining is more suitable for a bathhouse or cottage than for an apartment or cottage. This misconception is successfully refuted by designers who harmoniously integrate wood cladding into a wide variety of trends and styles.
- Wood lining in the interior harmoniously combines with wallpaper, tiles, and plaster. With a professional combination of textures, you can create a stylish and elegant interior.
- Lining can become an integral part of an interior in Scandinavian style. In this design, it is in harmony with artificial or natural stone and large beams on the ceiling.
- Anyone who is in love with Provence will certainly suit the walls made of wood in natural tones. In this option, the combination of wood with plaster and rough board floors looks nice and relaxed.
- Another style that requires the use of natural wood cladding is Russian. The walls, lined with a block house, look like the walls of a log house.
- You can also use lining in high-tech style. In this version, the materials are painted in neutral white or gray colors and are used as a background for rich accessories.
- Fans of minimalism will most likely like the combination of lining with a strict cladding made of ceramics and stone.
See below for more details.
How to line the inside correctly if the bathhouse is made of bricks or blocks
Brick buildings are the coldest, blocks made of foam concrete are still better thermally insulated, but in general both of them need additional thermal insulation, so there is no option when you simply make a sheathing on a brick wall and start installing lining on it. Because it would take a very long time to heat such a bathhouse.
Therefore, it is possible to properly sheathe the inside of a brick bathhouse with clapboard only on top of a thick (depending on the cold of your area) layer of insulation. Since mineral wool is most often used, it is worth proceeding from its popularity. Below we will give an example of the entire “pie”, with insulation and lathing for the lining in the bathhouse.
Nuances to consider
Lining is a board (of different thicknesses) that is made from various types of wood. The material got its name because of its original place of use. Namely, train cars, the internal surfaces of which were lined with small wooden slats, which created an excellent microclimate. Currently, wood products are returning to their former popularity, which decreased slightly when plastic and MDF options began to appear.
The modern construction market offers a wide range of types of lining
It is necessary to take into account that covering walls with clapboard with your own hands requires a balanced approach.
Therefore, it is important to pay attention to the product at the stage of its purchase. Pay attention to the following points:
- Correct storage of purchased goods. Packages must be stored horizontally on a support.
- The humidity level of the warehouse should be within normal limits.
- It is not allowed to place the product in an open space, exposed to sunlight.
You should also pay attention to the expiration date on the label. All information about the storage and shelf life of the lining must be indicated on the packaging of the material
All information about the storage and shelf life of the lining must be indicated on the packaging of the material
This precaution is necessary in order to mitigate possible risks. The fact is that work with the lining is carried out only after they are completely convinced that the material meets all standards
It is necessary to purchase material with a margin of 10%
Selecting a fixation option
Immediately determine the method of fixation. After all, paneling can be done using different methods:
- Pass-through option. This is the simplest solution that does not require much effort. It consists in the fact that the screws are screwed directly through the front part. This technology assumes that markings will be made so that the fasteners are in one line. Holes are also pre-drilled to prevent the wood from cracking. The screws are screwed in so that the cap is completely sunk. This can be easily achieved if you pre-drill out the space for the head with a larger drill bit. The resulting holes are closed with special plastic plugs or puttied. Naturally, this option greatly violates the aesthetic appeal.
Through installation of lining - You can also trim a room with clapboard using decorative nails. Their caps are made to match the color of the material. It is important to take into account that they must be hammered in very carefully, as the cap can easily be damaged.
- An excellent option are nails without a head (secret). They are driven exclusively at an angle of 80 degrees. This makes it possible to hide those places that have been damaged.
- You can attach it to staples, but this requires a professional stapler. This method is well suited when elements begin to be laid from top to bottom.
On a note! The manual staple driving tools that are sold everywhere do not do the job required. The fastening turns out to be unreliable.
- Claypers are used to cover a room with clapboard when the material is at its thinnest. This is a great option that makes the mount invisible. True, you will have to put in a lot more effort.
Installing the lining on clamps allows you to make the fastenings invisible.
The necessary fasteners are selected based on the specific situation. Currently, clamps are becoming increasingly popular.
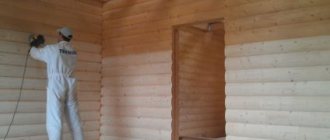
Wood panel installation technology
Before installing the lining, the wooden surface must be treated with special protective agents. There are a huge number of them in construction markets. Prices range from high to low thresholds. You also need to make sure that there are no nicks or protruding knots on the front of the board. If they are present, they must be removed with a grinding machine.
After the work has been done, the next step will be installation of the sheathing. A profile is used for this. It comes in wood and metal. It is worth considering that one of the advantages of lining is the alignment of walls. The lining itself is fastened using the tongue and groove type, that is, its tongue snaps into the groove. You can't do it without an assistant.
The next step is to stretch the line from one end of the platform to the other end. The distance between the frame parts should be no less than 50 centimeters. If you want to do less, then keep in mind that it may not be enough to lay the mineral wool seal.
Before installing the lining, it should be dried in the sun or indoors. If you dry it in the open air or where finishing work will take place, it is advisable to leave the material for a longer time. After these recommendations have been completed, proceed to tiling the room.
The lining fabric has a tenon on one side and a groove on the other. During installation, the groove should be located at the bottom to prevent moisture from occurring at the bottom of the structure.
Decorating the inside of a house with wooden lining begins from the ceiling, although assembly from the floor is possible. In this case, the gaps can be hidden under the baseboard. The slats of the structure are attached with nails or with a clamp, which is more aesthetically pleasing and beautiful.
Lathing
You can’t just nail the paneling to the wall, even if the wooden wall is completely flat: a system of capillary channels will appear between the paneling and the wall, the room will become damp, and the paneling and, possibly, the wall will rot. Cladding with clapboard must be ventilated, for which ventilation channels are cut out in the undersides of the boards. That is, a wooden sheathing is definitely required for clapboard cladding.
Why made of wood? Because the sheathing material, which has similar properties to the sheathing, also serves as a mechanical damper, especially if the base wall is made of mineral materials. For the same purpose, deformation gaps of 6-10 mm must be left between the sheathing and the wall, see below. If you put wooden paneling on, say, steel profiles for drywall, it will quickly swell or cracks will appear. And if, after a year or two, you remove the baseboards from the sheathing along the wooden sheathing, you will find that its edges have moved, but the visible surface remains smooth.
Schemes of sheathing for vertical, horizontal and diagonal cladding are given in Fig. The general principle is that the sheathing bars are perpendicular to the boards. Don't neglect the edge beams (marked in red!): there should be no hanging ends of the boards; the sheathing for diagonal cladding must have a continuous frame. The thickness of the sheathing beams is 20-40 mm; width 30-60 mm. The installation step of the beams is 4-5 board widths along the top surface.
Lathing schemes for clapboard cladding
Note 6: fastening the beams to the wall - 6 mm self-tapping screws in plastic dowels. In concrete from 70 mm, in brick from 90 mm, in foam/gas blocks from 120 mm. For a wooden wall - wood screws from 4x60. The beam fastening step is 400-600 mm. Attachment points 50-70 mm from the ends are required.
DIRECT UPHOLSTERY OF THE FRAME WITH CLIPPING
Here are several options for attaching the lining to the frame:
Option No. 1 - cut off the head of the nail so as to make it almost invisible at the attachment point, and then drive the nail in from the tongue side at an angle. Then the cladding will be more uniform and attractive.
Option No. 2 is fastening using a special clamp (“clip”). A very convenient way, since you can remove the lining at any time and secure it in another place.
Option No. 3 - when a nail is driven into the inner latch, the outer latch must be short.
Wall upholstery with clapboard. Three types of fasteners
If you want to get a neat and beautiful appearance of the walls, then remember that the lining must completely cover the fasteners.
Useful information
Both private houses and apartments, bathhouses, public institutions and utility rooms are often lined with clapboard. You can sheathe the eco-friendly and convenient material not only on the walls, but also on the ceiling. In essence, lining is panels of different lengths and widths, sometimes with grooves and locks (tenons) along the edges for better fastening. It is attached to a special sheathing, and there are several methods of attachment, which we will talk about a little later.
Initially, the finishing of the premises was carried out only with lining made from different types of trees; the price of the material varied depending on the value of the wood. A little later they came up with MDF - the same panels, but made from glued pressed chips. The environmental friendliness remained, but the weight of the material was significantly reduced, and installation became simpler and easier.