Wood is an excellent and long-used raw material for making knife handles. In terms of their aesthetic properties and performance parameters, various types of wood are in many ways superior to natural, synthetic and composite types of materials. A careful look at the photo of a knife handle makes it easy to appreciate the skill of the craftsman. A completely finished product, for the handle of which several types of wood have been exquisitely selected, can be both a highly artistic and practical thing.
Blade making
If you plan to make wood cutters with your own hands, then you will need a piece of saw blade approximately 8 centimeters long. Of this, 4.5-5 centimeters should be left for the shank, which will be attached to the handle. Using an electric sharpener, the shape of the future knife is cut out of the canvas. The master determines the form himself depending on the requirements. Then you need to grind the shape on a machine, making a large chamfer with an angle of 10-15 degrees. This narrowing from the butt to the cutting edge is necessary so that the cutter can be worked with. A cutting edge with an angle of 25-30 degrees, which will participate in the cutting process, is created later.
This work must be done slowly, otherwise the metal will heat up, become soft and no longer hold an edge. You can sometimes cool the workpiece in water.
Methods for making a knife handle
According to the method of fastening, handles are divided into:
- Overhead - used if the shank, on the size of which the profile of the entire handle depends, is wide enough. Such a handle has two mirror-matching parts, which are usually secured with through metal rivets. This mounting method is most often used for knives in which the blade has a relatively large length and width. In kitchen knives, the dimensions of the working part can reach 30 cm in length, so the pads best provide a working grip both in length and width.
- Mounted - are used in knives whose blade shank is small in length and width. This handle is most often made of solid wood, comfortable for complex and long-term work, durable, lightweight and resistant to mechanical stress, including impacts.
Making the handle
To make handles for objects such as machine tools, you need to give the wood a special shape with your own hands. For the handles, oak bars about 12 centimeters long and 12x22 millimeters in cross section are suitable.
- Sand the tail of the metal workpiece along the edges to remove burrs.
- Place the tail on the block and trace the shape with a pen.
- Use chisels to select wood to a depth identical to the thickness of the workpiece. Periodically, the workpiece must be tried on, placing a second block on top. The hole should not be too deep or too shallow - in the first case, the blade will wobble, and in the second, the handle will simply crack or not stick together.
- Once you are sure that all the parts fit together perfectly, you can glue them together. Glue must be applied to the socket and to the surface of the bar. You can apply less glue to the second part.
- Then connect the parts as accurately as possible and tighten them with clamps. You need to do this forcefully, but so as not to split the bars.
- Remove excess glue with a damp cloth and leave everything to dry for about 12 hours.
After this, the tightness of the structure must be checked - grab the handle with one hand, and try to loosen the blade with the other. If you hear characteristic creaks, the work will have to be redone. Don’t be lazy - if hand wood cutters are poorly made, the blade will quickly become loose and can ultimately lead to injury.
Handle adjustment
The good thing about DIY wood cutters is that you can shape the handle yourself, as you see fit. Although some general rules must be followed:
- Leave the back round and wide, much wider than the one closer to the blade. Therefore, it is better to make handle blanks in advance in the form of an elongated truncated pyramid.
- Be sure to make a notch on the handle for your index finger.
The edges of the handle can be sharpened with a grinding machine. This must be done in a respirator and safety glasses so as not to damage the organs of vision and breathing. Roughly grind the handle and then sand it down by hand with fine sandpaper. Afterwards, if desired, paint the handle and be sure to varnish it.
Tool sharpening
You need to start sharpening by aligning the tool blade. To do this you need to use coarse sandpaper. It quickly removes various hangnails. This creates a cutting edge.
When sharpening, it is important not to damage the sharpening angle and the geometric shape of the blade. After using a coarse abrasive, you need to move on to finer ones. With its help, the master can remove the remaining roughness.
If the tool gets very hot during sharpening, it should be cooled in water. At the end you need to apply sanding mixtures applied to the felt. They ultimately create a perfectly flat surface.
Sharpening if the knife is dull
Over time, your knife will, of course, become dull. Then it can be sharpened with sandpaper, and then also polished on the back of the leather belt with GOI paste.
- Wood carving technique
- Let's make it ourselves
- Blade
- Lever
- Sharpening
Knives for wood carving are a must-have accessory in the arsenal of a craftsman who makes decorative objects from natural wood.
Such tools can have different types and shapes, which directly affects the specific processing of individual parts. The most famous cutter, which is very popular among our craftsmen, is the Bogorodsk knife.
Special devices
Additionally, some special devices are used for wood carving, among which, first of all, it is necessary to highlight the following:
- Mallets. It is a famous carpentry tool made of hardwood. Recently, mallets have appeared that are made of rubber. This tool is used in cases where it is necessary to work with a chisel across the fibers of the workpiece. Also, a mallet may be necessary in cases where the volume of wood carving is quite significant. With its help, you can significantly facilitate the work and make the load on the master less significant. In most cases, the mallet has a round or semicircular box. This allows you to hit the chisel at almost any angle. The size of this tool can vary - from 75 to 150 millimeters in diameter. For most types of work, craftsmen select medium mallets.
- Tesla. They are carpenter's axes that have an unusual appearance. This is due to the fact that the blades in these tools are perpendicular to the ax handle. Thus, adzes are very similar to small peculiar hoes. In some cases, their blades have a convex or even semicircular shape. As a rule, adzes are used to hollow out various shapes from wood. In addition, with their help you can quite easily make grooves in workpieces. By purchasing one such hatchet cutter for spectacular wood carving, you can significantly speed up your work.
- Mints. They are a variety of metal rods that differ from each other in diameter, length, sharpening and some other important nuances. These instruments have notches on one side. As a rule, they are characterized by clearly defined geometric shapes. In most cases, embossing is used to finish the background if there is a sufficiently rough surface.
Thus, the above special tools for wood carving are also used when it is necessary to create sculptures or any other devices.
Wood carving technique
Wood carving is a complex but very interesting technique for decorating products, known since ancient times. Getting started, as a rule, consists of creating a blank, or, more simply, a deck or blank. Next, a rough surface treatment is performed, during which it is leveled and all sorts of defects are removed. Then comes the turn of artistic work, which the master carries out using wood carving cutters. Technically, this process looks like removing a piece of wood, which allows you to give the workpiece relief and volume. This stage can be called the main one, because it determines what the final appearance of the product will be. The finishing treatment of a decorative item consists of sanding the wood and impregnating it with antiseptics and paints and varnishes.
To perform manual work of this type, cutting devices with different blade configurations can be used. The purity of the ornament on the wood depends on their quality no less than on the skill of the carpenter, so it is necessary to ensure that the chisel blade is strong, sharp and free of jagged edges. If experienced craftsmen can determine the type and quality of carpenter's knives with their eyes closed, then choosing wood cutters for beginners can be a difficult task. For those who are not yet fully familiar with the features of choosing and manufacturing cutters, we suggest that you familiarize yourself in more detail with their main varieties and method of application. You can also learn how to make wood cutters yourself by giving them the required sizes and shapes.
Kinds
It is believed that virtuoso craftsmen can get by with one or two chisels, however, as practice shows, a good set of special carpentry tools, which includes chisels with blades of various shapes, will help to achieve the best result and make work easier. Experts in this industry recommend adding the following items to your arsenal:
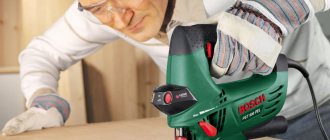
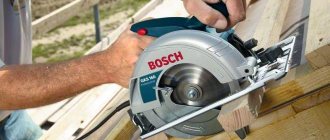
Along with devices for cutting openwork elements, there are also additional items that no carpenter can do without. Such tools include hacksaws, jigsaws, drills, wood hacksaws can be intended for roughing or finishing work (reciprocating saws, bow saws).
Those craftsmen who work with large-sized structures acquire not only hacksaw tools, but also include hatchet cutters, or, as they are also called, figured adzes, in their arsenal. Their operating principle is similar to that of smaller cutting tools, with the only difference being the scale and purity of the process. Beginners who are just starting to learn the craft do not understand the types of instruments as thoroughly as experienced craftsmen, so the main thing here is to follow the golden rule - quality above all. Since buying high-quality knives can be expensive, many people make cutters on their own, especially since today it’s easy to find suitable video and photo tutorials on the Internet. Next, we will tell you how to make knives for figured carving with your own hands from scrap materials.
Let's make it ourselves
Let’s say right away that a high price does not always force a carpenter to take radical measures. Often, a good experienced craftsman cannot choose a tool for himself that would meet his requirements, and this also becomes the reason for working on the cutter independently. In principle, this problem can be solved quite successfully; the main thing is to know what to make the cutters from and what technology to use in this case.
Blade
In most cases, ordinary wood or metal cloth is suitable as a raw material for self-harvesting. You can make an excellent jamb knife from such material - just break it off by hand or cut a segment of the blade on a lathe, and then form a cutting edge. The wood saw blade also has decent characteristics suitable for our product, because it is very important what steel the knife is made from, and here we are dealing with a carbon metal that is easy to sharpen and remains sharp for a long time even when working with hard rocks tree.
If your future homemade cutter is intended for cutting wood, it should have a semicircular blade shape, and in this case it is better to make it from a punch, which can be found in almost every home workshop. In private carpentry workshops you can find homemade bearing cutters, which have also proven themselves to work well.
Lever
When the cutting part of the chisel is ready, you can begin making an equally important part of the tool - the handle. Here we will need a wooden block, and it is better if it is hardwood, from which we will need to cut a holder with a hole in the end. Please note that the shape of the hole must correspond to a similar parameter of the metal shank of a knife for wood carving, made with your own hands from a canvas or disk.
If a handle consisting of two parts is used to make a wood cutter, it is recommended to additionally fix the blade with fasteners and carry out the gluing process using a vice or clamps.
Materials and tools
Popular types of wood such as walnut, cherry, beech, oak and birch are considered the best for making knife handles, both in texture and availability. After processing, such wood has a beautiful and smooth surface that is resistant to moisture and chips and scratches.
For all its positive qualities, wood is a rather capricious material. For work, you should select workpieces whose humidity does not exceed 12-15%. Material with a very low moisture content can crack both during the machining stage and during use of the finished sample.
Impregnation is a very effective means of treating wood. To protect the finished product from moisture and give it a finished look, linseed oil drying oil, natural-based varnish, and highly purified mineral oil are perfect. Impregnation is performed as the last stage of processing, after sanding with fine-grained sandpaper. To achieve the best effect, it is good to have turpentine, wax and rosin on hand.
For the mounting method, two-component epoxy adhesive is used. Epoxy resin mixed with wood chips is the best mixture for attaching the shank. If the overhead method is chosen, the rivets are best made from soft non-ferrous metals. You can also purchase ready-made rivets. For manual processing, the minimum set of tools should include: chisels, vices, rasp, files and needle files. To cut wood, you can use a hacksaw with a metal blade. If you have a power tool at hand, things will go much faster. The ability to handle a chisel can be well complemented with a jigsaw or electric drill, then the result can be achieved with minimal time.


