Sharpening knives is a process that even gentle female hands can handle.
Indeed, in our time there are many devices that make this task easier. Ceramic knives, for example, do not require sharpening, which is very convenient, but steel knives require periodic sharpening because the material becomes dull. To sharpen your knives, you can use abrasive stones or a knife sharpening machine. The last method requires following the recommendations of specialists, then the result will certainly please you.
Making a homemade machine
It is quite possible to make a knife sharpening machine yourself at home. The main requirement when creating a homemade sharpening machine is to rigidly secure the blade being sharpened and the abrasive element. Thanks to this, the main requirement for the entire procedure is achieved: creating and maintaining a sharpening angle.
Elementary vertical device
The device is designed for quick manual sharpening of knives with your own hands and is a wooden structure assembled in the form of a corner. The exact assembly drawing will not be given here, since the dimensions depend on the size of the grindstone used. You need to prepare:
- 4 bars or planks 5-7 cm wide and 2-3 cm thick. The length of the plank is determined by the length of the stone;
- 4 M4-M6 bolts with a wing nut. The length of the bolts is determined by the formula: (thickness of the board) x 2 + thickness of the whetstone + 1 cm;
- 4 self-tapping screws for wood. The length is selected based on the following calculation: board thickness minus 0.2 cm;
- Protractor or other angle measuring tool;
- A drill with a drill, the size of which is equal to the size of the bolt, or larger by one unit of the size range;
- Wood hacksaw;
- Chisel or chisel (or a powerful knife);
- Pencil or marker.
Making the device involves assembling two corners from existing planks. On one of them, at a distance equal to its width, a cut is made with a hacksaw to the middle. Then, from the end of the board, the sawn-off part is chopped off with a strong knife or chisel. A similar chip is made on the second plank. This is done so that when connecting the boards into a corner, both sides have a common plane. Then the boards, with their chipped parts, are joined into a corner. The second half of the device is assembled in the same way. Next, holes for connecting bolts are drilled in the upper and lower parts of the device. The holes are marked at the ends opposite to the junction, 3-4 pcs. on every board. The holes are marked so that there is at least 3 cm from the edge of the board to the outer bolt, and the distance between it and the other holes allows the edge of the sharpening stone to be securely clamped.
A mark corresponding to each of the future sharpening angles is applied on the inside or outside of one of the boards.
The advantage of such a device is its simplicity, ease of assembly and low cost. The disadvantage is the lack of rigid fastening of the sharpened blade.
Sharpener from mounting angles
The proposed device is more advanced compared to the previous one. The blade to be sharpened is rigidly fixed in it and the angle of inclination of the emery in relation to the blade is fixed. Another difference is that in this device the moving part is a stone rather than a blade.
The device is attached directly to the knife blade, in its upper part. The device consists of two interconnected metal corners and a movable part resting on one of the shelves.
The following figure is schematically indicated:
- The basis of the design is 2 corners.
- A movable rod or knitting needle with a thread.
- Clamping nuts with washers for securing the emery to the rod.
- Lever.
- Holes for adjusting the sharpening angle and supporting the moving part.
- Set of adjusting washers.
- Tightening bolts with nuts.
- Stitched edge of the top corner.
- A sharpened blade or knife.
- Whetstone (whetstone).
Manufacturing the device begins with selecting the corners of the base. In the vertical shelf of the upper corner, 3-4 holes are drilled with a size larger than the size of the rod by 3 steps. For example, for a rod with a diameter of 6 mm, 9 mm holes are required. The outer edge of the upper plane of the upper corner is ground down “to the bottom” at a distance of 10-12 cm from the end, so that the emery does not touch it when sharpening. In the horizontal shelves of both corners, two holes are drilled coaxially for the coupling bolts. These holes are drilled according to the principle: the first - at the end of the grinded part of the upper corner, the second - 10-12 cm from the first. The thickness of the set of shims should be equal to the thickness of the blade being processed. The diameter of the clamping washers located on the movable rod should be equal to the thickness of the sharpening stone multiplied by 2. As a handle, you can use a piece of PVC pipe of a suitable diameter or wrap several layers of electrical tape. To prevent the moving part from jumping off the blade, the rod on the outside of the upper shelf must be bent in the shape of the letter “L”, or secured with a locked nut if there is a thread.
Device for sharpening from mounting angles
The diagram and drawings of a homemade knife sharpener made from mounting angles, based on a Lansky device, are clearly shown below.
Diagram of a homemade sharpener made from mounting corners
To assemble this device you will need:
- Metal corners 90*90 mm with a wall thickness of 6 mm.
- Stud with M6 thread and length 160 mm.
- Thin rod (electrode, knitting needle, etc.).
- Touchstone.
- 2 rectangular pieces of metal (sponges for clamping the whetstone).
- Pliers.
- Hacksaw for metal.
- File (or any other tool for processing sharp corners).
- Set of hardware (nuts and bolts).
Drawing of clamping jaws of a Lansky type device
Drawing of clamping jaws of a Lansky type device
Holes should be made in the metal corners and threads cut into them according to the drawings. Then grind off the bevels on the jaws that secure the knife blade in order to prevent interference with the movement of the whetstone. All sharp corners and edges of the future sharpening device must be processed with a file.
Diagram of a finished sharpening device made from mounting angles
In both metal jaws intended for fixing the keystone, you need to drill holes and cut a thread for the connecting bolt. Fix the touchstone. A thin smooth knitting needle, previously bent at an angle of 90º, must be inserted and secured in the hole of one of the jaws. In the future, using this knitting needle-shaped clamp, a certain angle of inclination of the touchstone will be set. Such a device for sharpening knives is characterized by a wide range of sharpening angles, which will undoubtedly be of interest to most craftsmen.
How to check the sharpness of a knife?
Under no circumstances should you check the sharpness of the cutting surface with your finger.
If you move carelessly, a cut forms on the skin, into which metal particles get trapped. Such a wound takes a long time to heal
The most well-known way to check is to cut the paper by weight, holding the sheet by the corner. The knife should pass easily, without tears.
The sharp blade does not produce glare along the length. Their presence indicates that there are still dull areas on the blade and you will have to work a little more.
It is important to carry out maintenance on time. If this is not done, the blade quickly becomes unusable and you have to buy a new knife, which is not cheap
If you are unable to cope with the task yourself or have doubts about your own abilities, it is better to entrust this matter to a specialist.
We also found an excellent video on the topic of sharpening knives, it perfectly complements our article:
Can I sharpen it myself or do I have to carry it somewhere?
With such a knife, you can slightly correct one side with a small block. When the teeth are completely ground down, this knife will turn into a regular flat knife. If you only use it to cut bread, vegetables, and fruits, then you won’t have to sharpen it for very long.
Sharpening kitchen knives is an art that requires certain knowledge and effort. Cutting food with a dull knife usually looks more like medieval torture with a sad outcome than a pleasant process of culinary creativity. Therefore, before you start cooking, make sure that the knives you are going to use are well sharpened. And if you don’t know what and how to sharpen them correctly, then we’ll tell you now.
Sharpening kitchen knives is an art that requires certain knowledge and effort. Cutting food with a dull knife usually looks more like medieval torture with a sad outcome than a pleasant process of culinary creativity. Therefore, before you start cooking, make sure that the knives you are going to use are well sharpened. And if you don’t know what and how to sharpen them correctly, then we’ll tell you now.
There are several tools for sharpening: the usual whetstones, electric knife sharpeners, sharpening machines, and newfangled Japanese stones. But the most proven and reliable method is still sharpening with a regular sharpening stone. Remember that this process is quite complex and requires skill, so read more about it.
First you need to choose the right sharpening stone. They are natural and artificial. Both are suitable for sharpening, but artificial ones are more universal. Not everyone knows that before use, the bar needs to be oiled or wet and left like that for 15-20 minutes. We won’t go deep into physics and chemistry, but this procedure will extend the life of the whetstone.
Let's move on to sharpening:
Remove the required layer of steel with the rougher side of the whetstone. A whetstone is a grindstone. Sharpen the knife with smooth movements, slightly lifting the handle. The sharpening angle is very important: for professional chefs it is 25 degrees, and for ordinary household ones, 25–30 degrees is suitable. The sharpening angle affects 2 factors: the sharpness of the knife and how long it will stay sharp.
Therefore, remember - the smaller the sharpening angle, the sharper the knife will be; the larger the angle, the longer it will remain sharp. You shouldn’t put too much pressure on the blade, but you shouldn’t stroke the sharpening stone with the knife either - it’s very important to find a balance here. Sharpen the blade until a clearly felt “burr” appears on the back of the cutting edge. Repeat the procedure with the back of the blade. If everything is ready, we move on to the finishing stage
You can use several tools - a special leather belt, GOI paste or other abrasive paste. The ceramic edge of a plate or mug is quite suitable if they are rough, or musat is a steel rod with longitudinal grooves and a handle, usually found in knife sets. The knife is sharpened!
There are several ways to check whether you have completed the task.
First, check by touch. You need to carefully move the pad of your thumb across the blade, and do not apply pressure under any circumstances. If the edge of the blade is clearly defined, this means that you did everything correctly, and if the edge is rounded, then the blade remains dull. The main thing here is to be extremely attentive and careful so as not to cut yourself. You can check the sharpness by eye - if the blade “glares” in the light, it means there are still dull areas. But the surest way is to immediately apply it in practice, for example, cutting a tomato.
We advise everyone to buy a knife sharpener - you will very quickly understand how a good, sharp knife makes a cook's life easier.
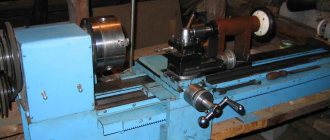
How to sharpen a drill without special tools
Many experienced specialists, who often deal with drills, sharpen them without special tools, using for these purposes only a sharpening machine equipped with a tool rest. It should be said right away that for those craftsmen who do not have such experience, it is better not to try to sharpen the tool in this way: otherwise the drill, which can be expensive, will have to be replaced with a new one. You should especially not experiment with this sharpening method in cases where you need to restore a drill whose diameter exceeds 3 mm.
When manually sharpening a drill, you have to rely only on your eye and experience, if you have it.
Those who are faced with the need to frequently drill various materials and do not yet have sufficient experience to sharpen drills without the use of special devices can purchase a similar device: the modern market offers a wide variety of models in different price categories. Moreover, many of these devices, ranging from a full-fledged drill sharpening machine to the simplest sharpening device, can be made with your own hands on a minimal budget.
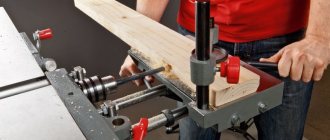
How to make a machine with your own hands?
To sharpen a jointer knife, you must use special sharpening machines
This is especially important when jointers, planers and other woodworking equipment are used frequently. The sharpening machine is compact in size, it can be installed even in a garage or small shed on a summer cottage
Before starting assembly, you must prepare the appropriate tools that will be used during assembly of the sharpening machine:
- the table on which the work will be carried out;
- faceplate;
- vacuum cleaner;
- engine;
- casing for the machine.
You need to start assembling the machine by finding a suitable faceplate. It is one of the most important parts for a sharpening machine. All jointer knives are quite narrow, so they can only be sharpened using a suitable type of faceplate. Then the sharpening work will be high-quality, safe, and fast. The faceplate takes up the bulk of the cost of all equipment. Making a sharpening machine yourself is more profitable; you don’t need expensive parts for it. Manufacturing will be quite justified if you have to frequently carry out woodworking.
You need to buy new faceplates; it is recommended to take American or German-made elements. They have the highest quality, and the cost fluctuates around 25,000 rubles. Next, you need to choose a motor for the future sharpening machine, it is best to take a 1-1.5 kW motor, you can even use a used element. Motors from old washing machines are excellent for the machine, but first you need to make sure the engine is working.
It is imperative to provide a button to turn the machine on/off. It should be located within reach of your hand. The faceplate is covered on top with a casing, which is made in the form of a square. One corner of the casing must be cut off, since from this side the jointing knives will be sharpened with your own hands. A hole is made in the lower part of the tabletop; it will be intended for a vacuum cleaner pipe, with the help of which all contaminants that arise during sharpening will be removed. In addition to sharpening jointing knives, a similar machine can be used for other work, for example, for processing ax blades, saws and other tools used in the garden.
Sharpening jointing knives can be done using various methods. Special sharpening stones are suitable for this. However, you can assemble a compact sharpening machine yourself. It will be used to sharpen a variety of tools including saws and axes.
The jointer and jointer have long been one of the most popular carpentry tools, and they have not lost their relevance today. Many specialized specialists are interested in the question of how to sharpen jointer knives, since a fully prepared tool for work allows you to achieve better quality of work. The first thing to do is to remove the knife and chipbreaker, which must be unscrewed before work. Used tools need to be cleaned of contaminants, such as tar, which is best removed with gasoline.
To sharpen planing and jointing type knives, it is better to use specialized devices. The procedure is also carried out manually; in addition, the device for sharpening jointer knives can be assembled independently. When working, you need to follow a number of rules, you can use several technologies. Regardless of which sharpening option you use, you need to follow the instructions as closely as possible. Otherwise, you can achieve poor-quality performance of the tool, the functions of which you will not be able to use 100%. If you are thinking about how to sharpen jointer knives at home, then use regular sharpening stones, although choosing a professional sharpening machine with a cooling function is ideal.
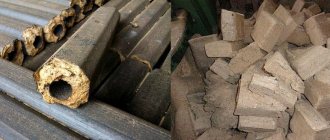
Making sharpening stones
It will not be difficult for a modern craftsman to make sharpening stones with his own hands. For this you will need:
- a wooden die to the size of the future sharpener;
- epoxy resin;
- cardboard boxes according to the size of the block;
- abrasive;
- protective rubber gloves.
You can use ready-made powder as an abrasive, or you can prepare your own abrasive, for example, from an old Soviet-made green block. Such a block can be ground into powder and used in the future as an abrasive.
Knife sharpening device
The wooden die needs to be treated on one side with sandpaper and frequent cuts must be made with a saw. Mix epoxy resin with abrasive chips. Having previously placed the block in a cardboard box glued to the size of the block, cover the prepared surface of the wooden block with a mixture of epoxy resin and abrasive. Once the resin has completely cured, the block is ready for use.
Another option for making your own sharpening stones is to create a sharpening stone from small rectangular glass plates about 5 mm thick. Using double-sided adhesive tape, sandpaper is glued to the surface of the glass plate. The sharpening stone is ready for use.
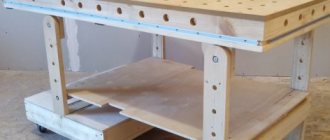
DIY carpentry tools
Let's move on and move on to carpentry fixtures. Those who are engaged in “carpentry” will appreciate the budget wedge - an indispensable device for any carpenter for gluing wooden panels.
One day I needed to glue together a lot of wooden panels. I didn't have any clamps. Therefore, I decided to quickly assemble a clamp from wooden blocks with a cross-section of 5x5 cm and metal plates with welded nuts in “tens”.
In total, the user made 3 of these wedges; this was enough to glue a wooden board measuring 1.5x1.7 m and 18 mm thick. To prevent the bars from sticking to the workpiece, under those places where there is a seam and glue may protrude, you can put a newspaper or shoot polyethylene with a stapler.
In order not to spoil the workpiece, you need to place a gasket under the plate into which the screw rests. The gluing width is adjusted by moving the stop bar.
Homemade woodworking tools are constantly being improved. A more advanced version of the wedge, made entirely of metal, is offered by Alano. The components and operating principle of the device are clearly demonstrated in the following photographs.
To make such a wedge you need a welding machine.
On FORUMHOUSE you will find other developments and even drawings of homemade devices.
Cyclone for carpentry workshop based on a vacuum cleaner
And at the end of the material, we offer our readers a photo selection of homemade cyclones, which are a necessary device for carpentry work.
Option 1
My first cyclone failed and I decided to make a new one. It took 20 minutes to do everything. To make it, I took a used putty bucket and polyethylene pipe fittings. They hold better and tighten quickly, ensuring the tightness of the assembly.
An oil filter from Moskvich was used as a filter element.
This is what happened in the end.
Option 2
And here is my version of a construction vacuum cleaner with a cyclone. For strength, I reinforced the bucket from the inside. It turned out that the drain hose from washing machines is perfect for my sander.
To summarize, to make homemade machines and tools of a high level, you need the ability to look at all the seemingly unnecessary household junk from the garage and boards from the carpentry shop with fresh eyes. For a true master and owner, everything should go to work, and by showing creativity and imagination, you can significantly reduce the cost of purchasing expensive “devices” required for one-time or infrequent work.
In the topic on FORUMHOUSE you can see a kaleidoscope of ideas from our users related to the manufacture of homemade machines. We also recommend a topic about the modification and restoration of hand tools.
And this video talks in detail about the selection of tools necessary for a self-builder.
This is interesting: How to make a garden wheelbarrow (trolley) with your own hands for transporting goods according to the drawings: we explain point by point
Types of sheathing
The most popular technologies for installing MDF wall panels today are:
- Wooden sheathing. This design is easy to make and does not require a large number of fasteners. However, wooden sheathing needs to be pre-impregnated with a special agent in order to prevent the appearance of fungus, rot, and mold. If the room has high humidity, then you should not use wooden sheathing in this case.
- Lathing made of galvanized profiles. Often, metal structures are used as sheathing for drywall, although they are quite suitable for covering walls with MDF panels. But galvanized profiles are not suitable for forming a frame on the floor due to their low strength. As for the ceiling, a structure made of light metal rather than timber is just right here.
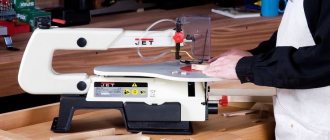
Homemade sharpening machine
belt grinder sharpening machine
The simplest homemade model of a desktop machine is made from a belt-type grinder. Making it yourself will take a couple of hours of time and a minimum of materials:
- cable ties;
- thick plywood No. 10;
- two bolts with nuts;
- self-tapping screws;
- jigsaw;
- screwdriver
Work progress:
- We cut out a rectangular base from plywood with our own hands, 4 parts for stands and one part for a tool rest;
- in the upper part of the grinding machine body we will make holes for cable ties;
- we turn the car over and pull it to the base with our own hands through the prepared holes;
- we will make holes for bolts in the construction details;
- we attach the lower parts to the base with self-tapping screws;
- We attach the upper parts of the racks to the stop, connect them to the rack bolts and the homemade sharpening machine is ready.
Criteria for selecting sharpening machine parameters
When choosing components for designing a sharpening machine, it is necessary to take into account the following technical indicators of the device:
- power: it should allow processing massive parts and tools (for example, an ax) without significantly reducing the rotation speed of the electric motor shaft;
- diameter of the mounting hole: it is taken into account for the manufacture of equipment;
- the diameter of the grinding and grinding wheel is selected depending on the size of the parts being processed;
- rotation speed: it should not exceed 3000 rpm (it is better to limit it to 1500 rpm);
- the ability to adjust the rotation speed - a convenient function necessary for processing various parts;
- weight – matters when it is necessary to move the sharpener.
...and keep the knife sharp?
Proven tips will help you in this matter:
- Do not store knives together with other cutlery (forks, spoons, etc.) - the blade will rub against the surface of other objects, microscopic nicks will appear on it, which will dull the blade. The best place for a knife is a wooden stand, a magnetic strip or a special case;
- Don't leave the appliance dirty - it takes a lot of effort to clean dried food. This may scratch the cutting edge of the knife. In addition, many products contain acid, which will lead to metal corrosion;
- Control the duration of contact of the knife blade with water. Lying in a bowl of water for a long time has a bad effect on the metal, as well as the material of the handle;
- To keep your knife sharper longer, wash it only with cold water and try to cut very hot food less often.
About thermal insulation
Installation of insulation
The installation of the sheathing is complete, but before moving on to the installation of MDF panels, the walls should be insulated. This will allow you to save a lot on heating the room, and also increase its thermal insulation. In addition, insulation additionally prevents the formation of mold, mildew and moisture in the voids of the sheathing. It is recommended to fill the cells in the sheathing with one of the following insulation materials:
- Penofol is a relatively new multilayer insulation material that consists of polyethylene foam and polished foil with a reflectance coefficient of 97%. It is fireproof, environmentally friendly, has good noise insulation and low vapor permeability.
- Mineral wool. The material has gained great popularity due to its high thermal insulation and moisture resistant properties.
- Styrofoam. Air is the best heat insulator, and this material consists of 98% of it. All this is thanks to the polystyrene granules that are formed in the foam during the production process. The material has high moisture and vapor resistance.
- Extruded polystyrene foam. This type of foam is obtained by melting with extrusion. The seal is not cheap, but it fully justifies its price. The material has excellent thermal insulation, as well as a high compression ratio. Therefore, it is often used to insulate floors.
Installation of this thermal insulation material is very simple:
- Sheets are cut from a roll of insulation in accordance with the cell sizes (lathing pitch).
- After this, they are attached to the wall using construction foam or silicone glue.
- The resulting protrusions of the polyurethane foam are removed using a utility knife.
After insulating the walls, we move on to the most interesting part - the technology of wall cladding with panels.
Rules for sharpening on a sharpening machine
With this device, sharpening knives with your own hands is not particularly difficult. You just need to follow a few rules.
- The blade must be placed on the tool rest with the tip facing you and secured with a clamping bar.
- Place a wooden block in the sharpening carriage and adjust the sharpening angle required for this blade.
- After adjusting the sharpening angle, you need to evaluate the degree of dullness of the blade. If the blade is very dull, has waves, tears, chips, then instead of a wooden template, the coarsest, coarse-grained block is installed.
- Having lowered the block onto the blade, the sharpener makes 5-6 pendulum movements from left to right and back, after which he assesses the condition of the blade. If necessary, repeat the procedure.
- After all rough irregularities have been removed, the block is replaced with a smaller one. Similar movements are carried out (as a rule, their number is smaller).
- The blade is inspected again, and the blade can be removed from the machine to make test cuts.
If the result is unsatisfactory, we can recommend the following: stick strips of fabric-based emery cloth onto the existing section of square pipe. It is necessary to glue sandpaper of different grain sizes: on one side - coarse, on the second - finer, on the third - the finest. On the fourth, it is better to stick a strip of suede, on which to apply GOI paste before work. By making several movements on each side and then changing them, you can achieve a perfect sharpening of the blade.
In conclusion, we can say that the time and materials spent on creating such a machine will subsequently more than pay off, due to the fact that sharpening the tool will be carried out quickly and efficiently.
Electric knife sharpeners
The procedure for creating an electric sharpening machine is simple: it is enough to equip almost any device for sharpening knives and scissors with an electric drive. Such a sharpening machine allows you to quickly and efficiently sharpen the product and at the same time provides a better concave shelf at the edge of the blade.
The mechanism of an electric sharpener for sharpening knives contains a guide, which is located along the axis of rotation of the sharpening stone, and with the help of which the blade is adjusted at a given angle. The sharpening angle is set and set by the guide, and the clamping force is determined by the master.
Particular attention must be paid to the speed of sharpening, because... The electric drive allows you to sharpen the product at high speed, as a result of which the surface of the knife heats up. Such surface heating leads to tempering of the hardened steel, as a result of which the knife can quickly lose its hardness and its service life will be noticeably reduced. To prevent tempering of the steel, sharpening should be done on a high-speed electric sharpener in short periods of time and with sufficient breaks to allow the knife to cool.
Do-it-yourself sharpening device
Rotation of the device by 900 is carried out only towards you. In relation to the axis of the oncoming abrasive cylinder, a negative angle of the guide plate is unacceptable. The platform of the tool rest acts as a protective stop.
Drawing of a device for sharpening drills
The guide plate is selected from sheet steel 5–8 mm thick. We mill an angular groove along the upper plane. The recess where the drill will rest is made on a machine.
Amateur work with improvised tools is acceptable if the material is replaced with thick textolite. Then a hand router will do. A sample is required without deviation in depth and direction, otherwise we will not achieve accuracy in the operation to restore the cutting edge of the drill.
The convenience is that when the drill moves longitudinally along the groove, the support area increases due to the contact of the palms with the guide plate. Rotating the drill when in contact with the sharpener does not cause any risk of arbitrary changes in the sharpening angle.
The support plate carries a bushing underneath. Usually this is a piece of pipe. After welding, the internal diameter is calibrated using a reamer. We select the bracket and bolt according to the size of the tube. We will order to turn 2 nuts with a cylindrical surface with a loose fit in the tube.
Assembly drawing of a sharpener clamp
Checking and self-monitoring
Screw on the bracket last. Its position will determine the functionality of the twist drill sharpener. It's time to do a test sharpening. Touching the abrasive above the center of the axis of the grinding wheel, we correct the cutting part, lifting it due to the hinge - processing the back of the head.
Common mistakes when sharpening:
Proper sharpening of spiral products
- Drill runout due to the difference in the length of the cutting edges.
- Asymmetry of cutting edges.
In the first case, due to the displacement of the drill axis, it becomes more difficult to hit the core point. The diameter of the hole will exceed the diameter of the drill. The thin drill will break. The divergence of the cutting edges leads to premature wear of the involved edge when work slows down.
How to re-sharpen correctly. Let's order a turner a boss with an internal cone. We attach it to a steel sheet. We rest the shank against the cone, leaving marks on the metal with the hangers of the side edges. Didn't match? We work to the optimum.
Step No. 2 - cut according to the markings
We cut according to the markings
We clamp the workpiece in a vice and make a cut using a grinder according to the markings.
Nut with sawn groove for drill
The end result should look like the one shown in the photo above.
back to menu
Installation of MDF panels
Installation of panels
Laying the product should start from the corner. The installation procedure is as follows:
- We apply the panel to the corner and check whether it fits tightly to the sheathing. Then we evaluate the evenness of the surface using a building level.
- If all is well, from the corner side along the entire height of the structure we fasten the panel with self-tapping screws to the sheathing.
- Subsequent strips are connected using clamps, which are inserted into the groove of the panel. It is advisable to fix these staples with nails to the sheathing.
- We slide the ridge of the next one into the groove of the first corner panel. In this case, it is necessary to control the tightness of their fit. If cracks are found, you should slightly trim the ridge of one panel with a knife and try to put it in place again.
- We attach the MDF plank to the sheathing using self-tapping screws along the entire height of the structure.
- The installation process is then repeated.
- The last panel must be pressed all the way to the penultimate one and secured at the free edge with self-tapping screws.
Important: If the last plank does not fit into the remaining space, you can still carefully shorten it in width using a jigsaw.
Slope finishing
This procedure is similar to installing panels. In addition, when finishing slopes, there are two decoration options. The first is to install the panel lengthwise, the second is to install it across. If the slope is small and its width does not exceed 1.8 times the width of the finishing panel, transverse cladding is performed. For wide slopes, you can resort to any of the methods.
Useful information: slopes sheathed across, with alternating dark and light tones, have an excellent appearance.
The finished look is given by fittings, thanks to which you can hide the corner joints between the panels. Folding corners cover up defects well. You need to apply glue to them from the inside and press the product tightly to the sheathing in the corner. To hide the joints with the floor and ceiling, you can use a plinth.
Basic Concepts
Such equipment will have numerous rotating parts. From this we can conclude that making such a machine with your own hands will not be so easy. Therefore, when starting to manufacture it, you need to calculate your strength. If you already have some similar experience, then you will cope with the task. It is worth noting right away that you will not be able to make a jointing machine entirely from parts of your own making. Of course, it’s possible that you have a large assortment of different devices in your “bins,” but this rarely happens. First of all, this concerns the shaft with knives and bearings. They will most likely have to be purchased or even ordered. But if everything you need is available, then you can safely start designing.
Some parts for the jointer: knife shaft, knife bearings, will have to be purchased or ordered
First of all, it’s worth understanding what kind of “package” you want to receive. There may be several options:
- just a jointer. It will only perform one function;
- set of jointer and circular saw. In this case, the functionality of the machine is doubled;
- equipment capable of performing the role of a jointer, a circular saw, a grinding device, a grinding and drilling machine. Such a device will be very useful for your workshop, but it will be difficult to do it yourself.
The most optimal and easiest option is to make a jointer and a circular saw on the same bed. Plus, both tools will rotate from the same electric motor. This feature will greatly facilitate our task.
Let's look at the main components of our future tabletop jointing machine. It will include:
- Bed. This structure will support the entire machine and the equipment installed on it. To make it, it is best to use durable channels with a wall thickness of 8-10 millimeters. The bed can be made either collapsible or permanent. In the first case, all its components will be connected using bolts and nuts. If you do not need a portable machine, then the channels can be secured together by welding. This option will be more reliable. You can do without a bed if its role is played by a desktop;
- Work tool. This is one of the most important components of the machine. The jointer knives and the saw itself - it is with their help that you will saw and process the boards. The knives are firmly attached to the shaft. They must be made of reliable and strong steel. Circular saw with pobedit tips. Such a tool will last you much longer;
- The rotor is where all the tools will be attached. Without this part it is impossible to make a single machine, planer or circular saw. Finding a suitable rotor can be quite difficult, so it is better to order it from a professional turner, having previously provided it with drawings;
- Desktop. For a properly functioning machine, you need three surfaces. One will serve as a workbench for a circular saw, and the other two for a jointer. The thickness of the material for the working surface must be at least five millimeters. Multilayer plywood or metal sheets are suitable for these purposes. In this case, it is advisable to make a slight difference in height for surfaces intended for jointing. The side along which the workpiece will be fed should be a couple of millimeters lower than the side to which the already processed side will go. This difference will make work easier and significantly reduce vibration.
Installation
The installation of lattice structures made of metal and wood has several differences. For example, when using galvanized profiles, they should be fastened only with powerful and long self-tapping screws. Using dowel nails in this case does not make sense - the tenacity between the profile and the fastener itself will be lost.
The most important point on which the strength of the fit of the fasteners and the entire structure depends is the fixation of the body of the self-tapping screw or dowel-nail (with wooden sheathing) at least 35 mm in the wall . For example, if the thickness of the rail or profile is 20 mm, and the MDF panel is 10 mm, then the depth of the groove for the mounting socket and, accordingly, the fasteners should be about 65 mm, or preferably more. The diameter of the fasteners is selected from 4 to 6 mm, depending on the density of the wall. The stronger it is, the smaller the diameter of the screw should be. All fasteners are equipped with a special socket. When drilling a groove, the diameter must be compared with the diameter of the body of the socket, and not its head, otherwise the safety margin will be insufficient.
Installation of a wooden structure
Installation of wooden sheathing
We start with the installation of vertical racks. We install slats in each corner in pairs so that they form a right angle, as well as along the edges of door and window openings along the entire height of the room. To ensure that the racks take an exactly vertical position, we use a plumb line. Now in order:
- We apply the strip to the wall and outline it on either side with a pencil or marker.
- We make holes for fasteners using a hammer drill with a concrete drill. For structural strength, the drilling pitch should be in the range from 0.4 to 0.5 m.
- We drive the sockets for the fasteners into the holes and make marks of their location on the rack itself.
- We drill holes in the rail with a diameter slightly smaller than the mounting hole.
- We install the racks in place using self-tapping screws or dowel nails.
- We install horizontal bars in the same way. The step remains the same. Don't forget to decorate the slopes with slats.
- At the end, we remove the ledge elements at the joints of the structure using a plane.
Fastening the metal base
The procedure for installing a structure made of galvanized profiles is completely similar to the above. First, the racks are placed in the corners of the room and in the places of openings for marking the walls. Afterwards, holes are made for fastening and installation of vertical profiles. UD type profiles are used as racks. In the marked places, horizontal profiles of the CD type are inserted into them in accordance with a step of 0.4–0.5 m. Afterwards, the transverse strips are attached to the racks and the wall. The elements of the metal structure are connected to each other using ordinary self-tapping screws. As was said earlier, such a sheathing needs to be attached to the wall only with powerful fasteners (dowel-nails will not work).
Helpful advice: to cut metal profiles, it is recommended to use a grinder or a hand-held circular saw with an appropriate attachment. The efficiency of a jigsaw even with a metal file is much less.
Locking blade machines
Knife sharpening machines with locking blades will attract the attention of those people who want to sharpen a knife not only efficiently, but also quickly. The design, which rigidly fixes the knife blade relative to the sharpening stone moving at a set angle, allows you to accurately set the angle of inclination. To create such a homemade machine with your own hands you will need:
To create such a homemade machine with your own hands you will need:
- The base is a rectangular wooden plate with dimensions 440*92 mm and a thickness of 18 mm.
- Wooden die 92*45*45 mm (for fixing the vertical threaded rod).
- A wooden block 245*92 mm and 18 mm thick (the plate to which the knife will be attached).
- Iron plate 200*65 mm and metal thickness 4 mm.
- Piano hinge, 92 mm long.
- M8 hairpin 325 mm long.
- Nuts and bolts with M8 thread.
- Drill 6.5 mm.
- M8 tap.
- Self-tapping screws 50 mm, 4 pcs.
The die intended for fixing the vertical threaded rod must be drilled through with a 6.5 mm drill. The hole should be located at a distance of 15 mm from the edge of the die, approximately in the center.
Layout of the hole in a wooden die
Next, in the resulting hole you need to cut a thread for an M8 stud. The wooden block prepared in this way must be screwed to the base at a distance of 265 mm from the edge using ordinary self-tapping screws 50 mm long, screwed into the back of the base.
After the block and the base are securely fastened, you need to insert an M8 pin into the hole in the block. The pin should run across the entire cross-section of the beam and the base; thus the risk of changing its position is minimized. The pin at the base of the block must be firmly fixed with an M8 nut, slightly recessed when twisting it into the wood of the block.
The second part of the work involves assembling a clamping device to fix the position of the knife. To do this, a piano loop is attached to a block of wood 245*92 mm with three self-tapping screws from the end of the wooden plate, with the help of which it will be attached to the base of the device.
Attaching the fixing bar to the base using a piano loop
After securing the wooden part of the holding device, you can begin to attach the iron plate. In the center of the 200*65 mm plate, you need to drill an oblong groove, 90 mm long and about 1 cm wide. The groove should be located from the edge of the clamping plate at a distance of 60 mm. Additionally, you need to drill a hole at a distance of 20 mm from the opposite edge and cut a thread in it for an M8 bolt. Then you need to attach the clamping plate to the previously prepared wooden base using this bolt. Using another bolt and a suitable washer, you need to fix the clamping plate in the center of the cut groove. The fixation should be clear, but at the same time neat, so as not to damage the surface of the blade.
Attaching the Iron Clamp Plate
The most difficult part of assembling this device is preparing the control device that will set the sharpening angle of the knife. For this you will need:
- metal square profile 40×40 mm;
- furniture bracket, 40 mm wide;
- a pair of rivets;
- a piece of plywood 42×25 and 18 mm thick;
- bolt and nut M5;
- a pair of M8 wing nuts;
- whetstone;
- steel bar with a diameter of 0.8 cm and a length of 40 cm.
It is necessary to drill a couple of holes on a piece of plywood: a through hole with a diameter of 8 mm along a cross-section of 42×18 mm (the distance from the edge on the 42 mm side should be set at 15 mm) and a through hole with a diameter of 5 mm along the side with a cross-section of 42×25 mm (the distance from edges 10 mm). The square pipe should be cut in half so that you get a “U”-shaped bracket with a width of 40 * 15 mm and ears of 20 mm. You need to drill 8 mm holes in the ears, into which an M8 pin will later be inserted. Connect the resulting bracket to a furniture hinge using rivets. Using the second part of the furniture bracket, attach a block of plywood to the resulting structure with an M5 bolt.
Location on the spoke of the guide mechanism
Connect the touchstone to a guide rod, which is a steel rod with a cross-section of 8 mm. When connecting the keystone and the guide rod, you should strictly ensure that their center lines coincide. If desired, for ease of use of the sharpener, a handle-holder can be attached to the whetstone on the reverse side. All that remains is to secure the whetstone in the guide mechanism, secure it with a thumb and the homemade device for sharpening knives is ready.
Sharpener assembly
A simple device for sharpening knives
The simplest device for sharpening knives is based on the use of an angular frame and a whetstone. The price of such a primitive factory-made device is quite high, as is the price of replaceable whetstones, but making such a device for sharpening knives at home will not be difficult for a craftsman. You will need the following equipment:
- Wooden blocks of the same size - 4 pcs.
- Drill (or any other drilling tool).
- Bolts and nuts (about 4 pieces each).
- Touchstone.
- Protractor.
First you need to make a pair of wooden corners, placing the bars to each other strictly at an angle of 90º (Fig. 1). Close the resulting wooden corners together parallel to each other as a single whole and drill holes through the diameter of the bolts. Insert bolts into the holes and tighten the corners slightly with nuts.
The simplest device for sharpening knives
The point of this invention is that it is possible to sharpen simply by holding the knife vertically in relation to the sharpening surface located at a given angle.
The most important thing is to properly secure the whetstone between the wooden corners of the device. To do this, using a protractor, you need to set the desired angle of inclination of the touchstone and tighten the bolts tightly to clearly fix the position of the touchstone.
With some modification of the device, you can also fix the position of the knife relative to the sharpening stone. A significant disadvantage of such a machine for manual sharpening is the inability to smoothly adjust the angle of inclination of the sharpening stone.
Features of using the device
Of course, a simple whetstone is suitable for sharpening a knife or the cutting edge of a plane. But its quality will not be the best. To ensure uniform removal of the metal layer and precision processing, it is necessary to use special sharpening devices.
The advantage of such a product is not only its ease of use, but also factors such as:
- The ability to fix the blades, which is quite reliable and does not cause unnecessary stress. a properly designed device does not allow the metal to be damaged during operation.
- Possibility of installing the bar at a certain angle. Thanks to this, when the cutting edge moves, the angle value will not change.
- Variation in setting different sharpening angles. With this functionality, it is possible to process various tools, even sharpening knives with a stepped structure.
https://youtube.com/watch?v=nliTUKgdbL8
Device for sharpening from wooden blocks
A simple device for sharpening knives is a tool consisting of a pair of wooden slats and a pair of abrasive bars with the same geometric dimensions.
Wooden slats should be thoroughly sanded with abrasive sandpaper. Then, after applying auxiliary markings, depending on the sharpening angle of the knife, make cuts to a depth of 15 mm. Insert sanding blocks into the resulting holes so that each groove matches, then secure them with bolts. To give the sharpening device greater stability, the lower part of the surface can be padded with a piece of rubber.
The types of devices for sharpening cutting tools are different and each master will be able to choose the manual machine that will fully satisfy his needs.
What will we make it from?
The next question to consider is.
The materials from which you will make it.
To create such a device you will need the following materials:
- A sheet of thick plywood (can be replaced with a sheet of chipboard) 16 mm thick;
- Self-tapping screws 50-70 mm long; (it is better to use furniture format);
- A drill corresponding in diameter and length to your self-tapping screws or conformation;
- M8 hairpin of appropriate length (approximately 70 cm);
- Aluminum plate (at least 5 mm thick);
- M8 bolts with nuts (it is advisable to use wing nuts, although you can also use regular nuts, but keep in mind that then, with each sharpening, you will have to use a wrench, and this, you will agree, is not very convenient);
- You will also need a small block of textolite or ebonite to create a movable connection between the stud and the frame, which can be adjusted in height (if necessary, it can be replaced with a block made of hard wood, for example, it could be oak, beech or hornbeam);
- Of course, you will also need abrasive stones of various grain sizes;
- You will also need a powerful neodymium magnet (“you can get” such a magnet from an old computer hard drive that has become unnecessary).
Sharpening angle, what is it?
So, since it is impossible to stop the process of dulling the cutting edge, then at least try to slow it down, and for this you need to sharpen your tool very well. Earlier in this article you have already come across such a concept as the sharpening angle of the cutting edge. And now more about it.
Blade sharpening angles can vary greatly. From an angle of about 10 degrees for razors and scalpels, to an angle of about 50 degrees for various Machete-type knives.
Basic materials and tools
The principle of operation of a homemade device
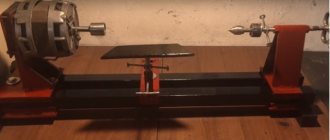
In order to construct a homemade emery, you need an electric motor left over from using old household appliances.
It is the electric motor that puts the product into operation, as a result of which the attachments, pre-sharpened on lathe equipment and installed on the motor shaft, sufficiently clamp the emery wheel.
How to choose an electric motor
Most often, craftsmen choose as a motor an electrical device left over from an old-made washing machine, for example “Volga”, “Sibir” or “Vyatka”. As you know, the equipment made during the Soviet era was of high quality, so the engines were also quite powerful, with high reverse performance. From such a washing machine, you will also need a switch with a manual starter mechanism.
The main difficulty encountered is the precise placement of the whetstone directly on the engine shaft. The shaft does not always have a thread; the size of the hole in the stone may also not correspond to the size of the shaft. A specially machined part that will smooth out the dimensional discrepancy will allow you to cope with this task.
The maximum speed limit used in emery is 3000 revolutions per minute. This nuance cannot be ignored, because a high rotation frequency can cause the sharpening stone to rupture. It is preferable to use a product at home with an engine speed of 1000 to 1500 rpm.