Added by: Victor Kaploukhiy May 15
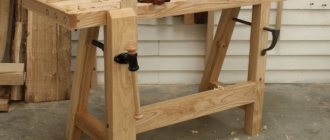
Every home craftsman knows that a well-equipped workshop with a stable and reliable carpentry workbench, equipped with all kinds of devices for processing parts, is half the success when making wood products. Of course, you can buy a desktop in a retail chain. However, we recommend making it yourself. Firstly, this will allow you to get a product of the desired size and functionality. Secondly, when building a workbench, additional equipment can be placed in the most rational way. Thirdly, the cost of the machine will be much lower than the factory version, which will allow you to buy a high-quality tool with the money saved. If these arguments have given you a reason to think about making a workbench with your own hands, then our drawings, instructions and recommendations will help you build a good-quality, reliable and functional carpentry workbench.
- 2 Types and design
- 3 Project and drawings
- 4 Necessary tools and materials
- 5 Manufacturing instructions
- 6 Installation of additional equipment
- 7 Video: Do-it-yourself carpentry workbench
Purpose and design of a typical carpentry workbench
A durable and reliable carpentry workbench will provide convenience and comfort during prolonged work with wooden parts.
A carpentry workbench is essentially a massive, reliable table for processing wood products of any size. The main requirements for equipment of this type are strength and stability. In addition, the machine must be equipped with at least a minimum set of devices for securing and holding workpieces. The dimensions of the workbench are selected depending on the size and weight of the parts being processed, as well as the available space in the workshop or garage. By the way, there are designs of compact workbenches that can even be placed on a balcony.
The design of a carpentry workbench with a stacked tabletop. In the figure: 1 - base or underbench; 2 - bench board; 3 - miter box; 4 - screed; 5 - vice; 6 - support beam
Since the work carried out on a carpentry machine is carried out using hand and electric tools, the workbench is made of solid timber and thick boards. By the way, the work surface, or in other words, the workbench board, is assembled only from hard wood. When making countertops, dry oak, beech or hornbeam boards with a thickness of at least 60 mm are used. If the tabletop is made of pine, alder or linden, then its surface will wear out quickly and will require periodic updating. Often, a workbench cover is assembled from several narrow and thick boards, placing them on an edge.
A series of holes made on the working surface of the table allows you to install thrust elements for easy processing of long wooden workpieces.
In order to facilitate the design, the supporting legs of the desktop, on the contrary, are made of soft wood. The vertical supports are connected to each other by a longitudinally installed beam to increase the stability of the product.
Typical diagram of a carpentry workbench
A vice of a special design is hung on the front and side of the workbench for fastening workpieces. In addition, on large-sized machines, separate clamping devices are installed for large and small parts. The optimal location for a carpenter's vice is the left side of the front apron and the near part of the right side panel.
In the underbench - the space between the supports, under the tabletop, convenient shelves and drawers are often installed for storing tools and accessories.
For convenience, a recess is made in the back of the tabletop for fittings and small parts. Often, a difficult-to-manufacture recess is replaced with a frame made of wooden slats.
General requirements and recommendations for making a workbench
There must be stops and clamps on the surface of the work table to secure the workpieces. To ensure production flexibility and the possibility of changeover for the production of new products, it is recommended to make these elements removable, and make technological threaded holes for their fastening at equal intervals over the entire surface of the table.
The height of the workbench from the floor should be such that it is convenient for a person to work behind it. It is selected experimentally (usually equal to 60-90 centimeters).
Shelves and places for attaching tools should be installed taking into account the individual preferences of the worker. So, if the carpenter is left-handed, then they should be located on the left, and if he is right-handed, then on the right. At first glance, it may seem that this is a trifle, but this is far from the case: with a reasonable and thoughtful placement of the tool, the carpenter will not have to be distracted by secondary tasks, he will concentrate on solving the main technological processes and observing safety standards and regulations when carrying out carpentry work. Ergonomics is a whole science. And it should not be neglected at the present stage of life.
Types and design
All homemade work tables for carpentry work can be divided into three types:
- Mobile workbenches have a weight of up to 30 kg, dimensions of less than 1 m in length and up to 70 cm in width, are equipped with only a vice and are made partly from metal elements. Such machines are intended for working with small, lightweight workpieces or minor repairs of wooden products. A mobile desktop is an excellent option if there is a lack of space and can be installed in any room in the country house or on the balcony. Often, mobile workbenches have a folding design.
Homemade carpentry workbench with mobile designIf there is no need for a stationary, professional workbench, then for minor repair work or the manufacture of small parts you can convert an old desk.
- A stationary carpentry workbench is made with reference to a specific location and is not intended to be moved during operation.
Equipment of this type allows you to process parts of any size and weight. A stationary carpentry workbench is a reliable, stable structure, arranged in accordance with the preferences of the owner and the characteristics of the room - The compound type machine is the most difficult to manufacture.
However, due to its variability, this design is the most practical and functional structure. If necessary, individual parts of the workbench can be easily replaced, since the elements of the workbench are connected to each other by bolted joints. A composite workbench is a structure that can be adjusted to any requirement
Video description
This video shows the process of making a carpentry workbench:
At the last stage of assembly, you need to sew up the back and sides of the workbench table with plywood, and also make a tabletop. If you decide to make the top from wood materials, you can use several sheets of plywood securely glued together. To obtain a more reliable, durable bench, you can install a two-millimeter metal sheet as a tabletop. To store tools and various materials that may be useful to a craftsman in his work, it is worth making shelves or drawers for the workbench.
Project and drawings
When developing the design of a carpentry workbench, the most important criteria are height, configuration and equipment. In addition, it is necessary to take into account who will use the desktop - left-handed or right-handed.
Considering that you will have to work at a carpentry bench for a long time, the closest attention should be paid to the height of the future structure. For people of average height, experts recommend making a table no higher than 90 cm.
Drawing of a carpentry workbench
When determining the distance from the floor to the tabletop, it is best to focus not on average parameters, but on the features of your own anatomy. It is optimal if the upper cut of the legs is at the same level as the hands. If you calculate this parameter taking into account the thickness of the tabletop, then you will be able to work tirelessly at such a workbench for several hours.
The machine cover can be made of boards, solid wood or plywood and is a composite structure. It is not recommended to use chipboard or OSB for these purposes. Professional carpenters have long determined the optimal size of the tabletop - a maximum of 2 m in length and 0.7 m in width. On such a workbench, you can make both a prefabricated wooden door and a small window with equal convenience.
When designing a structure, do not forget about the strength of the supporting frame. For supporting elements of the structure, timber with a cross-section of at least 100x100 mm is used. As longitudinal and transverse reinforcing elements, it is allowed to use slats and beams with a smaller cross-section - from 50 - 60 mm or more. The joints of the parts are mounted on tenons or dowels; furniture corners and other fittings are used for strength, and all connections are made using bolts and self-tapping screws. Nails will not be able to provide the required stability and fundamentality of the structure.
Carpentry workbench. View from above
Often the frame, or otherwise the workbench frame, is made of metal. Despite the fact that this material makes it possible to create a height-adjustable structure with less labor, professional carpenters prefer all-wood structures.
Next, let's look at a project for a carpentry table made from plywood, or more precisely from two plywood sheets 1.8 mm thick glued together. The dimensions of the lid are 150x60 cm. The edges of the tabletop are reinforced with plywood strips, which increases its thickness to 72 mm. By the way, the presented dimensions are not a dogma and can, if necessary, be adjusted in accordance with the needs and characteristics of the specific room used as a workshop.
Making a workbench project
The working carpentry table should be made of such dimensions that it is convenient to work on it.
The height of the table directly depends on the height of the owner, who should be comfortable standing to perform any operations. For an average height person, the workbench can be from 70-90 cm in height.
The length and width of the workbench depends on the area of the room in which it will be installed. A table with a width of 80-100 cm and a length of at least two meters is very convenient.
The necessary fastenings and table configuration should depend on which hand the master will work with and what operations he will perform on the workbench.
to install a workbench near a window, but you will still need additional lighting. In addition, sockets must be provided near the workplace.
The design of the collapsible table can be reduced due to the small thickness of the material. In such a workbench you can make folding legs or a twist-off tabletop.
Required tools and materials
Plywood with a thickness of 18 mm is a fairly expensive material (the price of one sheet measuring 1.5x1.5 m is more than 700 rubles, excluding delivery costs). Our project will require at least two sheets of this material. You can save a little if you buy one, larger sheet measuring 2500x1250 mm. Additionally, if possible, try to purchase scraps of plywood at least 300 mm wide, which will be used to reinforce the workbench cover around the perimeter.
Additionally, to build a carpentry machine you will need:
- wooden beam with a cross-section of at least 100x100 mm - for supports;
- timber or slats with a cross-section of at least 60x60 mm - for frame reinforcement elements; When choosing lumber for a carpentry workbench, carefully inspect the workpieces for the absence of knots and cracks. Remember that these parts will be subject to prolonged load;
- electric drill with a set of regular and feather drills;
- pieces of boards at least 1.5 m long for placing under clamps;
- wood glue. A good result can be obtained by using the domestic adhesive composition “Moment Joiner”;
- furniture bolts with nuts and self-tapping screws;
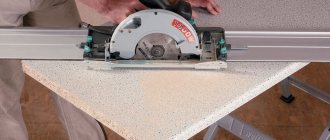
- Circular Saw;
- carpenter's square;
- long rule (at least 2 m);
- construction level;
- a notched spatula with the size of the cut sectors not less than 3 mm;
- carpentry clamps.
The clamps needed to compress plywood sheets when gluing must be strong and reliable. If you are a non-professional carpenter and do not have high-quality tools, then you can get by with inexpensive Chinese-made clamping devices. Of course, the number of such devices should be doubled.
Features of the working surface and frame
Before you begin assembling the workbench, you need to secure the stiffeners to the tabletop with self-tapping screws. Pine or spruce boards with dimensions of 100 × 60 × 800 millimeters are attached longitudinally, and boards with cross-sectional dimensions of 50 × 60 and a length of 1.8 meters are attached transversely. In this case, longitudinal boards are necessary in order to prevent warping of the tabletop, and transverse boards are necessary for further installation of equipment.
It may seem that this work is done by eye. However, this is a misconception. Dimensions must be maintained. If inaccuracies are made, problems will eventually arise with attaching the support legs to the tabletop. And the operation of such a table will be marred by poor stability.
Manufacturing instructions
- To make the tabletop, cut two pieces with a circular saw. If you managed to purchase a plywood sheet of maximum length, then you need to saw off one piece 1520 mm long from it. By cutting it in half, you will get two parts 1520x610 mm. After this, use the rule to check the concave and convex sides of each sheet. This will make it possible to correctly orient the sheets when gluing.
High-quality gluing ensures clamping of tabletop parts with clampsTo properly glue plywood sheets, they are folded with their convex sides facing each other.
- Having laid one workpiece on three parallel boards, apply wood glue to its surface.
To do this, use straight and notched spatulas. Remember that the work must be carried out very quickly, otherwise the composition will begin to set prematurely. recommends connecting the parts no later than two minutes after the start of applying the composition. Therefore, if you are not confident in the speed of your work, use wood glue, which has no time restrictions. Of course, the strength of the joint will be slightly reduced, but even a good quality PVA furniture mixture will provide an acceptable degree of adhesion. To avoid damage to the workpiece, support boards are placed under the clamps - Having laid the second blank on top of the first, place support boards around the perimeter of the future table top and begin to tighten the table top with clamps. At the same time, do not forget to control the flatness of the part using a rule. It will not be possible to tighten the center of the workpiece with clamps, so in this part you can install a load weighing at least 15 - 20 kg.
You can glue plywood sheets into a board without clamps, if you can find a perfectly flat surface for laying them, as well as a load of sufficient mass.
- After the glue has dried, the clamps are removed and they begin to strengthen the side surfaces of the tabletop.
To do this, strips of plywood 15 cm wide are glued along the entire perimeter of the lid in two layers. When performing this work, be sure to make sure that the top layer completely covers the joints. Reinforcing the side parts of the workbench with additional plywood strips - A circular saw is used to trim the side surfaces of the table. The parquet is driven smoothly, slowly. It is convenient to use the same rule as a guide. The tabletop is given a size of 1500x600 mm, observing right angles, for which they use a carpenter's square or a factory corner of a plywood sheet.
- The workbench supports are made of timber with a cross-section of 100x100 mm, connecting them with legs and drawers, for which lumber with a cross-section of at least 60x60 mm is used.
In our case, the height of the machine is 900 mm, however, you can adjust this size to suit your height. Making a carpentry workbench frame - The legs are assembled “in a tenon” or using dowels, making sure to apply wood glue to the parts to be joined.
- When assembling the upper and lower frames of the subframe, scrupulously maintain 90-degree angles between the parts.
It will be easier to fulfill this requirement if, even at the stage of preparing the parts, their edges are trimmed correctly. The width of the frame of our structure is 900 mm, and the height of the frame is 830 mm, taking into account the distance from the floor to the bottom rung of 150 mm. Assembly of the subbench - To attach the table top to the bench, long drawers are drilled in three places, through which the workbench parts are secured with 8 mm self-tapping screws with a length of at least 100 mm.
Installation of a tabletop on a benchtop - To prevent the head of the hardware and the washer from protruding beyond the support elements, a recess is made in them with a feather drill.
Holes made in the parts with a feather drill will help hide the bolt heads and washers.
If desired, you can build a shelf in the bench. To do this, a plywood panel is cut to the size of the lower space, in the corners of which rectangular cutouts are made for the legs of the machine.
The optimal place to install a homemade workbench
It is imperative to take into account the characteristics of the room before making a bench with your own hands.
It is recommended to install the workbench against the wall in one of the corners.
Drawings of the future structure, as well as its dimensions, are selected taking into account all the conditions:
- Type of design – stationary or mobile.
- Features of the tabletop: a fixed work area with constant dimensions or a folding lid.
- The functional content of the workbench is a simple design in the form of a table or a functional option with additional drawers, shelves or holders for storing tools.
- Table configuration - corner, straight or U-shaped.
- Installation option - a structure mounted near a wall or a free-standing table.
Most often, there is very little free space in the garage or workshop. According to the recommendation of experts, when making a workbench with your own hands, folding structures are given greater preference. They are mostly stationary and are usually installed near a wall. In this case, it is better to use the corner area of the room or its least used area.
If you plan to make a compact portable workbench with your own hands, you can install it anywhere. After use, the folding structure is simply removed to another place or retracted.
Note! If the room has windows or ventilation is provided, drafts may appear. It is not recommended to place a workbench in their area of effect, as this can cause problems with the neck and back, as well as with muscles heated during work.
Installation of additional equipment
It is impossible to imagine a real carpentry workbench without devices designed for fastening the workpieces being processed. For these purposes, a vice is attached to the finished tabletop in such a way that its jaws are flush with the surface of the lid. To correctly install the device on the workbench, apply a vice to the machine and mark the fastening points. After this, holes with a diameter of 12 mm are drilled and the tool is installed on the machine using a bolted connection with an M12 thread. When performing this operation, be sure to mill holes for the washers and bolt heads.
View of the finished product with a vice installed
If it is not possible to install a stationary vice, you can do without them by using bench clamps or clamps.
In addition to the vice, there are stops on the work table. To do this, a series of holes are drilled in the tabletop. The best stops are considered to be parts made of wood, since metal devices can damage the workpiece. The sockets for the supporting elements are located at a distance equal to half the stroke of the vice. This will allow you to securely secure a workpiece of any size.
Requirements for workbenches
Like any other industrial equipment, the workbench must meet a number of strict requirements. The main ones are the following:
- the product must have high reliability and good strength characteristics. After all, the mass and dimensions of the processed products, as well as their material (weight and density) can be very different;
- all surfaces must be smooth and polished to minimize the likelihood of injury to workers;
- the structure should not contain protruding nails and screws with which it was assembled. This could result in serious injury.
Video: Do-it-yourself carpentry workbench
Building a carpentry workbench is quite a difficult task. However, a self-assembled machine will allow you to work in a convenient, comfortable environment. This requires not only to think through the ergonomics of the workspace and correctly prepare a construction project, but also to carry out the work in full accordance with the recommendations of professional carpenters. Only then will the resulting product be durable and stable, pleasing its owner for many years of service.
- Author: Victor Kaploukhiy
Thanks to my varied hobbies, I write on various topics, but my favorites are engineering, technology and construction. Perhaps because I know many nuances in these areas, not only theoretically, as a result of studying at a technical university and graduate school, but also from the practical side, since I try to do everything with my own hands. Rate this article:
- 5
- 4
- 3
- 2
- 1
(24 votes, average: 4.1 out of 5)
Share with your friends!