SHARE ON SOCIAL NETWORKS
FacebookTwitterOkGoogle+PinterestVk
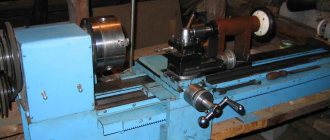
Processing of wood blanks is carried out using special turning equipment. Using a device of this type allows you to perform various operations with high precision. If necessary, you can make a wood lathe with your own hands. This will save money. To manufacture this device, you need to familiarize yourself with its design features and take advice from experts.
The design of a homemade wood lathe can be extremely simple, but to obtain the desired result you should understand in detail its specifics and application features
The device of a wood lathe
This unit includes several main components. Each of them performs a specific function. To make a homemade device, you will need to become more familiar with the structure of these elements.
A homemade lathe, which you make yourself, will allow you to significantly save on the purchase of such expensive equipment
Bed. The basis of any machine, including woodworking. This unit ensures the stability of the structure on the working surface and also facilitates the fixation of individual elements of the machine. Thanks to the frame, all components are located in the right places.
It is important to remember that stationary devices have a larger frame equipped with legs. In turn, desktop units have a more compact base, which makes them mobile. When making a woodworking machine with your own hands, you need to pay special attention to this unit, since the accuracy and efficiency of the structure as a whole depends on it.
Headstock. This unit performs a very important function: it ensures the rotation of the wooden block during its processing. The workpiece is fixed in a chuck located in the spindle shaft. It is worth noting that some small-sized machines include a headstock that can move along the guides of the base (bed). Its movement allows you to adjust the location of individual parts relative to each other.
When the part is being machined, the headstock of the lathe is securely secured. Models that are classified as stationary often combine this element with a frame, which makes it completely motionless.
Wood lathe diagram
Tailstock. This unit, which is part of the woodworking structure, is not static. It performs a very important function: it fixes the blank in the desired position during processing. Securing the workpiece by means of the rear assembly takes into account its pressing against the chuck. Due to the fact that the tailstock is able to move freely along the guide elements of the frame, fixing and processing of parts of different lengths is ensured.
Note! The tailstock must be in line with the spindle shaft.
Caliper. A very important design element, thanks to which the movement of the cutter is realized. Moreover, the latter may have a different location in relation to the spindle. In most homemade devices of this type, this function is performed by a tool rest, securely fastened in the working position.
This part of the machine is capable of moving along the guides of the base (bed). Small-sized desktop devices, as a rule, involve the use of an element such as a stop for cutters.
The support of a universal lathe is designed to move a fixed cutter along the spindle axis
Thus, both a serial and a home-made machine is a rather complex design. Any wood processing unit includes several interconnected units. Before you make a wood lathe with your own hands, you need to clearly understand the purpose of its components.
Sharpener tool
Moderator: shadow
Post by YAR-76 » 02 Nov 2022, 09:34.
Post by YAR-76 » 02 Nov 2022, 09:36.
Posted by maxx2000 » 02 Nov 2022, 10:05.
Posted by Alaster » 02 Nov 2022, 10:10.
Posted by maxx2000 » 02 Nov 2022, 10:17 am.
so you eat it. I don’t see any problem putting the cup down and turning the device 90 degrees. Didn't anyone go to school? Have you ever seen SZSh-1?
How to make a wood lathe: making a bed
In serial devices, the frame is in most cases made of cast iron. This material is distinguished by its mass. For a homemade unit, you should choose a less heavy option. For example, as the basis for a future design, you can choose angles made of rolled angle steel. The recommended length of the segments is 125 cm.
The length of the bed can be increased, but this action will require intervention in other parts of the woodworking unit. Before making it, it is recommended to draw up a plan on paper. You can also take a ready-made drawing from the specialized website that will help you assemble a wood lathe with your own hands.
Let us consider step by step the algorithm of actions for the manufacture of this unit. First of all, you need to place the corresponding corners on a horizontal surface (open side to each other). Then it is recommended to place calibrated inserts between them, which will allow you to maintain the required distance of 4.5 cm.
The components of a homemade lathe are placed directly on the bed
Next you need to connect the guides. For these purposes, the same corners are most often used, differing only in size (19 cm). It is recommended to mark the points at which welding will be performed in advance. The jumpers are located near the edges of the long corners. The next step is the welding itself.
Helpful information! The bed of any homemade woodworking machine is the basis of the structure, so its installation is very important. Any violation in the future will affect the efficiency and accuracy of the unit, made by hand.
Then you need to attach another jumper of the same size. It should have cutouts for long corners. After installing this part, a cell should be formed for the headstock tenon. The dimensions of this geometric element require precise adherence. To install a standard headstock tenon, 4.5 x 16.5 cm is sufficient.
Do-it-yourself woodworking machine: how to make a tool rest
Traditionally, this part includes two components. They are made from steel corners. The standard dimensions of workpieces for welding are 5 and 3 cm. The joining of these elements is carried out by welding (in length). The result is two segments, which should have a length of 26 and 60 cm.
Tool rest on a lathe - needed to support the cutters when working with wood
The short element is used as a customizable support base. Moreover, one of the corner shelves must be cut at an angle so that 11 cm of the untouched profile remains. Before performing the same manipulation on the other wing, it is necessary to step back from the edge by 6 cm. The angle itself in the second case remains straight.
Next, you need to make a counter frame for a homemade woodworking machine. A steel plate is suitable for the manufacture of this element. The next step is to make the guide element and its clamp. As a material for these purposes, you can use a regular inch pipe. You need to make a longitudinal slot in it using a grinder. Craftsmen advise not to make this part longer than 15 cm.
Then the guide sleeve is installed in a 2.5 cm corner. The cut made with a grinder should be perpendicular to one of the shelves. Next, the structure must be fixed in a clamp and connected using welding equipment. After this, the tube is covered with a second corner and connected to it in the same way.
The finished guide part is joined by welding to the protruding flange of the angle. For final fastening, it is necessary to weld a nut to the rail, and equip the second part with a screw. Also, do not forget that on the reverse side you need to perform additional fixation of the structure. To do this, you can weld a metal rod to its individual parts. It will give the structure strength and rigidity.
Diagram of a tool rest for a lathe on an eccentric clamp
The tool rest is fixed on a piece of reinforcement (smooth), which should have a diameter of 2 cm. Such a rod is fixed on the back side of the corner approximately in its center. At the end, it is necessary to connect the reinforcement to a long part (60 cm).
Homemade wood lathe: choosing a drive
The drive must have sufficient power to process wood products. When purchasing this device, it is advisable to pay attention to the standard models. Their power varies from 1200 to 2000 watts. This is quite enough for processing various kinds of parts at home. The most commonly used drive is a power rating of 1200 watts.
Induction motors are often used in homemade wood lathes. It is not possible to make this device with your own hands. Another characteristic that is common among drives installed on self-made machines is three-phase operation.
Note! When assembling such equipment at home, it is quite difficult to purchase an engine that would have the required rotation speed. However, if desired, this indicator can be adjusted by changing the diameter of the pulleys.
A homemade lathe must have sufficient power to process wood products
When installing the drive, it is recommended to equip the frame with a special plate. It is fixed on the gate canopies and ensures a tighter pressing of the strap. Some craftsmen install a pedal on the platform, which allows them to change the number of revolutions per second while processing a wooden block.
DIY lathe: headstock and tailstock
To manufacture these components, you must have access to a metalworking machine. If this is not possible, it is recommended to purchase ready-made structural elements. The headstock of a woodworking unit includes two housings that belong to the bearing category.
When assembling the machine yourself, it is important to remember that the height of the spindle axis above the base must be no less than 12 cm. This indicator affects the size of the front unit. The most suitable in this situation is a bearing block with a height of 7 cm. The shaft itself can be made on a metalworking device. Its diameter should not be less than 4 cm.
In turn, the procedure for making the tailstock of a wood lathe with your own hands is less complicated. This module includes 4 elements, including:
- base;
The headstock is designed to accurately support and move the part processed on the machine relative to the cutting tool or surface
- guide (external);
- inner tube;
- drive screw.
It is recommended to make the base from a steel angle, the height of which should not exceed 10 cm. To create a guide, you can use a tube measuring 4x15 cm. In its rear part, you must install a special plug with a hole (0.8 cm). In this case, the inner tube will have dimensions of 2 cm. Next, you need to make a drive screw. A thread is applied to it for the nut in the inner tube.
It is also worth noting that the headstock and tailstock should be on the same line. Otherwise, further construction of a woodworking machine will not bring any results. The headstocks are fixed to the bed in the same way as the tool rest.
Making cutters for a wood lathe with your own hands
If necessary, these functional elements can be purchased at a specialized store or ordered online. However, many craftsmen prefer to make these devices themselves. The most popular cutting elements today are Reyer and Meisel. They are quite simple to perform on a sharpening machine.
Turning cutters: A - with a semicircular blade for rough turning; B - with a straight blade for finishing turning; B - shaped; G - machine passage
In order to make these cutting elements, you will need a blank. You can use old tools (for example, a file) as it. The metalworking unit allows you to sharpen this blank quite quickly. Forming is performed at two points: where the blade will be located and the tail.
Related article:
Wood lathe: device, characteristics and review of models
Review of popular models of woodworking machines. Tips for selection and rules of use.
The next step in making a wood cutter with your own hands is stuffing a turned handle with a locking ring. In this way, you can independently produce cutters for a woodworking unit.
Note! As the initial material for making these functional elements, you can use not only files, but also rasps or fittings.
It is also important to remember that a homemade tool must first be tested on soft wood. Such a check will determine how well the cutter is made and whether it is advisable to use it when working with hard rocks.
Spindle type selection
Now let’s introduce specific varieties, note their advantages and characteristic features. They should be taken into account when selecting parts.
With built-in electric motor (electric spindles)
They:
- Contributes to the development of very high speeds. With standard 18,000 - 24,000 rpm, some models can also support operating speeds of 120 thousand rpm.
- They cut very well at high speeds.
- They have limitations in loads - it is dictated by the use of small ball bearings.
- Not suitable for reverse. The absence of such a function makes it very difficult to create some elements, for example, cutting threads.
- Cones or collet clamps are most often used as clamps.
Mechanical with external drive
They:
- Deal with much lower speeds. The standard can be considered from 300 to 8,000 rpm. This is due to the fact that it is quite difficult to set in motion all the bearings, gears and other elements transmitting movement
- Rigidity and load capacity are greater. Why? because you can use not only ball bearings, but also more stable ones - roller bearings. So such equipment can even be used for power milling of titanium or other strong metals.
- There is feedback - provided that a motor with an encoder is installed.
- Tool cones are used instead of collets - the latter do not meet the requirements for fixation rigidity.
Do-it-yourself wood turning and milling machine
From a design point of view, serial units of this type are quite complex. This is due to the fact that they are equipped with CNC. It is impossible to recreate such a system at home, so experts recommend making the simplest possible milling units.
Experienced home craftsmen prefer not to buy expensive factory equipment, but make a simple analogue with their own hands
First of all, it is recommended to draw a drawing of a wood lathe. You can draw a simple plan with your own hands, which will include a list of materials and a diagram of the future structure.
When manufacturing such a unit, it is not recommended to use the classic version, in which the blank is located between the front and rear units. It is also advisable to abandon the functional part represented by the cutter. In this case, the functional element will be a manual router. The advantages of this design are its economy and increased functionality.
Turning and milling equipment used to process wood includes several components. You can do them yourself. First you need to make the base of the unit (bed). For its manufacture, as a rule, wooden blocks are used. This type of support is characterized by high strength and rigidity.
Then the front node is fixed, which should not move. The tailstock, on the contrary, must change its position by moving along the mounting panel.
The simplest homemade lathe for processing wooden workpieces consists of several main parts: frame, headstock and tailstock, driving and driven centers
When swinging an electric motor, one common method is used to increase its efficiency. A disk of smaller diameter is mounted on the drive shaft, and a larger one is mounted on a similar element of the front assembly. The interaction in this case is carried out by means of a belt drive.
As mentioned above, in this case, the tool for turning wood is a milling cutter. It is mounted at the top support point on a self-made platform. It is important to remember that homemade devices exclude the possibility of connecting a functional element to the CNC. Thus, it is in this order that the simplest unit with a cutter, equipped to the minimum, is manufactured.
The principle of operation of the spindle and what it consists of
Almost all equipment with this element involves using a cutting edge on the prepared material. The design feature of the shaft is that it is possible to securely fix the tool in one of the machine operating modes - power or high-speed. In the second case, the main task of the device is to cut off the top layer from the surface of the workpiece as quickly as possible. The high-speed operating principle has its own special features:
- Productivity increases. Before simply choosing a high rotation speed, it is necessary to take measurements and enter all the parameters into the technological map.
- This option is most widespread in the case of finishing turning or fine milling, since only an extremely thin layer needs to be removed at high speed.
- The most common type of design is an asynchronous motor with a belt or gear drive.
- But sometimes there is simply no intermediary element. But because of this, you should not put too much force on the device, as this threatens to overload the motor. But this also significantly reduces the minimum dimensions of the entire installation, which is why direct connection technology is used in various hand-held power tools.
The second category - power devices - have the following characteristic features of manufacture and operation:
- Between the cutter (drill) and the fastening device of the electric spindle itself, it is necessary to insert bushings - these are conical spacers, which significantly increase the positive qualities of the product and reduce vibrations, and have a good effect on strength. They must be selected depending on the shank - diameter and type.
- It is not recommended to connect directly to the motor, as variable load will damage it. The main transmission method is V-belt or using gears.
Do-it-yourself wood lathe with a copier
A copier is a device that allows you to make carvings on a workpiece according to a given template. Thanks to it, it becomes possible to produce similar parts at high speed. A wood copying machine allows you to avoid painstaking work and is most often used in home workshops.
To make a copy element yourself, you can use a manual router as a basis. It must be placed on a plywood board, the thickness of which should not be more than 1.2 cm. The standard dimensions for such a workpiece are 20x50 cm.
A lathe and copying machine allows you to make monotonous wooden parts with your own hands
Helpful information! The productivity of a wood milling and copying machine allows it to be used not only at home, but also in small industries.
Then you need to drill holes for the fastening elements, as well as install small bars that will serve as supports for the functional part. Next, the cutter must be placed between the clamps and secured using ordinary self-tapping screws. After this, all that remains is to place the block (7x3 cm) on the machine. It is used to attach the stencil.
This is how you make your own wood lathe with a copier. Videos that allow you to clearly understand this issue can be viewed on the Internet. Making this device is not that difficult. All work comes down to a simple modernization of a conventional unit.
Tags: mobile workbench
Comments 29
Thanks for the detailed description, I’ll take it into account in my work
According to safety regulations, you cannot use fluorescent lamps with rotating parts! only incandescent!
There is no strobe with epra,
According to safety regulations, you cannot use fluorescent lamps with rotating parts! only incandescent!
Can you explain what the real danger is compared to incandescent lamps?
Inspired by posts about safety precautions I’ll tell you a story told by the director of a technical college, who taught a subject with us, the name of which is difficult to even pronounce.
Further from his words.
When I was young, I worked at a factory in a workshop where repairs had recently been made and new machines, in particular milling machines, had been purchased. The renovation was by no means cosmetic; Ilyich’s old light bulbs were replaced with fluorescent lamps that were then common among the masses. Bright, beautiful, everyone was happy. Until one moment.
Let's delve a little deeper into physics. The frequency of alternating current in our country (yes, in some countries it is different) is 50 Hz. That is, roughly, 50 times per second it changes from plus to minus, naturally passing through zero. Some physicists call Ilyich’s light bulbs inertial, because the spiral, when pricked, begins to glow, and during the time of changing the polarity of the voltage in the electrical network, the spiral does not have time to cool down, therefore, the light bulb does not “blink.” But fluorescent lamps are designed completely differently. There is a gas between two electrodes in a sealed tube. When voltage is applied to the electrodes, the current causes the gas to glow. There can be no “inertia” here. Such light bulbs blink at the same frequency as the voltage changes.
DIY mini wood lathe
A smaller device can also be made in a home workshop. A DIY mini wood lathe has a size of 20 to 30 cm. In order to make it, you will need an old motor and a power supply from an unnecessary Soviet-style radio. This small device is perfect for turning small wooden parts (for example, handles).
You can start assembling the mini machine in any order, the main thing is to follow the order when assembling its parts
This device can also be used as a mini metal lathe. With your own hands, it is not difficult to make such a small device that will allow you to give the desired shape not only to wooden blanks, but also to products made of tin and even aluminum.
In this case, there is a certain algorithm of actions that should be followed. First of all, you need to take a metal sheet and prepare a box that will serve as a case for the engine. Experts recommend choosing sheets with a thickness of 1-1.5 mm. The plate must be bent in the shape of the letter “P” and a hole must be made in it for the shaft.
Next, you need to make several elements from a wooden block at once. The thickness of the material should be approximately 2-3 cm. First, the supporting casing is made, and then the supporting parts for the motor and rear assembly.
The next step is to cut square pieces of wood and glue them together into a “tower”. Then you need to secure the resulting structure using self-tapping screws (4 pcs.). In the end, all that remains is to mark the point of the holder, the function of which is performed by a self-tapping screw, and fix the faceplate on the engine side.
A mini woodworking machine greatly facilitates the process of wood processing and makes the work more fun.
Such instructions allow you to make a small machine, the dimensions of which will not exceed 25 cm. Of course, such a device is not suitable for serious work. But for performing small tasks, such a device is the most suitable option, which is very easy to assemble with your own hands. A mini lathe consumes very little electrical energy, which is also a plus.
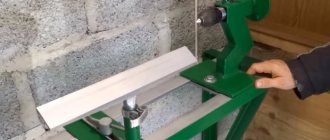
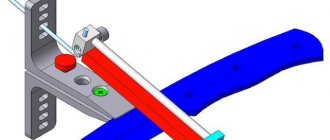
Tool for sharpening cutters.
- Go to page:
Tool for sharpening cutters.
Post #1 Alex72 » Jan 28, 2022, 01:53 pm
Tool for sharpening cutters.
Post #2 konstet77 » Jan 28, 2022, 2:05 pm
Tool for sharpening cutters.
Post #3 Alex72 » January 28, 2022, 2:13 pm
Tool for sharpening cutters.
Post #4 konstet77 » Jan 28, 2022, 2:31 pm
Tool for sharpening cutters.
Post #5 DemonY » Jan 28, 2022, 2:41 pm
I found it on my computer, I don’t remember where I downloaded it from. Maybe these photos will give you the right idea.
Tool for sharpening cutters.
Post #6 DOC » Jan 28, 2022, 4:02 pm
Tool for sharpening cutters.
Post #7 Machine operator » Jan 28, 2022, 10:03 pm
Tool for sharpening cutters.
Post #8 zonard » Jan 28, 2022, 10:20 pm
Tool for sharpening cutters.
Message #9 Alex72 » January 29, 2022, 01:58
Well, let there be this thing called a sharpening device. You also need to train your hand and work. I'm actually new to this. Once upon a time, about 30 years ago, a technician had a month of practice. Yes, he worked as a mechanic; in the brigade there was a machine from a German locomotive. So I want to learn along the way and make some kind of convenience for myself along the way, all sorts of adaptations. I understand that experience will come with time. But now it is, unfortunately, an insignificant minuscule.
Sent after 2 minutes 15 seconds:
Thanks for support ! It’s doubly nice, I’m also a fellow countryman, I served in Nizhny! Opposite the OKA hotel, Gagarin Avenue.
Sent after 2 minutes 15 seconds:
I have a microscope. It's just for other purposes. Looking at the incisors is too much
Do-it-yourself wood lathe using a drill
If you have a workbench in your workshop, then the process of manufacturing a woodworking unit is greatly simplified. In this situation, there is no need to search for materials for the frame or to assemble it directly. A conventional drill fixed on a flat, horizontal surface of a workbench can replace a turning device.
Helpful information! The drill performs several functions at once, which in a conventional machine are performed by the front unit, as well as a rotation drive.
The drill is fixed using a clamp and a clamp, which must be secured to the neck of the electronic tool. However, the remaining components necessary for processing wooden blanks still have to be assembled.
A do-it-yourself lathe from a drill will allow you to save on the purchase of several specialized processing devices
First of all, this concerns the tailstock, which acts as a stop. This unit is fixed parallel to the drill and, as a rule, is made of wooden blocks. For reliability, it is also recommended to use an adjustment screw, the head of which is sharpened to a cone.
Further assembly of the lathe from a drill is quite simple. The support can be replaced with an ordinary wooden block, which is fixed on a horizontal plane using a clamp.
The main rule when assembling such a simple structure is to ensure alignment of the spindle rotation axis and the adjustment screw on the rear assembly. For example, you can temporarily assemble a lathe from an ordinary drill. Moreover, on such a machine you can both perform wood processing and produce workpieces from soft metals (aluminum, copper, etc.).
A few basic rules for sharpening (using the example of twist drills for metal):
For a better perception of the material, let’s remember the structure of the drill.
- Do not press the tip against the sandpaper for more than 2-3 seconds at a time. The metal heats up and the so-called “tempering” occurs, that is, deprivation of hardening. Accordingly, the necessary hardness of the metal is lost. The first sign is the presence of temperature discoloration on the edge.
- For drills with a diameter of up to 4 mm: each time the sandpaper plane touches the drill, the drill is held in one position: rotation around its axis is not allowed. For larger diameters, the sharpening geometry is slightly different.
- On twist drills, only the back surface of the cutting part is sharpened.
- The cutting edge should be directed towards the rotation of the sharpener (for mechanical sharpening).
- The main angle (2φ in the illustration) depends on the type of material being processed.


