by Alexey | Crafts Vintage Decor Workshop Interior | Sunday, April 22, 2018
| Follow Make-Self.net on Facebook and be the first to read our articles. |
In every home ever built, there are two most important components - the floor and the roof. We don't spend a lot of time looking at the roof of our home, but we do spend many hours a day interacting with the floor. Regardless of whether we sit on it, walk or stand. Unless, of course, you can walk on the ceiling like Spider-Man . Considering all these factors, it can be said that the floor is the main part of your home that reflects your personality and lifestyle. Today we are going to share some amazing flooring ideas with you. Enjoy...
The floor is made of wooden cuts.
Nowadays, such seemingly very simple at first glance floorings made from wooden sections of logs - such unique stumps - have become very popular.
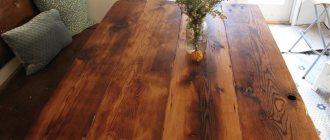
Table
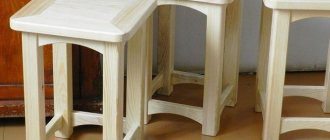
An original table made from cut wood is made both from solid material and using modules. It is necessary to proceed from what raw materials are available and from financial capabilities. Whatever material is chosen, the product made from it will be reliable and durable.
To make a massive piece of kitchen furniture, wood must be cut in a horizontal direction. This way the tabletop will be solid and the table will look more colorful. If there are cracks, they are filled with epoxy resin. This product can be transparent or tinted. You can choose intricately shaped tree stumps for legs and attach them to the underside of the tabletop. The finished attribute is processed using the technology described above.
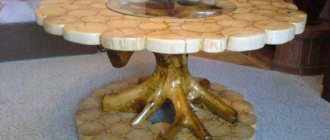
A tabletop made from wood cuts for a coffee table is created either on a rectangular base or from one vertical frame. The first option uses mixed technology. The plates are distributed over a solid base, as when creating a panel. Meanwhile, the table surface must be adjusted and polished to perfection.
Wood flooring with geometric patterns for $80.
Detailed master class here.
Items with utilitarian functions
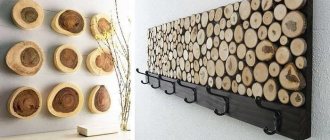
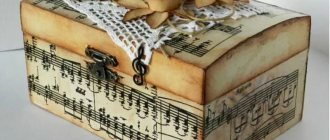
To make the most interesting use of wood cuts in the interior, you need to have dies of different sizes. From smaller circles you can make a photo frame or border a mirror with them. Medium-sized plates are used for the manufacture of kitchen utensils and various hot stands.
Items with utilitarian functions are made from large cuts of wood. In the interior, such things are the most valuable. One of these wonders is a wall clock. The mechanism for them can be purchased at a craft store or taken from an old device. A hole for the hands is drilled in the center, and the dial is designed at the discretion of the owner.
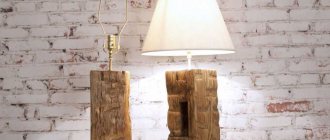
With the help of skilled craftsmen, wood cuts are transformed into bases for pendant lamps. Various intricate configurations are suitable for loft-style rooms. A product with several light bulbs hanging freely on open wires is attached to the ceiling.
Various crafts made from wood cuts can be combined with other types of materials during production.
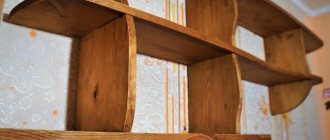
The floor in the bedroom is made from timber cuts.
A young Japanese designer who wanted to renovate his bedroom in the city center of Hamamatsu used materials left over from the renovation. This is how a floor made from saw cuts of wooden beams was born. The end result is a unique, handcrafted finish that resembles a giant Tetris made from multiple blocks of wood.
Option one
For this option of making a floor with your own hands, end logs of logs up to 120 mm thick can be suitable. However, in this situation, you can show your imagination and lay round log houses of various diameters. To complete the work, you will also need the following materials: lime, sawdust, wax, clay, flax oil, water.
Laying is done as for a mosaic with small gaps between adjacent parts. You need to pour sand with small pebbles onto the surface in a layer of up to 10 cm. Then you need to lay the saw cuts, slightly pressing them into the sand. You also need to adjust the height of the parts - it should be the same. The gaps must be filled with the following paste: 1 kg of fat, 5 kg of sawdust, 1 kg of lime, 2 kg of moistened length.
Then you need to carefully fill all the gaps and cracks in the wood cuts. Leave everything to dry for 2 days. Then the surface must be well polished. This can be done with wax and oil.
Floor made of leather belts.
At first glance, this flooring is very reminiscent of traditional parquet. But, if you look closely, you can see the original pattern of details, miniature holes and the heterogeneous color scheme of the canvas. To the touch, the floors seem softer and warmer than usual. And there is nothing strange about this. The fact is that the original floor covering is made of many leather belts connected to each other.
Laying end cuts
Laying slices is the main part of the work on installing decorative floors, similar to laying out a mosaic. There are several technologies for laying wooden slices on a prepared surface.
Filled with self-leveling mixtures
First, lay out the largest sections.
This option is best suited for creating noble floor coverings for apartments or country houses.
Sawed round pieces are laid out over the entire floor area. It is better to start the layout with the largest cuts, leaving space between them for smaller elements.
After this, we fill the gaps with small cuts, which allows us to diversify the overall picture and save on the consumption of such expensive material as self-leveling floors.
The rounds can be laid directly on the waterproofing without additional attachment: after pouring with epoxy mortar, all elements will be soldered into a single monolith.
After completing the layout of the end cuts, we begin to fill the floors with an epoxy self-leveling mixture.
For a greater decorative effect, you should choose not completely transparent, but slightly darkened epoxy self-leveling floors.
Distribute the mixture with a wide mop.
Dilute the mixture according to the instructions and pour it over the “stumps” so that they are slightly covered (0.3 - 0.5 cm).
Since self-leveling floors have increased fluidity, leveling them will not cause you any particular difficulties. To do this, just use a wide construction mop.
Laying on sand
If the thickness of the wooden “pancakes” you have is different, then for ease of leveling you can use coarse sand. The laying technology in this case is similar to laying paving stones. A 2-3 cm layer of sand is poured onto the subfloors, and cuttings are laid on top of it. To learn how to beautifully lay alloys, watch this video:
Leveling them in height is done using a building level and a rubber hammer, the blows of which deepen the protruding elements.
Filling joints with clay-lime paste
This option is the most budget-friendly, since it practically does not use expensive purchased mixtures.
In this case, the saw cuts are laid on a layer of plywood, to which they are glued using glue (PVA, “liquid nails”, etc.).
Then we prepare a solution consisting of 5 parts of sawdust, 2 of clay, 1 of lime and 1 of melted fat or vegetable oil. We fill all the gaps between the “pancakes” with this mixture. As a final touch, we cover the surface of the cuts with stain and varnish.
Floor made of coins.
What can you buy with small change these days? You can’t even buy a box of matches, but when you collect the coins together, you can think about really big projects. For example, make an original floor out of them.
Minor disadvantages
Those people who are involved in laying such floors claim that the process is not at all as complicated as it seems. But here everything depends on the size of the fragments and the floor area. Sometimes you can fuss for quite a long time;
When properly filled and processed, such floors are quite durable structures that do not require additional processing. However, if mistakes are made, such a floor can cause a lot of trouble. Therefore, the requirements for attentiveness and compliance with all rules are very high here.
The floor is made of old wood.
Wood floors are generally one of the most sought after elements in a home. Because of its natural appearance and natural warmth underfoot, wood looks very beautiful and always remains timeless.
This is useful to know
First of all, you should remember about the filler, which will fill the space between the cuts, while at the same time being a good fixer. As a filler, you can use a mixture of sand and gravel or something else that is free-flowing. You need to fill in the filler as the installed saw cuts settle deeper.
To preserve wood for many years, treat the cuts with drying oil, preheat it in a metal container, and send it to dry. Only after this can they be laid out in place of the future path.
Photo processing of saw cuts or stumps
For those who have better access to materials, it makes sense to recommend bitumen, which is melted in metal containers, usually larger and more powerful than for drying oil. They are used to treat the lower part of the cuts, since it will deal with moisture more often. The upper part is coated with varnishes that are not afraid of temperature changes and are resistant to abrasion and humidity.
A wooden path is the most environmentally friendly solution, closest to nature. Therefore, if her surroundings also begin to remind you of nature, do not rush into decisions. We are talking about weeds that feel in their element when surrounded by a tree. Often it is the blades of grass and blades of grass that make their way between the cuts that give the path an even greater natural look. If you like a more cultural design, use the seeds of lawn grass, which easily tolerates trampling on it and is an excellent soft bedding. You can walk along such a road, like a forest one, barefoot, and I’m not even talking about the mood from such a walk. One “but” - you will have to constantly monitor the height of the grass, otherwise a pleasant blooming view may soon turn into an abandoned one. Although someone might like this too.
The floors are made of old brick.
The brick floor is a striking architectural element. A real old floor resembles a city pavement or the paths of a quiet park. Despite the fact that these floors are hard and durable, they bring into the interior their own unique artistic play of their natural colors of old baked clay.
Material advantages
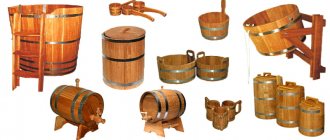
Saw cuts are flat, transversely divided plates, each of which has its own unique pattern. The cut clearly shows the annual lines enclosed in rings that determine the age of the tree. All of them are unique in their own way, and the finished finish from them looks stylish and even very modern.
Not only trunks, but also branches of various diameters are suitable for making cuts. Round cuts of wood are used to finish the surface of the floor and wall. In operation, this material is similar to ceramic tiles, but it is much easier to lay out. Here you don’t need to pay too much attention to the seams, just make sure that no voids are formed. The many advantages of the material include:
- durability;
- high aesthetics and beauty;
- environmental friendliness;
- availability;
- ease of processing and care:
- presence of thermal insulation properties;
- minor financial costs;
- individuality;
- variety of shapes, shades and sizes;
- multifaceted range of applications.
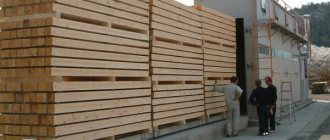
With proper wood processing, the finish will serve for a long time and will not be constantly exposed to mechanical damage, moisture and insect pests. The tree species usually chosen are: fir, birch, oak, pine, ash, spruce. You can use other types, it doesn’t matter.