How to do wood carving for beginners with a jigsaw in our advice. There are a huge number of ways to decorate your beloved home . In this article we will talk about one that will especially appeal to those who love applied art. Cutting out various patterns from wood is called slotted carving or figured weaving, which is used for interior and exterior decoration of houses.
Preparing for work
Despite the apparent simplicity of this type of creativity, it should be taken seriously.
Success here largely depends on how thoroughly you prepare. Namely, you will select and process a plywood sheet and select drawings that are suitable for your product that can be cut out of plywood with a jigsaw. Sawing stand.
Selecting a quality sheet
Now plywood is divided into many types, each of them was developed for specific purposes. And as strange as it may sound, not every material is safe to work with.
Speaking about artistic cutting, you should remember that during work you will inevitably breathe fine dust and fumes from plywood, and at the moment they are not always safe.
- Experienced craftsmen prefer to work with sheets made on the basis of urea-formaldehyde compounds; they can be easily recognized by the first letters of the “FK” marking. Such plywood may already come with a decorative coating such as varnish or have a clean “jacket”. In the latter case, it is more convenient to apply drawings to the sheet for cutting out of plywood with a hand jigsaw;
- Sheets marked “FOF” are aimed at furniture production and are often also quite safe. But they have another disadvantage: they most often belong to plywood boards and have a thickness of more than 12 mm;
Plywood thickness.
- The FB brand was developed as plywood for the construction or finishing of various types of boats and yachts, so the price of such material is too far from affordable, although this plywood is also safe;
- What you definitely shouldn’t mess with is “FSF” type plywood. No matter how beautiful it looks, it should be clearly remembered that its production uses compounds with a high content of phenol, which itself is considered one of the serious and rather toxic carcinogens.
Let's move on to the drawings
The easiest way to make, for example, drawings of animals for cutting out of plywood with a hand jigsaw is to use scrap materials and simple carbon paper. Everyone has a lot of printed material in their home, such as old postcards with birds, fish and other living creatures.
Simple stencils.
A pre-prepared carbon copy is placed on the prepared and sanded sheet, the image you have chosen or a photo of your favorite animal is placed on top of it, and secured with push pins (now you can use tape for this purpose). After which you just have to clearly outline the outline of the image.
Carbon copy.
You should not immediately take on complex highly artistic products with thin fragments. For an inexperienced craftsman, it will be difficult to process small parts without damaging them with careless pressure.
If you have children near you, then it is better to use, for example, simple drawings for cutting out a car from plywood with a jigsaw or making a cutting board. Thus, you will not only gain basic work skills, but will also delight the kids.
Drawings for complex products.
If you don’t have enough choice of images from your home archive, we recommend turning to ready-made collections. Nowadays, such stencils are used not only for cutting plywood, but also a number of artistic crafts use them as a basis, so it will not be difficult for you to buy such sets in office supply stores, and sometimes even in underground passages.
Advanced users who have a good printer at home can download one of the common graphics programs to their computer and use it to create professional original works.
A set of drawings for children's creativity.
Material base
What do we cut from?
If the goal of our work is to create an object with high aesthetic characteristics (and this is the case in most cases), then we need to start with the choice of material.
Plywood for sawing with a jigsaw must meet a number of requirements:
First, you should select the optimal sheet thickness. If we cut out a shaped piece of furniture from plywood with our own hands, then we can use panels 12-15 mm thick, and even thicker ones. If our goal is finer work, then accordingly we need to purchase material of 5 mm or even less.
Different thicknesses for different tasks
- The color of the veneer from which the plywood is made plays a role only if we do not plan to finish the finished product with stain, varnish or paint. But most often they don’t pay attention to the color - it won’t be visible anyway!
- The moisture content of the material is a critical parameter specifically for cutting with a jigsaw. The plywood sheets must be thoroughly dried, otherwise our main task will be replacing saw blades.
As for quality, only first or second grade plywood is suitable for artistic cutting:
- There should be no knots or stains on the sheet.
- There should be no “pockets” of resin inside the slab.
- You should choose only those panels whose veneer is glued with sufficient quality.
Veneer delamination
Safety precautions
Basic safety precautions are required for all types of physical work.
- The workplace must be properly prepared. It should not be cluttered with unnecessary objects or tools.
- The work table or workbench must be well secured and set to the individually required height.
- The workplace should be well lit.
- When working, you should use personal protective equipment, such as gloves, safety glasses, etc.
- When using a power tool, make sure it is in good working order. For beginners, study the technical documentation of the tool they use.
—>
| Vases |
| Mirrors |
| Baskets |
| Lamps |
| Furniture |
| Ship models |
| New Year |
| Candlesticks |
| Stands and frames |
| Religion |
| Watch |
| Miscellaneous |
Read also: Apparatus for producing beer at home
—>
—>
| "August 2022" | ||||||
| Mon | W | Wed | Thu | Fri | Sat | Sun |
| 1 | 2 | 3 | 4 | |||
| 5 | 6 | 7 | 8 | 9 | 10 | 11 |
| 12 | 13 | 14 | 15 | 16 | 17 | 18 |
| 19 | 20 | 21 | 22 | 23 | 24 | 25 |
| 26 | 27 | 28 | 29 | 30 | 31 |
—>
DIY kitchen facades
The outer panels of kitchen cabinets and tables, the doors of cabinets and hanging racks - without exception, this is what is considered the facade of the kitchen, and can be assembled without the help of professionals. Of course, handmade furnishings are in some ways inferior to factory furnishings, but they always look extraordinary and are more economical in terms of money. Making your own kitchen fronts requires experienced handles, carpentry skills and the proper tools.
HOW TO CHOOSE AN EVENING DRESS
The main thing when choosing an evening outfit is to understand how much to wear it? TBEAUTY.RU will tell you how to choose the right combination.
Finding the perfect evening outfit of your dreams is not an easy goal! A selection constantly appears before you, what to choose: large or short, in sequins or rhinestones, with an open back or with a deep neckline? . Read more "
Wood carving with a jigsaw is rapidly gaining popularity: many people want to purchase an interesting decorative item to decorate their home, furniture, and even clothes! Carved objects made of plywood of various thicknesses fit organically into any interior style; people often purchase photo frames for photographs with ornaments, cut-out words and letters, or order intricate shelves and other interesting products. Few people know that artistic cutting out of plywood with a jigsaw is a task accessible to anyone, even the untrained and inexperienced. You just need to understand how to work with the tool.
Simple flat crafts
Simple flat plywood figures can be easily made using a jigsaw. They are manufactured in the following order:
- A rectangular blank of the required size is formed from a plywood sheet using a hacksaw.
- A stencil (template) of the figure is prepared according to the size of the workpiece. It is made of cardboard or thick paper (Whatman paper). You can draw the figure yourself if you have artistic abilities, transfer it from a picture using carbon paper, or print it on a printer from the Internet. Then it is cut along the contour.
- The stencil is placed on a piece of plywood and outlined with a pencil or marker (felt-tip pen). All internal parts are transferred onto plywood using carbon paper.
- A figure is cut out using a jigsaw according to the markings.
- The edge is processed with files and all sawing errors are corrected. The surface is sanded with sandpaper.
- The figurine is given the desired appearance. You can apply all the necessary elements using a burning device. Another option is to paint with acrylic paint using a brush along the markings made from a stencil.
- Final finishing - Most often, varnishing.
Using this method you can make the following crafts:
- Figures of animals, birds, fish. Figure 1 shows a stencil for making a swan figurine. It can be enlarged to the desired size and printed on a printer.
- Figures of funny people, cartoon and fairy tale characters.
- Composition crafts. Figure 2 shows a dolphin on a sea wave.
A cute “Dog” craft can be made using a burning device. For it, you can cut a blank along the contour of the head or burn a design directly onto a plywood blank. You can offer a huge number of different ideas. Fantasy is not limited by anything.
Peculiarities
Artistic cutting with a jigsaw is a unique opportunity to show your creative talents and find a hobby you like. Even a child can master the simplest cutting patterns. However, there are some peculiarities here that you should be aware of before getting started.
Carving can be done on the simplest materials, such as plywood or small wood planks. Later, when you gain work experience, you can begin more complex forms of work - cutting out patterns on interior items.
There are several basic types of jigsaw carving. You should master the technique from the simplest of them.
Another feature of artistic wood carving with this tool lies in the fact that when performing it, it most often requires the use of several jigsaws at once. Some are designed for cutting small parts, others for large ones. Therefore, it is necessary to have at least two types of such tools in your arsenal.
What additional materials and tools will be needed?
- Stencils and drawings with drawings for work. You can come up with them yourself or copy them on the Internet.
- Carbon paper to transfer patterns and lines according to the drawing;
- Glass paper and sandpaper, a set of files - for grinding parts;
- Joiner's (optionally casein) composition for gluing parts;
- Transparent varnish – for coating;
- To make holes inside the material to thread the blade through, use a drill and an awl.
Adviсe:
- Before starting cutting with a jigsaw, carefully sand the material with glass paper, and only then transfer the patterns according to the drawing.
- Transfer elongated shapes of designs with narrow elements onto plywood so that they are located along the fibers of the “face” of the material.
Safety precautions
Basic safety precautions are required for all types of physical work.
- The workplace must be properly prepared. It should not be cluttered with unnecessary objects or tools.
- The work table or workbench must be well secured and set to the individually required height.
- The workplace should be well lit.
- When working, you should use personal protective equipment, such as gloves, safety glasses, etc.
- When using a power tool, make sure it is in good working order. For beginners, study the technical documentation of the tool they use.
—>
| Vases |
| Mirrors |
| Baskets |
| Lamps |
| Furniture |
| Ship models |
| New Year |
| Candlesticks |
| Stands and frames |
| Religion |
| Watch |
| Miscellaneous |
Read also: Diode bridge diagram photo
—>
—>
| "August 2022" | ||||||
| Mon | W | Wed | Thu | Fri | Sat | Sun |
| 1 | 2 | 3 | 4 | |||
| 5 | 6 | 7 | 8 | 9 | 10 | 11 |
| 12 | 13 | 14 | 15 | 16 | 17 | 18 |
| 19 | 20 | 21 | 22 | 23 | 24 | 25 |
| 26 | 27 | 28 | 29 | 30 | 31 |
—>
DIY kitchen facades
The outer panels of kitchen cabinets and tables, the doors of cabinets and hanging racks - without exception, this is what is considered the facade of the kitchen, and can be assembled without the help of professionals. Of course, handmade furnishings are in some ways inferior to factory furnishings, but they always look extraordinary and are more economical in terms of money. Making your own kitchen fronts requires experienced handles, carpentry skills and the proper tools.
HOW TO CHOOSE AN EVENING DRESS
The main thing when choosing an evening outfit is to understand how much to wear it? TBEAUTY.RU will tell you how to choose the right combination.
Finding the perfect evening outfit of your dreams is not an easy goal! A selection constantly appears before you, what to choose: large or short, in sequins or rhinestones, with an open back or with a deep neckline? . Read more "
Wood carving with a jigsaw is rapidly gaining popularity: many people want to purchase an interesting decorative item to decorate their home, furniture, and even clothes! Carved objects made of plywood of various thicknesses fit organically into any interior style; people often purchase photo frames for photographs with ornaments, cut-out words and letters, or order intricate shelves and other interesting products. Few people know that artistic cutting out of plywood with a jigsaw is a task accessible to anyone, even the untrained and inexperienced. You just need to understand how to work with the tool.
What can be made from plywood: interesting ideas and drawings
Sawing wood with a jigsaw or hand tools is a creative process. You can create many decorative products of different directions:
- Funny figures from cartoons and fairy-tale characters for children as toys or room decorations;
- Sawn parts for making furniture: shelves, panels for wall decoration, tables, trim for wooden windows, cabinet doors;
- Three-dimensional and flat toys;
- Figurines for interior decoration and clothing.
Drawings of plywood crafts do not have to be made in exact dimensions. Even taking an example from the Internet and changing its proportions, you will get a unique product that no one else has in this form.
DIY plywood crafts can be painted or left in a natural color; you can glue buttons, beads, ribbons and other decor onto them to liven up the product. To do this, it is worth involving children in the work; their imagination is a bottomless well of interesting ideas.
We offer you diagrams with photos for cutting out of plywood with a jigsaw.
You can come up with your own idea of what you can cut using a hand or electric tool, make your own sketch and transfer it to paper, then to a piece of wood or plywood.
Carving plywood with a jigsaw requires certain knowledge and skills
If you don't have them, consider the following rules:
It is necessary to cut strictly along the line, without pressing the tool with force; Use templates and saw according to the sketch; Plywood should be sawed across the grain whenever possible.
This way you will get a straight line and a clear contour; Corners must be done carefully: on blunt corners of coal, a straight cut is made, after which the plywood is turned (not a tool!) and the corner comes out smooth. For sharp ones, otherwise - using the method of forming a loop, we first make a cut for one edge, then from the outside we make a slotted path for the file in the form of a loop so that the blade can be brought onto the second edge.
Beautiful examples
With a simple jigsaw you can create real masterpieces. Let's give a few examples.
Such a carved iconostasis will decorate the room, and also a wonderful gift for every believer for the holiday.
A gorgeous example of slotted carving - even a simple and unremarkable alarm clock in such a frame looks elegant, stylish and unusual.
You can also use a jigsaw to cut out chic flower vases. They look beautiful and stylish even without herbal additions.
Artistic cutting with a jigsaw is a unique opportunity to decorate your home with original and unique objects that immediately attract attention. The jigsaw cutting technique is presented in the video
The jigsaw cutting technique is presented in the video.
Blade selection
From all the variety of options, at the stage of learning and starting independent work, it is worth choosing files No. 3, No. 5 and No. 7, with a small tooth and, accordingly, with a large number of teeth per inch (TPI marking parameter). They will cut slower, but maintaining control over the blade will be much easier. As you gain experience, you can switch to faster and “toothy” saws.
Classification of files depending on material
Also, at the initial stage, it is better to avoid files with reverse teeth. Without sufficient skill, such a blade will pull the workpiece upward, and the cutting process will be slow and tedious.
We wish you success in mastering a fascinating and interesting hobby - sawing with a hand jigsaw.
Body positioning
In every profession, for every typical operation, there is an optimal pose or set of poses from an ergonomic point of view. The working area is clearly visible in it, you don’t have to make unnecessary movements, sawing is convenient, and fatigue is minimal.
When cutting with a jigsaw, it is recommended to sit at a work table on a chair high enough so that your back does not bend. To unload the working hand, it is often rested with the elbow on the knee. This way your hand will be lighter and less tired. You just need to make sure that your knee doesn’t go numb. The work space should not be cluttered with scraps of material, tools and equipment not currently in use. A sketch of a drawing or an assembly drawing should be fixed in a vertical tablet at eye level.
Carving techniques for beginners
Organization of the workplace is important. The master must work while sitting in a comfortable position, without bending or reaching with his hands to the place of work. For small parts, a sawing table is used.
They are on sale. But to gain first experience, it is better to cut it out with your own hands from a piece of thick plywood or board according to the following drawings:
The table is attached to a large work table with a clamp or self-tapping screws.
In some cases, it is more convenient to clamp the workpiece vertically with a clamp, then you will have to cut not from top to bottom, but horizontally, which is more convenient.
Basic shape cutting skills
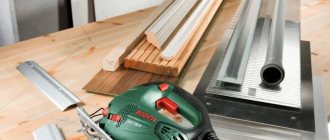
The main tool for sawing wood is a hand jigsaw, consisting of an arc-shaped or U-shaped holder, a metal file stretched between its ends and a handle. Most files are flat and equipped with teeth on one side, but thread-like blades coated with diamond are also used.
Sawing with a jigsaw does not seem from the outside to be as complex and mysterious as, for example, welding. This is how it really is: the basic skills of figure cutting can be acquired in a few hours by ruining several plywood and saws.
Openwork cutting with a jigsaw
But to master the nuances of cutting wood with a jigsaw and start creating, it will take long evenings of honing the skill. Openwork sawing requires its craftsmen to have a precise eye, a steady hand and great patience.
About the device and principle of operation
During the operation of the product, the cutting part makes reciprocating movements, due to which the particles of the workpiece fall off, forming a fairly narrow cut. During operation, 500-3000 work cycles are completed in one minute. The final figure depends on the model used.
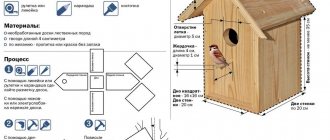
Visual acquaintance with the components of the tool.
Basic components
- The base plate acts as a guide element. It sets a certain cutting angle for the tool and holds the blade in this position while cutting.
- A blade with a fine tooth is the main device that comes into direct contact with the material being cut. It is selected depending on the situation.
- An electric motor is the force that powers any device. The most commonly used models are those with power ranging from 200 to 900 W. The choice of a specific option is carried out taking into account the characteristics of the intended work.
- Each instrument has a special holder that looks like a mushroom stem. By grasping it, you can perform construction operations related to cutting materials.
- The role of a guide for the file is played by a special sponge or roller. These elements are installed on the flat side of the blade. That is, it turns out that the canvas slides directly over one of these parts.
- To start the engine, a special button is usually used, which is not necessarily held down during work.
Purpose of some files.
Attention! The blade for a jigsaw for wood can differ in the quality of workmanship, the shape of the shank, the size, shape and size of the teeth, as well as the width of their setting
Additional details
This device can be equipped with other elements that can make work comfortable and safe. For example, very often they add: a quantitative shear control, a lighting device, a chip blowing mechanism, protective equipment and all kinds of vibration and sound mufflers.
Safety precautions
To preserve the tool and your own health, you must follow safety precautions.
- Before starting to work with a new tool, you must carefully study the instructions, check its completeness and serviceability;
- Do not use faulty saw blades;
- When working with a hand jigsaw, it is held by a special handle. Do not hold by the frame;
- Before starting work, the electric jigsaw is checked for the integrity of the electrical insulation;
- During work, use protective equipment - goggles, gloves, respirator or mask. Glasses are required even when working with a hand jigsaw - if the file is damaged, its pieces can damage your eyes;
- during operation, hold the jigsaw with both hands;
- the cutting part of the jigsaw should be limited to specialized devices;
- the workplace must be ventilated or ventilated;
- After finishing work, you must disconnect the jigsaw from the network.
It is important to remember that following safety precautions will ensure the safety of the tool, but will also help avoid injury.
How to cut letters from wood with your own hands in a step-by-step lesson
What might be needed to create letters and inscriptions from a solid piece of wood:
- The first is a thoughtful stencil of letters or words if you want to cut it out entirely.
- It is best to carry out such work on plywood with a thickness of 6 to 10 mm.
- Copy paper and pencil for transferring the drawing onto the working material.
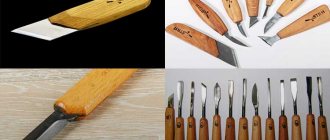
- Convenient tools for cutting out letters. The choice of tools can be very wide - some prefer to cut with a jigsaw, others use a power tool. If you want to add texture to your product after carving, then a set of knives and chisels for wood carving will come in handy.
1. There are a great variety of different ways to transfer a design to a wooden surface. You can read about all of them on the Internet, watch videos, learn many new and interesting ways to create original paintings on wood. But, in this case, in order to avoid unnecessary waste of effort, time and materials, a simple pencil and carbon paper are used.
2.The next step is to drill holes in the cavities of the letters so that they do not extend beyond the outline and do not touch the letters themselves. We only need these holes to place the blade of a working tool (a jigsaw or jigsaw) there.
You should be very careful when performing such work. It is worth remembering that with strong pressure the plywood may begin to crack, and then the product will be damaged.
3. It will be most convenient to use a hand jigsaw to saw off the word from the rest of the sheet of plywood and, perhaps, make the simplest upper and lower cuts.
4. It is more convenient to perform more delicate work on a jigsaw machine, due to the smaller size of the saw blade. Working with this machine allows you to carefully cut out the smallest and most fragile parts, but you will still need some experience and certain skills in working with this or similar
5. After the entire inscription has been properly processed, you can begin the final stages of processing the wooden product - sanding the inscription, varnishing the finished product, or possibly decorating the appearance. You can decorate using decoupage techniques, the effect of artificial aging, painting with any moisture-resistant paints or coating with special oils. But in any case, after all the manipulations, it is necessary to secure the work with transparent varnish.
Never forget about safety precautions when working with sharp cutting or power tools! Always work with glasses and gloves! When working with a jigsaw, the cutting blade often bursts, flying in all directions, which can be very dangerous.
In the next photo you can see all the materials that were used in this work to create a beautiful three-dimensional wood inscription.
Operating procedure
To obtain a high-quality product and minimize the formation of defects, you need to do the work slowly and focus on the process. Before starting work, it is recommended to make sure that the thickness of the plywood is equal to the height of the groove on the printed sketch.
Preparing the stencil
Schemes for sawing with a tool can be of different sizes. To create a drawing of an interior item, for example a shelf, you will need to use whatman paper in A1 or A0 format, and for toys you can use a standard sheet of cardboard.
The contour of the product is applied to the surface in compliance with the exact dimensions. Templates for cutting with a hand jigsaw can be found on special resources. But it’s easier to come up with your own compositions based on the type of workpiece. An individual approach to developing a product design will highlight the texture of the wood.
Transferring an image to the surface of plywood or boards
To accurately apply a contour to the surface of plywood or wood, print the template on thick paper. Transferring a drawing from an A4 drawing can cause a lot of trouble if you draw the ornament with a pencil.
The drawing can be glued to the plywood with 2-sided tape. When using glue, you need to clean the surface with sandpaper. An accessible method involves using a stencil made using nail scissors. After preparation, the template is applied to the surface and each fragment is outlined with a pencil.
For convenience, the sheet is secured with tape or insulating tape. The design can be applied thermally. For this, an inkjet printer is used, with which the diagram is printed. After this, the design is applied to the surface with the front side and processed with a heated iron.
Sawing process technology
Sawing from plywood is carried out after applying the drawing to the workpiece. Processing begins with the internal elements of the product, and then the outer contour is cut out. This order of work allows you to get a straight line and provides convenient fastening of the workpiece.
Holes for the blade must be drilled in sharp places on the internal contour. This requires attention as chips may form on the back side. To avoid this, it is recommended not to make the holes completely.
You can limit the depth using insulating tape that is wrapped around the drill. After this, turn the workpiece over and process the hole with an awl. After finishing the work, the product is polished using a file or needle file.
Sawing with hand tools requires the equipment of a special machine with a clamp. This device is used as a base. During processing, the workpiece is fixed at chest level, which provides convenience and allows you to closely monitor the process.
For beginners, it is important to be careful when using a jigsaw in order to practice smooth movements. The cutting blade for a jigsaw is fragile, so it is recommended to avoid distortions, sudden movements, and overheating
When processing a workpiece, the movements must be reciprocating, and the tool must be positioned vertically. Using an electric jigsaw requires securing the workpiece to a workbench. When using this equipment, workpieces up to 5 cm thick can be processed.
Defects in work
If the workpiece processing technology is violated, the tool may shift. A jigsaw may cut crookedly if the tool is tilted or improperly fastened. If the blade gets stuck at the stage of forming the figured elements, then you will need to carefully draw a new line located parallel to the fragment with the defect.
Features of cutting tools
Each plywood cutting tool has its own characteristics when used. Let's look at the rules for working with plywood with various cutting tools.
Sawing with a circular saw
Using a guide when cutting with a circular saw will help to avoid unevenness.
To effectively cut a sheet using a circular saw, you should adhere to the following rules:
- Place the plywood sheet on a stable support and make the first cut closer to the middle of the sheet.
- Adjust the cut depth. To do this, lower the disk and start cutting, while the depth of immersion of the disk should be 0.5 cm greater than the thickness of the blade.
- To avoid injury due to the high risk of kickback, position yourself to the side of the saw's line of action.
- Prepare the saw to make the required cut. To do this, you should attach the saw shoe (its part in front) to the blade and install the blade on the cutting line, having previously bent the casing.
- Make sure there are no obstructions at the bottom of the sheet.
- Turn on the saw and slowly plunge its blade into the material. To prevent kickback, hold the saw firmly. After immersing the disk in the slot and installing its shoe on the surface of the sheet, the protective casing should be returned.
- Run the tool along the line to the end of the canvas.
- Turn off the saw and only after it has stopped completely, remove it from the slot.
Cutting with an electric jigsaw
A jigsaw allows you to make high-quality curly cuts
To obtain an even cut, the sequence of actions should be as follows:
- Securely fix the material.
- If possible, cut perpendicular to the grain of the wood, otherwise it will be very difficult to obtain a straight edge.
- Under no circumstances should you put pressure on the tool; this will not increase the cutting speed, but the tool is guaranteed to break.
- The surface of the teeth should be lubricated with oil to facilitate work (subject to working with high-strength wood).
- It is undesirable to use the tool for a long time due to its heating and damage to the engine.
- After use, you need to clean the jigsaw and lubricate it.
Working with a hand saw
Metal saw is good for working with plywood
Working with a hand saw involves a lot more labor compared to a circular saw. To properly cut a sheet of plywood, you need to consider the following rules:
- Make a vertical notch along the cut line. To do this, you need to place a saw blade and pull the blade through to form a groove.
- Tilt the saw blade until an acute angle is formed with the plane of the sheet (from 30 to 40) and begin to make smooth movements.
- To maintain an even cut, the forearm and shoulder should be located in the same plane. If you deviate from the specified direction, you need to slightly bend the saw in the desired direction and continue working.
- To avoid the formation of a fracture, you need to hold the part being sawn off with your unoccupied hand.
- When you finish cutting, you need to return the blade to a vertical position and finish the work by making several movements perpendicular to the sheet of plywood.
Assembling a steam locomotive model
When the material is prepared and the drawing is printed, you should begin the process of transferring the diagram to the workpiece. In this case, it is necessary to take into account some operating rules. Many home craftsmen tend to transfer a drawing onto plywood using only a copy and a pencil. However, you can also use the “Black Ribbon”. When choosing this tool, the drawing is glued to the workpiece. Then the diagram is washed off the plywood with water, leaving only the marking lines.
Then you can make holes in the parts of the future locomotive. The parts of the locomotive contain parts of grooves cut out from the inside. To make such elements, holes should be made in them with a hand drill or an awl. The holes must be at least 1 mm in diameter. To avoid damaging the table surface when creating holes, you should place a board under the workpiece.
Now you can cut out the parts. You should not rush when cutting. The basic rule is to hold the jigsaw at a right angle to the workpiece. All elements must be performed smoothly, avoiding unevenness.
https://youtube.com/watch?v=BnA1aQSFI3s
Operating rules
Using a jigsaw, you can perform both ordinary construction tasks and cut out a variety of decorative shapes and patterns. For beginners, there are the following simple tips to help you get the job done as efficiently as possible:
- starting to cut, you will have to create support in the lower back; this position makes it possible to hold the canvas, work while sitting, and even do it while standing;
- when you need to cut a small fragment, first a small hole is made in the workpiece with another tool, and then a jigsaw file is inserted there; By the way, to make a hole in plywood, an awl is enough;
- It is correct to work with a jigsaw slowly and measuredly, without rushing anywhere; This is especially true for complex elegant designs, so for beginners, by the way, it is better to start with geometric shapes and simple contours on a cutting board;
- When changing the cutting angle, you need to unfold the working panel and the unused file;
- the work ends with the mandatory processing of all irregularities and roughness;
- using a jigsaw, you can not only cut out various patterns on a straight surface, but also, for example, make a medallion, casket or photo frame; diagrams for all these items and images are widely available on the Internet.
Carving with a jigsaw is carried out with such specifications as:
when working, do not put pressure on the saw blade - it will heat up faster and stronger and, as a result, even break; a wide file will allow you to create a long, straight cut, since the width of the cutting blade will balance the position of the jigsaw; When working with the device, it is important to periodically change the saw; cutting with a dull blade will only spoil the material, and, in addition, will increase the load on the motor, and will also worsen the quantity and quality of work; cutting on metals and plexiglass requires pre-treatment of the material being processed with water or liquid car oil; such an action will not only ensure a clean cut, but will also keep the cutting blade itself in satisfactory condition; if you need to cut metal with a thickness of less than 1 millimeter, you will additionally have to place a piece of plywood under it, and also reduce the feed so as not to create vibration; it is important to allow the device to rest periodically, especially in the case of a minimum frequency of strokes; The jigsaw should be periodically cleaned and oiled with a special product.
Products, as a rule, are created according to drawings, which are printed on thick cardboard, cut out along the contour and transferred to a plywood blank. In this case, the contour should be applied from the inside and with a simple pencil so that correction can be made. Experts recommend placing the pattern in such a way that you have to cut along the fibers to a minimum. The first step is to work out the internal contours. To do this, simply move the jigsaw along the fixed panel.
Sometimes it is not possible to cut straightly, because either the jigsaw is tilted, or the fastenings and tension of the saw have become loose. This can be prevented if you pre-set the equipment and tighten all the fasteners. When the file is already stuck, you need to carefully remove it and start applying the design again, following parallel to the damaged line. You will be able to saw without chipping if you choose high-quality material and also follow the following rules:
- processing of low-quality plywood should be carried out as intensively as possible using saws equipped with small teeth; in addition, a cutting blade with a reverse tooth will also come to the rescue;
- on the reverse side it is worth sealing the cutting lines with tape or adhesive tape, and also moisturizing the surface;
- before you start creating fantasy patterns, you need to work out the basic ones;
- to make the inner circle, you will first have to drill a small hole, the diameter of which will allow you to place a file inside; the cutting movement will have to follow the internal contour of the image with a move of medium intensity;
- obtuse and right angles are formed by turning the material being processed, combined with the smooth movement of the jigsaw;
- sharp corners are obtained from two cuts brought together at one point;
- an oval contour is also obtained when unrolling the plywood;
- the work always starts from the center and then moves to the edges of the workpiece.
How to carve plywood
Working with the device will not be difficult if you properly prepare for the creative process.
- The work area must have good lighting;
- The working plane must be protected from damage. You can, for example, lay a sheet of plywood or cover it with film;
- All necessary tools and spare blades should be prepared in advance. And we can begin.
The first step should begin with drawing the inner outline of the drawing or drawing. To do this, you need to make slots into which the blades of the device will be inserted. Usually, when cutting large contours, there is no problem, but in small remnants, working with a jigsaw from the inside can cause chips, burrs or cuts. You must act very carefully.
Working with a jigsaw
- Secure the working material on the table so that the blade does not catch on the surface of the plywood.
- Turn on the device and start cutting.
The jigsaw is not very difficult to control: move the tool forward along the lines. If the equipment is equipped with additional options for tracking the result of work, use them. Working with a jigsaw - After finishing cutting, sand the ends with sandpaper or files.
- Carry out further finishing work on the cut product: varnishing, painting, etc.
How to saw with a hand jigsaw
- Secure the piece of plywood with one hand and hold the cutting jig by the handle with the other.
- Start moving along the drawn contours, moving the jigsaw up/down. This should be done around the perimeter of the drawing.
Working with a manual jigsaw
As you can see, there is nothing super complicated in this work. And you will acquire a real creative hobby by learning how to operate these devices.
How to cut plywood with a jigsaw
Sawing plywood with an electric or manual jigsaw is undoubtedly a creative process. And you will be able to create decorative items of various styles with your own hands: from fairy-tale cartoon characters for children to decorations for furniture and home.
What is a jigsaw: general description
A jigsaw is a tool designed for cutting various contours from plywood, including curved ones. It is equipped with a blade with fine teeth that can make an even cut of plywood without the formation of significant burrs.
Hand tool
The ancestor of this type of tool is a manual jigsaw. It consists of a metal arc in the shape of the letter “U”, between the ends of which a sawing blade is stretched and attached to clamps. They securely hold the file during operation and allow you to adjust its tension. On one side of the frame there is a handle.
The clamps on the tool can rotate, creating different planes for sawing, thereby providing the opportunity for wood carving of varying complexity.
When cutting from plywood with a hand jigsaw, you need to be careful: its design is quite fragile, and during intensive work, the blade often breaks from force and heat, so it has to be replaced. To do this, each master must have several dozen spare files.
When working with a jigsaw to carve internal contours, it is convenient to use such an auxiliary board as in the photo: it will help both protect the table and solve the problem of convenient placement of the workpiece.
Jigsaw
The tool operates from an electrical network. It is a housing in which the working mechanisms are located, and there is also a handle for control on it. The sawing organ is located in the lower front part. The blade is often protected by a foot, which allows you to cut the contour exactly along the line without deviation. Advanced and professional jigsaw models have various attachments that facilitate the cutting process and straighten the edges of plywood.
Blades can have different teeth in shape and size. It is necessary to select saw blades that are appropriate for the material being processed so that damage and damage to the plywood sheet does not occur during operation of the mechanism.
Classification of jigsaws by power and application:
- Jigsaws for household use are usually equipped with a low power of 350-500 W. A household jigsaw for beginners is the best option if you want to learn how to cut out patterns, create crafts from wood and shapes from plywood, the thickness of which does not exceed 7 cm. It is safe to work with such a tool if it is equipped with a safety foot.
- The professional jigsaw is equipped with various attachments and functions; it has increased power from 700 W, cutting speed and accuracy. A jigsaw can handle a wooden sheet with a thickness of 130-140 mm, a sheet of steel 10 mm and aluminum 20 mm.
The instructions on how to use a jigsaw, or the technical data sheet, should describe the main parameters of the tool that must be taken into account when using the mechanism.
Master class on creating a cutting board
Beginning craftsmen should start working with a jigsaw with simple work. A cutting board would be an excellent option.
To work you will need:
- a piece of sawn wood;
- jigsaw - both manual and mechanical are suitable;
- Sander. You can also use sandpaper.
- mineral oil for impregnating the finished board.
The work is carried out in several stages:
You should start by choosing the material
Any piece of wood will do - the species is not important here. It is important to pay attention to the following aspects: The wood must be dry. The workpieces should not be stained with technical liquids. Knots and cracks on the surface are not desirable.
Design selection. It is determined by the shape of the future product and decorative patterns. In accordance with the chosen design, a template or stencil is created. It is transferred to plywood.
- Using a jigsaw, carefully cut out the future product in one continuous cut along the contour of the template. This is necessary for smooth, easy-to-process ends.
- A through hole is made in a predetermined place so that the board can be hung. To do this, use a drill to drill a hole, insert a file into it and use a jigsaw to cut out a cavity along the intended contour.
- Using a grinding machine or sandpaper, carefully process the ends and, if necessary, the entire surface of the board. A file is used to process hard-to-reach places.
- If desired, you can make a recess along the contour of the board. For this you will need a milling machine. After making the grooves, the product is carefully polished.
- The non-working surface of the board can be decorated with decorative elements, for example, using pyrography or painting.
- The final stage is treatment with specialized solutions. Mineral oil is suitable for this. This can be done by immersing the board in the solution. Or by applying the oil in several layers - apply it with a brush, let it absorb, then apply another layer. Repeat until the oil stops being absorbed.
As you can see, having the necessary tools at hand, creating a cutting board with your own hands is not at all difficult.
You will learn the secrets of mastery of working with a jigsaw from the video.
Why does a jigsaw cut crookedly?
Initially, a jigsaw was intended for cutting out patterns and circles. The straight sawing function is not available on all models. The price of such a tool is many times higher.
You can achieve a straight cut with a regular jigsaw. To do this, you should use a ruler, which should come with the kit. To make it easier to control the sawing process, you need to reduce the speed.
Beginning craftsmen often encounter a problem: when cutting, the jigsaw moves to the side, and the cut is made at an angle. To cope with this, you need to study in detail the process of correct and even cutting.
There are several reasons for an uneven saw blade:
- the saw is dull;
- too much pressure is used;
- There is a cross grain in the wood.
One of the reasons for a crooked cut may be that the material is too thick. As a rule, thin wood is easier and easier to saw. The jigsaw may have poor mechanics - in this case it needs to be changed. You can check the quality of the jigsaw by moving it from side to side. If it's loose, it's a cheap tool for rough work. To get an acceptable result, you should cut with a margin, and decorate the edges with a hand router.
Another effective way to learn how to cut smoothly with a jigsaw is to draw not one line on the workpiece, but two parallel ones. This way the cut will be smoother.
Some people recommend using the pendulum function. There is no need to press on the jigsaw - it should move on its own. You can try changing modes.
Tool for making decorative and openwork crafts
Sawing with a jigsaw is a type of creative activity that most people are familiar with from childhood, from school. At least it wasn't that long ago. When labor lessons began at school and girls learned sewing and needlework, boys were introduced to such a tool as a jigsaw.
It is not difficult to use, and crafts made with a jigsaw from plywood carry not only artistic value, but also practical application. Manufactured products can act as souvenirs: various boxes and toys, and also have practical applications in everyday life. Decorated elements of the porch of a house, windows, stylish benches with carved legs, beautiful kitchen furniture and many other useful wood products can be made using this wonderful tool.
Ideal hobby tool
A hand jigsaw is a tool for cutting shapes out of plywood or some other material, for example, plastic. Its manual version is budget-friendly - its cost does not exceed several hundred rubles, and its scope is very wide. Figure cutting with a hand jigsaw is a very interesting activity. This is not only a pleasant pastime, but also practical benefits, not only financial, but also moral.
The design of this tool is very simple:
- U-shaped frame. It can be either tubular or lamellar.
- Saw handle.
- Two fastenings for a file. These mounts can rotate, thereby creating different planes, allowing you to perform cutting of varying complexity.
- Jigsaw blade. Sets of such files of 50 pieces are available for sale. The blades are distinguished by the thickness and size of the teeth. Thick blades are used for cutting out contours, and thin blades are used for openwork work with small elements of the workpiece.
Electromechanical jigsaws
The electric hand jigsaw has become an indispensable tool in the household. It can be used to cut various materials: plywood, wood, plastic, metal, ceramics, etc.
This tool operates from a 220 W electrical network and is a plastic case with working elements, equipped with a control handle. Its main component is the saw blade, which is mounted on a rod located in the front of the device.
The rod is driven by an electric motor. The movement of the cutting blade is reciprocating. To speed up the sawing process, some samples of this tool use the pendulum principle, that is, the file moves not only up and down, but also back and forth.
Cutting blades are consumables and need to be replaced from time to time. They are functionally different from each other - there are attachments for wood, metal, and ceramics. There are thicker blades, with more or less rigidity, with larger or finer teeth
An important characteristic of files is their shank. The most common ones nowadays are files with U-shaped and T-shaped shanks.
It is with such files that you need to purchase a jigsaw - then there will be no shortage of consumables.
Electric tools differ in many respects, but in this article we will pay attention to only one important factor - the backlash of the saw. This characteristic affects the pull towards the cutting blade during figure cutting
Many brands of jigsaws cannot cope with the task of perpendicular cutting, this is especially sensitive when cutting thick wood - the error can be up to 5 mm.
Experiments on cutting wood to shape showed that the best jigsaw was a tool from Festool. The popular company Makita did not show its best side in this competition - the error of the perpendicular-shaped cut turned out to be quite large (up to 5 mm), and the jigsaw of this brand entered the tree with large chips.
An electric stationary jigsaw is already professional equipment for cutting. Its design is more complex than the equipment discussed above. The principle of its operation can be compared to a sewing machine, which has a jigsaw blade instead of a needle. The quality of the products obtained using this unit is incomparably better. The error of a perpendicular cut with a large workpiece thickness is zero.
The only disadvantage of this electromechanical device is its high price. But this is compensated by the comfort of working on it and high productivity with the highest quality of the resulting products.
Artistic cutting with a jigsaw: drawing, stencil and work
Let's get to know the devices
A jigsaw is a toolkit that is designed for working on different contours. The device includes a blade equipped with teeth small enough to cut the working material, practically without forming burrs or chips.
Manual
The “founder” of the genus is, of course, the manual jigsaw. Everything ingenious is simple: a metal U-shaped arc, and a working blade is stretched between the ends, which is secured with clamps. They hold the files during operation, and with their help, its tension is also adjusted. The handle for convenient operation is located on one side of the frame. The tool clamps can be rotated, thereby creating a different plane for carrying out work, providing opportunities for carving plywood with a jigsaw of increased complexity.
Adviсe:
- When creating with a hand-held device, you must be extremely careful: the design is quite fragile, and with intense pressure, the blade sometimes breaks and needs to be replaced. Every novice craftsman should stock up on additional working files.
- When working with a jigsaw, it is convenient to use an auxiliary board: it protects the table and solves problems with the convenient location of the plywood workpiece.
Jigsaws
This device operates using electricity. It is a housing where the mechanism is located, and the control handle is also located there. The sawing element is located at the bottom of the device at the front. The blade is protected, and this allows you to cut along the contour very smoothly, without deviations. Professional models of equipment have many attachments that greatly facilitate the work process, for example, leveling the edge of the material. Jigsaw blades can also have teeth that vary in shape and size. They should be selected in accordance with the material for the saw to avoid damage to the plywood sheets during operation.
- Household electric jigsaws for non-production purposes are usually of low power (from 350 to 500 W). For beginners, this is the most common option when you are just learning to cut out crafts and figures from plywood (usually of small thickness). It is quite safe to operate such a device, especially when it is equipped with protection.
- A professional jigsaw is intended for industrial purposes, has a power of more than 700 W, high speed and cutting accuracy. It can cut sheets over 10 cm thick, aluminum, and thin steel.
Video: simple jigsaw:
Fraser
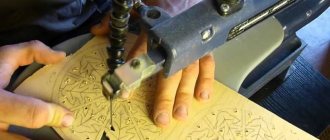
Sometimes this device is used for carving. It is a type of special hand tool, with the assistance of which you can perform various types of work on wood and plywood in everyday conditions. However, working with it requires some skill; but craftsmen who deftly handle this equipment can create real, highly artistic masterpieces of folk art.
Preparing the stencil
Drawings for creative work come in different sizes, depending on the scale of the products being manufactured. For example, for diagrams of a shelf or a piece of furniture, for a three-dimensional toy, you should take a sheet of whatman paper in A1 format, a roll of wallpaper left after repair may also be suitable, and for small figures (such as souvenirs) we take office paper (A4 or A3 format).
Using a marker or pencil, we draw the contours of the future object on the surface of the paper, adhering to the specified dimensions. Templates are presented in the public domain in a wide range, we choose the appropriate one (for beginners, as a rule, it is not too complicated). Or you can come up with your own options for cutting with a jigsaw and then transfer it to a paper base.
Then we transfer the images to the surface of the working material (plywood, boards). To do this, cut out a figure from paper, apply it to plywood and carefully trace along the contour with a pencil. The lines must be precise and even. If necessary, correct it by erasing it with an eraser.
The contours are applied “from the rear” of the material so that no remnants of the drawing are noticeable on the finished form. The internal areas can also be shaded so as not to cut off an extra piece, thereby indicating an inviolable fragment.
Vase
Snowflake
Deer
Typewriter
Where to start
First, the workplace is properly organized
Fulfilling this condition is especially important for high-quality cutting. If the space is arranged correctly, work will be convenient and comfortable
This condition is necessary to create a quality product.
The thrust structure is a special machine. People call it “swallowtail”. This table is made from rectangular boards. It has a wedge-shaped incision that extends into the working area. The dovetail is attached to the edge of the table.
An electric jigsaw can be used while standing or sitting. The workpiece should be located at a distance of 40 cm from the eyes. It is necessary that the lighting lamp be installed in front of the master. It is placed at an angle to the surface.
Features of the sawing process
Doing the job requires good lighting. It is advisable to prepare the tools in one convenient place under the right hand, without cluttering the space with unnecessary details.
Sawing should begin with the internal elements of the design applied from the stencil. To perform slotting work on plywood, holes are first made in some places on the contour.
When cutting with a regular hand jigsaw, hold a piece of plywood with your hands. When working with an electrical apparatus, the workpiece is fixed on a workbench or table using a vice. If you have experience working with an electric jigsaw, cutting is easy and quick; As a result, the lines are smooth, neat, requiring minimal subsequent sanding.
Successful carving is only possible if the nail file is properly and firmly secured, which is subject to mandatory inspection. Carelessness leads to distortion of the drawing, which will turn out to be completely different from the stencil. Inattention can provoke traumatic situations.
The presence of stencils, a good jigsaw and the desire to start cutting - all this together can bring pleasure to the work process and the result both to the master himself and to loved ones or customers.
Why use plywood to create carvings?
This wood material is chosen for the following reasons:
- moisture resistant;
- temperature changes do not have a negative impact;
- quite low cost;
- ease of learning to cut with a jigsaw;
- low weight of products.
It is also necessary to choose plywood of the 1st and 2nd grades for crafts. The rest are not suitable for creativity: the surfaces have cracks with knots and chips (unless they can be used for internal substrates). Birch plywood (3-10 mm thick) is most suitable for cutting.
At the present time, this material is divided into a fairly large number of subspecies - each for specific purposes.
- Experts and folk craftsmen advise using sheets produced using a urea-formaldehyde composition. Such material is marked “FC”. This type of plywood can be bought “clean” or coated, for example, with varnish. It is most convenient to transfer the drawing to untreated plywood sheets for cutting with a jigsaw.
- Plywood marked “FOF” is intended for furniture production, and is often produced over 12 millimeters in thickness.
- The FB brand was originally developed as a boat material, which is why its cost is high (but if it is possible to use it, then it is suitable for cutting with a jigsaw).
- But masters do not recommend purchasing FSF. Although attractive in appearance, it is toxic because it is made using a composition of phenolic resins.
Produced grades of working material
Sawing with a jigsaw: tools
The first thing you need to cut out plywood figures with your own hands is a jigsaw.
Such a tool is represented quite extensively on the domestic market and in several main types:
- Manual. A tool familiar to many from labor lessons at school. As the name suggests, all cutting work will need to be done manually. The best choice for creating small things or teaching children the skills of this exciting process;
- Electric. It works much faster than a manual one, but at the same time, it has a significant mass (1-3 kg), and therefore it is quite inconvenient to hold it “in weight”. Yes, and it will not be possible to create a thin pattern, since the blade of the file is too large for such jewelry work;
Drawing for woodworking
Stationary. The only drawback of such a tool is its price - it is much higher than that of an electric or manual device. Nevertheless, the device is very convenient for the carver; it does not need to be held suspended, and although the cutting line will be rougher than that of a manual “colleague,” the speed of work is still many times higher.
The choice of one or another tool for creating various structures from wood raw materials depends only on the amount of work and the personal preferences of the master himself. If, for example, working with a jigsaw on plywood is just a hobby, then a hand tool will be quite enough.
Preparation of raw materials and stencil
For those people who have skillful hands and extensive experience working with tools, cutting out plywood with a jigsaw will not be difficult. First, you will need to take a piece of material on which the design will be applied and sand it to a smooth surface with fine sandpaper.
After such preparation, it will be enough to apply the desired drawing and begin the process itself. Traditional template for wood raw material sheet products
Well, novice craftsmen, in order not to spoil the material and get really interesting and beautiful elements, will first need to download special drawings on the Internet for cutting out of plywood with a jigsaw. Currently, the choice of such decorative pictures is really large; you can download certain options for every taste for free without any problems. (see also the article Cutting out plywood with a jigsaw - drawings for success)
All you need to do after downloading the drawing is to print it, transfer it to a sheet (you first need to prepare it with sandpaper) and start working with the tool along the contour.
Thus, even the person who has started working with a jigsaw for the first time will be able to get a beautiful product with an even contour that will become a real decoration for the home. (see also the article Laser cutting of plywood: technology features)
The process of sawing wood: features
The process of creating decorative parts from wood is even simpler than applying a design to a sheet of material. It is enough to simply insert the file into the pre-made hole (for this you can use a hand brace or an electric drill) and start working along the drawn contour.
Photo of a beautiful box made from a sheet of pressed wood
Moreover, if the work is performed with hand tools, then all movements must be smooth, without jerking, otherwise you can simply break the fragile jigsaw file.
If everything is done correctly, then in the end you can get a uniquely beautiful design, transferred exactly to the material, a detail that can advantageously decorate any room or facade of a building.
Additional finishing
To make a product created from a sheet of material using a jigsaw look even more beautiful and original, it can be further trimmed. First, you should sand all surfaces with sandpaper, eliminating all small irregularities and roughness.
Afterwards, you can varnish or stain the entire surface of the plywood product, cover it with paint or other finishing materials.
Prefabricated decorative product made from a single sheet
It should be noted that cutting out plywood with a jigsaw allows you to obtain not only solid, but also prefabricated structures. In the latter case, the final finishing will also be accompanied by joining several elements together using special glue or shingled nails.
The main thing in the process of creating a prefabricated product from several parts, even during the work process, is to pay special attention to the cutting line; it should be positioned so that the notch is somewhat smaller than always. Stationary jigsaw for making products
Stationary jigsaw for making products
Materials for slotting threads
In most cases, plywood is chosen for this type of work - it is uniformly thin, has a pleasant color and structure, and does not suffer from further use or storage, unlike solid wood. It is the choice of material that becomes the third pillar of successful work.
The modern market is replete with different types of materials, so it’s easy to get confused. For this work you should choose:
- FC plywood – harmless to humans and the environment, durable, easy to cut, practical;
- FB plywood is also safe for humans, but resistant to aggressive environments, since it undergoes special processing and receives a protective coating, which is why it can cost an order of magnitude more.
Do-it-yourself carved window frames. Stencils and templates. Step by step photos
The content of the article:
Carved trim on doors and windows decorate the house and make it different from its surroundings. Even if a building is built according to a standard design, it can become unique.
How to make a template from a drawing?
To make beautiful window frames with your own hands, you will need templates. With their help, the design is transferred to the surface of the wood.
The creation of a template begins with the selection of a picture . You can find many options; if you wish, you can copy the pattern from a photograph. There are several ways to enlarge a drawing to the size of a template. If the drawing is in electronic format, then it can be processed in a graphics editor.
If the drawing has already been printed, then you should use one of two methods. The first is photocopying. All copiers can print with changes in scale and proportions. The second method is manually. It can be called traditional. The pattern is simply redrawn with increasing cell size.
The resulting enlarged drawing is transferred to cardboard, and then ready-made window frame templates are cut out of it. A separate template is made for each pattern or element. Then it is placed on a board from which the platband will be cut and traced with a pencil.
We make window frames with our own hands
Project
Design is the basis of any process. If you want to make carved window frames with your own hands, then you should also start with design. A drawing of the facade of the building is made and a drawing of carved elements . This allows you to imagine the appearance of the building. If you have a visualization program, you can make a three-dimensional house project.
Do-it-yourself platbands: drawings.
DIY window trims. Photo
At this stage, materials and tools are prepared. The best material is pine boards with a minimum number of knots.
You can make window frames with your own hands using:
- jigsaw with soft start;
- feather drill with a diameter of 12mm;
- screwdriver;
- grinding machine.
Sawing
Do-it-yourself carved window frames. Step by Step Photos
After the stencils of the window casings have been traced, you should begin the cutting process. First, the internal openwork elements are cut out. To do this, holes are drilled along the contour of the image. The drill should be perpendicular to the board.
Next, the pattern is cut out with a jigsaw . They start cutting from the hole and follow the drawn contour.
After cutting out the internal contour, move on to the external one.
The jigsaw is led from one end of the future casing to the other. The cuts are made in advance to make the process easier.
The result is a finished part. For the other side of the window, you need to make a mirror image of it.
Grinding
In order for the surface to acquire an aesthetic appearance, it is treated with a grinder. An 80-grit sanding wheel is used. After this, the part can be painted.
Primer and painting
Wood is sensitive to rot and damage by insects, so before painting it is carefully treated with an antiseptic . The fewer gaps, the longer the platbands will last.
After applying the composition, the parts are dried. Dry surfaces are painted. The best option is water-based paint for wood. The color is selected during design. In this case, white and cherry are used.
Paint with two brushes. The wide one is used to paint the outer surface, and the narrow one is intended for the side parts and hard-to-reach places.
The elements are painted carefully, in two layers. The second layer is applied when the previous one has dried.
The final layer is varnish. For this purpose, it is better to take an acrylic composition that is water-based.
The varnish is applied in one layer, trying to avoid drips. Dry the parts outdoors.
Assembly
All parts are assembled into a common composition before installation on the window. This sequence is more convenient.
Do-it-yourself carved window frames. Step by Step Photos
Fastening is carried out according to the sketch using self-tapping screws. They are screwed in from the wrong side so as not to spoil the appearance of the platbands.
Installation
Direct installation of platbands on the window is carried out using scaffolding. It is safer and more convenient than stairs. Fasten the module in place using self-tapping screws.
Variants of stencils for platbands
When choosing patterns for platbands, you should pay attention to a number of points. Among them is compatibility with the overall appearance of the house. If you are making wooden window frames with your own hands for the first time, then it is better to choose a simpler option.
DIY trim templates
Previously, each region had its own traditions in window design. They can be used now if you want to remind about cultural heritage.
The role of platbands
Window trim elements are often called platbands, but their correct name is casing. Cashing has many functions. Let's consider the main ones:
- decorative - the appearance of the windows and the entire facade looks complete; with the help of the platband you can visually change the proportions of the house;
- the right ornament helps express personal preferences or traditions;
- with the help of platbands, all buildings on the site are combined into a single architectural ensemble;
- thanks to the platbands, moisture and debris do not get into the cracks between the wall and the frames;
- Heat loss is reduced since the gaps around the windows are additionally closed.
When making platbands, it should be taken into account that wood deteriorates over time. Antiseptic compounds will help prolong his life.
Let's get started
The following instructions will help you avoid making mistakes when cutting:
- Sawing should be started only after all the punctures have been made in the workpiece, since the workpiece will lose its strength during operation (drop-out contours are removed). A “weakened” sheet may break when punctured. Holes are pierced in all places where “closed” patterns are present.
- Punctures are made with a sharp awl. It is impossible to pierce all plywood layers at once, since in this case the bottom layer will crack. The puncture is done as follows: we make a hole so that only the tip of the awl comes out on the other side. Then we turn the sheet over, expanding the hole on the opposite side.
- Sawing obtuse angles is done by turning the sheet in place. Having finished cutting to the top of the corner, stop pushing the sheet onto the file, while continuing to move the jigsaw. When you feel the file move more freely, turn the sheet in the desired direction.
Additionally: How to make a jigsaw with your own hands
Correct hand placement when cutting with a jigsaw.
- We cut out templates from plywood only with the correct fit and positioning of the hands. If the fit is incorrect, the saw blade deviates from the vertical. You can check the correctness of the cut as follows: when, after a circular cut, the cut piece of plywood falls out of the sheet, insert it into place from above. If it inserts without effort, the cut is perpendicular and you are doing everything correctly.
- Sharp corners can also be sawed out, but in this case the file should be slightly pulled towards itself to avoid excessive rounding.
Instructions: how to cut smoothly with a jigsaw
It is absolutely indisputable that a tool such as a jigsaw is necessary for any carpentry workshop, and will also not be superfluous in a set of home tools. It is precisely this that is most suitable for cutting out shaped blanks of various types, both curved and straight.
But how to cut smoothly with a jigsaw? To do this, you must follow certain instructions.
First stage
First you need to prepare the necessary tools:
- clamps;
- pencil;
- bar or beam for guide;
- jigsaw;
- measuring tool.
When starting work, you should secure the workpiece as firmly as possible. It is not at all advisable to use a jigsaw to cut along the fiber, because in this case it will not be possible to cut straightly.
But if such a need still exists, then you can use a parallel stop, one end of which is attached to the jigsaw, and the second rests against the edge of the workpiece material.
In this way it will be possible to saw off extremely smoothly.
If you need to cut with a jigsaw in the inside of the workpiece, you should first drill a hole in it. After this, a saw blade is inserted into the drilled hole, and the jigsaw is moved exactly along the marking line. Once the cut is complete, adjust the corners on each side of the workpiece.
Sawing should be done using a guide, which can be a straight bar or block. You will need several clamps into which the workpiece material and guide should be placed. Cut smoothly with a jigsaw
It is necessary to place something under the workpiece so as not to rest when working with a jigsaw. Next, using a measuring tool, measure the width of the area that needs to be cut.
Then a line is drawn along the ruler connecting the marks. After this, the guide is secured with clamps at the required distance from the edge of the cutting line.
Then the jigsaw is placed with the blade against the cutting line. The guide is pressed against it and also secured with a clamp.
You need to fix it motionless, but you shouldn’t clamp it too hard. Next, everything is done in the same form on the opposite side.
Next, after turning on the jigsaw, you need to set the speed to the maximum and adjust the movement of the pendulum, setting it to one. The jigsaw is placed with the blade against the cutting line, the platform is pressed sideways against the guide, and you can start sawing.
Second phase
When working with a jigsaw, you should avoid applying excessive pressure on the tool. The device is pushed forward with a slight movement, also exercising control over the platform.
The edge of the sole should be pressed against the guide so that it does not move. At the end of the cut, when a couple of centimeters remain to the edge, it is necessary to hold the sawn fragment to avoid breaking.
In order to achieve higher cutting accuracy when working with a jigsaw, and to cut small parts more evenly, an auxiliary method is the use of a sawing table.
As a result of this cutting, the lines come out more evenly. How to cut smoothly with a jigsaw?
To improve the quality of movement of the saw on the workpiece, you can use an auxiliary device in the form of a replaceable plate, which can be made of various materials. The plate is attached to the main support platform of the jigsaw. The adapter and guide bar allow you to cut more evenly.
When cutting some materials with a jigsaw, there is a need to cool them. Therefore, before you start cutting, you need to install a container with cold liquid on the support platform, designed specifically for this.
Before sawing metal, the file must be lubricated with machine oil, and the cutting line area must be cooled.
It is recommended to cut curved shapes using files with a narrow blade. When cutting out a round part, a special circle cutter is used, which is installed in the center of the circle.
That's all for a simple description of how to cut smoothly with a jigsaw.
Photos in the interior of the rooms
Examples of pink ceilings in various rooms.
Kitchen
Pink in combination with chrome surfaces creates a rich and very advantageous design. Thanks to this shade, a unique emotional mood is formed in the kitchen.
Children's room
Tension or hanging models will look great in a girl’s room. This ceiling solution, combined with furniture or other accessories in milky shades, will add special tenderness, fabulousness and coziness to the interior.
The photo shows a soft pink matte stretch ceiling in a room for a newborn.
Bedroom
A pink ceiling will be especially appropriate for dark bedrooms located on the north side. This decor will make the room much lighter and brighter.
Bathroom
A soft pink ceiling covering in combination with white tiles or sanitary ware will make the bathroom very cozy and add a little freshness and coolness to it.
Examples of crafts or what you can do with your own hands
Here, endless opportunities open up for amateurs who can then become professionals. The technology allows both to give the external shape to the product and to create ornaments on different surfaces, from boxes to openwork stair railings or carved platbands.
Let's look at simple examples of work. The photo below is a purely artistic product that has no practical value.
An arts and crafts product, a hanger for the hallway, kitchen or bath.