How to make a chandelier from boards
For work, take flat beams of any cross-section (for example, 10x10 cm or less) - the dimensions of the finished product will depend on their exact dimensions.
You will also need a piece of mirror, which should protrude beyond the inner perimeter of the lamp and rest on the beams, wiring with a socket. The course of action is as follows:
- Make 4 blanks - cut out flat bars of equal length.
- A rectangular “bowl” is cut through half the thickness of the bars to form a “lock”.
- They assemble the structure together and fasten it with reliable glue.
- Paint the chandelier and let it dry completely.
- Place the cartridge inside and pull the wiring through, fixing it from the inside with staples or small nails.
- A mirror is attached to the top of the corners - it is needed as a light reflector.
To attach such a chandelier, you need to attach any suspension to it, for example, a chain, and then attach it to the ceiling in a selected place in the kitchen.
Making a lamp yourself
It’s hard to imagine, but you can even make an LED lamp yourself and save a lot on purchasing equipment.
Tools and materials
The quality of materials and tools needed to create a 220V lamp plays an important role. The reliability, safety, and durability of the product depend on this.
It's easy to make directional light lamps with your own hands
To work you need the following elements:
- halogen lamp without glass;
- LEDs in the amount of up to 22 pieces;
- fast-acting glue;
- copper wire and aluminum sheet, the thickness of which is 0.2 mm;
- resistors selected depending on the circuit.
Before work, it is necessary to draw up a diagram of the connection of all parts, which depends on the specific situation. For this purpose, a variety of online calculators are used to obtain accurate results. When the number of LEDs is more than 22, the connection is complex and requires a special approach.
The scheme is selected depending on the situation
The tools used are a screwdriver, a hammer, a hole punch, and a small soldering iron. During the work, you will also need a small stand that allows you to conveniently place the diodes on the reflective disk.
Step-by-step instructions for making a lamp
Making a 220 V LED lamp with your own hands does not require professional knowledge or complex tools.
- First you need to prepare the faulty lamp by opening the housing. The base is detached from it very carefully, and you can use a screwdriver for this.
- Inside the structure there is a board for an electronic ballast, which will be needed for further work. LEDs are also needed. The upper part of the product has a lid with holes. The tubes should be removed from it. The base is made of plastic or thick cardboard.
- LEDs on a plastic base will stick more securely than on cardboard. Therefore, it is best to use a piece of plastic.
- The lamp will be powered using the RLD2–1 driver, which is suitable for a network with a voltage of 220 V. In this case, you can connect 3 white one-watt LEDs in series. Three elements are connected in parallel, and then all chains are fixed in series.
- The wires in the base may be damaged during disassembly of the lamp structure. In this case, you need to solder the elements in place, which will provide a simple technique for further assembly of the product.
- A piece of plastic should also be placed between the driver and the board. This avoids short circuits. You can also use cardboard, because the LED lamp does not heat up. After this, the structure is assembled, and the device is screwed into the socket and tested for functionality.
After assembly, you need to check the functionality of the device
The power of such a lamp is approximately 3 Watts. The device is connected to a network with a voltage of 220 V and provides bright lighting. The lamp is effective as an auxiliary light source. Based on this DIY example, it is easy to create more powerful designs.
Making a driver
A current stabilization device and a constant voltage source - the driver - are present in the design of the lamp, connected to a network with a voltage of 220 V. Without it, it is impossible to create a light source, and you can make such an element with your own hands. To do this, you should carefully disassemble the lamp, cut off the wires leading to the base and to the glass bulbs. It is worth considering that one of the roundabout wires may have a resistor. In this case, the element should be cut off after the resistor, since it is needed when creating the driver.
After cutting off the wires, the following detail remains:
Each board option differs depending on the manufacturer, device power and other features. For 10W LEDs there is no need to modify the driver. If the lamp differs in the intensity of the light flux, then it is best to take a converter from a device of higher power. 18 turns of enamel wire should be wound around the choke of a 20 W lamp, and then its output should be soldered to the diode bridge. Next, voltage is applied to the lamp and the output power is checked. This way you can create a product whose characteristics meet the requirements.
Video: making a DIY LED lamp
https://youtube.com/watch?v=ZlP3mgKIzRw
It’s easy to make a 220 V LED lamp with your own hands, but you first need to determine the required power, circuit and select all the elements. Further, the process does not cause difficulties even for novice craftsmen. The result is an economical and reliable device for lighting any room.
"Eco-lamp" made of wood
Such a table lamp is obviously most suitable for the interior of a country house, although under certain conditions it will also find its place in a city apartment. To make it, you need to have at least some experience in creating crafts and skills in working with tools.
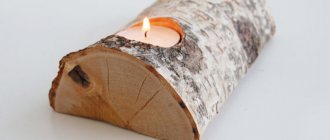
To begin, select a suitable round piece - an end cut of a log with a diameter of 25-30 cm. The round piece should be heavy enough to provide the lamp with a stable position; it would be nice if the opposite planes converge slightly on one side, as in the photo below. Then the bottom cut will need to be made at the widest point for maximum stability.
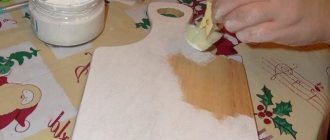
Treat the surfaces with sandpaper in several stages, reducing the grain size of the sandpaper, then saturate the wood with some protective compound, the same stain, keeping in mind their properties to change the color of the surface being coated. Try not to touch the outer surface around the circumference, preserving its natural appearance as much as possible, especially if the bark is preserved on it. In those places where the bark has peeled off, it needs to be glued with PVA or other wood glue. To preserve the natural texture and relief, the bark should be carefully brushed and covered with 2-3 successive layers of colorless varnish. Apply the same varnish to the remaining surfaces of our round wheel after all the drilling work has been done with it.
Next you will see options for using a tree stump and suitable size logs as a stand.
Let's start drilling. To do this, you will need an electric drill and wood drills of a suitable diameter and length. Our task is to install in the upper part a tubular metal stand-holder for the socket and lampshade frame, into which to insert an electric power cord from the back side of the lamp (decide on the side of the round, it’s logical to choose the less beautiful one). To do this, drill a through hole with a slightly larger diameter than the thickness of the prepared wire, exactly in the middle from top to bottom. If the drill is not long enough, continue drilling from the opposite side (from the side of the stand) towards the hole already made - try not to miss each other! Then, on the back side, closer to the stand, drill a side outlet of the main hole, into which we will insert the wire a little later.
Read also How to make artificial snow
The next step is installing the lampshade stand. As a rule, they use a part from an old lamp. This is a chrome-plated (less often painted) metal tube of small diameter with an external thread for mounting on wide nuts of the lampshade frame and the lamp socket bracket. Depending on the outer diameter of the tube, drill or expand with a round file a hole in the upper part of the wooden round to a depth of 7-10 cm. The task is to fit the lampshade stand as tightly as possible into the hole to the specified depth. Measure the required length of the tube in advance: from the top threaded part to the round frame - slightly greater than the height of the existing (or planned to be manufactured) lampshade, plus a length equal to the depth of planting in the wooden round frame. Saw off the excess with a hacksaw.
Inspect the stand carefully: if it is in good condition, then you can use it as is; if there are noticeable traces of rust, then it is probably better to thoroughly sand it with sandpaper and paint it with spray paint.
When everything is ready, we run the electrical cable. We push it through the short side hole and, pushing it from below with a long strong rod, direct it to the upper exit. Pull out the required amount of wire with a small margin (always make a supply of wire) and, passing it inside the tube, insert the latter into the prepared hole and, gently tapping the top with a wooden hammer or a suitable block, press it into the round. Please note that pressing into a hole that is too small can split the wood, and in a hole that is too large it will wobble, which is also undesirable. Planting on glue is also not the best option.
The last stage of manufacturing our “eco-lamp” is to connect the wire to the socket, the plug to the free end and, if desired, a switch. In the photo you can see a chain hanging from under the lampshade from a microswitch, like in a sconce, but this is not at all a necessary element; you can limit yourself to the usual series switch on the power cord, as in a regular table lamp. Then we install the lampshade, screw the lamp (incandescent or LED) into the socket and check the functionality. Hooray! From now on you are the owner of a stylish and practical item in your home.
Alternatively, instead of a round log, you can take an ordinary log of suitable size and texture, and instead of a lampshade, leave an open lamp - there is a large selection of original electric lamps on sale, for example, the stylish “Edison lamp”.
Key holder for the hallway
An interesting option for DIY work is a key holder craft, cut out of plywood with a jigsaw. This product not only has a beautiful design, but also serves a practical role. The keys will always be in a visible place, preventing the risk of losing a key in the apartment. To work, you will need a sheet of plywood, a set of metal hooks, compositions for impregnating the accessory, and compositions for decoration. Mounting hardware and hooks can be purchased at any hardware store. Drawings for simple plywood crafts can always be found in the public domain.
Instructions for operation:
- Preliminary markings are made on a sheet of plywood, drawing the outline of any selected shape. Modern key holders can look like a clock, a house, an open book or another artistic image.
- Using a jigsaw, cut out the base image strictly along the contour.
- The key holder may have additional sides. If they are provided for by the selected product model, you should also cut out parts for the sides.
- Measure the diameter of the purchased hooks.
- Several holes are made in the main panel using an awl or other sharp tool.
- Next, they impregnate the future key holder with special compounds.
- The plywood base is decorated (painting, opening with acrylic varnish, wood burning or decorative carving).
The hooks are mounted by inserting them into the prepared holes. On the reverse side, fastenings to the underlying wall are made.
Advantages of material selection
Plywood sheets are produced by pressing wood shavings. For this reason, like solid wood, plywood is a fairly durable and natural material.
Due to its natural origin, the structure does not emit toxins or allergens. Due to the small thickness of the sheets produced for wounds, the material is easy to work with (just use a jigsaw).
Crafts made from plywood with your own hands have an undoubted advantage:
- Stylish look.
- An excellent preparation for subsequent decoration.
- Particular strength.
- Safety for humans, in particular for children.
- An extensive collection of drawings for crafts made from plywood (for working with a jigsaw).
With optimal treatment with antiseptics, antipyretics and moisture-resistant compounds, the maximum possible service life of the product can be achieved.
Features of the material
Do you want to give a friend a birthday gift? But do you want something unusual, non-standard? We suggest “shaking up the old ways” and making an original gift with your own hands from plywood. But why her?
- Quite affordable. You can buy it at any building materials store. The price is not at all affordable.
- Easy to process. It cuts quite easily, as well as drills. Its surface is quite smooth. Therefore, it is also used for burning.
- Quite durable. Since the structure is multilayer, plywood is quite strong and durable as a material. Or you can do a “family contract”. If you have a daughter or son, do woodworking together. And then, you see, the wife will catch up.
But first you need to look at the illustrations from the photos and think: “What can be made from plywood?”
- Pictures-illustrations. Both simply painting on wood and using a burning machine.
- Interior items
- Dishes
- Hangers (both in the wardrobe and on the wall).
- sculpture
- Furniture
Table lamp stand
If you make wood crafts at home and you have accumulated a significant amount of waste that is a pity to throw away and cannot be used almost anywhere, then you can make a beautiful stand for a table lamp out of it. You don't need a lot of material for this, and the best thing is that you can use different types of wood to give the lamp a beautiful look.
The lampshade, socket, light bulb, and channel tube are sold at all hardware or lighting stores. Therefore, buying them will not be a problem, and you can make a lamp much better than those sold in stores.
To begin, prepare the upper and lower supports as in Figure 1A. They are needed to prevent the lamps from being glued together and guarantee the strength of the entire structure. It is not advisable to use glue in large quantities in this rack, since if the parts squeeze it out, it will be very problematic to remove it. If you make wood with your own hands, then you know how difficult it is to remove the glue from the recesses, and it is in them that the fastening parts will be located in this design.
Click to enlarge
The figure below shows a detailed view of the lamp. As you can see, there is nothing complicated in its design, and it can be made from materials that are not useful for other products.
The second stage will be vertical racks, for this you will need four small bars, in principle, their length and thickness can be changed, depending on how thick you want to make the rack. To begin, use a router to make longitudinal grooves on both sides; they are best done at this stage, before the block is narrowed.
After the grooves are ready, you need to narrow the bar on two outer sides. This is not difficult to do, you just need to mark a cutting line on the side and use a jigsaw or band saw to give the workpiece the desired shape. Once you've tapered the two edges, you'll want to sand or plane them nicely, as this will be the face of the post.
You also need to make four strips that will serve as a connecting link between the bars. You can see their sizes in the diagram. When you have all the parts, you can start assembling. To begin with, the parts are glued together in pairs, after which the tube is inserted, the stand is completely glued together and the lower and upper stands are screwed on.
The next stage will be the upper and lower decorative overlays and legs; you can see how to assemble them correctly in the pictures below. It is important to correctly assemble the wiring and its fastening parts, since the safe use of the lamp and the longevity of its service life depend on this. Therefore, be very careful at this stage. If you do not know how to make a cartridge, then review the relevant literature.
Then you just need to varnish the stand and install the lampshade, and your classic-style table lamp is ready.
List of materials
Using the “gifts of the forests”
Street light
But this is not a troublesome option at all. Make a hole in the trunk of a dead tree in the area and insert a kerosene stove or solar-powered LED lamp inside. Original, simple and sincere! This street lamp is well protected from bad weather and warms the soul on long winter evenings, shining from under the snow cap.
By the way, there is another plus - you don’t have to worry about uprooting the stump.
Very unusual lampshades are made from birch bark; cover it with a finished lampshade made of thick paper or fabric
Just use this lamp with caution
Bark lampshade
Since strong heat can quickly dry out the bark, crack and even ignite - safety comes first. It is preferable to install fluorescent or LED lamps - they heat up significantly less than conventional ones, and they consume significantly more energy.
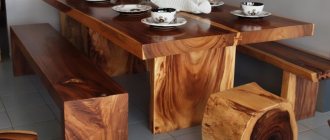
Or you can simply cut a birch log, drill holes (not through holes - to the size of the base), screw several light bulbs in a row and attach them above the dining area or work table.
Birch lamp
During the New Year holidays, lampshades decorated with pine cones would be appropriate. Provide them with small, barely noticeable LEDs and the lamp will shine, spreading intricate patterns of chiaroscuro on the walls, which will further emphasize the festive atmosphere.
Lampshades with cones
Paint the pine cones with white paint to create a frost effect; you can dust them with salt crystals on top.
What types of table lamps are there?
Table lamps can vary in shape, style and purpose. These parameters can be so varied that it can be quite difficult to single out just a few. In addition, in the modern world, designers strive for innovation, so they try to mix different styles and shapes, developing something unique and unusual. This approach to creating a table lamp can also be used in making it yourself.
- Classic style . It never goes out of fashion and has always been relevant for several years now. Such table lamps are usually restrained in shape and color; the light they emit is very soft and pleasing to the eye. Classic style table lamps will look great in the bedroom on the bedside table, or in the office on the desk;
- Office Style . These lamps are designed for functionality and practicality. Their use should be easy and at the same time mobile. Most often, lamps with a bracket are used here, so they can be rotated in different directions and used for any need. The degree of illumination and its intensity in such lamps can be adjusted independently, which is a definite plus;
- Ecological style . In the modern world, people strive to be closer to nature, so they try to use similar motives when arranging their homes. A table lamp made in eco style is perfect for this, i.e. from environmental materials. An excellent solution here would be to use natural wood as a base for the lamp;
- Decorative style . What matters with these lamps is not how well they can illuminate a room, but how they look. To decorate table lamps, completely different materials can be used, which at first glance may not be compatible with each other. The main condition is an unusual, attention-grabbing appearance. The shape of such lamps can also be absolutely fantastic: unimaginable geometric shapes, silhouettes of plants and animals, contours of musical instruments and much more. Particular attention is paid to the lamp leg; a figurine or some kind of souvenir looks unusual here.
When choosing a table lamp, pay special attention to the light source. It should not be too bright or dull. The best choice in this case would be the golden mean. In this case, the likelihood of pain in the eyes will be zero.
Wood lamp
An elegant wooden floor lamp is always in fashion.
1. Select a branch so that its lower part is strong and thick.
2. Remove the bark and clean the branch with a sander.
3. Use a circular saw to cut out a square sheet of fiberboard.
4. In a square, connect opposite corners with lines using a ruler and pencil.
5. The intersection point is drilled several mm with a 6 mm drill, and then a thicker drill is used and deepened to a through hole.
6. The finished sheet is painted with varnish of the desired color and allowed to dry.
7. In the lower end part of the branch, in the center, drill a recess with a diameter of 6 mm.
8. The finished fiberboard sheet is connected in the holes with a branch using a screwdriver and placed on the floor.
9. At the base of the upper branches, make through drillings, where the lamp cord is pulled, unscrewing it along the branch.
10. Connect the lamp.
The floor lamp is ready on your own! Enjoy the comfort.
Required Tools
Plywood is easy to saw and paint. It seems that working with it requires a couple of tools. However, the thematic list expands significantly when the craft is complex:
- Electric or manual jigsaw - for sawing;
- Screwdriver - for screwing in and out of screws;
- Electric drill or hammer drill - for drilling holes;
- Wood files – for initial smoothing of the surface;
- Grinding machine or sandpaper of different grain sizes - for final smoothing of the surface;
- Clamps - for clamping and fixing parts during their assembly and gluing;
- Vise - for clamping parts when sawing and drilling.
A pencil and measuring tools – a square and a ruler – will also come in handy. After all, crafts made from plywood, the drawings of which are themselves complex, have to be adjusted and aligned many times. If the workpiece has patterns, then you will need a stencil.
A few tips for novice carpenters
Even beginners can make beautiful things that will decorate any interior. To do this, you just need to have the desire and a minimum set of carpentry tools. But if you think that making your first wooden object will be easy, then this is a little wrong. You will need to make an effort, sit with sandpaper and gain a little experience.
But after this, any item you make, be it a chandelier, stand, shelf, stool, chair or other piece of furniture, will look beautiful and attractive. After all, each type of wood has its own characteristics and properties, so you need to learn how to work with them.
In addition, every carpenter is to some extent a sculptor, since this is a creative work. Most craftsmen have all their products in a single copy and they do not repeat each other. And this is precisely their greatest value, since they allow you to create unique and inimitable interiors that show the good taste of the owner.
That is why carpentry requires creativity and imagination. Don’t be afraid to change the appearance of the product, its size and shape. You will see that it is easy when you have experience. The most important thing is to start, because any journey begins with the first step.
Manufacturing instructions
- Preparation of consumables. It must be thoroughly washed and dried.
- Next, the most massive, stable piece is selected from the wood materials, which will be used as a stand for a table lamp. A hole is made in it with a drill for a pin, which is first trimmed to the required parameters with a metal knife. The height of the stud should be approximately 5 cm higher than the level of stones and wooden blanks stacked on top of each other.
- The pin is inserted into a hole made in a wooden base.
- Using different drills, holes are made in each prepared stone and wooden piece to match the diameter of the stud. All made parts are threaded onto a pin already fixed at the base.
- At the very end, a reed branch is put on the hairpin (it will cover the thread).
- Next, a socket is attached to the end of the pin (while the electrical wire remains outside), the light bulb is screwed in, and a decorated lampshade is installed.
This DIY design invention is perfect for a rustic, ethnic style; the most optimal installation option is a country house.
In addition to the options described above for manufacturing exclusive lighting fixtures, there are many more. From scrap materials you can make lighting devices from LED strips and other lighting devices for any room, for any interior, at home.
DIY table lamps: components of the product and its varieties
The main condition when choosing the type of lamp is to decide on the tasks that it will perform, and based on this, start working. If the main purpose of a table lamp is lighting, you should carefully consider the shape of the lampshade and the design of the leg. If the main function is illumination, then it is worth choosing a simpler form, and for a night light you can use the most basic option. If you look at the lamp, the following details generally stand out:
Any table lamp has a cord, a switch, a shade, a column and a lamp
- Column. The main element that ensures the stability of the lamp on the table.
- Light diffuser. The most visible detail can be a lampshade or a lampshade. It is the lampshade you made yourself that allows you to harmoniously fit the device into the surrounding interior.
- Cord. Serves to connect the lamp to power; there must be a plug at the end of the cord. If you make a device using a battery or batteries, this element can be neglected.
- On/off button. Allows you to regulate the operation of the device without disconnecting the cord directly from the network.
- Light source. This refers to a light bulb that provides illumination. It is selected based on the type of lampshade, the required lighting and the purpose of the lamp.
- Mounting the lampshade. Promotes reliable positioning of the light diffuser.
Before starting work, you need to decide on the type of lamp
The most popular types of table lamp designs
Based on their purpose and design, there are various options for table lamps. The table rack lamp is considered the most popular because it illuminates a large space on the surface of a work or dressing table and at the same time can easily be moved to the right place depending on needs.
Another advantage is that such lamps are easy to decorate, and the technical side of the issue is quite simple. Before you make a table lamp yourself, you should take into account that such a product cannot be adjusted in height, but by adding a thyristor power regulator to the device, you will be able to change the light intensity. And also the light falling evenly on the table surface reduces eye strain and prevents rapid fatigue. There are other types of table lamps (the photo is proof of this) that you can make yourself.
A lamp with a lampshade is quite simple to make, so it is suitable for beginners.
On a hinge. Such lamps are more suitable for people with an analytical mind than for creative individuals who like to decorate. Before you make a table lamp on a flexible bracket with your own hands at home, it is worth considering that making such a design is not so easy, and the price of the finished product will most likely be higher than the cost of the purchased option. The main difficulty in creating this model, as opposed to a rack lamp, is that more effort will be required to ensure electrical safety. One of the advantages is the ability to adjust the angle of inclination of the incident light rays.
Console lamps. They are heavy due to the fact that it requires the development of a heavy base that firmly holds the device on the surface. These lamps, like rack lamps, are not adjustable in height or angle, but they provide good light.
The easiest and safest lamp to use is a flexible LED tube, which will serve as an excellent night light in the room. It is important that you do not need an outlet to connect the product, because the lamp can be powered by several button batteries with a voltage of 3 W. To make it you will need an LED, a transparent tube and a fluorescent liquid.
It is more difficult to make a lamp on a flexible bracket, and you will also have to spend money on materials
How to make a lamp with your own hands: the technical side of the issue
If we talk about the internal filling of the lamp, then everything is extremely simple, because the device consists of a power plug, a cord, a switch and a light bulb socket. Those who are no strangers to technical issues can supplement their homemade device with a voltage regulator. Whatever chuck is chosen, it is mounted on a thread or steel plate.
Helpful advice! The best option for self-production is considered to be a chandelier socket with screw-on threaded flanges, because between them it is easy to clamp a steel faceplate, which serves as a fastener for the lampshade frame, or a clamp for mounting on a hinge.
For homemade lamps, it is better to use sockets with threaded flanges
The main requirement for devices is electrical safety, since if you make a table lamp with your own hands incorrectly, you can not only cause a short circuit, but also damage the wiring. To prevent this from happening, experts recommend first choosing the right cord, which should be round and double insulated.
The places where the cable passes must be protected with dense dielectrics. To prevent damage to the integrity of the cable, before inserting it into the channel, it is tied with a small knot and pulled through the hole of the dielectric fixing washer. Only after all these points have been completed can you begin decorating and exterior finishing.
Electrical safety is the most important thing when making a homemade lamp
The method of pulling the cable for the lamp on a hinge should also be clarified. So, if the bracket link is solid, the cord is passed at the top, left or center and securely fastened to the movable knee. If the hinge is a pipe, then it is better to pass the cable inside, but you need to add additional centimeters to the required length of the cord, which will be enough to bend/unbend the lamp.
Special attention should be paid to the place where the cable from the bracket passes to the illuminator: you need to leave 8-10 cm of additional length, because the design of the lamp provides for significant changes in the position of the lampshade, which must be taken into account when selecting a suitable power cord. It is worth considering in advance the method of attaching the hinged lamp. Most often, a screw clamp or clamp is used for this. Craftsmen recommend using a carpenter's clamp for this purpose, which, unlike a metalwork clamp, has a softer coating.
Related article:
LED table lamp: an economical and modern way to organize lighting
Advantages and disadvantages. The most important parameters: power, light output, color temperature. Popular manufacturers.
DIY plywood chandelier: photos of simple drawings
Chandeliers that are made of glass or other fragile materials have long become boring. Creative individuals strive to make their interior unusual and at the same time unique and inimitable. Plywood is a very convenient material from which many products can be made. With proper processing, you can make interesting accessories that can refresh any accessory. Therefore, you can create a chandelier from plywood that will last much longer, while emphasizing the taste of its creator. Anyone can make such a chandelier with their own hands; you don’t need to have certain professional skills to do this. In addition, such a unique material as plywood has a very wide use, but it is mainly used as a primary option - a rough one. Therefore, we will try to learn how to make lampshades using plywood.
DIY lamps: photos and principles for choosing a light bulb for the device
The first thing you should pay attention to when choosing a lamp for a homemade lamp is wattage, which determines the amount of energy produced by the light bulb. For a regular table lamp, the figure varies from 40 to 120 W. It is important to take into account the type of material from which the device is made, since fire safety will depend on this criterion. Thus, an incandescent lamp, even of relatively low power (60 W), when used for a long time, can cause a plastic lampshade to melt, damage the integrity of a wooden lampshade, or even cause a fabric lampshade to ignite.
You should also pay attention to the lumens indicator, which determines the amount of light emanating from the lamp. Accordingly, the higher this value, the brighter the lamp will shine, but for a table lamp you should not choose an option higher than 1000 lm. It should be noted that the proximity of artificial light to natural light depends on the number of lumens. There are other things to consider when choosing a light bulb.
Form. The pear-shaped type of light bulb is considered traditional. It should be said that not only incandescent lamps, but also modern energy-saving fluorescent options are distinguished by this form. In addition, there are spiral lamps, in the form of a candle or tube. The choice of product generally depends on the design of the homemade lampshade.
Base size. Repairing a table lamp, which involves changing the light bulb, is much easier to carry out if you have a standard E27 socket. Other, no less popular options are E14 or E40. Modern DIY LED table lamps have a bayonet base, characteristic only for this type of light bulb.
For table lamps, a lamp with a power of 40-120 W is suitable
Life time. Basically, manufacturers indicate on the packaging the approximate service life of the product, but in most cases this indicator depends on proper use and the characteristics of the power supply. It is logical that with frequent voltage surges, a lamp of any class will fail faster. Among all lamps, LED products have the longest service life.
Character of lighting. The instructions for the device indicate what kind of light will come from the device (it can be cold or warm). The choice of warmth of light depends on the selected lampshade and its color, as well as on the main functions assigned to the device.
Energy consumption. If you plan to use a table lamp as a night light, you should choose the most energy-efficient light bulbs that will save on electricity. Despite the fact that you will have to pay a little extra when buying a light bulb, utility bills will be lower.
Contains hazardous elements. Fluorescent lamps contain mercury inside, so it is extremely dangerous to install such a tabletop device in a child’s room. These lamps must not be thrown into the trash because they must be disposed of properly to prevent environmental pollution.
How to make a lamp with your own hands in Oriental, Japanese, Chinese style?
Lamps play an important role in the design of premises. A lamp successfully chosen in style and color can transform an ordinary room interior into a stylish and modern one. There are many options for lamps: wall, pendant, floor, table.
Let's talk about table lamps. They can be used in various rooms: in offices, bedrooms, living rooms. You can make a table lamp yourself. With some effort, you can invent an original designer lamp. This way you will emphasize the uniqueness of your interior.
First you need to decide on the style of your lamp. Oriental style is popular. Let's consider what features a Japanese-style lamp should have:
- Simplicity
- Strict geometry
- Convenience
- No acid colors
Japanese lamps are usually rectangular in shape. Sometimes you can find round-shaped lamps. In Japanese style, table lamps are rarely used; soft light should come from them. The color range is not rich: black, white, brown.
The decor of the lamp may include the following elements:
- Japanese or Chinese characters
- Applications
- Painting in Chinese or Japanese style.
To make a lamp in an oriental style you will need the following tools and equipment:
- Base with an old lamp socket
- Wood slats
- Rice paper, tracing paper or plywood
- Wood glue
- Saw
- Square
- Scissors
- Brush
- Paints
Step-by-step production:
- The first step is to make blanks from wooden slats. Using a saw and square, prepare 4 long slats and 8 short ones. Select the size yourself, based on the size of the room, the size of the table or bedside table on which the lamp will stand.
- Sand all the slats with sandpaper to avoid any roughness or nicks.
- Next, you need to glue all the parts together and let them dry. Assembled nails of this design should not be used. You can fasten the slats with rope.
- Paint the lamp frame black, white or brown. Let the paint dry. You can open the structure with varnish.
- After this, cut out 4 layers of the required size from rice paper or tracing paper. For this you can also use plywood, which will be more durable and practical.
- Apply the drawing with paints. You can cut out an ornament on paper by first printing the finished design on a printer.
- If you took plywood, then first print the drawing on paper and then transfer it with a pencil onto the plywood. Cut out the picture on plywood.
- Glue paper or sheets of plywood between the frame frames with glue.
- Place the frame on the base of the old lamp with socket.
Lamp frame assembly diagram
Japanese style lamp
DIY table lamp: the main advantages of the product
Table lamps are not considered the main sources of light; their main task is additional light directed to the right place. This device is most often installed on a table, which for the most part is not sufficiently illuminated. A limited amount of light in the workplace can not only lead to problems with the visual organs, but also provoke diseases of the musculoskeletal system.
The main advantage of a homemade lamp is its exclusivity
Important! Tabletop products, the light source of which does not rise above the table, are not lamps, but nightlights. Their main purpose is to create dim light, relaxing the nervous system and allowing a person to relax.
It is especially important to install a lamp in a place where there is an acute lack of natural light. In this case, you should properly secure the device on the table. Basic rules for placing a table lamp:
A product made with your own hands will fully meet your needs.
- If the main purpose of the device is to provide light when working at a desk, it should be installed taking into account which hand the person writes with: for a left-handed person - on the left, for a right-handed person - on the right. In this case, normal operation will not be interfered with by the shadow cast by the hand.
- In any situation, for whatever purpose the lamp is used, it must rise above the table surface by at least 35 cm, but not higher than 40 cm.
- If there is also a monitor on the table, the lamp should be higher than its top edge.
- It is important that the light from the lamp does not fall directly on the face and does not blind the eyes.
All these rules apply to both self-made lamps and purchased ones. Homemade lamps, in comparison with models available in retail outlets, have their own advantages, which include:
It is more pleasant to use a lamp made by yourself than a purchased one
- Exactly the right sizes. Before making a lamp with your own hands, you should carefully select the installation location and the available amount of free space, which will allow you to make the device ideal in size.
- Harmonious match to the interior. Beautiful table lamps, made independently, always harmonize perfectly with the interior, because the materials and colors are selected taking into account the design of the room.
- One of a kind product. If you look through photos of table lamps made by yourself, you won’t be able to come across two identical options. Even if the products are made according to a similar pattern, they will still differ in decorative elements or some small details.
Cutting out a table lamp with a jigsaw
There are many rules for cutting, but you need to rely on the most common ones. First you should cut out the internal elements and then start cutting out the outline. There is no need to rush when cutting. The main thing is to always keep the jigsaw straight at a 90-degree angle when cutting. Saw out the parts along precisely marked lines. The movements of the jigsaw should always be smooth up and down. Also, do not forget to monitor your posture. Try to avoid bevels and unevenness. If you go off the line while cutting, don't worry. Such bevels and irregularities can later be removed using a flat file or “coarse-grained” sandpaper.
Rest
When sawing, we often get tired. Fingers and eyes, which are always tense, often get tired. When working, of course, everyone gets tired. In order to reduce the load, you need to do a couple of exercises. You can view the exercises here. Do the exercises several times during work.
Assembly diagram for a plywood table lamp
Assembling the parts of our craft is not so difficult here. In order to correctly assemble the parts, you need to print out the instructions for assembling the table lamp, following which you will assemble your craft, to do this, follow from part number 1 to number 1 from number 2 to number 2, etc. After the parts are assembled into one common craft without any problems, then start gluing them. Pay special attention to elements marked Z-9 and Z-10; the diameter of the holes must be suitable for the cartridge you choose. The approximate scale for printing under E14 base is 220%.
Gluing the parts
The shelf parts must be glued using PVA or titan glue. You don't need to pour a lot of glue. It is better to tie the assembled craft with glue with a strong thread, tighten it and lay it out to dry. The craft glues together in about 10-15 minutes.
Varnishing crafts
If desired, you can transform our craft by covering it with Wood Varnish, preferably colorless. Varnishing is carried out using a special brush “For glue”. Take your time. Try not to leave visible marks or scratches on the craft.
You can download a template for cutting out a table lamp from plywood with a jigsaw on our website using the following link: Lampa-iz-faneryi.pdf (11582 Downloads)
Which type of product is more interesting for you?
How to make a chandelier with your own hands from thread tassels and hoops
CBC Life YouTube channel
What do you need
- Yarn;
- small photo frame;
- scissors;
- 3 sets of wooden hoops of different diameters;
- 3 identical short and 1 long metal chains;
- pliers;
- bulb;
- lamp pendant.
How to do
1. Wrap the yarn around the photo frame many times and cut. Take a small piece of thread and tie it on top of the yarn so that the ends remain. Cut the threads on one side, where the frame hole is located.
CBC Life YouTube channel
2. Remove the yarn from the frame and fold it in half. Place the knotted thread in the middle so that its ends are at the bottom and the loop is at the top. Details are in the video below. Cut another piece of thread and use it to tie a tassel just below the loop.
CBC Life YouTube channel
3. Make the rest of the tassels in the same way. The quantity depends on the diameter of the hoop. The threads should frame them tightly.
CBC Life YouTube channel
4. Remove the center hoops from all hoops - you won't need them. Open the large hoop and put some of the tassels on them by the loops.
CBC Life YouTube channel
5. Close the large hoop. Place the tassels on the rest in the same way.
CBC Life YouTube channel
6. Make nine pieces of thread. Place the middle hoop into the large one and tie them in three places at the same distance from each other.
CBC Life YouTube channel
7. Place a small hoop inside and tie it to the middle one in three places. These threads should be located approximately in the middle between those that connect the large and medium ones.
CBC Life YouTube channel
8. Turn the design over and straighten the tassels. Tie short chains to a large hoop at equal distances from each other.
CBC Life YouTube channel
9. Use pliers to open the end link of the long chain. Place the attached chains on it and close it.
CBC Life YouTube channel
10. Attach the pendant to the ceiling, screw in the light bulb and thread the lampshade through the bottom. A long chain can be hung, for example, on a hook mounted on the ceiling next to the base of the chandelier.
What other options are there?
There is another way to mount a chandelier. Place a metal ring on the lamp hanger and attach chains tied to the hoop to it. The detailed process is shown in the video below. By the way, the technology for making brushes in it is slightly different. And the author does not use a hoop, but metal hoops.
The tips of the brushes can be painted in a contrasting color:
Or make a gradient chandelier from colored threads, like here:
Lamp made of wooden slats
Such a lamp will look very original, and you will not have to spend a lot of time and effort on it. The most important thing is to strictly follow the instructions and observe the dimensions. The only tools you will need are a jigsaw, a router, a pencil, a tape measure, a caliper, and a ruler for correct markings. Additionally, you will need sandpaper, which will be needed to remove burrs.
As a material, you can use any wood, but preferably hardwood; on such thin planks it is easier to work with and is more durable. Strength parameters should also be taken into account, since different situations may occur during operation.
The most complex details in the design of this lamp are the side strips; their exact dimensions can be seen in the figure below. We recommend starting with them.
Click to enlarge
Once you have prepared the side posts, you can proceed to the remaining parts of the structure. They are not difficult to make, just follow the dimensions. Please read the drawings and dimensions carefully; we tried to make them specifically so that they would be understandable even to a simple schoolchild.
To begin with, it’s worth making frames, since there are most of these parts. It is important that all 16 planks, which will be parts of the internal frames, are absolutely identical, and the bevel angle on them does not differ, and is exactly 45°. If you are not very strong in geometry, then make a template, for this you just need to draw a square, draw one diagonal on it and cut it, the remaining acute angle will be exactly what you need.
When all the parts are ready, you can glue the frames, and then glue the entire frame with the side slats. To make the frame even, it is advisable not to glue it “by eye”. It is best to mark exactly the middle of the side of the frame and the middle of the thickness of the plank; these two marks should coincide at the time of gluing.
Next, to make the lamp you need to make the top frame; this is no more difficult to do than the side frames. But the lower frame, as you see in the diagram, is a little more complicated, since you will need to cut a groove in which the stand for the lamp and socket will be located. After this, it is enough to simply make the legs and install the cartridge, as shown in the diagram. In addition, the lamp needs to be varnished and, if desired, covered with stain to give the lamp a beautiful look and protect it.
Instead of plexiglass, you can make a frame from scrap materials, it can be canvas, tulle, colored paper and other materials. This table lamp will perfectly decorate your bedroom, and not only in a classic style. If you get a little creative with the framing, it will look good in the nursery, since the child will have a lamp with his favorite characters.
List of materials
Author's handwriting
Nowadays, things made by hand are highly valued. Such unique decorative works are not in vain considered works of art.
Such projects are individual in nature and will require a fairly large amount of financial resources from a person.
As a rule, such orders are not limited to hanging wooden chandeliers. They include the entire range of original lighting fixtures that will be installed in a specific room.
These could be, for example, floor lamps, wall lighting, outdoor sconces that can create lighting effects, etc.
- How to choose office LED lamps - see the instructions here! Photos of ready-made solutions + electrician’s answers
- Choosing the best linear LED lamps: types, installation rules and tips for choosing LED lamps (130 photos)
- Vertical blinds: features of the mechanism, pros and cons, photos of beautiful design
The following ideas look quite interesting:
- Table lamp with stand in the form of a wooden stump;
- Stylish round chandelier;
- Cone-shaped chandeliers with wood inserts;
- Wooden table lamp in the shape of a man, etc.
The most optimal choice for installing such a product is the living room or bedroom. It is there that they will demonstrate all their decorative advantages.
Table lamps from scrap materials: 7 master classes on how to make a lamp
- Tie the cable with the plug in a knot (or put on a washer to fix it
- Select your rack (it could be a glass or plastic bottle, jar, clay base, etc.) and run the cable through it
- Fix the light bulb socket on the stand and attach the cable to it
- Secure the frame (it can be made of wire or a bottle)
- Put on a lampshade
Wooden lamps: 100 photos Best Ideas of 2022
Thanks to the flexible base, this design is very convenient to use: you can direct the light to the desired area.
Expert opinion
It-Technology, Electrical power and electronics specialist
Ask questions to the “Specialist for modernization of energy generation systems”
Lampshade To do this, we need to select any piece of wood we like, process it correctly, namely, dry it, apply impregnation against pests and varnish it. Ask, I'm in touch!
Casket
The box is a lightweight version of previous creations. However, it is not without patterns, and is sometimes even presented in an oval form. It is better to start with a rectangular model, because... its production does not require complex decisions:
- First, a drawing of the craft is drawn;
- Next, four walls, a bottom and a lid are cut out of a sheet of plywood;
- The next stage is to cut holes in the walls and lid (optional, but desirable)
- Next, the edges of all elements are smoothed using a grinding machine;
- The final step is to fasten the walls to each other, after which comes the fastening of the bottom and lid to the walls, respectively.
Moreover, to attach the lid you will have to purchase decorative canopies. The walls are fastened to each other and the lid to the walls using the tongue-and-groove method or using screws.
The finished box, like light crafts made from plywood, welcomes painting and other decorative designs, which will be discussed a little later.
How to make a moon lamp out of paper with your own hands
Shot: @Crafts Junction / YouTube
What do you need
- Paper napkins, towels or toilet paper;
- PVA glue;
- water;
- brush;
- plastic ball;
- White paint;
- black paint;
- sponge;
- lamp base;
- plastic bucket with lid;
- glue gun;
- knife;
- bulb;
- pencil;
- wire.
How to do
Separate napkins, towels or toilet paper into single-layer pieces. Start gluing them to the ball by coating it with glue lightly mixed with water. Place the pieces of paper on top of each other and also coat the top with glue.
Shot: @Crafts Junction / YouTube
Thus, glue the entire ball in several layers. Dry the paper completely.
Shot: @Crafts Junction / YouTube
Cover the figure with white paint and let dry. Mix white paint with a little black to create a gray color. Use a sponge to make gray spots on the ball.
Shot: @Crafts Junction / YouTube
Glue the lamp base to the back of the cover using hot glue. Cut a large hole in the bottom of the bucket. Connect the lid and bucket and screw in the light bulb.
Shot: @Crafts Junction / YouTube
Draw a circle on the ball with a pencil. You can circle a glass or some other object. Cut along the marked line and remove the plastic.
Shot: @Crafts Junction / YouTube
Place the ball on the light bulb. For reliability, you can glue the figure to the base.
Tips and tricks at work
Experts recommend that novice lighting equipment designers pay attention to the following recommendations and tips:
- When working with plywood or wood, use safety glasses or a mask;
- from a lamp with one light bulb there are two wire strands - one phase, the second zero, the phase always goes through the switch, zero is connected to zero directly;
- when a lamp has many bulbs, there will be more wires, but the switching circuit works on the same principle;
- It is optimal to place wall lamps at a height from the floor covering from 1 meter 20 centimeters to 1 meter 60 centimeters;
- in corridors, the installation height of sconces is recommended at 2 meters.
We can conclude that anyone with skills in working with a jigsaw and knowledge of electrics can make their own lighting device from plywood or wood, not only in the form of a chandelier or floor lamp, but also in the form of a wall lamp for a children’s room.
Design Features
The table lamp consists of the following elements:
- Electromechanical part. Thanks to electromechanics, electricity is supplied from the mains to the lamp socket.
- Support part. This element supports the illuminator or reflector.
- Illuminator. It is a lamp under a lampshade or in a reflector.
In lamps with stands, the main aesthetic is usually the design of the lampshade, with the stand acting as an accessory. In articulated models the opposite is true.
Electromechanical part
The electrical circuit of a table lamp includes a power plug, cable, switch and socket. In some cases there is a voltage controller.
The E27 chuck is installed only on a threaded shank (M10, M12). The cartridge for a narrow base (E14) is also installed on a thread (another option is a lamella in the form of a metal strip). The best option for a table lamp is chandelier sockets equipped with threaded flanges. A metal faceplate with a lampshade structure or a hinge clamp clamp is clamped between the flanges. The figure below shows lamp socket options.
During production, special attention is paid to electrical safety. To do this, adhere to the following rules:
- The cable must be round, covered in a double insulating layer.
- The current-carrying conductors are selected to be flexible and contain many wires. A suitable core cross-section is from 0.35 sq. mm or more.
- Areas where the cable is laid through conductive parts, as well as damp places, are protected with dielectric bushings. Knees or cuffs are also used.
- The cable tension inside the lighting fixture should not be excessive.
The figure below shows a diagram of the mechanical components of a rack table lamp support.
Before insertion, the cable is tied from the inside with a knot or threaded through the opening of a dielectric locking washer. This is done so that after tensioning the cable from the outside, it does not lose the integrity of the internal part.
Hinge Features
The design of a table lamp stand is simple, unlike a hinged bracket. The wire to the lamp socket is supplied through fireproof dielectric elbows. If the hinge link is solid, the cable is routed along its top (right and center). At the same time, they are carefully fixed to the link. In the case of tubular links, the cable is placed inside them. Cable loops are created above the kinks of the links (diameter of at least 60 mm, or from 12 conductor diameters). In the area of cable transition from the bracket to the illuminator, the loop is larger - from 90 mm, or 20 cable diameters.
The position of a table lamp with a hinge varies widely, so it is not easy to ensure its stability with a load. Because of this, a table lamp with hinges will require screw clamps. For a homemade lamp, you can use, for example, a small carpenter's clamp. What is needed is carpentry, not metalworking, since the latter lack a soft coating.
To create a holder from a clamp, use a metal tube socket (inner diameter - at least 10 mm, length - 120-150 mm). A longitudinal groove is sawed in the tube with the same thickness as the clamp holder. The socket is fixed to the clamp using through bolted connections. A metal pin with an eye is installed in the socket, acting as a stationary element of the lower hinge of the bracket.
Note! The clip is made of high-carbon steel so that the clamp does not deform under the pressure of the parts. However, such steel is brittle, so the drill must be made of a durable alloy. Do not hit the clip with hard objects or try to bend it.
Reflectors
For articulated table lamps, only reflectors are suitable. The lampshade is too heavy for this type of lamp. A parabolic type reflector is required because it produces a very even, directional light. You can purchase a reflector or make it yourself. Usually only single reflectors are made independently. However, the lighting from them is not the most uniform. But high-quality reflectors (fourth order of curvature) cannot be made on your own; you will have to buy this part.
The reflector on the hinged bracket needs an upper opening to remove heated air. Although LED and fluorescent lamps heat up moderately, the life of the product is still reduced, so the removal of hot air is highly desirable.
General rules
There are a huge number of ideas for all kinds of lampshades, chandeliers made from branches, driftwood, and boards. In general, the process of making a chandelier comes down to making a frame, providing wire connections for sockets and elements for fixing the product to the ceiling.
To make the wires invisible, you can make grooves in the wood. Secure the wiring with special plastic ties or staples. If it is invisible from the outside, then there is no need to make grooves. Sometimes the wires are left completely visible - this is a design decision.
Wood must be used without rot or wormholes. If you find some branch or snag in the forest, then inspect it; perhaps it has begun to rot and collapse. This type of wood is completely unsuitable for a chandelier, unless it can be trimmed.
Some people are interested in how to make a beautiful chandelier from driftwood. One idea is this. The driftwood must first be cleaned, peel off the bark if there is any, cut off all excess, and sand the surface. It is best to use such a figured tree for a lamp stand. If you want to make a chandelier, you can hang a piece of driftwood on chains from the ceiling and run a wire to it, threading it through the links. In this design, hollow cylinders can be cut out of wood for cartridges.
You should not pile up a lot of branches, as this will make the chandelier heavier. In addition, such a product does not always look harmonious. A large volume chandelier is better suited for spacious rooms, while in a regular kitchen small lampshades will look more impressive.