The greening trend has affected all areas of the forestry industry, not excluding the segment of laminated materials and structures. For gluing, manufacturers use special compounds that, under pressure, penetrate into the deepest pores of the wood, providing the finished products with a high margin of safety. With the right choice of glue, wood can remain a “breathable” material, will not release toxins and will retain these properties throughout the entire life cycle of the product.
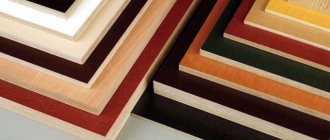
OSB, fibreboard, MDF, chipboard, LVL, CLT - this parade of abbreviations can be combined with the concept of “laminated wood products”. For each type of product, manufacturers select their own glue based on the properties of wood raw materials, technological features of production, as well as the design, operational and aesthetic characteristics of finished products.
Emphasis on environmental friendliness: it is better to choose a harmless material for gluing wood
However, there are requirements that are common to all adhesives without exception: good gluing quality, ensuring high strength of the adhesive seam, resistance to temperature, chemical and humidity influences, reliability and durability. Recently, manufacturers and users are paying more and more attention to another important characteristic - the environmental friendliness and safety of the materials used. And if there are no questions about wood, then the adhesive compositions used to connect individual wooden elements often raise doubts about their harmlessness to humans and the environment.
“The environmental safety of the materials and adhesives used has been and remains an important production factor. It is important both in the production of wood materials themselves from waste from the wood processing industry (MDF, OSB, chipboard) and in the production of structures from solid wood (laminated veneer lumber, furniture panels, furniture).
By environmental safety of products we mean the absence of their negative impact on the environment during the manufacturing and disposal process, on personnel during production and on users during the operation of finished products. Compliance with these parameters is monitored at all stages of the product life cycle.
It is safety, all other things being equal (moisture resistance, strength and other technical indicators of the resulting adhesive joint) that will further determine the possible area of application of glued materials: indoors in finishing and making furniture, in exterior finishing of premises, in house construction and other areas,” the specialist lists technical support of Polymer-sbyt LLC (UMACOLL® trademark) Svetlana Burova.
“Of course, manufacturers of furniture components cannot remain aloof from the struggle for environmental friendliness and safety of their products. And every year this struggle gets tougher. It covers the entire life cycle of a furniture product from its “birth” during the production process to its “death” at the time of disposal. For example, polyurethane (PUR) adhesives are increasingly used in the production of laminated veneer lumber and CLT panels in Europe.
They replace adhesives based on urea-formaldehyde or melamine that have been used for many years. Also popular are PUR hotmelt adhesives, which have a wide range of applications including edge bonding, face cladding, profile wrapping and other processes. They are characterized by a reduced content of isocyanate monomer, do not require the creation of special labor protection conditions and are absolutely harmless to both production workers and users of finished products.
On the other hand, biocomponents are increasingly used in adhesive formulations, which makes them cleaner at the stage of product production, its operation and subsequent disposal,” notes General Director Nikolai Kechaev.
For reference, the list of harmful chemicals released from furniture is contained in the Technical Regulations of the Customs Union “On the Safety of Furniture Products” (TR CU 025/2012), effective from July 1, 2014. Requirements for wood boards, plywood and other glued materials are contained in the regulatory documentation for them and the guidelines of the Ministry of Health of the Russian Federation “Sanitary and hygienic assessment of polymer and polymer-containing building materials and structures intended for use in construction and industrial buildings” (MU 2.1.2.1829- 04).
Glued laminated timber technology
4.1. Application area of laminated timber
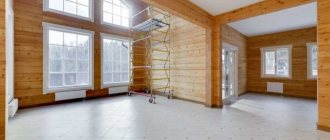
The production of construction parts from laminated veneer lumber significantly improves the strength and performance characteristics of products. Beams made of laminated veneer lumber are used in the construction of floors, roofs and ceilings (Fig. 28). Walls are also made from laminated veneer lumber (Fig. 29).
Rice. 28 The use of laminated wood beams in wooden house construction
Rice. 29 House walls made of laminated veneer lumber
Glued laminated timber is used in the manufacture of wooden windows (Fig. 30).
Rice. 30 The use of laminated veneer lumber in the manufacture of windows
When you don’t need to make a choice: how to choose a material for gluing wood and not make a mistake
Not all compositions are suitable for the production of glued materials and structures intended for direct human use. Some adhesives contain many harmful components, and although after hardening most of them do not emit volatile substances, some ingredients have a long final polymerization in the deep layers of wood. The finished product can be considered environmentally friendly only if it strictly complies with GOST and SanPiNam.
“The quality of gluing is clearly regulated by regulatory documentation, and conscientious manufacturers do not use products that do not comply with them. High-quality adhesives must satisfy absolutely all current standards and regulations, while meeting the manufacturer’s requirements for moisture and heat resistance of products made with their use.
So the concepts of “sustainable” and “eco-friendly” are not mutually exclusive and can be specific to the same product. But you should understand that each group of products (plywood, OSB, laminated timber, etc.) has its own criteria for moisture resistance, heat resistance and environmental friendliness,” says Svetlana Burova.
Nikolay Kechaev is also confident that the use of more environmentally friendly components should not come at the expense of the quality of products. In his opinion, the use of modern safe adhesives does not reduce the resistance of finished products to moisture and temperature.
“New adhesives, created taking into account higher requirements for environmental friendliness, must provide stable technological properties. This may lead to a slight increase in the price of a particular glue, but may not affect its cost at all,” comments the CEO.
Svetlana Burova confirms that the cost of new generation adhesives, which minimize the content of harmful substances, may be higher than the price of previously used ones. But manufacturers of glued products are willing to pay more, because compliance with environmental requirements provides them with significant competitive advantages in the sale of finished products and has a positive effect on the company’s image.
Main types of defects
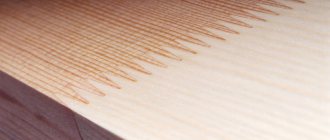
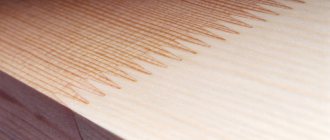
A high-quality connection provides the spliced lamella with the strength of the original wood and should not be very noticeable. If the technology is violated or the operator is inattentive, the following defects may be present in the finished product received from the splicing line:
| Defect | Cause of occurrence |
| There is empty space between the spikes | Insufficient pressing or uneven application of the adhesive composition |
| The resulting product does not have the required strength | The spikes received less than the required amount of resin (glue) |
| Stepping - stepped surface of the finished part | Uncalibrated workpieces (of different thicknesses) are supplied for splicing. The resulting product is rejected and used for further processing |
| Helicality - the lamellas have planes with a slope - the final product can have the shape of a propeller. | Poor-quality workpieces are obtained from the use of parts with conical planes or due to incorrect initial settings of the machine, when the right angle between the plane of the cutting tool and the edge of the workpiece is not maintained. The permissible deviations per meter of the workpiece in length are 3 mm, in width – 2 mm. These products are also recyclable |
| Finished parts may have areas with torn wood fibers in the tenon joints. | Formed when working with blunt instruments or violating technology. Products with torn fibers are also rejected. Defective products are spliced again to achieve a high-quality product. |
All spliced workpieces must be left to rest for two to three days so that the glue used has time to polymerize and acquire working qualities. After aging, the workpieces are subjected to finishing processing and a product completely ready for use is obtained from it. The range of finished products may include painted floor slats, platbands, skirting boards, laminated veneer lumber or laminated boards.
The use of automatic and semi-automatic splicing lines makes it possible to find use for off-grade or oversized wood and significantly expand the range of products.
No law - no reason
In the liquid state, before polymerization, most of the adhesives used in the production of glued structures belong to the first hazard class. You can check this by studying the safety data sheet for a specific adhesive system. However, this does not mean that toxic compounds are completely absent in modern Russian language.
“Unfortunately, in the Russian market of chemical materials in general and adhesives in particular, the desire of manufacturers to use less toxic or harmful materials is far from desired. The reasons lie both in the lack of a strict legislative framework and in the desire to gain benefits here and now, without thinking about the future.
Greater social responsibility for the fate of consumers of products manufactured in violation of safety requirements could encourage industry to switch to environmentally friendly materials if this were supported, for example, by providing tax benefits from the state,” says Nikolai Kechaev.
“There are no direct restrictions on the use of adhesives of one type or another; manufacturers are limited by standards for the release of harmful substances from the finished product for various categories of goods. Products that do not meet the standards will simply not be allowed for sale.
Therefore, when choosing an adhesive composition for a product, manufacturers take into account the possibilities of its sale, taking into account the resulting safety category,” explains a technical support specialist at Polimersbyt LLC.
Adsorption theory
This theory considers the formation of an adhesive joint as a multi-stage process. At the first stage, as a result of thermal (Brownian) motion, movement occurs - migration of large molecules of the adhesive polymer from the solution to the surface of the substrate. The second stage of bonding, according to this theory, is adsorption. When the distance between the molecules of the glue and the substrate becomes less than 5 A, intermolecular forces will begin to act, which, as already noted, can be of a very different nature: dispersive, inductive, orientational and hydrogen, with a binding energy of 0.1 kcal/mol (dispersive) up to 10 kcal/mol (hydrogen). The third stage of gluing is the removal of solvents from the adhesive solution, increasing the cohesive strength of the adhesive so that its cohesion achieves adhesion. If viscous polymers are used as an adhesive, then the third stage will be the process of strengthening the polymer.
The adsorption theory of adhesion has become widespread abroad, although it has a number of disadvantages. In addition, it does not take into account the phenomena of electrification of adhesion planes, as well as the peculiarities of the behavior of polymers that distinguish them from liquids and elastic bodies.
Under the CH2O sign
Perhaps the most important “horror story” when using glued materials and structures is the presence of formaldehyde in them. It has a general toxic, carcinogenic and mutagenic effect on the human body, where it enters mainly in the form of vapors emitted by new furniture, some paints and finishing materials.
The degree of harm caused to the body directly depends on the volume of its release (emission) and the duration of exposure. Formaldehyde tends to accumulate in some organs, and with systematic exposure, sensitivity to it increases.
“However, formaldehyde cannot be completely eliminated from our lives. It is produced in small quantities by living organisms (it is involved in metabolism), and even such an environmentally friendly material as wood contains a small amount of formaldehyde (<0.03 ppm).
The general trend throughout the world is strict regulation and reduction of the formaldehyde content in products to a natural, environmentally friendly level, at which the body is not exposed to harmful effects. The permissible level of formaldehyde emission from wood materials in Europe, the USA and Japan is set by internal standards: for Europe these are classes E1 and E2, for Japan - F* - F****, for the USA - CARB1 and CARB2.
In Russia, according to the degree of formaldehyde emission, the material is assigned class E1 or E2. The IKEA company in its standard IOS-MAT-003 establishes class E0.5 (formaldehyde emission 0.05 ppm), GOST 3916.1 - 2022 also allows this class.
Since 2006, class E1 is mandatory for plywood and wood panel materials in Europe (not more than 0.124 mg/m3). Such materials can be used in the production of household furniture and furniture for public premises, as well as products used inside living rooms,” notes Svetlana Burova.
In her opinion, there is currently no need to abandon formaldehyde adhesives. The very presence of this substance in the product should not be scary; the main limiting factor in this case is its subsequent release into the environment.
This can be confirmed by a number of modern adhesive products containing formaldehyde, the environmental safety of which has been tested and confirmed by current standards. Examples include low formaldehyde emission formaldehyde resins (PF, MF, MUF, RF and PRF) or isocyanate resins (PMDI).
Formaldehyde-free adhesive products are also available on the market - these are polyurethane adhesives and EPI (emulsion polymer isocyanate) adhesive systems. Scientists continue to search for safe compounds, experimenting with the formulations of adhesive compositions, creating new sorbents for toxic substances and using more environmentally friendly starting components.
A method has already been found for preparing formaldehyde-based glue using readily available aluminosilicates with a rigid frame structure of synthetic and natural origin. The strength of products made using this aluminosilicate-modified adhesive increases compared to products made using a traditional adhesive formula.
Nikolai Kichaev, in addition to this, notes that in some cases, adhesive compositions not only do not cause harm to humans and nature, but also help reduce the volume of harmful fumes from products. For example, this effect is achieved by covering chipboards with decorative films and edges. Primers, putties and varnishes can also act as such “barrier” finishing materials.
They can reduce formaldehyde emissions from 2 to 10 times. If initially a dry board contains 40–100 mg of formaldehyde per 100 grams, then after finishing with a laminate, the emission decreases to 10–18 mg, if the finishing is done without sealing the ends, and with sealing - to 2–4 mg. To reduce the toxicity of chipboard used in construction, formaldehyde-binding paints and enamels are used - thanks to this finishing, toxic emissions from the boards are reduced by 50–60 times.
Selecting a splicing scheme depending on the load on the finished product
If the product will only be subjected to compression, then it is enough to use the simplest type of splicing, connecting the parts with an overlay (oblique or straight cuts). To increase the resistance of the product under lateral loads, a rim lock type connection is used. In this case, an overlay is made using beveled ends or with an end tenon.
For products designed for tensile loads, padlock connections (notched or simple) are used. To perform it, recesses and protrusions are cut out on the workpieces to be joined. The serrated rim lock design allows for high joint strength that can withstand compressive, tensile and lateral loads.
The double pan joint is a straight overlay with a tenon called a dovetail. Shows high strength under different loads - lateral displacements, tension and compression.
The “sliding lock” connection scheme in the form of an overlay with a beveled stop can impart strength to a product subject to tension and lateral loads.
There is a scheme in which increased rigidity of the structure of overhead locks is achieved by driving additional wedges between the protrusions. Such locks are called tension locks. They are made either detachable or glued together. Detachable tension locks should be oiled or painted, which will help protect the lock from moisture.
Once again about processing
It is important to remember about the environmental friendliness of laminated materials and structures not only at the stages of production and operation, but also when a laminated wood product completes its life cycle. The best-case scenario in terms of environmental impact is the recycling of wood products for secondary use. Unfortunately, in our country it is still associated with a lot of difficulties.
This was clearly demonstrated by the experience of implementing the “New Life of an Old Cabinet” project, which was organized by the Association of Furniture and Woodworking Industry Enterprises of Russia (AMDPR). IKEA also became its participants - today they are the only players in the Russian woodworking market that offer services for collecting old furniture for its subsequent processing.
Of course, this is negligible. But even if there were more processing capacities, this is not enough for success - active involvement in the chain of government bodies and the population is necessary. To make it interesting for citizens to support the wood products processing cycle, collection points and competent logistics are needed. So far, the Russian timber industry cannot boast of this.
“Companies themselves are engaged in establishing logistics chains for the supply of recycled wood and used furniture. That is, the IKEA and Kronospan projects are, by and large, an internal corporate initiative, which can hardly be extended as an algorithm to the Russian Federation as a whole. This is still a big problem in our country,” noted AMDPR General Director Timur Irtuganov at the Woodindex-2020 online conference “Investments in the timber industry and pulp and paper mills: growth points and development directions.”
In addition, serious limiting factors in the development of recycling of wooden products are the lack of a legislative framework on this topic, as well as the lack of specialized equipment and investments for its acquisition.
Theories of adhesion. Mechanical theory of bonding
The earliest theory explaining the effect of adhesion and gluing of bodies is the mechanical theory of gluing developed by McBain. Bonding strength, according to this theory, is explained by the penetration of liquid or liquid-viscous glue into the pores of the bonded surfaces, followed by its hardening.
Indeed, the large surface covered with glue (the so-called glue locks), the shape of the pores into which the glue penetrates, the strength of the glue itself and the peculiar isthmus bridges that make up the pore walls provide a high gluing effect.
Unfortunately, the mechanical theory is not able to explain the strong bonding of relatively smooth surfaces of metals, glass, porcelain, etc. It also does not explain why smooth planed wood surfaces sometimes bond better than fine-haired ones. This theory does not take into account the most important factor - the nature of the bodies being glued and the nature of the glue itself. It arose at a time when, as a rule, protein adhesives (hidewood, gelatin, casein) were used as an adhesive, and wood was used as a bonding material.
Applying glue by hand
Adhesives are usually applied to one of the surfaces to be bonded. Only when gluing surfaces that strongly absorb glue after application (ends, ends), use double-sided application.
In Fig. 2 shows devices for applying glue.
Rice. 2. Device for applying glue manually: a – with an upper tub; b – with a lower bath; 1 – bath; 2 – glue; 3 – handle; 4 – dosing roller; 5 – glue application roller; 6 – adjustable gap; 7 – ruler
A device with an upper bath (Fig. 2, a) consists of a bath 1 with glue 2, two metal rollers - dosing 4 and glue-applying 5, handle 3. The glue-applying roller is lined with soft porous rubber or foam rubber. The supports of both rollers are fixed in the guides, but can be moved up or down, which allows you to adjust the size of the gap 6 between the lower edges of the walls of the bath and the surface of the metering roller. This way you can change the amount of glue supplied. When applying glue, the device is held by the handle and rolled on the surface of the base.
A device with a lower bath (Fig. 2, b) consists of a bath 1, a glue-applying roller 5 and a ruler 7 for removing excess glue from the roller. The device is installed on the table. To apply the glue, the workpiece is passed over a roller.
How to glue wooden boards into a board
13 classification of methods for restoring parts
To properly glue furniture panels, you should first acquire special equipment:
- Planing machine;
- Circular Saw;
- Hammer;
- Thicknesser for drawing marking lines;
- Long ruler, tape measure and pencil;
- Clamps or homemade tools for tightening boards;
- Surface and belt sanders for stripping wood. Instead, you can use sandpaper, screwing the wood onto the block, but cleaning will take more time;
- Electric planer;
- Wooden boards.
- Glue.
To successfully glue boards, it is important to choose high-quality and reliable glue:
- Isofix G818. Professional wood glue made on the basis of polyvinyl acetate. It does not contain solvents, is characterized by high moisture resistance and powerful fixation, and is used for interior and exterior work, gluing any type of wood. Becomes transparent after drying. Product cost: 232 rubles per 500 ml package.
- Joiner or Super PVA Moment. Heat-resistant, quick-setting and high-strength adhesive designed for gluing all types of wood, chipboard, MTF, DVM, veneer, plywood, fittings and laminate. After drying it becomes transparent. Cost: 330 rubles per 750 ml package.
Instructions - how to glue a shield without clamps and clamps
Once you have all the equipment, tools and suitable glue ready, start gluing the shield. This process consists of several stages.
Preparing the boards
The wood for making shields must be of the same type.
Types of wood that are used to make furniture panels:
- Birch;
- Pine;
- Oak;
- Clear;
- Larch;
- Aspen.
The wood must be dry, smooth and free of knots. It is best to buy ready-made timber and cut it at right angles into pieces of the required size. If there are any unevenness on the bars, use a planer.
The thickness of the boards should be several millimeters greater than the final parameters of the shield, since after gluing and drying they will need to be refined by sanding. To do this, select a workpiece with a width to thickness ratio of 3:1. The boards should be no wider than 15 centimeters so that excessive stress does not arise in them during drying.
Preparation for gluing
Before connecting all the boards, they must first be adjusted so that you get a beautiful shield:
- Build a flat surface so that it is convenient to glue the board from the boards. For this, it is best to use a chipboard sheet;
- Attach the strips to the two edges of the chipboard, adjust their height in accordance with the height of the workpieces;
- Place the boards between the planks so that they fit snugly together. If there are gaps, remove them with a jointer. Carefully examine the wood grain of each specimen. The lines of adjacent blanks should connect smoothly and then the shield will turn out beautiful. To adjust the lines, move the boards along the length;
- After placing the blanks on the chipboard sheet, mark them or mark them with figures so that you can quickly put the board back together.
Gluing process
Once you have adjusted the boards, glue them together one by one.
Cover the surface to be glued completely with glue.
It is important not to apply too much glue, otherwise it will cover the seams. But do not neglect the glue - its deficiency will negatively affect the strength of the shield; Press the greased boards firmly one to the other; Attach two more planks perpendicular to the two planks located on both sides of the chipboard and secure them with self-tapping screws
This will avoid bending of the furniture board when gluing; To increase the adhesion of the bars, use wedges. Press the boards until the first drops of glue appear on their surface; Let the shield dry for about an hour. Then remove it from the surface of the chipboard sheet. Do not touch the material for another day.
VIDEO INSTRUCTION
Final stage
As soon as the homemade furniture board dries, the wood must be sanded, planed and traces of glue removed.
This will give you a smooth and even surface:
- Place coarse sandpaper in the sander to pre-sand;
- Then treat the surface of the shield with a surface grinder;
- If you notice lint, you can get rid of it with a small amount of water. Pour it onto the surface of the furniture board and wait until it dries. After this, the fluff will rise and can be easily removed with sanding equipment.
By following these instructions, you will create a high-quality furniture board that will become an excellent basis for the construction of bedside tables, tables, shelves and many other items for your home.
Chemical theory
It appeared relatively recently and explains the formation of a strong bond not by physical, but by chemical interaction between polymers. In this case, chemical bonds are highly directional and short-range; their formation is possible provided that the distances between the nuclei of covalently bonded atoms do not exceed 0.1–0.2 nm. It has been proven, in particular, that when gluing wood with urea and phenol-formaldehyde resole-type adhesives, chemical bonds are formed between the hydroxyl groups (OH) of cellulose macromolecules and methylol groups (CH2OH) with the formation of ether groups. To obtain a strong bond, an optimal number of functional groups and their appropriate arrangement are necessary. There is a significant influence of the molecular weight of the polymer on its adhesive properties. For example, adhesives with low molecular weight have good adhesion due to their ability to wet hard surfaces well, but they have low cohesive properties.
Chemical theory also emphasizes the great influence of internal stresses that arise during curing of the adhesive and during its shrinkage on the strength of the adhesive joint.
Electrical theory of adhesion
The theory was proposed by B.V. Deryagin and N.A. Krotova (USSR); it is based on the phenomena of contact electrification that occurs during close contact between a dielectric and a metal or between two dielectrics.
The adhesive system - the material being glued, according to this theory, is identified with a capacitor, and the double electrical layer that appears when two dissimilar surfaces come into contact is identified with the capacitor plates. When the glue is separated from the surface or, which is the same thing, the capacitor plates are separated, a potential difference arises, the magnitude of which increases with the increase in the gap between the surfaces being separated to a certain limit, when a discharge occurs. The work spent on spreading the surfaces turns out to depend on the speed: the lower the speed, the less work is required to separate the surfaces, because the charges have time to flow off. With rapid dilution of surfaces, the high initial density is maintained until the onset of a gas discharge. This ensures that the work of adhesion is of great importance, since the action of electrostatic forces of attraction is overcome over relatively large distances.
As for the reason for the formation of a double electrical layer at the interface between two surfaces (glue - glued material), there are two assumptions. In one case, its appearance is explained by the adsorption of glue by a solid surface and the orientation of the polar groups of the glue on this surface. In the second case, when it comes to gluing metal, the formation of this layer is explained by the transfer of electrons into the glue. The electrical theory of adhesion is not universal, since it cannot satisfactorily explain the formation of an adhesive bond between polymers that are similar in nature; does not explain why nonpolar polymers, in which an electrical double layer is not formed, can still form a sufficiently strong bond.
It should also be pointed out that a number of characteristic phenomena during the destruction of adhesives, which serve as the main proof of the correctness of the electrical theory of adhesion, appear only under certain conditions, when the adhesives are previously well dried. When freshly prepared adhesives delaminate, no electrical charges are observed, and the strength of the adhesives is still quite high.
Film veneering
Covering furniture with films is as follows. A sheet of film is placed on the prepared surface of the base. If the film does not have adhesion to the base, then glue is first applied to the base. A polished metal gasket is placed on top of the film, and a shock absorber made of cardboard or asbestos fabric is placed on it. The shock absorber increases the service life of polished pads and makes it possible to more evenly distribute pressure on the base during pressing. If it is necessary to obtain an embossed coating, then instead of metal spacers, a fiberglass matrix is used, which has anti-adhesive properties to the film. During the hot pressing process, the matrix, depending on the pattern applied to it, leaves an embossing on the finished surface.
The formed bags are loaded into a hydraulic press and pressed for 8–10 minutes at a temperature of the press plates of 110–150°C. The specific pressure during pressing is 20–25 kgf/cm2 if gluing occurs without the use of adhesives, and 5–8 kgf/cm2 when using adhesives.
Table of contents
Chapter II. Properties of metals and their alloys
- § 1. Physical and chemical properties of metals and alloys
- § 2. Mechanical properties of metals and alloys
- § 3. Technological properties
- § 4. Technological tests
Chapter III. Iron-carbon alloys
- § 1. Basic information about the production of cast iron
- § 2. Classification of cast irons
- § 3. Basic information about steel production
- § 4. General classification of steel
- § 5. Carbon steels
- § 6. Alloy steels
Chapter VI. Basics of Heat Treatment of Steel
- § 1. Equipment of thermal shops
- § 2. Heating rate of metal during heat treatment
- § 3. Annealing and normalization
- § 4. Hardening
- § 5. Vacation
- § 6. Aging of hardened steel
Chapter X. Organization of the workplace and safety precautions
- § 1. Organization of a mechanic’s workplace
- § 2. Safety precautions when performing plumbing work
- § 3. Fire prevention measures
- § 4. Industrial sanitation and personal hygiene
Chapter XI Basics of Measurement
- § 1. General information about the basics of measurement
- § 2. Classification of measuring instruments
- § 3. Accuracy and error of measurement
- § 4. Line measures of length
- § 5. Vernier tools
- § 6. Micrometric instruments
- § 7. Templates
- § 8. Probes
- § 9. Special tools
- § 10. Plane-parallel gauge blocks
- § 11. Lever-mechanical devices
- § 12. Means for controlling flatness and straightness
- § 13. Tools for measuring angles
Chapter XII. Tolerances and landings
- § 1. Processing accuracy
- § 2. Surface cleanliness
- § 3. Interchangeability of parts
- § 4. Nominal, actual and limiting dimensions
- § 5. Concept of admission
- § 6. Fit, clearances and interference
- § 7. System of tolerances and fits for smooth cylindrical products
- § 8. Accuracy classes
- § 9. Designation of tolerances on drawings
Chapter XIII. Marking
- § 1. The concept of marking. Types of markings
- § 2. Marking plates
- § 3. Tools for planar marking
- § 4. Marking technique
Chapter XIV. Chopping
- § 1. The concept of felling
- § 2. The essence of the metal cutting process
- § 3. Tools for cutting
- § 4. Cutting technique
- § 5. Mechanization of the cutting process
Chapter XVI. cutting
- § 1. Tools for manual cutting
- § 2. Basic cutting techniques with scissors
- § 3. Basic cutting techniques with a hacksaw
- § 4. Cutting pipes
- § 5. Mechanized cutting
Chapter XVII. Filing
- § 1. The essence and purpose of filing
- § 2. Files
- § 3. Technique and control of filing
- § 4. Types of filing
- § 5. Mechanization of filing work
Chapter XIX. Drilling
- § 1. The essence and purpose of drilling
- § 2. Drills
- § 3. Sharpening drills
- § 4. Manual and mechanized drilling
- § 5. Drilling machines
- § 6. Installation and fastening of parts for drilling
- § 7. Fastening drills
- § 8. Elements of the cutting mode when drilling
- § 9. Types of drilling
- § 10. Countersinking. Countersinking. Countering
- § 11. Deployment
- § 12. Deployment technique
Chapter XX. Threading
- § 1. Thread elements
- § 2. Thread systems
- § 3. Tools for thread cutting
- § 4. Thread cutting technique
- § 5. Mechanization of thread cutting
Chapter XXI. Riveting
- § 1. General information about riveting
- § 2. Types of rivets
- § 3. Types of rivet joints
- § 4. Tools for hand riveting
- § 5. Manual riveting process
- § 6. Mechanization of riveting
- § 7. Coinage
Chapter XXII. Spatial marking
- § 1. Devices for spatial marking
- § 2. Tools for spatial marking
- § 3. Techniques and sequence of marking
Chapter XXIII. Scraping
- § 1. The essence and purpose of scraping
- § 2. Scrapers
- § 3. Sharpening and finishing of scrapers
- § 4. Scraping straight surfaces
- § 5. Scraping curved surfaces
- § 6. Mechanization of scraping
- § 7. Replacement of scraping with other types of processing
Chapter XXIV. Lapping
- § 1. The essence and purpose of lapping
- § 2. Abrasive materials used for lapping
- § 3. Tools and materials. used for lapping
- § 4. Lapping technique
Chapter XXV. Soldering and tinning
- § 1. The essence and purpose of soldering
- § 2. Materials for soldering
- § 3. Tools and devices for soldering
- § 4. Soldering technique
- § 5. Tinning
Chapter XXVII. General concepts about technological processes in mechanical engineering
- § 1. Types of production
- § 2. Production and technological processes and their elements
- § 3. Main stages of technological process development
- § 4. Allowances
- § 5. Technological documentation
- § 6. Technological discipline
Plastic cladding
Decorative laminated plastics are glued onto particle boards, wood-fiber boards, plywood, and solid wood.
Plastics should be glued to the base so as not to damage their front surface, i.e., so that the gloss does not fade or the surface wrinkles. To do this, plastics are glued at relatively low specific pressures (3–10 kgf/cm2) and low temperatures, the limit of which is set depending on the type of plastic used.
For gluing plastic, urea adhesives modified with latex or polyvinyl acetate dispersion are used. The surface of the plastic should be sanded with sandpaper No. 25–10 until the gloss is removed, cleaned of dust and degreased. The surface obtained after grinding must be smooth and clean and correspond to the 8th class of roughness (GOST 7016–75).
