Nature is the most perfect creator. Each of her drawings, each form is unique. Designers skillfully use this, complementing sophisticated or high-tech interiors with objects as close as possible to their natural state.
Meanwhile, everyone can see the unique true beauty in an ordinary piece of wood, a stump, a branch, skillfully highlight it with their own hands and find the best place for use in their own home, at their summer cottage, in the garden. A large or small table, made from a longitudinal or transverse cut of wood, will become the highlight of your living space.
What will you need for your job?
To make an original table from a vertical cut of wood with your own hands, you need to prepare:
- A cut of dry wood with approximate dimensions of 1700x600 mm, 25 mm thick.
- Metal (steel) plate about 600x35x3 mm.
- 4 steel rods with a diameter of 9 mm, length 1.5 m.
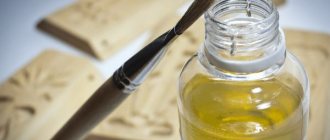
- Epoxy resin (transparent).
- Wax, varnish for a transparent finishing coat of wood.
- Black spray paint.
- Screws No. 12 (1.9 cm).
- Painting tape.
- Grinding machine.
- Sandpaper of different grits.
- Hammer.
- Chisel.
- Drill.
- Welding machine.
- Protective gloves and glasses.
What is good about a table made from sawn wood?
Before we talk about how to make such a table yourself, you should understand why you need to pay attention to it in the first place. So, first of all, it should be noted that furniture made of wood is an environmentally friendly and natural product. To make such a table, you only need a tabletop, the role of which will be played by the end cut of a thick tree trunk, as well as what will play the role of legs. These can be metal supports or supports made of wood.
Table made from cut oak
On a note! Sometimes you can take a whole piece of driftwood suitable for the parameters and make a table directly from it, where the root part will serve as a kind of support, and the even cut itself can be decorated and made into a tabletop.
Table made from cut birch bark
Another undeniable advantage of a table made from sawn wood is that it can fit into a number of different interiors. So, it will look good in an ecological style, country style, it will fit perfectly into the kitchen or living room, and in the country it will become the optimal addition to the house.
Coffee table made from cut wood
It is also worth understanding that the pattern of the tree, although it will be similar to other cuts, will still remain unique and inimitable. And it will still be different for different trees.
Making a table from cut wood yourself is quite simple - you don’t have to resort to the help of craftsmen and designers. It is enough to allocate a little time and make some efforts, and a unique and inimitable, unusual and beautiful product will appear in the house.
Making a table from cut wood yourself is quite simple.
Important! Such a table will look wild in some interior styles. So you must definitely decide in which room it will stand and whether it will fit into its style, if the decision was made to make such a table.
Description of work
It should be noted that the wood from which the table will be made with your own hands must be well dried. Otherwise, during operation, unevenness and cracks may appear on it.
- Use a chisel and hammer to remove the bark and cut off any loose fibers that are located along the edge of the tree.
- Use a sander to thoroughly sand the surface and ends of the material. To make them as smooth as possible, you should continue sanding by hand, alternating sandpaper of different grits (first coarse, then fine).
- The surface of the table should become absolutely flat, so you need to remove all the cracks and cut depressions. Cover the areas to be treated with masking tape. Fill the uneven areas with epoxy resin, heating successive layers with a blowtorch. This will prevent air bubbles from forming in the resin.
- When the resin has completely hardened, smooth it to the surface of the wood using sandpaper.
- Cut the prepared steel plate into 8 identical elements (10 cm each). Then weld them in pairs, forming corners. Sand the weld seam. If such work is difficult for you, you can find similar ready-made products.
- You need to make table legs from steel rods. Bend the metal rods in the middle. Then weld their ends to the ends of the metal corners.
- Using a drill, prepare 2 holes in the corners, with which we will attach the steel legs to the wooden tabletop.
- Paint the finished legs with black paint.
- Proceed to finishing the cut of the tree. The entire surface should be coated with matte transparent varnish.
- Polish the surface of the future table with wax.
- All you have to do is attach the legs with screws to the table.
A table made with your own hands from a vertical cut of wood can be used as a small dining table or a sleek workstation with a computer. You will definitely appreciate the advantages of its original shape and attractive appearance.
General requirements for wood
Our future craft from a stump or log should initially be dry wood. Fresh wood must be dried for at least 1-2 months at a temperature of 15-25 degrees. It is best in a dry room and/or without direct sunlight, otherwise our stump may crack and crafts from it may not work.
Frankly rotten stumps or logs should not be taken, but if the stump is a little rotten on the outside, such a stump can be used by treating it with a grinder and a brush, removing the rotten layer from it, in which case something can be made from it. Before drying the stump, the bark can be removed, for which it is convenient to use a chisel and a hammer or an ax, or you can leave it, it will need to be well treated to prevent rotting, for example, with iron sulfate and varnish.
Stump for crafts
If you have a stump on an area that you have long wanted to uproot, be sure to do it, or use it untouched, grown into the ground - this option is also applicable for making a table or chair from a stump or decorative crafts for the garden.
I recommend: How to deal with flooding of land adjacent to a lake
This completes the general requirements for the wood of stumps and logs, now let’s look a little at the processing methods.
Decoration of any interior
Many horizontal rounded cuts of wood are now actively used as decoration for walls, floors and, of course, in the production of tables, chairs, and other furniture. Tables finished using this technique are unique; the arrangement of small and large cut circles can be arbitrary or form a specific pattern.
Making a beautiful product with your own hands is not easy, but very interesting. And if you follow all the requirements for the work, the result will please you.
Wooden cuts
Previously, small tree cuts that were so useless to anyone went into the furnace. Now, various products from wooden saw cuts are at the peak of their “boom”. Not just like that.
Items made from wood cuts look very beautiful and very solid. Free material, in the form of dry branches in the forests, is another plus for various kinds of products from saw cuts.
- Garden paths are made from saw cuts
- Floors in the house are made from saw cuts
In today's article, we will tell you step by step how to make a table from wooden saw cuts
Materials and tools
- Tabletop. It will serve as the basis for the arrangement of wood cuts. You can use an old piece or prepare the shape you want from a piece of moisture-resistant plywood (12mm). This material is preferred, it will not change shape and will provide a flat surface for DIY decoration of the main part of the table.
- The required number of horizontal (end) cuts. They can be selected from the same type of wood or from different ones in order to play it off in an interesting way in the drawing. It is advisable to have different cut diameters (from large to small), in this case they can be stacked more closely together. Each cut should be no more than 1 cm thick. Otherwise, more epoxy resin will be needed.
- To fill the free space left after laying the cuts, you will need high-quality epoxy resin with a hardener.
- Wood glue (suitable for all types of wood). With its help, each section will be separately attached to the tabletop with your own hands. Purchase a container up to 300 grams.
- Finishing varnish.
- A grinding machine with wheels of different grain sizes - from 120 and more.
Preparing the mold for filling the table with epoxy resin
I laid the slab halves on plastic film on a workbench and fixed them with their uneven sides facing each other using plywood slats, which were previously wrapped with tape and treated with wax. There was a small distance between them, into which it was planned to pour epoxy resin.
The original plan was to make the table narrower, but it was not possible to purchase a small canister of resin. Therefore, I decided that there would be nothing wrong if the product was a little wider. To avoid leakage of epoxy resin, I coated all possible cracks with ordinary silicone sealant, and covered the film between the boards with wax, which made it uneven (the mistake I mentioned). In the future, if I start making another table like this, I should use hard plastic instead.
The slab cuts were fixed on a workbench covered with plastic film, and all joints were coated with sealant
Final steps to prepare the mold for pouring
The same sealant was used to “lay” strips designed to prevent the resin from spreading over the wood. I didn't want to create a completely glossy surface, so I needed to prevent the epoxy from bleeding onto the sanded wood.
Boundary strips of sealant on wood
sealant
All that remained was to tightly fix the parts of the slab on the workbench using clamps. But you need to keep in mind that their small platforms can push through the elm, and it will have to be polished again. It is better to cut small squares from the same plywood and place them between the wood and the clamping part of the clamp.
We press the wood with clamps to the workbench
Aesthetics
Since the tabletop is constantly in sight, attracting the attention of everyone around, the closest attention should be paid to the selection of wood patterns:
Oak: shades of golden brown intersected by darker growth rings look very attractive.
Light birch is ideal for interiors decorated with pastel colors.
Affordable beech is the first material that comes to mind when it comes to the production of premium furniture. The heartwood of old trees of this species, colored dark brown or red, looks very rich.
Assembling the underframe
The underframe is assembled using self-tapping screws. The upper drawers are additionally tied with bars cut into them.
Features of fastening the lower drawer
The drawer is screwed to the legs using 6x120 mm self-tapping screws. The end of the drawer must be coated with glue - this will add strength to the structure of the base.
Creating a designer wall
For decoration, it is advisable to choose one side of the room. The design of all planes is a sign of bad taste, and the room will look overloaded. Any room needs to be given air, and it’s not about the windows. It should breathe space, and light empty planes give this effect. Only one “woody” edge of the room will become a kind of accent, which will become its mood. You can lay out the “wood puzzle” yourself, and now we’ll talk about how it’s done.
Everyone has a dead tree in their yard that needs to be removed. Now it's time to chop it down. We take a branch and cut it into bars of medium thickness. You can remove the bark from the resulting “pancakes” and then sand it. Thanks to this, you will not drive a thorn when touching the wall. The resulting wood layers should be treated with a special insect repellent, and then placed on glue. It is advisable to varnish the resulting relief - varnished wood can last a long time.
Fastening the table top
The tabletop is secured at four points by the upper drawers. Self-tapping screws are screwed in at a distance of a quarter of the length of the drawer from the edge. This allows the tabletop to more or less freely expand and contract with changes in air humidity.
Design selection
The design of the entire table can be divided into two components: the choice of tabletop and legs.
When choosing a countertop design, it is important to consider some features of your room and your imagination:
- If you want a round or oval shape, then you should have enough space, because... it has impressive dimensions. Ideal for a large living room or hall, and also harmonizes with the gazebo;
- A small tabletop is a beautiful addition to a small living room;
- The rectangle shape is suitable for all occasions.
When choosing legs, rely solely on your taste. You can make a table with one, two, three or traditionally four legs.
What do you want the final version to look like? This is a purely personal question and depends on your taste and preferences. If you want something unusual, but nothing comes to mind, you can look at photographs of tables made from cut wood and make everything according to the sample.
Cutting options
In addition to the type of tree, the type of massif is also determined by the method of cutting the trunk:
Cross cutting - cutting a trunk into circles of varying thickness. When cut, you can see the pith, growth rings and outer layers (sapwood, cambium and bark).
A radial cut is made along the trunk in the center. Semi-radial and tangential cuts are also carried out along the trunk, but at a distance from the center.
When cutting wood in this way, the texture of the material is most fully revealed.