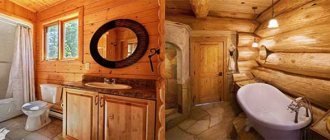
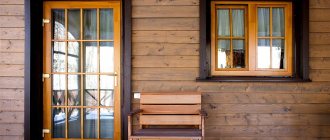
- Start › Decorating a wooden house:
The basement on the farm is perhaps the most necessary auxiliary structure, without which there is no other way to preserve the vegetable harvest until next year or create a supply of homemade jams and pickles.
An equipped basement under a wooden house or outbuilding is a fairly practical solution, as it is convenient to use and does not take up useful space on the building site. It is better to build a cellar at the same time as building a house, since a basement is being dug in the house, and access to it will be from the premises. In this case, there is no need to leave the house, and the problem of insulating the basement floor goes away. If it was not possible to build a cellar in the house, then you can make it under the garage, summer kitchen, or a separate structure on the site.
In our article we will look at how to make a basement, types of cellars and their design. We'll tell you how to make a cellar in a house or a separate one, and everything about arranging basements with waterproofing.
- What you need to know before preparing to build a cellar.
- Construction of an earthen cellar.
- We are building a basement in a wooden house.
- Construction of a cellar with a superstructure - a cellar.
- Design of a vegetable storehouse.
- We are setting up a glacier to preserve food.
- We equip the basement with waterproofing.
What you need to know before preparing to build a cellar
Basements can be recessed, i.e. underground, semi-buried (semi-underground), or above ground. It all depends on the groundwater level, but under any circumstances the cellar floor should be located 0.5 m above this level. Additionally, we can distinguish types of simple storage: pits, glaciers, piles, etc.
It is worth knowing that buried cellars are installed if the groundwater level is not high, or if it periodically rises. During a geological study of groundwater in the area, it may be revealed that their level is quite high (exceeds 1.5 m from the ground surface), then it is advisable to make a remote cellar, since it is almost impossible to protect the basement from dampness.
Semi-buried cellars are installed in those places where the occurrence of groundwater from the ground surface reaches a depth of about 80 cm, and in the absence of the possibility of arranging a cellar on a natural hill. When constructing this type of cellar, an artificial hill is created; in this case, flooding of the cellar is excluded.
A vegetable storage facility (a ground cellar) is built for storing root crops and vegetables if you plan to store stocks exceeding three tons or more.
The subfloor, that is, the cellar that is built under the house, must be buried at least 1.5 m from the floor level in a wooden house. If the depth is shallower, the temperature in the basement rises to 8°C, which negatively affects the preservation of root crops. The optimal temperature for storing vegetables and root vegetables underground should be from 0°C to +5°C.
The walls of the basement are most often built from brick and concrete, less often - from wood and stone. It is imperative that the cellar room be equipped with supply and exhaust ventilation to maintain the correct humidity and temperature conditions.
The level of groundwater at the site of the cellar construction can be determined using several methods:
— drill a hole on the site, with the help of which to control the level of groundwater depth;
— inspect the nearest wells, analyze the water level in them;
- on plants growing on the building site. The water level from the ground surface in the area does not exceed one meter if the vegetation is bright in color and lush, and horsetail, sedge or forget-me-not plants predominate.
Groundwater monitoring is best done in early spring, when the snow has melted and melt water raises the water level in the ground, or in the fall, during heavy rains. In the future, monitoring the groundwater level can help avoid flooding of the basement in a rainy autumn or spring, and will save you from the cost of repair work and installation of additional waterproofing.
Ventilation
We have already mentioned the problem of condensation. Vegetables release some water vapor during storage; water can enter the underground through cracks in the walls and simply with warmer air when the hatch is open.
Dampness is an eternal problem in rooms located below ground level.
High-quality thermal insulation partly solves the problem of condensation; however, to ensure that the air in the basement is not damp and stagnant, a ventilation system is required. How to build it?
The simplest ventilation consists of two pipes of equal length, equipped with umbrella-deflectors for protection from rain. The diameter depends on the volume of the room: if for 10 cubic meters you can get by with a 50 mm pipe, then for a volume of 25 cubic meters pipes with a diameter of 110 mm are used, and for 50 or more - 150.
Useful: ventilation capacity increases in proportion to the square of its cross-section.
Both pipes lead to the street; in this case, one of them takes air from the ceiling of the room, and the second - the supply air - ends about half a meter from the floor. On the street, the deflectors, accordingly, also appear at different heights; due to its difference in the channels, a weak but constant thrust is created.
When laying ventilation it is worth considering a couple of nuances.
- It is better to equip pipes with metal gratings. The goal is protection from rodents.
- An exhaust fan with an adjustable damper wouldn't hurt either. This scheme will make it possible to either organize forced ventilation, drying the room in the shortest possible time, or limit the flow of air from the street in extreme cold.
One of the possible ventilation schemes.
Construction of an earthen cellar
The design of a deep earthen cellar provides the best conditions for preserving root crops and vegetables. An earthen cellar requires some separate area on the site.
A hole for an earthen cellar is dug with the walls sloping (Fig.). The height from the cellar floor to the ceiling should be about 2 m, in the case of arranging an earthen cellar, the design of which consists of two parts (upper and lower), where the lower underground part goes 2.5 meters into the ground, but we will consider this type of cellar in our article later. How to make an earthen cellar correctly we will consider further.
The walls of the cellar must be lined if the pit is dug in sandy soil. The sheathing can be made collapsible from slabs and boards, so that in the warm season it can be disassembled and taken out for drying. We cover the inside walls of the cellar with two layers of boards, laying them overlapping so that no gaps form. Between the pit slope and the cellar wall we will lay two layers of waterproofing made of roofing felt coated with bitumen.
The base of the floor of the earthen cellar is equipped with a layer of about 5 cm of compacted crushed stone, which must be impregnated with hot bitumen. The thickness of the adobe floor, consisting of a mixture of fine brick crushed stone or coarse river sand and clay in a 1:1 ratio, of the cellar should be from 8 cm to 10 cm.
The ceiling will be made of logs and covered with waterproofing clay coating. When constructing the ceiling, it is necessary to provide a ventilation pipe, which we will protect with a waterproofing box and equip with a damper inside the cellar. We will cover the ceiling with a layer of soil up to 50 cm thick. We will build a gable roof above the ceiling, lowered to the surface of the ground, the overhangs of which should overlap the cellar room by at least 50 cm. The roof can be additionally insulated to avoid freezing.
We will install a drainage ditch along the perimeter of the cellar, at least 50 cm deep, to drain excess water. It is advisable to insulate the low door leading to the cellar.
The most rational way to use land is to locate the cellar on a slope. In this case, the volume of excavation work is significantly reduced, and at the same time the cellar is quite well protected from flooding by groundwater. At a distance from 3 m to 5 m above the cellar, a drainage ditch is laid along the slope. The ditch is constructed with a depth of at least 80 cm and it is better to arrange it diagonally along the slope than across the slope. This type of room is called a semi-buried earthen cellar.
Groundwater
If building a cellar on a plot allows you to choose its location, then building under an existing house, for obvious reasons, gives a minimum of freedom. The choice comes down to a simple “to dig or not to dig.”
What might influence the decision?
- Soil type . If the house is on a rocky foundation, digging a cellar is an almost hopeless undertaking. We are not talking about bringing in heavy equipment: you can’t drive an excavator into the room.
- Groundwater height . No matter how high-quality the waterproofing is, sooner or later, if the level is high, the basement will begin to flood.
Please note: Generally, the height of groundwater varies throughout the year and reaches its maximum level in winter. It is desirable that the bottom of the cellar be at least half a meter higher than the top mark.
How do you know how high the water rises?
- Interview your neighbors. Perhaps some of them have a well or water well.
- Conduct test drilling.
- A simple experiment will give a rough estimate. After several days of dry weather, it is enough to cover the area of soil near the house with plastic film at night. The appearance of condensation on its lower surface will indicate the proximity of water; if the film remains dry, you can safely dig.
It's definitely not worth digging a cellar here.
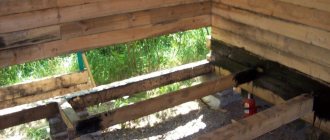
Building a basement in a wooden house
The basement can be built directly under the log house, and we will look at how to make a basement correctly in our article later. The solution to arranging a basement under a wooden house practically does not require material investments, but in this case there are advantages and disadvantages.
The first requirement for a basement in a house is that the depth from the floorboards of the log house floor to the surface of the underground soil is at least 150-180 cm. A disadvantage of the underground may be the risk of rodents appearing in the log house. If the ventilation of the basement is not properly arranged, the wooden elements of the structure of the base of the log house may become moldy due to high humidity in the basement. Because of this, every year you should whitewash the wooden surfaces of the log house’s subfloor with lime white, and sort through the vegetables, since root crops can spoil.
The foundation pit for the future underground is made 60 cm wider on each side to make waterproofing, concrete and stone work more convenient to carry out. We will level the bottom of the pit, compact it, then lay a layer of crushed stone up to 80 cm thick and compact it again. Next, we impregnate the crushed stone layer with hot bitumen.
Using formwork, we will fill the underground walls with dense concrete and tie reinforcement with steel wire. The pouring should be about 30 cm thick, after the concrete has dried, remove the formwork and plaster the basement walls with a cement-sand mortar in a ratio of 1:2 to a thickness of up to 2 cm.
We will equip the entrance to the basement with a hatch, the door of which should fit tightly to the floor and close. The advantage of the underground in the house is that it does not require additional equipment and insulation of its ceiling. The advantage of this storage is that there is no need to leave the house to buy canned goods and vegetables, but if necessary, you can build it separately, an example of which we will consider in the next section.
Safe descent
To build a staircase that will lead you to the basement or cellar, you also need to consider:
- it should be simple;
- comfortable;
- have a certain level of inclination;
- width of steps.
Since you will most often be going up and down it empty-handed, such a simple staircase will reduce the risk of falling and injury. The most optimal angle of inclination for stair steps is forty-five degrees, and their width should not be less than twenty centimeters.
Construction of a cellar with a superstructure - a cellar
An earthen cellar, consisting of two parts (upper and lower), is already a permanent structure. This type of cellar can last quite a long time, but it also requires not only a separate location on the building site, but also large material and physical costs.
The lower part of the cellar must be buried at least 2 meters into the ground; most often it is built at a depth of about 2.5 m.
The upper part of the superstructure above the cellar is called the cellar. The cellar can serve not just as a vestibule to protect the main part from overheating in summer, hypothermia in winter and protection from precipitation, but also as a shed for storing equipment. It is recommended to place the door of a remote cellar with access to the north. The size of the hatch is taken based on the convenience when lifting and lowering a person with a box or bag into the cellar. It is worth remembering that a large hatch can contribute to severe hypothermia in the cellar in winter and overheating in the summer.
You can dig a pit for the cellar yourself, but it will be slightly larger than the size of the bunker itself. The slopes of the pit should be arranged with a slight angle of inclination. We will build the walls of the cellar, up to 30 cm thick, from durable materials: rubble concrete, concrete, brick, etc. To build the walls, you can also use logs with a diameter of up to 18 cm, but when using any material, it is worth remembering that it is necessary to waterproof the walls. We will cover the outside walls with roofing felt, coated with hot bitumen, in so many layers so that the total thickness of the waterproofing is at least 2.5 cm.
The bottom of the pit will be properly leveled and compacted. Then we will arrange bottom drainage from crushed stone of a fraction of about 10 cm. We will cover the crushed stone with a layer 3 cm thick of crumpled fatty clay, which we will level, compact and fill with concrete with a layer thickness of up to 10 cm. After the concrete has set, we will make a cement-sand screed on top with a thickness of 5 cm
We fill the space between the slopes of the pit and the walls of the cellar with crumpled fatty clay, hammering it tightly, laying it in layers of 20 cm and tamping it.
The ceiling above the lower part of the cellar must withstand quite high loads, so we will make it from a couple of layers of thick boards. We will lay the boards with insulation from a mixture of clay, moss and brick chips, a layer thickness of up to 3 cm. In this ceiling we will install a hatch with a lid, and from the hatch down to the cellar we will install a ladder.
To maintain a constant temperature in the cellar and air circulation to maintain humidity conditions, we equip a two-channel ventilation pipe with a damper located inside the cellar room.
We will build the burial chamber from the material that is available at that time. It can be brick, boards, thick sanded slab or natural stone. We will make the roof of the cellar gable with wide overhangs for better protection of the walls from precipitation. We will install the roof using roofing felt, flat slate or roofing felt over a continuous sheathing.
Along the perimeter of the superstructure we will provide a blind area up to 1.2 m wide, which we will make from a mixture of clay and crushed stone and cover with soil.
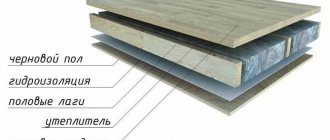
Overlap
Laying finished floor slabs over a cellar in a house is understandably somewhat difficult. In most cases, the ceiling is made of wood; The thickness of the beams allows you to lay insulation, which reliably insulates the cool subfloor from the heat of living quarters.
The structure of an insulated wooden floor.
How to do this work yourself?
- A solid panel is sewn to the floor beams from below - plank, plywood or OSB. It is better to use self-tapping screws for fastening; if for some reason you prefer nails, drive them staggered at an angle to the vertical.
- The shield is covered with a vapor barrier film. It ensures that there is no filtration of water vapor from a warmer room.
- Then insulation is laid between the beams - polystyrene foam, mineral wool or glass wool. It is better to focus on an insulation thickness of at least 100 millimeters: the better the cellar is thermally insulated, the safer the food in it will be.
- On top, the insulation is covered with waterproofing (the same dense polyethylene); a load-bearing flooring (again, boards, plywood or OSB) and a finishing coating are laid on top of the waterproofing material.
The access to the cellar is equipped with a double hatch; as an option, you can assemble a two-layer lid with insulation inside.
Design of a vegetable storage shed
On waterlogged soils, where it is not possible to build a dry cellar, you can build a vegetable shed - an above-ground vegetable storage. A free-standing structure differs from traditional cellars in that there is no need for insulation of the ceiling, therefore this storage requires less physical construction costs and is cheaper.
The storage shed is a frame structure. When planning the construction of a vegetable storage facility, you should know that using wood that has been used is not recommended. For example, old boards from a dismantled house, since the likelihood that such wood is infected with fungus is very high. Dead wood is not suitable for the construction of a storage shed.
The frame of the vegetable storage is made from sanded logs selected in diameter from 0.13 m to 0.22 m. The logs are dug to a depth of about one meter, connected at the top with strapping. The ends of the logs are treated with hot bitumen. The roof slopes are made of continuous plank sheathing, which is covered on top with a sheet of rolled roofing felt in two layers.
This structure involves embanking the structure with earth from bottom to top. From the base, the thickness of the embankment should be at least 60 cm, towards the top - 40 cm. It is better to take peat soil for embankment - it is a poor conductor of heat. It is recommended to cover the top of the soil with turf plates or sow it with grass.
In the middle part, the height of the storage shed should not be more than 2 m, since vegetables may freeze. In general, the storage shed should turn out to be a squat structure - like a hut.
The vegetable storage area must be protected from drafts. This issue can be resolved, for example, by covering one end of the building with a pair of rows of boards, between which a layer of roofing felt should be laid. At the same end you can also install a low insulated door.
A storage shed is usually built up to 3.5 m wide, and a vegetable storage facility can be built up to 5 m long or more. One side of the passage, approximately 70 cm wide, can be equipped with lattice bins, and the other side can be equipped with shelves.
It is recommended to select a site for the construction of a storage shed on dry sandy subsoils, where it is possible to bury the building into the ground. The buried vegetable storage, due to heating by soil heat, maintains normal levels of humidity and temperature inside.
If high groundwater is detected at the construction site, the storage shed should be made into a ground structure. In any case of construction around the cellar, there is a need to dig a not very deep drainage ditch, which will protect the storage shed from rain, surface and melt water.
Near the ridge in the roof there is a need to install an exhaust system, for example, a wooden box with a valve for adjustment. In the case of an extended storage structure, a pair of ventilation pipes should be installed.
There are collapsible storage sheds that can be built in the fall, if necessary, and disassembled in the spring. These warehouses are convenient and practical in that they can be disinfected annually.
Stages of insulation
It is important to note here that work on thermal insulation of the subfloor must be carried out comprehensively. It is advisable to carry out insulation during construction, since it will be much more difficult to do later.
Basement insulation is carried out in stages:
- organization of good ventilation;
- arrangement of an insulation cake, including heat, hydro and vapor barrier;
- insulation of the foundation and basement of the house.
It should be noted that for good insulation, the distance between the ground and the floors is of great importance. An air layer is formed under the house, which serves as additional protection for the house from the cold coming from the ground. In this regard, it is advisable to locate the basement at a height of at least one meter from the ground.
Setting up a glacier to preserve food
On the site, in addition to stationary basements, you can build a storage facility that is a little simpler, for example, a pit, a pile or a glacier. Let's take a closer look at how to properly build a glacier.
The glacier serves to preserve food and is a room buried in the ground, which has an ice chamber, a compartment for storing food and a vestibule. Glaciers can be divided into three types, which are determined by the method of filling the ice: bottom, side, top filling. The simplest option is a glacier with a top filling of ice, but at the same time, the arrangement of a water drainage system becomes more complicated. The glacier is loaded once a year.
The location of the glacier on the site should be selected taking into account its distance from the garbage pit, yard latrine and other sanitary facilities. A pit for arranging a glacier is dug in a rectangular shape with the most acceptable dimensions: length - from 1.5 m to 2.2 m, width - 2 m, and depth of the pit - from 2.2 m to 2.5 m. Wall cladding should be done with brickwork , logs, which must be treated in advance with an antiseptic or rubble stone. The floor is laid with bricks or cobblestones.
Above the ground, the glacier is erected up to 3 m high and covered with a continuous plank sheathing. On the outside, the covering and walls should be covered with a layer of a mixture of crumpled clay and straw, and then covered with a layer of dry earth at least 30 cm thick. The outer layer of earth should again be coated with clay up to 3 cm thick and the entire surface should be covered with turf.
To increase the shelf life of ice in the glacier, it can be covered with matting, a layer of shavings or sawdust. To enter the glacier, you need to equip a vestibule with good wall insulation.
Choice of insulation
The first question that arises before starting work is: how to insulate the basement from the inside? Today there are many materials suitable for cellar insulation. Let's list them:
- Styrofoam;
- mineral wool;
- ecowool;
- polyurethane foam;
- expanded polystyrene
- expanded clay
Each insulation has both pros and cons. Polystyrene foam is an inexpensive and durable material, but it is highly flammable and releases toxic substances when ignited.
Ecowool and polyurethane foam are sprayed insulation materials that have excellent thermal insulation characteristics. The materials are able to completely cover the entire surface, right down to the most inaccessible areas and small crevices. But their application requires special equipment, as well as skills to work with it, so insulation is quite difficult to do with your own hands.
Mineral wool has low thermal conductivity, retains heat well, but strongly absorbs moisture and steam. In this regard, it is undesirable to use it for thermal insulation of baths and saunas. When using this material to insulate a log house, it is necessary to install high-quality hydro- and vapor barrier. It is best to finish the top of the heat insulator with water-repellent materials.
Extruded polystyrene foam. It practically does not absorb moisture, has low thermal conductivity and light weight, and is easy to install. But the material breaks easily, so you need to be careful when working, and after installation the insulation must be reinforced with mesh.
Insulating the basement floor with expanded clay also gives good results. This natural insulation consists of porous granules with excellent thermal insulation characteristics. The advantages of the material are also non-flammability, low cost, and low weight. Disadvantages: fragility of granules and high water absorption.
Parquet for renovation
Parquet as a floor covering has been known since the 17th century, when it was first used in the palaces of the kings of France. The main advantage of parquet flooring is its environmental friendliness. Modern manufacturers offer a wide selection of colors, sizes and methods of laying parquet and parquet boards, which allows you to renovate the floors in a room in a style unique to each room.
Before laying such a covering, the floors are leveled with a special screed so that the differences in the heights of uneven surfaces do not exceed half a centimeter. Next, the humidity of the room is determined, for which a small piece of plastic film is laid on the floor for a day, the edges of which are secured with tape. If there is high humidity in the room, the film will become covered with perspiration from the inside. In this case, it is not recommended to lay parquet.
The disadvantages of this coating are the high price and instability to moisture. Also, this material cannot be used when installing “warm floors”.
Drainage
At the excavation stage, it is recommended to install a ring drainage:
- Dig a groove 30-50 cm deep around the perimeter of the foundation (outside)
- Lay perforated pipes with a slight slope at one point.
- Connect them to a vertical collector.
- Fill the drainage with crushed stone.
Based on the presence of water in the well, it will be possible to judge the rise of groundwater and take timely measures. Pumping is done with a submersible drainage pump. The liquid is discharged into a drainage ditch or onto the ground in a lower part of the site.
Conclusion
The underground of a wooden house must be carefully protected from moisture coming from the soil, insulated in order to maintain optimal temperature conditions at any time of the year and provided with high-quality ventilation. Only then can you be confident in the durability of the entire structure (see also the article “How to remove the creaking of a wooden floor or stomp on your health”).
A dry underground is a guarantee of the longevity of a wooden building
The video in this article will introduce you to additional materials that are directly related to the information presented. Monitor the condition of your home's subfloor.
How to choose a place
The site for constructing a cellar at your dacha with your own hands must be dry and protected from seasonal flooding. The higher the platform, the better.
Objects located nearby that pollute the soil are potentially dangerous - compost pits, toilets, sheds with livestock, bathhouses, summer showers. SNiP 30-02-97 recommends safe distances:
- 12 m from cesspools;
- 12 m from the barns;
- 8 m from compost heaps;
- 8 m from the bathhouse, shower, sauna, swimming pool.
You need to take into account not only the sources of pollution on your site, but also on your neighbor’s. If the storage facility is located underground, it is recommended to move at least 7 m away from the residential building to prevent heat transfer through the ground. You can draw a diagram of all buildings in advance and determine the location of the cellar that corresponds to specific conditions.
Wiring
Due to constant humidity, the cellar is classified as a high-risk area, so the electrical wiring is installed according to strict rules:
- sockets are located outside the basement in a dry room;
- cables are laid only openly in corrugated channels or boxes; metal pipes cannot be used;
- luminaires must be sealed to avoid condensation.
It is recommended that you consult a professional electrician before installing wiring.
Walling
For the construction of the cellar, red brick, concrete blocks, rubble stone, and monolithic concrete are used. You can dig in large diameter sewer rings. It is not recommended to lay sand-lime bricks or large-porous cellular blocks in the ground. They have high water absorption, so they freeze and quickly collapse. If the cellar is above ground, the same materials are used as for the construction of buildings, but with enhanced insulation.
Masonry of walls made of bricks or blocks is carried out in bandaging seams with reinforcement every 3-4 rows. This will allow you to withstand the lateral pressure of the soil without the formation of cracks and eliminate the risk of collapse.
For the installation of monolithic walls, formwork made of plank panels is installed. Reinforcing cages are placed inside, concrete M250-M300 is poured. The solution must be compacted along its entire height with a metal pin to release air bubbles. It is advisable to carry out the pouring as quickly as possible, before the formation of seams between the set and fresh concrete.
You need to worry about a hole for ventilation in advance, so that later you don’t have to work with a hammer drill and break through the hardened wall. At a height of 50 cm from the floor, a sleeve is installed in the brickwork or in the formwork for concreting - a piece of pipe with a larger diameter than the future channel. The hole can be temporarily plugged with paper or a rag.
General provisions
First, let's highlight the functions that underground space in a wooden building provides:
- Protection of the floor structure from the negative effects of excessive humidity. The earth in our climate zone is always saturated with liquid, be it precipitation or groundwater. Direct contact of wood with such an environment leads to the occurrence of rotting processes, which is where the creation of such an intermediate dry zone as an underground is required.
- Increasing the thermal insulation of the house. A kind of air cushion in combination with insulating materials will make your home warmer, which is especially valuable in winter.
- Convenience of laying all necessary communications. Sewage, water supply and electrical networks located under the floor do not disturb the interior and do not interfere with free movement around the rooms.
An example of laying communications under the surface of a wooden floor
- Possibility of use as a cellar. A properly equipped underground will do an excellent job of storing food.
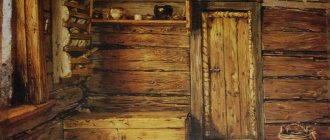
Underground with products
Foundation structure
Without a solid foundation, you can only build a cellar made of wood. And if the walls are made of brick or concrete, a good foundation is required.
The foundation can be arranged in two ways:
- Lay reinforced concrete strip. To do this, a groove measuring 20x30 cm is dug around the perimeter. The bottom is covered with sand to a thickness of 10 cm and compacted. Then you need to lay reinforcement cages from Æ10 mm rods and fill the trench with concrete. After 2-3 days you can start laying.
- Fill the monolithic slab. The structure has a multi-layer structure - a cushion of crushed stone and sand 10 cm thick with compaction, a layer of lean concrete 50-100 mm, hot bitumen plus 2 layers of roll waterproofing, a reinforcement frame and concrete of a grade not lower than M250. Such a foundation is practically waterproof and serves as a finished basement floor.
Interior decoration, racks and shelves
The most common method of finishing cellar walls is whitewashing with slaked lime. It dries the surface well, destroys fungal spores and insect larvae.
You can line the walls with waterproof plaster, ceramic tiles, and plastic panels. It is necessary to carefully ensure that the surface is as smooth as possible, without pores, since it is very difficult to fight mold on loose coatings.
Racks and shelves in the cellar are used in conditions of high humidity. Materials for manufacturing must be resistant to rot, moisture and fungi. This:
- impregnated timber and boards;
- metal with anti-corrosion coating;
- durable plastic;
- brick, stone, concrete.
Before storing supplies, the racks are dried, disinfected and, if necessary, the protective coating is repaired.
Content:
- Basement walls
- Basement waterproofing
- Underfloor ventilation
- Subfloor floor design
- Subfloor ceilings
- Causes of dampness
- Eliminating moisture in the underground
- The need for basement insulation
- Backfilling the underground room
- Necessary underground maintenance
- Video on the topic of water in the underground of a wooden house
Many owners of country cottages may encounter a problem when there is water in the underground of a wooden house. What to do. The situation can be improved. First, you should determine the reason for the collection of liquid, and then take measures to eliminate the moisture.