For the manufacture of rafters in individual construction, wooden materials are usually used: boards, timber, logs. Despite their relative cheapness, wooden roof rafters are strong enough to withstand all roofing loads and serve faithfully for many years.
Other possible materials for rafter systems - metal and reinforced concrete - are not practical for private construction due to their heavy weight, complex installation and high cost.
What is better - logs, beams or boards?
The rafter system must be strong, but not heavy. Of course, for the load-bearing foundation of the roof of large industrial buildings and high-rise buildings, you have to use metal or reinforced concrete. But for ordinary private houses this is an unnecessary excess. In this case, the rafters are made of wood - from boards, timber (regular or glued), logs.
Logs are rarely used, exclusively for log houses. This material is too heavy, requiring high professionalism from the carpenter and the ability to make complex cuts in the fastening areas.
Timber is the best option from which you can mount strong and durable rafters. The only drawback of the timber is the high price.
Cheaper boards with a minimum thickness of 40-60 mm are often used as a replacement for timber. The list of their advantages also includes low weight, ease of installation and a high margin of safety.
The following requirements apply to the selected lumber:
- The minimum acceptable types of wood are 1-3. The presence of knots is allowed in small quantities (it is better to do without them at all!), no more than three knots, up to 3 cm high, per 3 m.p. Cracks are also acceptable, but they should not penetrate right through the wood, and their length cannot exceed half the length of the material.
- It is allowed to use dried wood with a moisture content of up to 18-22%. If these indicators are higher, the rafters, as they dry, may crack or bend and lose their shape.
- The load-bearing parts of the rafter system are made of material with a thickness of 5 cm and a width of 10-15 cm.
- The length of elements made of coniferous species is up to 6.5 m, and of hardwood – up to 4.5 m.
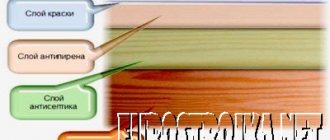
- All wooden parts of the rafters, before use, must be treated with protective compounds to prevent them from rotting, fire and damage by wood-boring insects.
Main parts of a wooden rafter system
The main component unit of a wooden rafter system is a truss - a flat triangular structure. The sides of the “triangle” form rafter legs connected at the top at an angle. To connect the rafters horizontally, tie-rods, crossbars, and clamps are used.
The rafter system is made up of several trusses placed on the mauerlat and fastened together by purlins.
To better understand the specifics of the farm, let’s define its elements. Their composition and quantity in one structure depends on the type of roof, its dimensions and the type of rafters used.
So, the components could be like this:
- The rafter leg is the rafters themselves, onto which the sheathing is stuffed and the roofing material is laid. The truss consists of two rafters (beams) connected at the top at the ridge in the form of a triangle. The angle of their inclination is equal to the angle of inclination of the roof slopes.
- A tie is a crossbar that fastens the rafter legs horizontally and prevents them from moving in different directions under load. Used in a hanging rafter system.
- A crossbar is a beam similar to a tie rod, but works on a different principle. In the system it is compressed, not stretched. Fastens the rafter beams in their upper part.
- The scrum is also a horizontal crossbar that connects the rafter beams and increases the stability of the truss. Used in a layered rafter system.
- The stand is a horizontal beam that serves as an additional support for fixing the rafter legs.
- A strut is an element mounted at an angle to the horizontal, giving the rafters additional stability.
- Fillies - used to lengthen rafter legs when it is necessary to create overhangs.
Also, the rafter system can include parts that are not directly related to the trusses, but are used for their installation and assembly. They are:
- Purlin - a beam running along the slopes, connecting the rafter legs of the trusses. A special case is a ridge purlin, which is installed along the roof slopes at its highest point (ridge).
- Sheathing - consists of beams or boards placed on the rafters from above along the roof slopes. Roofing material is mounted on the sheathing.
- Mauerlat – timber or boards laid along the perimeter of the external (main) walls of a building. The presence of a Mauerlat is provided for securing the lower ends of the rafters to it.
- A bench is an element similar to a mauerlat, but laid along the inner wall of a building. Vertical posts are fixed to the bed.
DIY making
Let's consider the main stages of arrangement using the example of a conventional system with inclined beams.
- To calculate the length of the rafters, you first need to measure the house.
The easiest way to do this is with a laser rangefinder. Simply point the tool at one end of the wall and press the button. Then aim the rangefinder at the far end of the same wall and press the button again. The distance will be displayed on the device indicator. If you don't have a laser rangefinder, you can use a regular tape measure. When a small structure is being built, you can do without measurements. - Next, the length of each of the common rafters is determined.
The measured width of the house is divided by 2 and the width of the ridge board is subtracted from the resulting value. Then the roof slope is calculated. To calculate the length of each rafter, you can use an online roofing calculator, such as this one. - For rafters on the short ends of the house, it is necessary to subtract the length of the ridge board from the total length of the building. The result will indicate the length of each of the longitudinal rafters.
- We mark the places where grooves need to be cut on the common rafters. To do this, mark an inclined plumb line on a wooden beam with a pencil to find the place where a ridge cut is needed. Then we'll make a mark for the notch.
- Mark the location of the gap that needs to be cut so that the timber can fit on top of the wall. We mark the location of the cut on all elements, and use a plumb line to ensure accurate measurements.
- We cut all the rafter beams to size, using the first one as a standard for length. The number of rafter boards should be sufficient so that they are located no further than 500 mm from each other. All cuts must be parallel to the wall and allow the rafters to protrude onto the roof by at least 200 mm.
- Now you can start assembling the system. To do this, 4...6 centering rafters are sequentially attached and the ridge beam is raised to its installation location in the upper part of the roof. To install the ridge beam, install 4...6 common rafters in designated locations (along the two longest walls) and securely nail them to the wall. Now the ridge beam can be raised to the desired height.
- The next step is fixing the ridge beam: it must be nailed between the centering parts. After this, several more ordinary rafters are installed, which are nailed to the walls. These elements will support the ridge beam. When installing and fastening you will need 2...3 assistants who should hold the centered structures.
The remaining components of the rafter system are assembled in a similar manner (usually only one rafter beam is installed along the short wall of the house). The assembled structure must be supported independently from the ridge beam .
Types of rafter systems
From wood you can assemble many options for trusses and, accordingly, rafter systems. But all of them can be divided into two types: hanging and layered.
Hanging rafter systems
Used for rooms without internal walls. Trusses made up of rafters rest solely on the outer walls; there is no need for additional support. That is, hanging rafters cover one span, 6-14 m wide.
An obligatory part of hanging trusses, in addition to the rafter legs connected at the top at an angle, is a tie - a horizontal beam connecting the rafters. The tie becomes the basis of the “triangle” of the truss. In most cases, it is located at the bottom of the structure, connecting the lower ends of paired rafters. But raised-pull designs are also used. And also with its modified version - a crossbar, which looks like a raised tightening, but works on compression, and not on tension, like a true tightening.
The need to use a Mauerlat depends on the presence of the tie and its location in the farm. If the tightening is located at the base of the rafter legs, then the Mauerlat is not needed. During installation, the truss is supported on the external walls through the existing tie, which at the same time becomes a floor beam. If the tie is raised upward or a crossbar is used instead, then the Mauerlat must be included in the diagram as the basis for attaching the rafters to the upper edges of the walls.
Headstocks and struts are used as additional elements in the hanging system. They serve to strengthen the truss when covering wide spans.
The headstock in appearance resembles a vertical post running from the center of the tightening to the top point of the truss (ridge part). In fact, the headstock is a suspension, the function of which is to support a pull that is too long (more than 6 m) and prevent it from sagging.
In tandem with the headstock, with an even greater increase in the tightening length, struts are used - diagonal beams. They are rested with one end against the rafter leg, and the other against the headstock. In one farm, two struts are used, on both sides of the headstock.
In country houses and small private houses, hanging rafters made of wood are good because they allow you to create spacious attic rooms without partitions inside. Of course, we are talking about schemes where there are no struts and headstocks. Their presence imposes on the developer the need to divide the attic into at least two rooms.
Layered rafter systems
The layered structure of wooden rafters is used for rooms with internal main walls, which serve as additional support for the system. In this case, the distance between the external walls (total overlapped span) can be within 6-15 m.
Rafter trusses necessarily consist of rafter legs supported on the outer walls and a vertical drain supported on the inner wall. If there are two internal walls, two studs can be used in the scheme.
Unlike a hanging system, a layered system must have a Mauerlat to which the rafter legs are attached. The racks crash into a kind of mauerlat - a bench. This is a timber laid on top of an internal supporting wall.
For a span of 6 m or less, the simplest layered truss is used, consisting of two paired rafter legs and a stand. The construction of wooden rafters with an increase in span requires the addition of additional details to the diagram, such as contractions and struts (rafter legs).
The contractions are similar to the ties in hanging systems, but they are always located above the base of the rafters. The main purpose of scrum is to increase the stability of the system.
For stability, struts, also called rafter legs, are also provided. The strut supports the rafter leg, that is, in fact, it becomes an additional (third in a row, after the Mauerlat and ridge girder) support for it.
Layered wooden rafters are the most common for private residential buildings and cottages. As a rule, such buildings have one or more internal main partition walls, which can become a support and additional support for a strong rafter system.
Roof shapes
Pitched roofs come in different shapes. It is worth highlighting here:
- single-pitched;
- gable;
- hipped (tent and hip);
- broken
The most common are gable and hipped hip roofs.
The most common option is a gable or hipped hip roof. The first requires the construction of pediments. Broken lines are relevant when constructing an attic. At first the rafters go at a steep angle, and then at a smaller one. This technology allows you to raise the ceiling of the attic room. We also recommend reading about the rafter system for a half-hip roof.
Methods of fastening rafters to the Mauerlat
The attachment point of the rafters to the mauerlat is one of the most important; the functionality of the rafter system and its ability to bear loads depend on its correct execution.
There are two types of such fastenings: rigid and sliding. The choice of one of them depends on the design of the truss structure. Replacing a rigid fastening with a sliding one or vice versa, as well as insufficient provision of the required degree of shift of the rafter leg, will lead to the fact that the circuit will “break” and will not work.
The rigid fastening ensures a strong, motionless connection between the rafter and the mauerlat. Shift is not allowed, but the rafter can be rotated at the hinge. Such fastening is organized in two main ways:
- by cutting the rafter beam into the mauerlat and further fixing the assembly with corners, staples, nails;
- using metal corners and a support bar.
A sliding fastening (or, as roofers call it, a “sliding fastener”) is of a slightly different type and functionality. It allows the rafter leg to move relative to the support. Of course, this shift will not be noticeable to the eye, but will allow the rafter system not to deform during the natural shrinkage of the walls of the house. Sliding fastening is especially necessary in the construction of wooden log houses. It is also implemented in the construction of houses of any other type, if required by the design and calculations of wooden rafters.
To provide the rafter leg with a small range of movement relative to the Mauerlat, special fastening elements are used - sliders. Structurally, they consist of two metal elements, the first of which is static, and the second is capable of moving relative to the first. There are two types of sliding mounts: open and closed types.
The open-type slider is a prefabricated structure consisting of two separate parts: a static guide bar and an angle with a bend at the top. The guide is threaded into the bend of the corner and fixed on the rafter leg, the corner is attached to the mauerlat. When changing the geometric dimensions of the building, the guide can move relative to the rigidly fixed corner by 60-160 mm.
The sliding mount of the closed type is exactly the same in its properties. The design changes a little; it is no longer collapsible, but solid. The corner, which is attached to the Mauerlat, has a loop in the central part. A guide is inserted into it, which, in turn, is attached to the rafter leg.
What both fastening options are (sliding and rigid) is shown in the video:
Design selection criteria
The rafter system, or simply rafters, is a supporting system that serves as a supporting structure for the roofing covering, thermal insulation and other layers of the roofing pie. In addition, the rafters take on all external loads caused by climatic and weather factors. When calculating the design, two main factors are taken into account:
- Wind load. In some regions, real hurricanes occur when wind speeds are 20 m/s or more.
- Snow load. This is a significant amount. Suffice it to say that for Moscow the weight of snow per 1 m2 is 180 kg (III snow region according to SNiP maps). This means that even for a small building (for example, a garage) with a roof area of 20 m2, the snow load will be 3600 kg, or 3.6 tons.
The weight of snow on the roof can reach several tons Source g.nh.ee
To reduce the wind load, it is necessary to reduce the angle of inclination of the slopes. At the same time, conditions for snow melting arise when the roof has a large slope. Therefore, designers have to choose some average value. The comparative rarity of strong winds and the stability of the snow load and its seasonal nature are taken into account. If there are rare winds and there is a lot of snow, the slope is increased, and vice versa.
In addition, the type of roofing is taken into account. Each material has its own limitations - if snow melting on metal tiles is possible with fairly flat slopes, then for a soft roof a higher slope is allowed. The ability to melt snow on its own is considered a very useful, but also dangerous property of the roof. On the one hand, unwanted loads are removed, on the other hand, there is a danger of damage to property and injury to pedestrians who find themselves under a mass of snow. The problem is that the collapse is always unpredictable and occurs at an unknown moment. Therefore, they try to make the slopes either steep so that snow does not have time to accumulate, or flat if the amount of precipitation in the region is not too high.
Soft roofing is laid at a relatively small angle Source goldkryshi.ru
Connection of rafters in the ridge
Another important component of the rafter truss is the rafter attachment point in the ridge part. In private housing construction, the following fastening options are most often used for these purposes:
- overlap;
- end-to-end;
- using a half-tree cut.
Overlapping fastening is considered the simplest option. The upper edges of paired rafters are simply placed on top of each other. Then a hole is made at both ends and the connection is secured with a pin or bolt and nut.
To make a butt connection, the upper ends of the rafter legs are cut off at an angle to make it possible to align the sawn surfaces. Fastening is carried out using nails, which are driven into the end of the ridge part through both rafter legs. To further secure the nail joint, use wooden horizontal plates or metal plates that are placed over the joint on both sides of the truss.
A half-tree connection involves preliminary cutting out notches at the upper ends of the rafters to half the thickness of the beam. This allows you to combine the rafters in the ridge, like parts of a designer, without increasing the thickness of the ridge assembly (as happens with an overlap connection). After combining the parts, they are fixed with nails, bolts or dowels.
In addition to the methods described, there are other, less common ones. For example, a tongue-and-groove connection. It is not popular, as it requires great professionalism from the carpenter. The essence of the fastening is that a groove is made in one rafter, and a tenon is cut out on the other. The tenon and groove are combined and fastened with a nail or dowel.
One of the possible connections of the rafters in the ridge (end-to-end, through the ridge purlin) is discussed in the video:
Connecting elements
In order for the roof to be reliable, the components of the rafter system must be connected correctly. It is necessary to take into account the direction and strength of loads (both static and dynamic). It is also important to provide for possible cracking of the wood due to shrinkage, making sure that the components of the rafter system do not stop working properly.
Previously, all parts of the rafter system were fastened together with notches. It's reliable, but not very economical. After all, for this it is necessary that the wooden structures have large cross-sections, which would allow making cuts while safely weakening the wooden elements.
Therefore, at the present time, rafter assemblies are fastened not with notches, but with dowels and bolts.
Methods of fastening rafter legs.
The use of perforated steel plates coated against corrosion is popular. The overlays are secured with nails or plates with teeth recessed into the wood. Such fasteners for the rafter system are convenient because:
- Overlays reduce wood consumption by one fifth, since elements of a smaller cross-section are required than when cutting;
- they can be installed by a technician with little experience;
- they are fixed very quickly.
Perforated plates used for fastening rafters.
Finally, you can watch a useful video that talks about all the most important aspects of designing a roof truss system.
Advantages and disadvantages of wooden rafters
However, working with wood and installing wooden rafters does not present any particular difficulties. In addition, there are other advantages of using wood as a material for rafters:
- low cost of wood;
- universal availability;
- relatively light weight, simplifying installation;
- there is no need to use heavy construction equipment;
- versatility, the ability to be used on buildings made of any material, regardless of the bearing capacity of the foundation.
The disadvantages of choosing wooden rafters are minor, but they also need to be known in person before starting construction:
- the need for treatment with protective agents that prevent fire and rotting of wood, as well as reducing its “attractiveness” to various insect pests;
- the use of wooden rafters is possible only on spans up to 14-17 m; for wider spans it is recommended to use metal or reinforced concrete;
- slightly reduced service life compared to metal or reinforced concrete trusses.
Thus, all the shortcomings are features rather than real negative aspects. This explains such a widespread use of wooden rafters in private housing construction.
