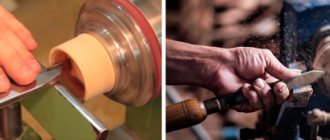
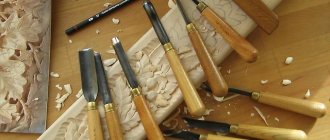
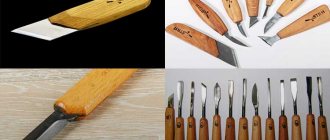
Creating wooden cylindrical products is impossible without a hand tool - a chisel for a lathe. It is from under its blade that the unnecessary amount of material is removed and the workpiece acquires an artistic decoration.
Turning chisels can be bought ready-made, but such kits are very expensive, especially high-quality ones. Cutters for wood processing are easy to make yourself, which will be discussed further.
What types of chisels are there?
For professional processing of a wooden workpiece on a lathe, various working tools are required, including a rich set of chisels. Based on their functional role, they can be divided into groups:
- For rough processing. They have 2 cutting edges located at an angle to each other.
- Meisel for finishing. This cutter is a blade with a flat plane and an angular sharpening on the left or right side. The angle of inclination of the cutting part may be different.
- The semicircular reyer chisel is used for working with non-standard products.
- The cut-off cutter is used to remove fragments of wood when forming a pattern.
- A boring tool for wood turning has a shoulder to help remove excess material released during the pointing process.
- Round chisel for processing round products. Its tip can be smooth or jagged.
- Cutting file for processing the end sections of the workpiece.
- The cutter stop is installed on the tool to adjust the turning depth.
The presented types of incisors are basic; there are many variations in size, modification, and quality. Experienced woodworking craftsmen often come up with their own proprietary devices for turning wood blanks.
To ensure that tools are manufactured in an orderly and accurate manner, craftsmen recommend creating drawings for the products containing dimensions, shape, slopes and material. This way, you don’t have to constantly think about the required parameters; sharpening wood turning tools can be done simply like clockwork.
Adaptations
Craftsmen have different experiences in creating hand tools, and the sets of tools for production, accordingly, differ from each other. Let's try to imagine an average universal set of blanks:
- Metal - blank. Depending on the intended type of chisel, old files and rasps, scraps of steel pipes, square-section reinforcement, and automobile springs are used.
- A wooden handle is necessary for ease of use of the future cutter. You can buy it ready-made at a hardware store or turn it using a wood lathe.
- Metal processing machine. This can be any setup that works with sanding wheels.
- Overalls. Even when making cutters at home, there is a risk of injury from hot sparks and metal chips. Prepare glasses, gloves, and a robe.
Manufacturing and service
Making the cutter yourself
Many craftsmen, either wanting to save money or not trusting third-party manufacturers, prefer to use homemade carving tools. In principle, making a knife or chisel is quite simple, the main thing is to choose the right material.
The photo shows a hacksaw blade and a simple jamb knife made from it
The raw materials for our design can be used:
- A saw blade for wood or metal is an almost ideal blank for a jamb knife. During the manufacturing process, we cut off a piece of blade on a machine or simply break it off at the angle we need, and then form a cutting edge.
- The wood saw blade also has acceptable characteristics. The carbon steel used to produce such saws holds an edge well, which means that the cutter will not become dull even when working with hard wood.
- Before making a semicircular chisel, you can look “in the bins” for an unnecessary punch. To make a tool, we will only need to cut off part of the wall diagonally - and we will get a very convenient device for sampling wood.
An important part of any cutter is the handle.
The instructions for its manufacture are also not complicated:
- We take a block of hardwood and cut a handle out of it.
- We make a hole at the end of the handle, the shape of which corresponds to the shape of the shank of the metal part.
Gluing the blade into the handle
- We glue the cutting part into the handle, and then clamp the structure with a metal ring.
Note! Sometimes the handle is made of two halves. In this case, the blade can be additionally secured with screws or rivets, and gluing should be done in a vice or clamps.
Sharpening cutters
You can only get a decent result if you work with a perfectly sharp tool. And since even the softest wood dulls the blade quite quickly, sharpening wood cutters is definitely included in the “minimum program” of training for a novice carver.
To perform this operation we will need:
- Bars of different grain sizes - from coarse to fine.
- Old leather belt for straightening.
- GOI paste (or similar composition).
We do the work like this:
- First, we moisten a coarse-grained block, place the cutter on it at the selected angle and sharpen it using pressure from ourselves.
- We switch to a block with medium abrasive grain and repeat the operations until a clearly defined sharpened edge appears.
- We carry out the finishing on a diamond stone, removing the metal chamfer that appears on the tip of the cutter.
- Then we apply a layer of GOI paste (a composition based on chromium oxide) to the belt and polish the working part to a mirror shine.
Editing on the belt
Advice! Finishing on the belt can be done more often than the main sharpening - this way we can correct a slightly dull blade.
It’s easy to check the quality of our work: if the cutter cuts the newspaper without effort, it means we’ve done everything correctly, and we can start working on the workpiece.
Algorithm for carrying out the work
The production of any cutting devices is carried out according to a standard algorithm:
- Using drawings and photos, the required shape of the future chisel is cut from the blanks using metalworking machines.
- Primary turning of the product is carried out.
- When the workpiece is processed, the metal needs to be hardened to give the homemade product strength. This way he can process wood of different hardnesses. To do this, the metal tool is heated to maximum temperature and dipped in machine oil until it cools.
Another hardening option is natural cooling at normal ambient temperature. - Final sharpening of cutters for a lathe.
- Wooden handle attachment.
Power tools
Wood carving involves manual processing, but at the initial stage it is possible to use power tools for wood carving. These include:
- Electric jigsaw;
- Drill;
- Lathe;
- Electric planer.
Preparatory stages involving additional equipment are needed to give the workpiece the necessary proportions for further processing using hand tools.
A wood carving workshop should be equipped with a standard set of power tools.
Do it yourself
To understand how hand tools for woodworking are made, let's look at the manufacturing process of several of their main varieties.
Meysel
This is the main tool used for finishing wood workpieces. In skillful hands, this chisel is enough to create any pattern.
A straight-sharpened meisel is ideal for creating rectangular notches in a workpiece . Its width varies from 4 to 40 mm, the standard sharpening angle is from 22 to 450. The required blade slope is determined by the personal preferences of the master over time.
How to make it:
- We take an old file or any other flat rectangular piece. If necessary, align the working end;
- We grind the cutting part, carrying out primary turning. We use an abrasive wheel, making sure that the blade is processed evenly in thickness without differences;
- We harden if the metal is not hard enough;
- We put the handle.
This type of chisel is easy to prepare and can be used to start creating your own collection of hand tools to gain experience and understand the process.
The Meisel with a beveled blade is more versatile than its counterpart:
- It becomes possible to process round products;
- An obtuse angle is suitable for creating roundings;
- The tool is convenient for processing the end of a product.
Manufacturing is similar to the previous device:
- The blank part is processed to the shape of the future tool;
- The chisel is sharpened at an angle of 70-750, after which the tool must be sharpened.
- We attach the handle. Meisel is ready.
Using a similar algorithm, the remaining angular cutters for a wood lathe are created. Sharpening is carried out only after careful control of the tool dimensions .
Maintaining exact angles when making tools yourself is not necessary. It is enough to adhere to the necessary and convenient proportions and evenness of processing.
Semicircle
The semicircular tip of the chisels allows you to create neat notches when processing a wooden product. To make such a cutter, we mark on the workpiece the outline of the tool along which we cut. After this, we sharpen it in the usual way at an angle of 25...400.
The radius of the chisel affects the size of the recess in the product, therefore for professional production it is advisable to make several cutters with a semicircular tip for different cases.
Groove
After stripping the bark, the wooden trunk is processed with grooved chisels; they are intended for the initial rough finishing of the material and creating a blank for the product.
In addition, grooves are used to cut concave shapes and recesses in frontal turning.
How to make a groove cutter:
- Take a tap to cut a thread of the required diameter.
- We process the metal blank with it at a distance of up to 8-10 cm from the edge, actually cutting off half of the rough product.
- We sharpen the lower convex part of the blade at an angle of 30-400.
Grooved homemade wood turning tools are not easy to make, but it is quite possible to understand the process.
Make or buy
The process of creating tools for working with wood is a fascinating and not always easy task. If you have the right set of tools, an inexperienced person will not have any problems - the process is intuitive, but painstaking.
Of course, you can buy a ready-made set of devices, but how much will it cost... At the same time, the wear of the metal increases over time and even brand new chisels will soon require turning. Own production is a way to get a tool under your own hands. Designer cutters with individual sizes will be adapted to the owner and his needs .
A more detailed description of the chisel making process is presented in the video. The master talks in detail about creating a workpiece, applying sharpening and touches on other important points that are necessary for the successful completion of the work.
Knives
When working with wood, you cannot do without a good knife; when choosing this tool, you should give preference to the one that will be most convenient for processing wood. It is also important to find out what grade of steel was used in its manufacture.
When choosing a knife from a foreign manufacturer, you need to compare the specified steel grade with a domestic analogue, and check what properties it has according to the steel grade.
A good knife is characterized by a high carbon content with the addition of alloying elements.
Knives for working with wood are divided into three types: folding, with a replaceable and fixed blade. A blade with a length of 40 to 50 mm and a thickness of 4 mm is considered optimal.
How to choose the right cutter?
When choosing a cutter, you need to take into account a number of recommendations. Determine what type of metal you will be working with, what processing operations you are planning and what degree of load the cutter will experience. Determine what type of metal you will be working with, what processing operations you are planning and what degree of load the cutter will experience.
Determine what type of metal you will be working with, what processing operations you are planning and what degree of load the cutter will experience.
Decide what is most important - the accuracy of the geometry of the product or the level of surface treatment. Depending on this, the cutter is selected in accordance with the classifying characteristics and geometric proportions.
Determine for yourself how important it is to ensure the wear resistance of the device and how long it should remain unchanged.
Types of machines (for wood and metal)
Universal
The universal lathe is designed for initial roughing, as well as sharpening, cutting and drilling. Also, using this equipment, carvings are applied to a wooden object.
Turning and milling
Most often, this equipment is used for boring grooves. If such a machine additionally contains a copying device, this will allow the work to be completed faster and more accurately. Also, such machines help to obtain objects of completely unusual shapes, real works of art.
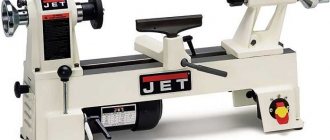
Desktop
This equipment is suitable for domestic use only. Such machines can be located in an apartment, in a garage, in a private house and perform the most standard operations for processing wood products. It is on such machines that folk craftsmen make the most necessary and beautiful items for their interior.
Turning cutters
A huge number of different jobs that are constantly performed using lathes has led to the creation of a number of cutters that allow productive technological operations to be performed. They all have a different design and purpose for which they were created. Each turning cutter, depending on what geometric shape it has, received its own separate name. It depends not only on the form, but also on its properties and purpose. All of them will be listed below.
1 – straight cutter through passage; 2 – bent through; 3 – pass-through persistent; 4 – scoring cutter; 5 – wide passage; 6 – boring cutter; 7 – boring thrust; 8 – cutting cutter; 9 – thread cutter; 10 – shaped cutter.
Pass-through straight cutters are used if you need to grind the outer surface of a cylindrical shape.
Thrust cutters are used for turning cylindrical surfaces and shafts with small shoulders
If you pay attention to the shape of the cutter, then the main angle of such a tool is exactly ninety degrees. This will reduce the vibration that appears during work.
A straight-through bent cutter is considered a more universal tool. Without changing its position in the tool holder, you can grind both cylindrical surfaces and trim the ends of the workpiece. This cutter is often used to process stepped shafts or any other parts that, as a result of the technological process, require trimming a small shoulder.
A scoring cutter is used to machine external end surfaces. During operation, the feed of the tool must be such that its movement is perpendicular to the axis of rotation of the part that will be processed.
Boring cutters are used to bore various through holes that have been previously machined with a drill.
Boring thrust cutters are also used for boring parts after drilling. Typically this tool is used for machining blind holes.
Parting cutters are used to cut material. Usually, in order to get the desired result when performing work with such cutters, you need to choose a tool whose head length will be greater than the radius of the workpiece itself. In this case, the rule is observed when the thickness of the head towards the body of the cutter gradually decreases. This is done to minimize the friction that is generated during cutting of the part between the end planes and the auxiliary cutting edges.
Thread cutters are used to cut internal or external threads. In this case, the profile of the thread that is being cut must correspond to the shape of the cutting part of the tool.
Grooving cutters are used for processing technological grooves of various profiles and purposes.
Shaped cutters are used to process special shaped surfaces
In this case, it is important to maintain the profile that will be at the cutting edge of the tool. It must be such that it corresponds to the profile of the workpiece and its surface that will be processed
Such cutters are sharpened exclusively on the front surface. For this reason, the edge profile does not change.
Modern, efficient production is characterized by the use of special cutters, which are equipped with non-sharpening and often multifaceted carbide inserts. When the blade wears out, the plate is removed and rearranged in such a way as to secure the next unused edge of the blade.
About blanks
There should be a sufficient number of blanks, at first twice as many. Newbie marriage – 4 out of 10. After two spoiled workpieces in a row, a break of several minutes is necessary.
It is better to immediately exclude workpieces with knots from processing. Before important, urgent work (when making the simplest part), I strongly recommend not to sharpen the tool, because the chance of spoiling the workpiece increases significantly and can reach 80%. If possible, do not use other people’s blanks, glues, or tools. Trim the workpiece if there are end cracks measuring 5-15 cm. Monitor drying and mark longitudinal cracks.
In some species (oak, pear), the cracks converge during drying. For the first turning experiments, use linden, for scraping beech.
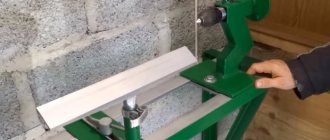
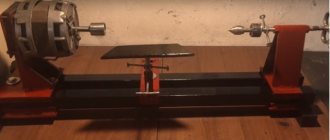
Let's get to work - make the bed, tailstock and tool rest
The tailstock will be made from a chuck and head piece taken from the body of an old electric drill.
To ensure that the equipment lasts a long time and does not fall apart a year after use, it is best to use a drill with a metal body. In order for your homemade machine to stand properly, not wobble and thereby not create problems in operation, you should pay special attention to creating a stand. It is installed on the machine bed, so that the operator later has the opportunity to move equipment units longitudinally along the axis
The cartridge will make it possible to carry out significant longitudinal loads. And this has a positive effect on the use of this element in the overall design of the unit.
To make a frame with your own hands, you will just need channels. After this, the frame elements should be attached to each other. We do this using a welding machine. To install the headstock (an electric machine for sharpening knives), you need to immediately place a sheet of thick plywood as a base.
Drive unit
It also needs to be mounted on a special plate. It will be installed on the table, where the equipment installer will be placed. It must be done taking into account the movement of the operator while working on the machine. This way the user will be able to regulate the speed of the shaft, which is located on the headstock.
Bed, tailstock.
Don't forget to install the caliper
This device will serve for uniform movement along and across your lathe equipment bed. This is where you need two pipes with different diameters to build it at home. A tool rest will be placed on it, which serves as a support for the incisors.
When you're all set, be sure to go to a hardware and lighting store to buy a small sheet of clear plastic and a lamp for yourself. They are useful for protecting you from chips and chips that may fly out during grinding and sharpening of equipment. And the lamp will help you cope with your work easier.
Tip: choose a lamp with a movable rod so that you can direct the light flux to a poorly lit area.
All that remains is to buy working tools. It’s better to buy it immediately as a set, but it will cost the owner of a homemade lathe, made by hand, in the region of 300 to 2,000 rubles.
Order a tape machine pilam.ru/piloramy-lentochnye/ at a favorable price.
Important! Do not forget to ground the installation with a wire with a solidly grounded neutral