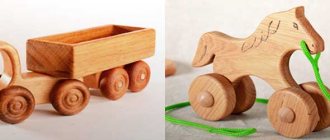
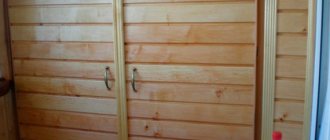
A wooden box is a simple but very functional item. Depending on the shape and depth, such products can be used to receive correspondence, grow seedlings at home, or store children's toys or tools.
The design is quite simple, so wooden flower boxes can be made with your own hands. If you use your imagination and apply a little skill, even such an elementary thing can be turned into a real work of art.
Regular wooden box
In fact, this is an ordinary rectangular design that is suitable for growing flowers in the country or storing various household items at home.
The advantages of making boxes from wood are due to the fact that it is an environmentally friendly and affordable material, convenient for processing with hand tools.
To assemble such a product you will need:
- boards that will go to the bottom and walls;
- fastening elements: screws, nails, metal corners;
- tools: screwdriver, hammer, wood saw;
- roulette;
- a simple pencil and paper to prepare a drawing.
First, a drawing is made. A sketch of the finished product is drawn on paper and the main dimensions are determined. The schematic image allows you to accurately calculate the material needed to make the box.
Any boards left over after construction or renovation are suitable as raw materials. The main thing is that the material is of high quality: there should be no signs of rotting or wormholes, otherwise the service life of the box will be short.
The boards are cut according to the specified dimensions. There should be 5 elements in total: side and front walls, bottom. The boards are nailed together; corners can be placed at the joints to provide additional rigidity to the structure. If the box is intended to be used for growing flowers indoors, it makes sense to lay a layer of waterproofing made of plastic film on the bottom.
How to choose a place for flowerpots?
The most common location for pots is the porch of a house. Planters with lush flowering living decorations will decorate the entrance, emphasizing the architectural style of the house.
The second most popular installation location is occupied by terraces, gazebos, and wells.
For private buildings with a wide blind area, it would be appropriate to place flowerpots along the house - they will emphasize the line of the foundation and make it more contrasting.
When choosing a location, you should follow some tips:
- Oversized forms will look awkward in a small area, just as small pots will get lost in a spacious area.
- When installing flowerpots, their mobility plays a role: portable types should be lightweight, and stationary ones should be positioned in such a way that the plants feel comfortable in them.
- When selecting structures, it is recommended to pay attention to the material of the architecture. For example, tubs are suitable for wooden log houses, while garden flowerpots cast from concrete will be inappropriate.
Plywood structures
Here the material is selected depending on the intended use of the finished product. If the box is intended for correspondence, you can get by with thin plywood. For seedlings or flowers, multilayer sheets impregnated with a waterproof compound are more suitable.
The design is made according to the following scheme:
- make a drawing of the box with dimensions;
- the drawing is transferred to a sheet of plywood;
- parts are cut out according to the markings;
- individual elements are fastened together with self-tapping screws or nails, and the joints are treated with sealant.
Considering that plywood is easy to process, you can make more complex, non-standard country boxes. For example, the joints of the walls should be designed according to the tongue-and-groove principle. If you are making a deep box for storing children's toys, you can attach wheels from an old computer chair to the bottom. Drawers with a sliding top panel look interesting. Here a cover is cut out of a sheet of thin plywood and a groove is cut in the upper part of the walls.
What tools are needed to assemble barrels?
Having decided to make your first barrel, keg or tub, you need to equip your workplace and stock up on the necessary tools, fixtures, and available materials. In addition to the usual carpentry kit, you will need to stock up on special cooperage equipment, fixtures and tools. This:
- carpentry workbench equipped for cooperage;
- cooper's long jointer, circular humpback plane;
- a device for planing the edges of the boards from which the product is assembled);
- devices for tightening rivets (frame machine-gate, chain tie, post gate);
- plow, stapler, stapler;
- hand-made patterns and templates;
- metal or wooden clamps for assembling the barrel frame;
- morning maker (a device for cutting a morning groove into which the bottom of the product is inserted);
- heels (metal, wood, combined), tension for hoop;
- cooper's bracket.
Fixtures and measuring instruments
It should be taken into account that coopers make a significant part of the devices and tools themselves, “to suit themselves”, ensuring that the handles of the tools are held in the palm like a glove, and that the machines and workbenches are of the same height.
On the left is a two-handed, on the right is a one-handed morning drill and how to work with it
Flower box for balcony
The general principle of making a flower box from wood with your own hands remains unchanged, but the specifics of use force you to take into account a number of nuances.
Depth is of particular importance. Experienced gardeners do not recommend making walls more than 20 centimeters high. Flowers need to be watered regularly, and wet soil significantly increases the weight of the structure.
Balcony boxes need to be placed on a solid base to prevent them from falling down. For these purposes, metal frames welded from reinforcement bars are usually used. The advantage of this method of fastening is that the outdoor box can be easily removed and brought into the house for the winter.
Note! If painting is planned, it is better to give preference to natural and neutral tones. Bright colors not only fade quickly in the sun, but also hide the natural beauty of plants.
To save on decoration costs, it is recommended to plant flowers in two rows. In the foreground there will be climbing plants that will disguise the wooden container. The flowers of the main composition are planted in the background.
What tools are needed?
To make wooden barrels with your own hands, you need to purchase a certain list of tools and accessories:
- workbench for carpentry;
- cooper's jointer. You need to choose a longer one;
- circular humpback plane;
- devices for planing the edges of boards;
- frame gate machine (for tightening rivets);
- chain tie;
- post gate;
- plow;
- stapler and stapler;
- patterns and templates. Determine the shape and dimensions of the barrel being manufactured;
- clamps made of metal and wood;
- morning. Necessary for cutting the morning groove into which the bottom is inserted;
- heels made of metal, wood or combinations;
- tension for the hoop;
- staples for cooperage;
- planes and hatchets of different sizes.
Did you know? It is assumed that barrels were invented by the Celts, although the ancient Greek historian Herodotus in the 5th century BC. e. mentioned palm wood barrels.
For ease of operation, machines and workbenches are installed according to height.
For seedlings
The size and shape of wooden planting boxes will depend on how you grow your flowers. Bulky items take up a lot of space and spoil the overall interior of the apartment. Therefore, if you plan to grow cucumbers and tomatoes on a windowsill, it is better to limit yourself to small wooden plywood boxes.
A garden plot offers more opportunities for the DIYer. So, a large and functional box for seedlings can be made from an old pallet. In fact, a pallet initially represents a finished product. The gardener can only make the bottom and walls from pieces of multi-layer plywood. To do this you will need decorative nails and a hammer. After this, the internal space is filled with earth, the seeds are sown between the top rows of boards.
Second life for old things
Both for indoor flowerpots and outdoor flowerpots, recyclable materials are perfect - an inexhaustible source of creative ideas and creativity. An outdoor flowerpot can be seen in almost any object...
Unusual uses for old things
Flowerpot made from old tires
In this video from the channel GARDEN, VEGETABLE GARDEN, WITH YOUR OWN HANDS, you will find a simple explanation of how to turn a tire into the shape of a flowerpot, and the decor is everyone’s imagination and skill.
And this flower basket made from tires from the Kaleidoscope will be an excellent decoration for your garden.
Application of pallets
From several pallets you can make a deep wooden box with an opening lid for growing garden crops in a greenhouse. To do this, the pallets are carefully disassembled into their component parts, nails are removed, and damaged boards are discarded.
The boards are cut to size based on the future shape of the box: rectangle or square. For the racks, 4 square bars are cut, their length depends on the height of the box.
The boards that will go on the side walls are laid in a row and a straight line is drawn at a distance of 15-20 mm from each edge. In accordance with the markings, apply a block and tighten the screws. The result should be two longitudinal walls. In order to subsequently equip the box with an inclined lid, the top board of one of the sides must be shortened by 3-5 cm.
The finished panels are installed in parallel, and the end boards are attached to the support bars. After this, the bottom is made from plywood. If the seedlings are grown outside, the lower element of the structure can be neglected.
The lid is made of a slatted frame corresponding to the size of the box. The elements are fastened together with flat metal corners. If the box has a large area, it is better to strengthen the lid with two longitudinal slats. Using a stapler, plastic film is nailed to the surface of the lid. 2-3 loops are attached to the back of the wall.
At the final stage, all wooden elements are treated with a special disinfectant composition to prevent rotting and the appearance of bark beetle larvae. For ease of use, the sides of the lid can be supplemented with window latches that will hold it in the half-open position. Now all that remains is to fill the box with soil and plant the seeds.
Master class on making outdoor flowerpots with your own hands
Pots displayed outside along garden paths, on both sides of the stairs or on the porch at the front door will be a delight to the eye. Landscape design from floral arrangements, created by yourself, will highlight the architecture of a private house.
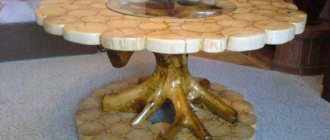
How to make a flowerpot from cut down trees or a stump?
Wooden flowerpots will decorate any garden area. To make them, you only need to select a suitable workpiece.
A sawn trunk, an old stump, or a snag are suitable as raw materials. The main thing is that the surface is textured.
The technology for making a wooden stand is as follows:
- First, the height of the future tub is measured, and the fallen trunk or stump is sawn according to the marks.
- A circle is marked on the saw cut, which will become the inner border of the tub. The entire internal contents of the circle are removed with a drill: holes are made across the entire surface to a depth of 10-15 cm, then the wood is knocked out with a chisel.
- The resulting hollow cylinder is treated with stain on both sides. It is recommended to apply the composition with a paint brush, carefully painting each area.
- After drying, the block is nailed onto the bottom treated in the same way. The same cut of the trunk can be used as the bottom of the tub.
- A flower pot made of plastic or baked clay is placed inside the cylinder, soil is poured into it and street flowers are planted.
The most convenient height for a flower pot is considered to be 40 cm, so it is advisable to measure this value and saw off the excess from the trunk. If desired, you can organize not one tub, but several, stacked on top of each other in a checkerboard pattern. Then the height of the tubs can be varied so that the structure looks like a separate landscape item on the site.
Made from natural stone, ceramics or clay
The simplest material at hand is clay, from which it is easy to build a flowerpot of any shape.
Stone flowerpots for the garden are distinguished by their durability. The materials used for production are natural stone, pebbles, fragments of brick or granite.
To build a flower stand made of stone or ceramics, you need to do the following:
- Prepare the site: clear the area, level the surface.
- Prepare a cement-sand mortar with a viscosity similar to liquid dough.
- Lay out the first row on the surface: first, using a trowel, lay a layer of mortar in the form of a border, then lay stones or fragments of ceramic bricks on it.
- Coat the masonry with mortar when laying a new row.
Masonry layers should be alternated with mortar and a stand of round, rectangular or oval shape should be formed.
After complete laying out, the stone flowerpots should be left for a week, periodically watering them with water for good setting.
An easier way is to build gabions. To do this, a frame with hollow walls is assembled from a fine-mesh mesh, into which rubble stone, cobblestones, and pebbles are then poured. Flower pots are placed inside.
Tires for flowerpots
Another quick and easy way to make flowerpots. To work you will need a jigsaw, a knife, and chalk for marking.
The technology of work consists of cutting car tires according to the markings made:
- The old tire is cut over the entire area - the cut should go along the thick upper rubber.
- A pattern is marked on the wheel for the edges of the future stand.
- The tire is cut with a jigsaw, the depth of the cut is from 5 to 10 cm.
- The cut parts are turned inside out, as a result of which the finished flowerpot takes the shape of a pot with patterned edges.
- Inside, the bottom is covered with geotextiles, soil is filled in, and annual flowers are planted.
This stand can be decorated with enamel painting or painted in a single color by applying several layers of paint.
Vases made from plastic bottles
The easiest way to make it is to build a flower pot on a leg. To make flowerpots from plastic, you will need a 2.5-liter plastic bottle, superglue and an old CD.
The whole process looks like this:
- The bottle is cleared of stickers and cut into 2 parts (1/3 and 2/3, respectively).
- The lid is unscrewed and glued to the pre-degreased disc.
- The lid is screwed back onto the cut off part with the neck.
- The resulting flowerpot on a leg needs to be decorated - pasted over with colored paper, small broken glass or painted.
- A flower pot with a plant is placed in an inverted bottle.
The second method is even simpler: a large hole is cut out on the longitudinal side of the bottle, filled with earth and plants are planted. This option is convenient for decorating a street wall, when you hang flowerpots with your own hands on twine.
Flowerpots made of silicate blocks with several tiers
Manufacturers specially produce hollow silicate blocks intended for planting plants. To create a multi-level mini-flower garden, you first need to think about the future structure - the structure must be stable and hold the maximum load.
It is necessary to arrange drainage in the blocks so that when watering, moisture does not accumulate inside the structure.
First, a base is made, which is recommended to be filled with earth to ensure strength, then the first tier of blocks is glued to it. After this, all tiers are lined up according to the intended design. Silicate blocks should be fixed with special glue.
After installing all tiers, the voids in the blocks are filled with soil, where plants are planted. The resulting decorative flowerpots will be large, so you should choose a permanent place for them.
The tiers can be laid out in the form of a pyramid, a semicircle, or a single-line multi-story structure.
DIY polystyrene flowerpot
Polystyrene foam is an easy-to-process material that can be used to make a rectangular outdoor pot.
First, the foam sheets are cut into identical rectangles, which are fastened together with an adhesive solution. Then the internal and external surfaces of the walls are coated with plaster in several layers. At the same time, the outside of the product is reinforced with a plastic mesh to enhance its strength properties, after which irregularities are removed from the surfaces.
The final stage will be covering it with a decorative finishing layer. You can use plaster as decoration by adding pigment dye to it - then the stand will look like it’s made of concrete.
From boards and plywood or wicker
Flowerpots can be made from lumber. For this, edged boards and plywood sheets are used. The boards will serve as the base to which the plywood “walls” will be attached. Such products have a rectangular shape and can be decorated with painting or varnished.
Closer to natural material is a wicker pot made from grape vines. It is distinguished by strength, durability and aesthetics.
Made of metal
Metal flowerpots, mostly forged or cast, are sold in specialized stores. They are suitable for those areas whose landscape requires the presence of wrought iron gates or metal fencing.
From barrels, tubs and other cooperage products
Cooperage products are good because they are a ready-made basis for crafts. An old tub can be used as a stand by restoring the walls: sanding the surface, impregnating the wood with an antiseptic composition to increase the service life of the product, and covering the walls with varnish.
An old metal or plastic barrel can be cut into several parts, using each of them as a separate container. A base should be attached to parts without a bottom, the walls should be painted or sheathed with wooden slats. Sheets of plywood and corrugated sheets can also be used as sheathing.