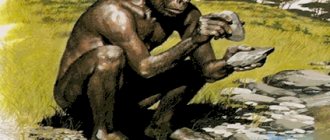
Pyrography or burning is one of the ancient types of applied art that has been known to mankind for many centuries. Most likely, man learned to burn designs on wood and other materials immediately after conquering fire. Stencils for wood burning appeared much later, but significantly simplified the work and made it possible to obtain more complex designs.
What is wood burning
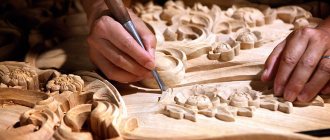
Wood burning is the application of images, drawings or inscriptions to wood using hot tools. For this purpose, pyrographs, burners or other electrical devices are used.
It is believed that spending time doing this activity has a very relaxing and calming effect, and also brings positive emotions.
Registration of the finished work
A wood burning master class cannot be complete without a description of the design of the work.
Sometimes the natural texture of wood makes the best decoration
What options are there:
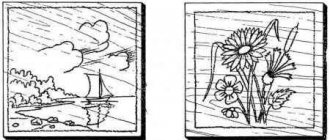
- patterned frame, which is part of the design itself;
- if you are burning a piece of wood, then the outline of the cut itself will be a beautiful frame, you just need to think about how to fix the work on the wall;
- standard – frame, glass;
- specially ordered baguette;
- homemade frame from PVC skirting board, etc.
Important! If it is decided to varnish the work, this is the task of an adult; the child should not come into contact with toxic materials.
Take things step by step, follow the principle of “from simple to complex,” don’t be afraid to make mistakes and don’t be too critical. Pyrography is an interesting and popular trend, the practice of which can turn from an ordinary hobby into a way to earn money.
Types of wood burning
There are several ways to burn wood. As a result of technical processing, either flat or three-dimensional designs can be obtained.
Burning types:
- Using a pyrograph. In turn, this method is divided into: contour and silhouette burning.
- Outline. This method is very good for beginners. Does not require special skills or abilities. Only the outline is burned.
- Silhouette. The technique involves complete shading. In other words, the background is burned out, but the image remains untouched.
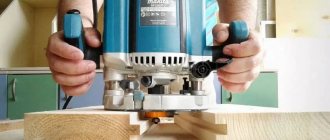
- With the help of alternative options. It consists of other methods of applying an image to a wooden base, for example, using: acid, laser, electric discharge, friction, pyrotyping, or even sunlight and a magnifying glass.
Wood for burning
The wooden base for burning should have a uniform structure, fine porosity, and should not have chips, scratches or cracks.
It is also necessary to make sure that there are no mechanical defects so that there is no resin.
- The wooden base must be light, otherwise the image will not be visible.
- Tree species that are suitable for the base: linden, poplar, alder, aspen and birch.
- A properly selected foundation guarantees a successful result.
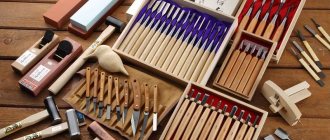
For a beginning craftsman, it is recommended to use ready-made wood burning kits. Sheets of plywood are also the best option for starting out.
Which plywood is suitable for burning
For burning on a Pyroprinter, we recommend buying FC plywood, 2/2 or 2/4, Ш1, 6mm.
Now let’s look at what all these designations mean:
Plywood grades according to the degree of water resistance: FSF - plywood with increased water resistance for indoor and outdoor use, FC (plywood + urea glue), FB - bakelized waterproof plywood.
Grades of plywood according to the degree of mechanical processing: NSh - unsanded, Sh 1 - sanded on one side, Sh 2 - sanded on both sides. Sh2 is rare, so we usually buy Sh1
Plywood grades: E (A) - elite, 1 (AB) - standard, 2 (B) - cracks are acceptable, 3 (BB) - knots are acceptable, 4 (C) - the lowest quality for construction work. When marking, indicate the grade of each side of the plywood. Therefore, 2/4 is sold - this means that one side is grade 2, and the other side is grade 4.
thickness for burning portraits is up to 10 mm, otherwise the portrait will weigh quite a bit. We ourselves prefer 6 mm plywood for burning, because... 4 mm plywood is often bent in a figure eight, which is why it is completely unsuitable for large formats.
Image selection
The only condition when choosing an image is that the drawing must have a clearly defined outline.
- Drawings can be found on the Internet and printed. Or you can come up with it yourself.
- But the first time, it is recommended to use simple images in order to understand the principle of operation and get the hang of it.
- Each time you will hone your skills and your work will look better and better.
The image is applied to the base using carbon paper or manually.
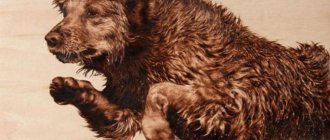
Let's start with a portrait
Burning out a portrait is not so easy. The most important thing is to correctly and efficiently transfer the drawing from the photo to the base.
As already mentioned, first you need to transfer the portrait from a photo or from life to wood. He should look like the person you decided to paint a portrait of.
Then we begin the burning process itself. All thick tips were used for this portrait. In the end, this is what happened:
Safety precautions
When working with a burning tool, you should adhere to the following rules:
- When the tool is turned on, only grip it by the handle to avoid burns. The device is very hot. Avoid touching the tip to other parts of the body.
- Place the instrument only on a special stand.
- Nozzles cannot be changed with bare hands. Use pliers for this.
- Do not allow the tool to overheat, otherwise it will quickly break. While working, turn off the tool for a while and rest.
- Do not leave the device turned on unattended, even for a couple of minutes.
- If exposed wires or other damage appears on the device, it is recommended to replace the device. Such damage is very dangerous and can lead to fire.
If your child is engaged in such an activity, always keep an eye on him, do not leave him unattended, and always check that everything is fine. Of course, before starting work, tell him the safety rules.
Tips for Beginners
To ensure that the first point does not stand out and the lines are smooth, blow lightly on the tip.
- Follow the outline with one line. Work slowly. You can help yourself by moving the base with your other hand.
- Fill with medium heating temperature of the device. Perform slow circular movements.
- Using a metal scouring pad, clean the tip several times as you work.
- It is impossible to erase an already scorched line, so work carefully and focused.
- Thick lines can be obtained by moving the tool very slowly across the surface. And thin ones are the opposite - draw lines quickly.
- The higher the temperature of the device, the darker your lines will be.
To get smooth tonal transitions in one line, use a small table fan. It will cool the tip and the lines will be smooth. But be careful and attentive!
Pyrography: master class for beginners
We will need:
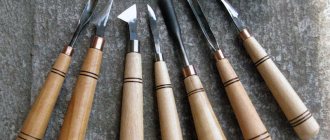
- device (pyrograph) for burning;
- dried wooden cuts;
- simple soft pencil;
- acrylic paints (set);
- brush for painting;
- picture loops;
- magnets.
So, let's work:
1. Burning only seems simple. Moreover, on saw cuts, in which the fibers are arranged in such a way that they make the treated surface loose and heterogeneous.
- To achieve straight lines, you will have to make some effort, that is, press the pen of the burning device. Work with strong, confident movements – “smooth” the wood fibers. If the burning of the lines is uneven, go through it again, and maybe again.
3. Now let's take white paint and place the necessary accents on the almost finished work. The white color sets off both the wood and the burnt lines very favorably.
4. That's it! The decor is ready! These cuts can decorate the New Year's table, become Christmas tree decorations, elements on gift wrapping, coasters for cups... whatever!
Step-by-step instructions for burning
Prepare the wooden base. You should use fine sandpaper and rub it with a chalk-water solution. Wait for it to dry and get to work.
- Apply a sketch to the prepared surface using carbon paper, manually or using a stencil.
- Turn on the device and wait until it heats up to the desired temperature. Don't forget about the safety precautions mentioned above.
- Conveniently place the base on your desktop. Move the device along the contour with the same pressure and speed.
- Start your drawing with the outer lines, and after working them out, proceed to the main part of the picture. Secondary parts of the work are burned last.
- Once you have drawn all the lines, you can consider the painting to be ready.
- Turn off the device.
- If you want to get a color picture, then color it with paints. Acrylic is best.
- Cover the painting with acrylic varnish.
Registration of the finished work. The picture has already turned out beautiful, but you can put it in a frame. A frame made from sawn wood or homemade baguettes will look very original. By the way, you can also pre-burn patterns on them.
Wood burning is a type of art that is accessible to every person. By purchasing a pyrograph, you get a great opportunity to plunge into the world of art with your children. The paintings that you make in this way will be an excellent holiday gift, as well as a good business idea.
Create an angel
This master class will describe the step-by-step process of creating a scorched picture, which we will call “Angel”.
The following tools and equipment are required for work:
- Plywood or wood;
- Burnout apparatus;
- Ready drawn template;
- Copy paper;
- Drill;
- File;
- Jigsaw;
- Varnish;
- Stain;
- Frame;
- PVA glue.
First of all, you need to make a template. We look for a suitable picture on the Internet and print it in the size you need. Next, we cut out or buy a sheet of plywood, which will later be the base.
Related article: Patterns of crocheted flowers - violets poppies roses calla lilies
We transfer the printed template to the base.
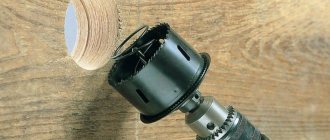
Then you need to cut out the necessary parts. To do this, first we use a drill and use it to make holes. In the future we will insert a file into them and cut them out. First of all, we cut out the smallest parts, gradually moving on to larger ones. After that, we take a burning device and make touches around the office.
The substrate for the finished work is covered with stain. The color is chosen at your discretion. We glue the finished parts with PVA glue. Then we insert the finished picture into the frame and after that apply a layer of varnish.
That's it, the painting “Angel” is completely ready.